
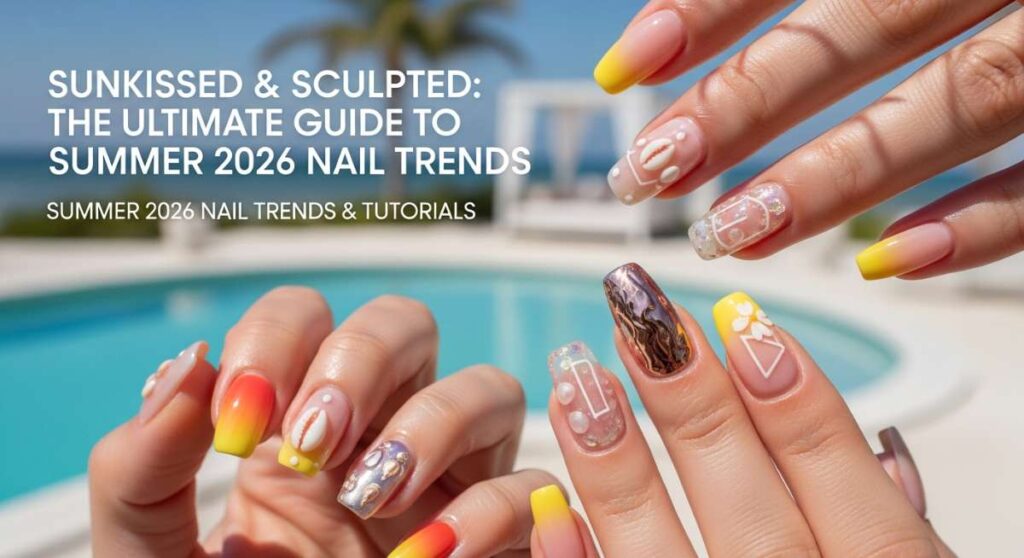
Sunkissed & Sculpted: The Ultimate Guide to Summer 2026 Nail Trends
Hi loves! Can you feel it? That first true breath of summer air that smells like coconut oil and possibilities. As the sun begins its long, golden dance across the sky for 2026, I’ve been sitting on my porch, iced latte in hand, thinking about how our hands are the storytellers of our season. They hold the melting ice cream cones, wave hello to old friends at beach bonfires, and sparkle under the dim lights of a graduation stage. I wanted to create a space for us to explore the art of the manicure as a form of self-love—a soft, colorful embrace for your fingertips.
This season isn’t just about color; it’s about a mood. We are leaning into textures that catch the light and designs that make us feel like the best versions of ourselves. Whether you’re celebrating a milestone or just the joy of a Saturday morning, I’ve gathered the ten trends that are defining our 2026 aesthetic. Let’s dive into these little canvases of joy together, shall we?
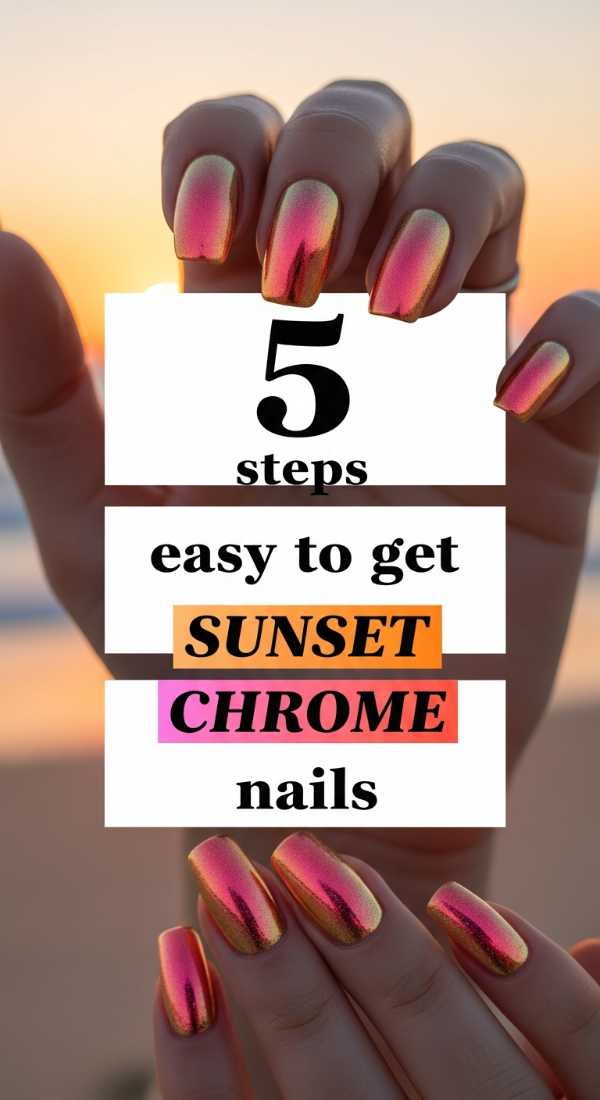
5 Easy Steps to Get Sunset Chrome Nails
Why to love this Design:
There is something so deeply romantic about wearing a sunset on your fingers. These nails capture that fleeting ‘golden hour’ glow and hold onto it all day long. The chrome finish gives it a futuristic yet organic feel, like a pearl found on a Martian beach. It’s the perfect companion for those late-August evenings when the sky turns that impossible shade of violet-pink.
Essential Elements:
- Peachy-orange base polish
- Iridescent pink chrome powder
- No-wipe top coat
- Sponge applicator
How to Prepare:
- Apply two thin coats of peach base color and cure.
- Apply a specialized no-wipe top coat and cure for only 30 seconds.
- Use the sponge to buff the chrome powder into the nail until it shines.
- Gently brush away excess powder with a soft brush.
- Seal with a final thick layer of high-shine top coat.
Budget Range
- Drugstore Base (Holo Taco or Essie): $11.00
- Chrome Powder Kit (Amazon/Born Pretty): $8.00
- UV Lamp (Entry level): $25.00
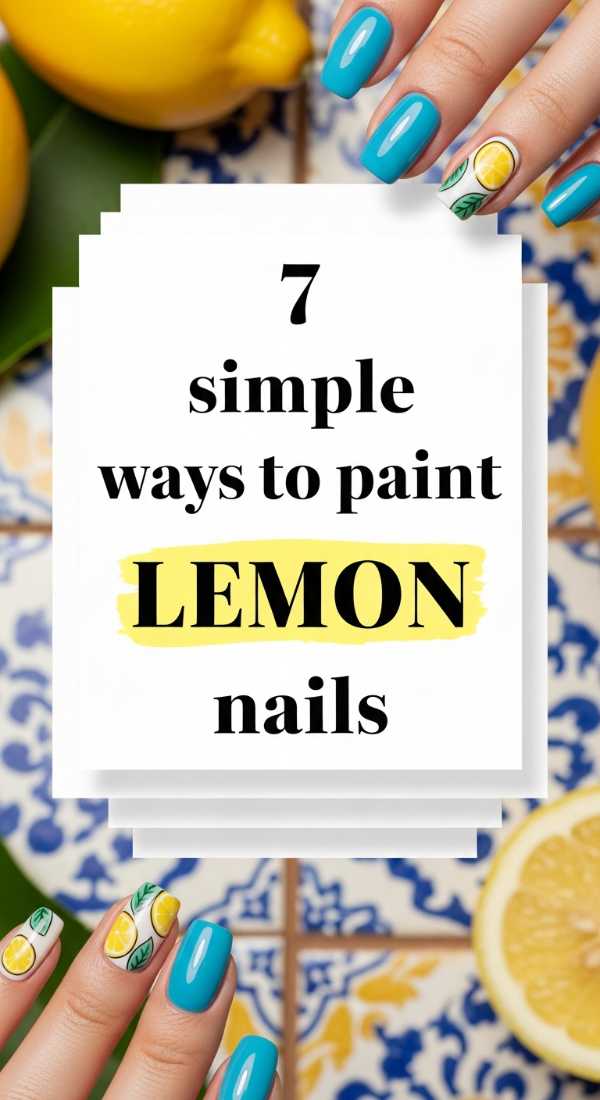
7 Simple Ways to Paint Lemon Nails
Why to love this Design:
Lemon nails are the ultimate ‘clean girl’ aesthetic with a twist of zest. They feel incredibly fresh and bright, like a cold glass of lemonade on a humid afternoon. It’s a design that looks high-effort but is actually quite forgiving, making it perfect for my loves who are just starting their DIY nail journey.
Essential Elements:
- Pale yellow polish
- Fine liner brush
- White acrylic paint
- Matte and glossy top coats
How to Prepare:
- Start with a sheer nude base to make the lemons pop.
- Dot two small circles of yellow polish where you want your lemons.
- Use the liner brush to pull a small ‘stem’ end from the yellow dots.
- Add tiny white highlights to give the fruit dimension.
- Paint small green leaves if you’re feeling extra fancy.
- Use a dotting tool for a ‘pulp’ texture.
- Finish with a glossy top coat for that juicy look.
Budget Range
- Yellow Polish (OPI ‘Exotic Birds Do Not Tweet’): $11.50
- Detailing Brushes (Set of 3): $6.00
- Nude Base (Zoya): $12.00
6 Quick Ideas for Graduation Nails

Why to love this Design:
Class of 2026, this is your moment! Graduation nails should be the perfect balance of ‘I worked so hard’ and ‘I am ready for the world.’ We’re moving away from harsh school colors and toward sophisticated neutrals with metallic accents that look stunning when you’re holding that diploma.
Essential Elements:
- Soft milky white polish
- Gold leaf flakes
- Fine tweezers
- Strong adhesive base
How to Prepare:
- Apply a milky white base for a clean, sophisticated canvas.
- While the second coat is tacky, use tweezers to place gold leaf.
- Concentrate the gold at the tips for a ‘shattered’ French look.
- Press the flakes down firmly with a silicone tool.
- Apply two layers of top coat to ensure the flakes don’t snag.
- Keep the shape almond or oval for a timeless silhouette.
Budget Range
- Milky White (Funny Bunny by OPI): $11.00
- Gold Leaf Sheets: $5.00
- Silicone Tool: $4.00
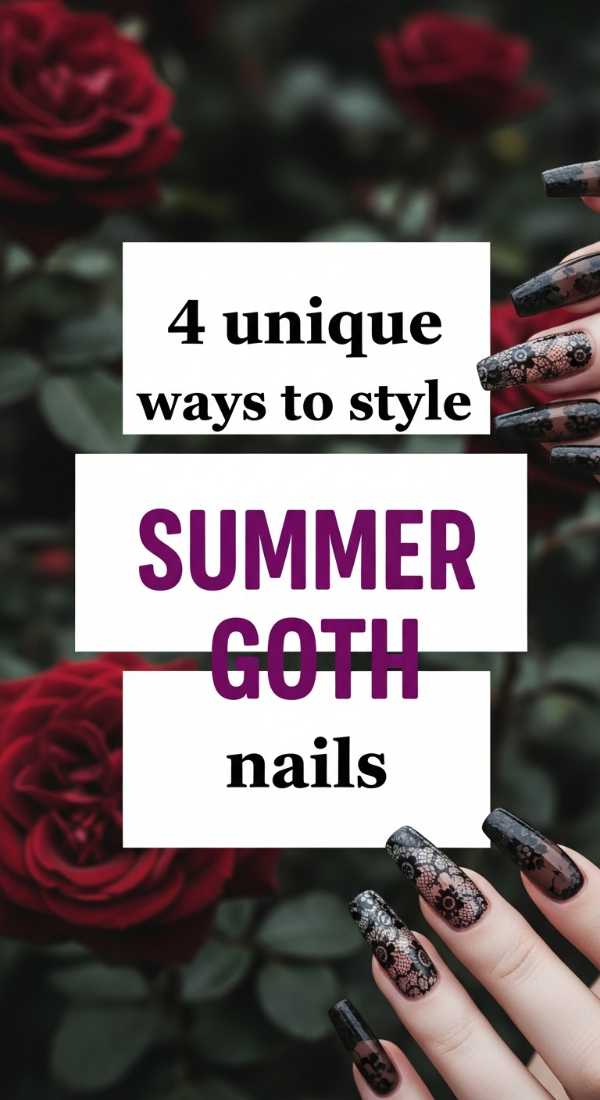
4 Unique Ways to Style Summer Goth Nails
Why to love this Design:
Who says dark colors are only for winter? Summer Goth is all about the ‘Midnight at the Beach’ vibe. It’s for the souls who love the contrast of black lace against sun-warmed skin. By using sheer blacks and floral accents, we make the dark aesthetic feel light enough for July heat.
Essential Elements:
- Sheer black ‘jelly’ polish
- Black stamping ink
- Floral nail decals
- Silver micro-studs
How to Prepare:
- Apply the jelly black polish to create a ‘smoke’ effect.
- Layer black floral decals over the middle and ring fingers.
- Add a single silver stud at the base of the thumb for a touch of edge.
- Use a matte top coat to give it a velvet, high-fashion finish.
Budget Range
- Jelly Polish (Cirque Colors): $12.50
- Floral Decals (Etsy): $4.00
- Matte Top Coat (Sally Hansen): $7.00
3 Fast Steps for Neon Cheetah Nails
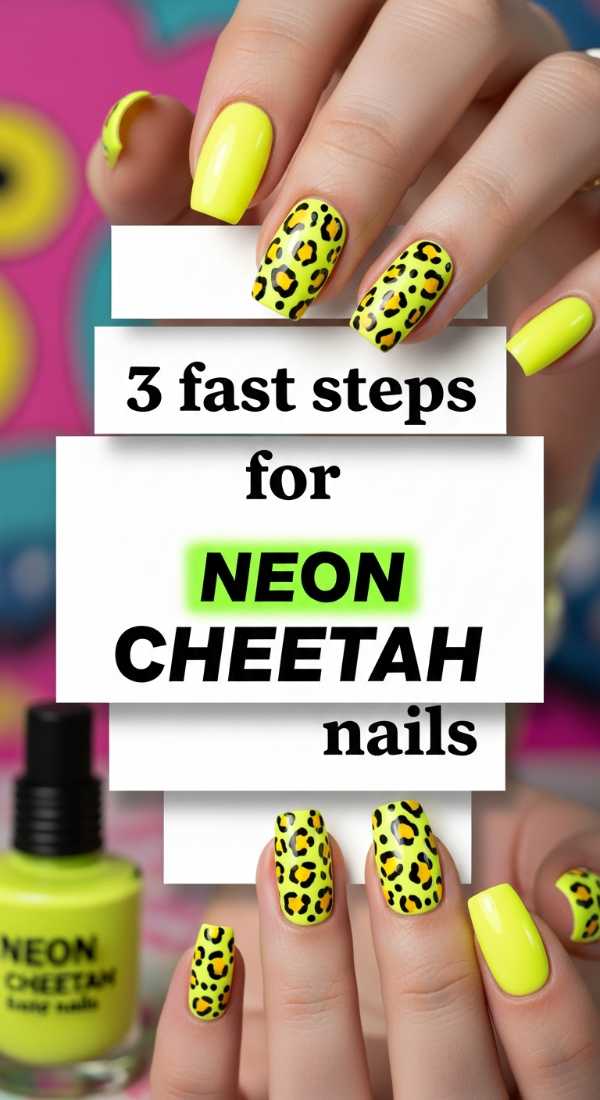
Why to love this Design:
Neon cheetah is for my boldest loves! It’s high energy, unapologetic, and screams ‘vacation mode.’ In 2026, we’re seeing a shift toward ‘electric neutrals’—mixing wild patterns with colors that practically glow in the dark. It’s a party on your fingertips.
Essential Elements:
- Neon pink or lime green polish
- Black liquid liner (nail-specific)
- Dotting tool
How to Prepare:
- Paint your base with the brightest neon you own.
- Use the dotting tool to create irregular ‘C’ shapes in black.
- Fill the center of some ‘C’ shapes with a slightly darker neon shade for depth.
Budget Range
- Neon Polish (Orly): $15.00
- Nail Art Pens: $9.00
- Base Coat (Bonder): $10.00
8 Ways to Blend Teal and Coral Nails
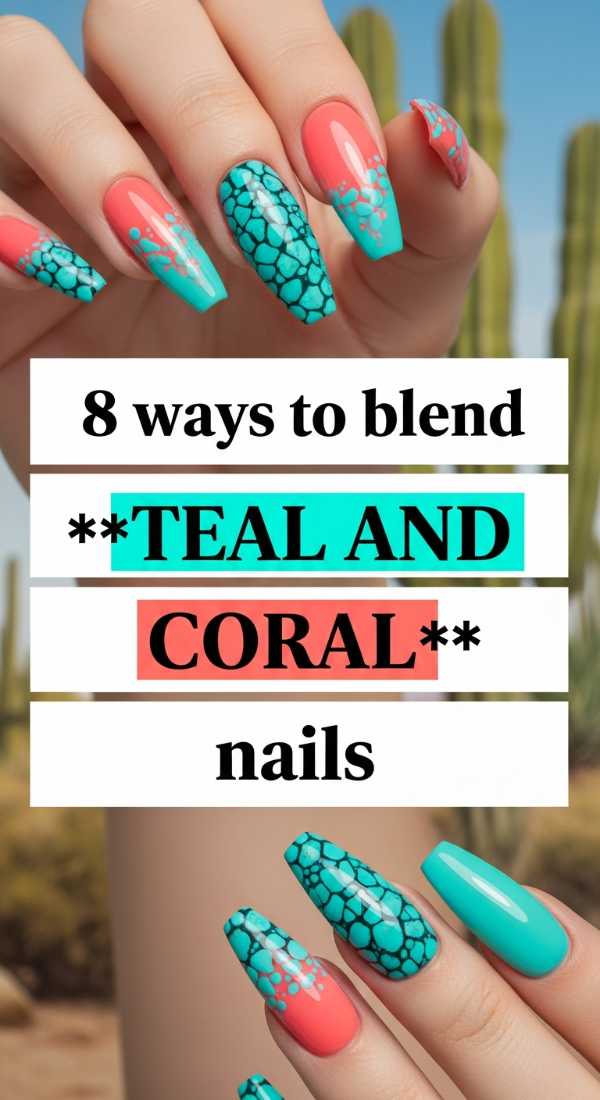
Why to love this Design:
Teal and coral are the soulmates of the color wheel. This combination reminds me of coral reefs and crystal clear lagoons. Blending them creates a vibrant, tropical energy that works beautifully on all skin tones, bringing out the warmth of a summer tan.
Essential Elements:
- Bright coral cream polish
- Deep teal shimmer
- Makeup sponge for ombre
- Liquid latex (for clean up)
How to Prepare:
- Apply liquid latex around your cuticles to prevent a mess.
- Paint teal on the bottom half of a sponge and coral on the top.
- Dab the sponge onto the nail repeatedly to blend.
- Wait for it to dry slightly and repeat for vibrancy.
- Remove the latex barrier.
- Add a shimmer top coat to mimic water.
- Try a vertical ombre for a slimming effect on the nail.
- Use a tooth pick to swirl the colors at the transition point.
Budget Range
- Coral Polish (Essie): $10.00
- Teal Polish (Lights Lacquer): $13.00
- Liquid Latex: $7.00
10 Tips to Match Hands and Toes Nails
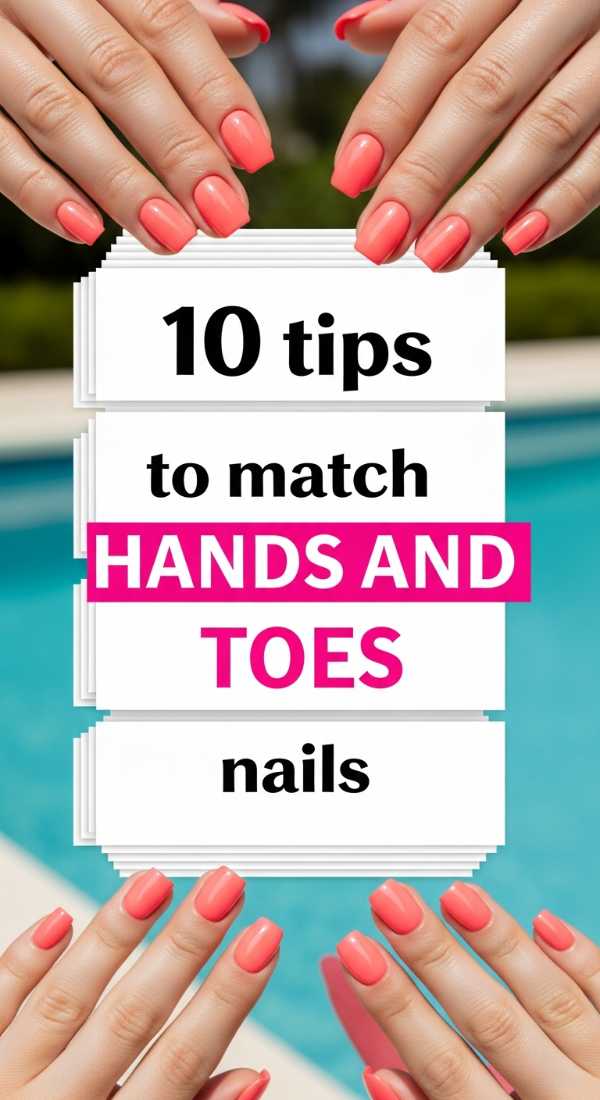
Why to love this Design:
There’s a quiet confidence in a coordinated look. We aren’t doing ‘exact matching’ anymore—that’s a bit dated, loves! 2026 is about the ‘sister, not twin’ philosophy. It makes your whole outfit feel curated and thoughtful from head to toe.
Essential Elements:
- Complementary color palette
- Shared metallic accent
- Consistent finish (all matte or all gloss)
How to Prepare:
- Choose a primary color for your hands.
- Pick a secondary color from the same family for your toes.
- If hands have art, keep toes solid.
- Match your pedicure to the ‘accent’ nail of your manicure.
- Ensure the shape is consistent (square vs round).
- Use the same top coat for both.
- Use a glitter topper on just the big toe and ring finger.
- Keep the brightness levels the same.
- Try ‘tonal’ matching (light blue hands, navy feet).
- Always moisturize both with the same scented oil for the full experience.
Budget Range
- Dual Polish Set: $20.00
- Cuticle Oil (Cuccio): $9.00
- Foot File: $5.00
5 Steps to Design Pucci Nails
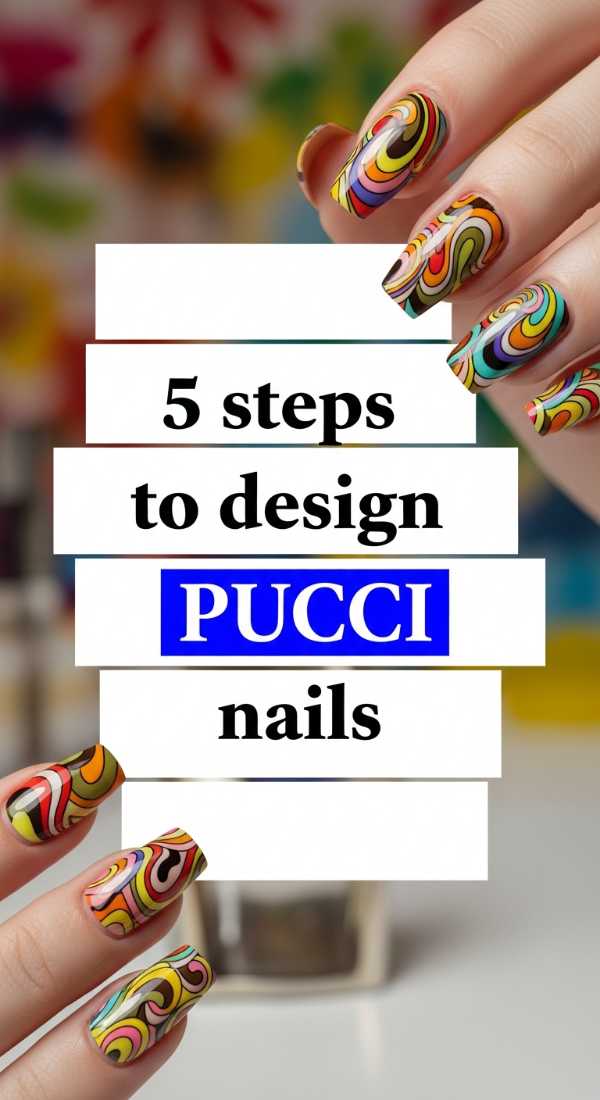
Why to love this Design:
Pucci-inspired nails are a trip back to the glamorous 60s and 70s Italian Riviera. These swirling, geometric patterns in bold colors feel incredibly high-end and artistic. It’s like wearing a designer scarf on your nails—sophisticated, playful, and very ‘yacht club chic.’
Essential Elements:
- 4-5 contrasting cream polishes
- Extra-long striping brush
- Steady hand or a glass of wine!
How to Prepare:
- Paint a solid white base to make the colors pop.
- Draw organic, ‘blob’ shapes in your first color.
- Outline those shapes with a thin black or white line.
- Fill the negative space with swirling lines in a third color.
- Add tiny dots in the corners of the swirls for that authentic vintage look.
Budget Range
- Professional Striping Brush: $12.00
- Palette of Creams (Modelones): $18.00
- Clean-up Brush: $6.00
9 Best Looks for Taurus Birthday Nails
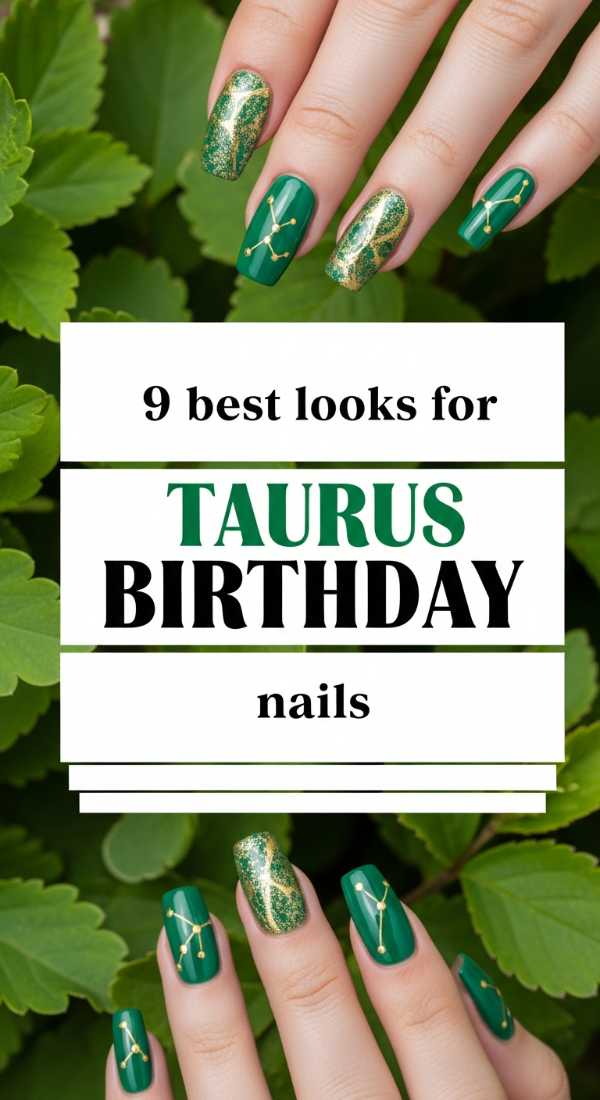
Why to love this Design:
Taurus babes, we see you! You’re the queens of luxury and comfort. For your 2026 birthday, we are leaning into earthy elegance. Think moss greens, rich creams, and rose gold. It’s a grounded look that still feels like a celebration of your sensual nature.
Essential Elements:
- Sage green polish
- Rose gold foil
- Matte finish
- Small emerald rhinestones
How to Prepare:
- Start with a deep sage green base.
- Apply a matte top coat for a ‘velvet’ earth feel.
- Add rose gold foil to the ring finger for a ‘vein’ effect.
- Place a single rhinestone at the base of the middle finger.
- Try a marble effect using green and white.
- Add a ‘crescent moon’ in gold leaf.
- Use a velvet magnetic polish for a ‘cat eye’ effect.
- Incorporate pressed dried flowers.
- Finish with a nourishing hemp-based cuticle oil.
Budget Range
- Sage Green (Olive & June): $9.00
- Rose Gold Foil: $6.00
- Pressed Flowers: $8.00
4 Easy Guides for Summer Stiletto Nails
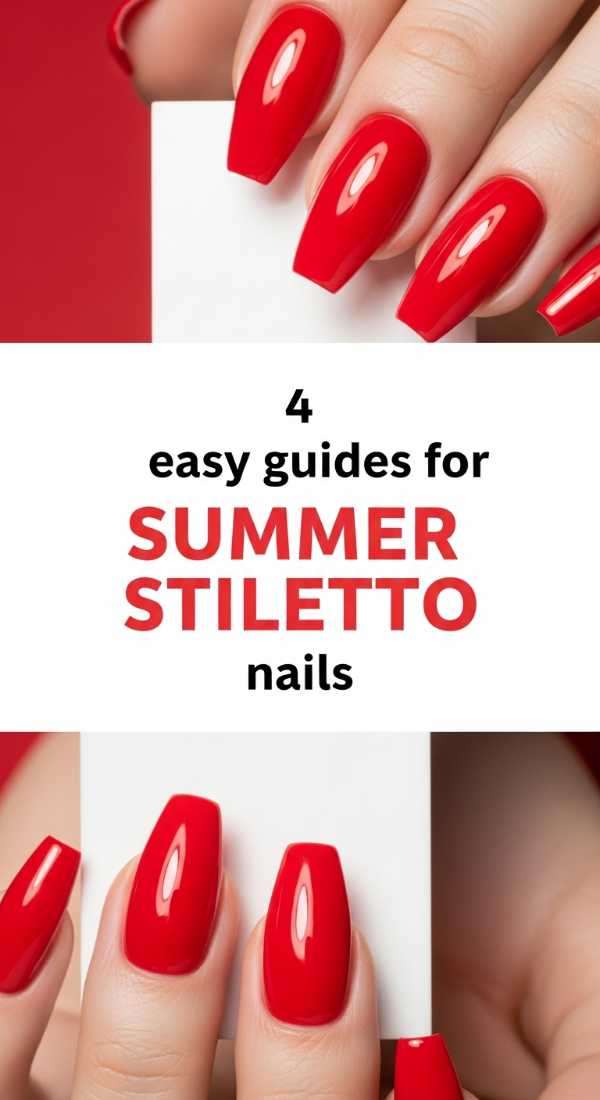
Why to love this Design:
The stiletto shape is the ultimate power move. It elongates the fingers and gives every gesture a bit of drama. For Summer 2026, we’re softening the sharp edges of the stiletto with ‘aura’ fades and soft pastels, making the fierce shape feel approachable and ethereal.
Essential Elements:
- Stiletto shaped tips or forms
- Strong builder gel
- Aura airbrush tool (or sponge)
How to Prepare:
- Sculpt the nail to a sharp point, then slightly blunt the very tip for safety.
- Apply a nude base.
- Using a sponge, dab a circle of color in the center of the nail for the ‘aura’ effect.
- Seal with a thick builder top coat for strength.
Budget Range
- Full Cover Stiletto Tips: $10.00
- Nail Glue (KDS): $6.00
- Builder Gel (IBD): $14.00
Wishing You a Colorful Summer…
I hope these designs spark a little flame of creativity in you today. Remember, your nails are just an extension of your beautiful spirit—there are no rules, only what makes you feel like you’re glowing from the inside out. Whether you go for the bold neon cheetah or the soft, grounded Taurus greens, I hope every time you look down at your hands this summer, you’re reminded of how special you are. Tag me in your recreations, loves! I can’t wait to see your sunshine-filled sets.
Frequently Asked Questions
How do I make my summer manicure last longer in the pool?
Chlorine can be harsh on polish! Always apply a fresh layer of top coat every 2-3 days to create a barrier, and rinse your hands with fresh water immediately after leaving the pool.
What nail shape is the most ‘on-trend’ for 2026?
While stiletto is making a huge comeback for drama, the ‘soft almond’ remains the queen of the season for its ability to make fingers look long and elegant while being practical for everyday life.
Can I do these designs on short nails?
Absolutely! Most of these designs, especially the lemon and sunset chrome, look incredibly chic on short, square-round nails. Just scale down the size of the art to fit your canvas!