

10 Must-Have Nail Designs for Your 2026 Graduation and Beyond
Hi my sweetest loves! Can you feel it? The air is shifting, and there is such a beautiful, electric magic in the breeze as we head toward the Summer of 2026. Whether you are walking across that stage to grab your diploma or simply stepping into a new season of life, your hands deserve to carry the story of your hard work and your radiant future. It feels like just yesterday we were dreaming about these milestones, and now, here we are, ready to shine.
Think of your nails as a gentle hug for your fingertips—a little bit of self-care that reminds you of how far you’ve come. This season is all about blending that soft, ethereal glow with the bold confidence of a graduate. I’ve curated these designs specifically to help you feel like the best version of yourself. Let’s dive into these dreamy trends together, shall we?
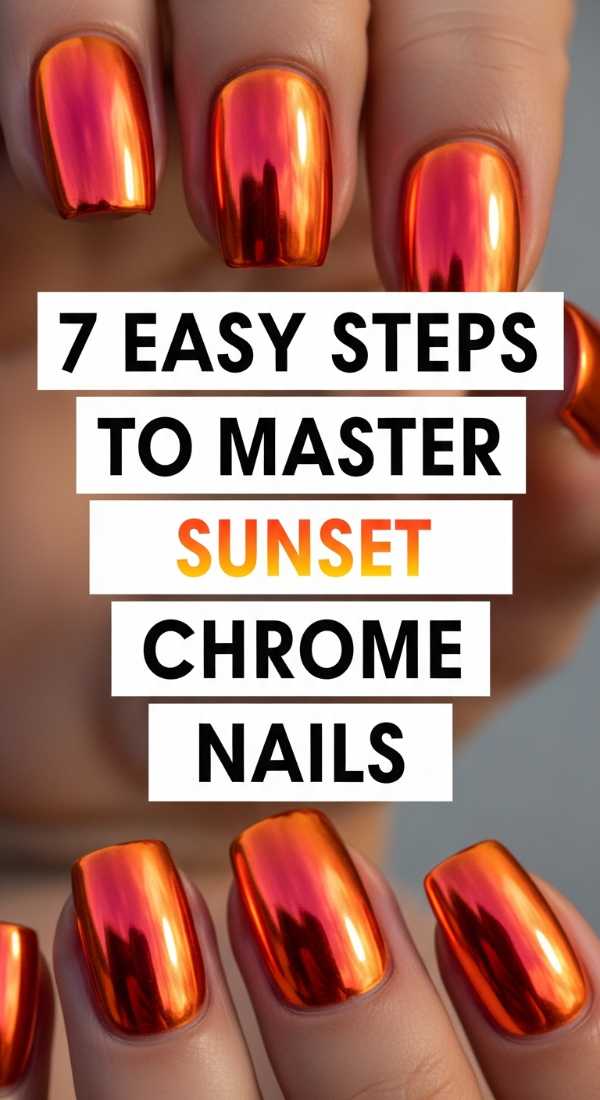
7 Easy Steps to Master Sunset Chrome Nails
Why to love this Design:
Oh, my loves, sunset chrome is like wearing a piece of the horizon on your hands. It captures that soft, warm transition from golden hour to twilight, making every movement of your hands look like a literal masterpiece. It’s perfect for those late-night graduation parties where the light hits just right.
Essential Elements:
- Iridescent chrome powder in peach or pink
- A high-shine no-wipe top coat
- Warm tangerine base polish
- Soft applicator sponge
How to Prepare:
- Cleanse your nails thoroughly with alcohol.
- Apply a thin base coat and cure.
- Paint two coats of your favorite tangerine or soft orange polish.
- Apply a no-wipe top coat and cure for only 30 seconds (it should be slightly tacky).
- Use a sponge to rub the chrome powder onto the nail until it glows.
- Dust off the excess powder gently.
- Seal with a final layer of top coat and cure fully.
Budget Range
- Drugstore Orange Polish: $8
- Chrome Powder Kit: $12
- UV Lamp: $25
5 Ways to Style Your Graduation Nails

Why to love this Design:
Graduation is such a monumental moment, and your nails should reflect your personal victory! Styling them correctly means they won’t just look good in photos, but they’ll make you feel grounded and sophisticated as you turn that tassel. It’s about finding that balance between ‘celebration’ and ‘timeless elegance’.
Essential Elements:
- Neutral or school-specific colors
- Delicate gold leaf or silver accents
- A classic almond or coffin shape
- High-gloss finish
How to Prepare:
- Coordinate with your gown: Pick a shade that complements your stole or hood.
- Incorporate school pride: Use a thin striping brush for subtle school-color accents.
- Add a ‘Year’ charm: A tiny ‘2026’ decal on the ring finger adds a personal touch.
- Go for a ‘Glass Skin’ effect: Use a sheer milky base for a clean, professional look.
- Try a matte-gloss mix: Matte base with glossy French tips for a modern twist.
Budget Range
- Nail Decals: $5
- Milky White Polish: $10
- Professional Manicure: $45-$70
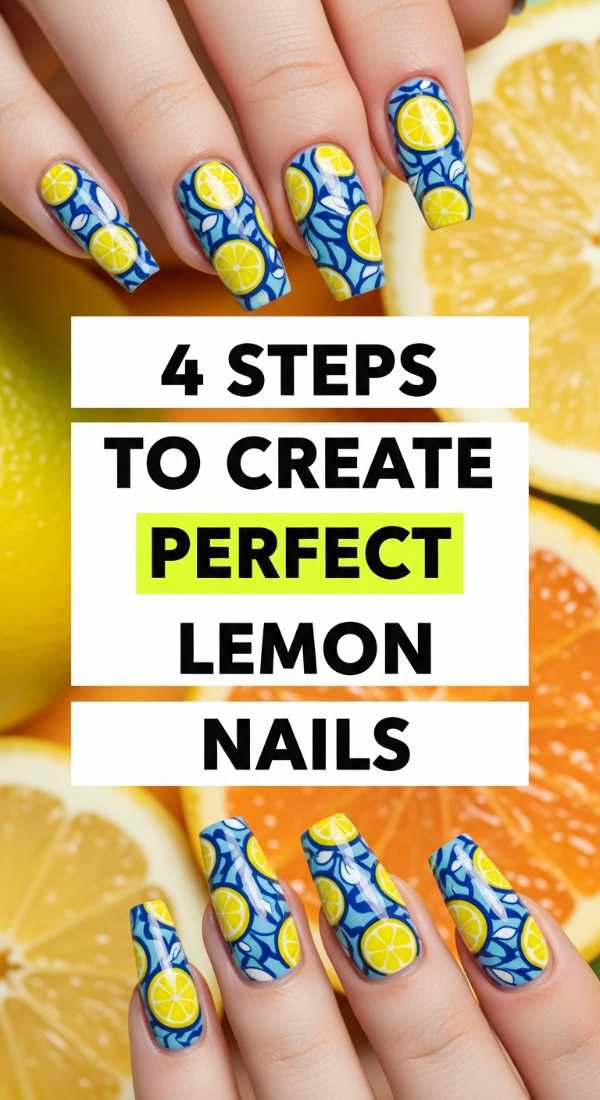
4 Steps to Create Perfect Lemon Nails
Why to love this Design:
Nothing says ‘Summer 2026’ like a zesty, bright lemon print! It’s playful, fresh, and brings an instant smile to everyone who sees it. If you’re heading to a post-grad brunch or a beach trip, these are your absolute best friends for a cheerful vibe.
Essential Elements:
- Bright yellow polish
- White and leaf-green acrylic paint or polish
- A very fine detailing brush
- Clear glossy top coat
How to Prepare:
- Paint a clean white or nude base to make the yellow pop.
- Dot small circles of yellow polish where you want your lemons.
- Add a tiny white ‘rind’ line and a small green leaf flick to each yellow dot.
- Protect your art with a thick, protective top coat once dry.
Budget Range
- Yellow Nail Lacquer: $9
- Detailing Brush Set: $7
- Green Polish: $8
6 Simple Tips for May Birthday Nails

Why to love this Design:
For my May babies, this is your time to bloom! These designs celebrate the heart of spring moving into summer. It’s all about rebirth, growth, and the soft textures of a garden in full flower. It’s like a cloud-soft embrace for your birthday month.
Essential Elements:
- Emerald green accents (May’s birthstone!)
- Pressed dried flowers
- Soft lavender or sage green bases
- Iridescent shimmer
How to Prepare:
- Choose an emerald-inspired glitter for an accent nail.
- Apply tiny dried flowers onto a tacky base coat.
- Keep the shape natural—short oval works beautifully here.
- Use a pearl-finish top coat for a magical, misty look.
- Mix textures: try a matte sage green with one glossy emerald nail.
- Add a tiny constellation map of Taurus or Gemini for flair.
Budget Range
- Dried Flower Set: $6
- Emerald Polish: $11
- Matte Top Coat: $9
8 Ways to Rock Summer Goth Nails

Why to love this Design:
Who says dark colors are only for winter? Summer Goth is a huge vibe for 2026. It’s for the loves who want to maintain their edge while basking in the sun. Think ‘witchy beach day’ or ‘midnight garden’—it’s moody, sophisticated, and incredibly cool.
Essential Elements:
- Sheer black ‘stocking’ polish
- Silver celestial charms
- Deep plum or burgundy tones
- Negative space designs
How to Prepare:
- Use a sheer black base for a lighter, ‘summery’ dark feel.
- Paint tiny silver stars or moons on a thumb accent.
- Try a black-to-clear gradient (ombré).
- Incorporate velvet magnetic polish in dark shades.
- Use a matte finish to give it a ‘stone’ texture.
- Add a single ‘blood red’ heart on the pinky.
- Leave ‘negative space’ half-moons at the cuticle.
- Finish with high-gloss edges for a ‘wet look’ effect.
Budget Range
- Sheer Black Polish: $10
- Silver Star Studs: $4
- Magnetic Polish: $15
5 Easy Steps for Teal and Coral Nails

Why to love this Design:
This is the ultimate vacation color palette! Teal and coral are complementary soulmates. They remind me of the ocean meeting a tropical reef. It’s energetic, vibrant, and looks absolutely stunning against a summer tan.
Essential Elements:
- Vibrant Teal polish
- Soft Coral or Peach polish
- Striping tape
- Gold flake accents
How to Prepare:
- Paint your thumb, index, and pinky in Teal.
- Paint your middle and ring fingers in Coral.
- Apply a strip of gold flake horizontally across the Teal nails.
- Create a ‘half-and-half’ design on one nail using striping tape for a clean line.
- Seal everything with a plump gel-effect top coat.
Budget Range
- Teal/Coral Polish Duo: $16
- Gold Leaf Flakes: $5
- Gel-Effect Top Coat: $12
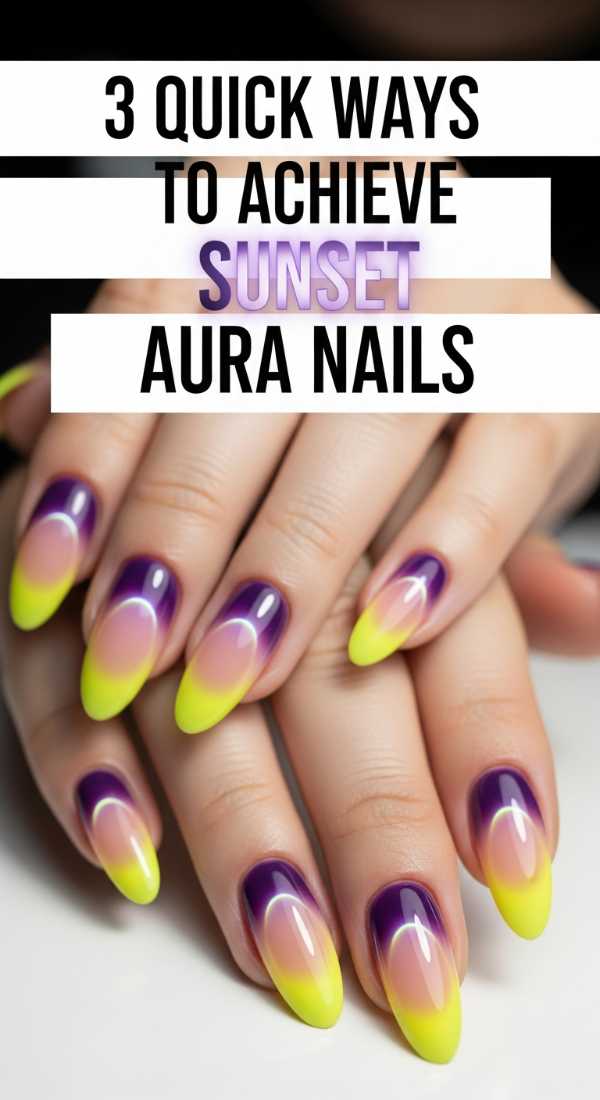
3 Quick Ways to Achieve Sunset Aura Nails
Why to love this Design:
Aura nails are all about your inner energy, and the sunset version is so deeply healing. It looks like a soft puff of color emanating from the center of your nail. It’s the trend of the year for anyone seeking a spiritual, ‘main character’ energy for graduation.
Essential Elements:
- Makeup sponge or airbrush tool
- Soft pink and vibrant orange polishes
- Nude base color
How to Prepare:
- Apply your nude base and let it dry completely.
- Dab a small amount of pink polish in the center of a sponge, surrounded by orange.
- Press the sponge gently onto the center of the nail to create a blurred ‘halo’ effect.
Budget Range
- Makeup Sponges: $3
- Sunset Palette Polishes: $20
- Airbrush Kit (Optional): $40
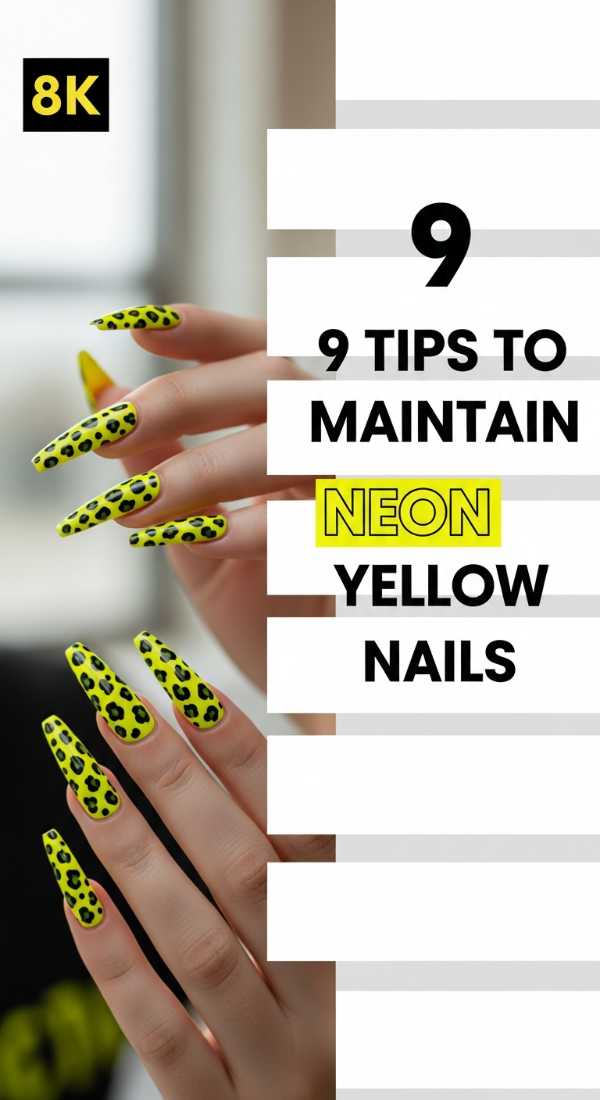
9 Tips to Maintain Neon Yellow Nails
Why to love this Design:
Neon yellow is the loudest, proudest color of Summer 2026! It’s for my loves who aren’t afraid to be seen. However, neons can be finicky, so keeping them bright and fresh is key to rocking this bold look throughout graduation week.
Essential Elements:
- Neon yellow lacquer (high pigment)
- Opaque white base coat
- UV-protective top coat
- Cuticle oil
How to Prepare:
- Always start with a white base coat—it makes the neon scream!
- Use thin layers to avoid bubbling.
- Apply a UV-protectant top coat to prevent fading in the summer sun.
- Oil your cuticles daily; neon looks harsh against dry skin.
- Wear gloves when cleaning or gardening.
- Re-apply top coat every 3 days to keep the shine.
- Avoid harsh hand sanitizers with high alcohol if possible.
- Shape them into a ‘squoval’ to prevent chipping.
- Buff the nail surface gently before application for better grip.
Budget Range
- Neon Yellow Polish: $12
- White Base Polish: $8
- Cuticle Oil Pen: $6
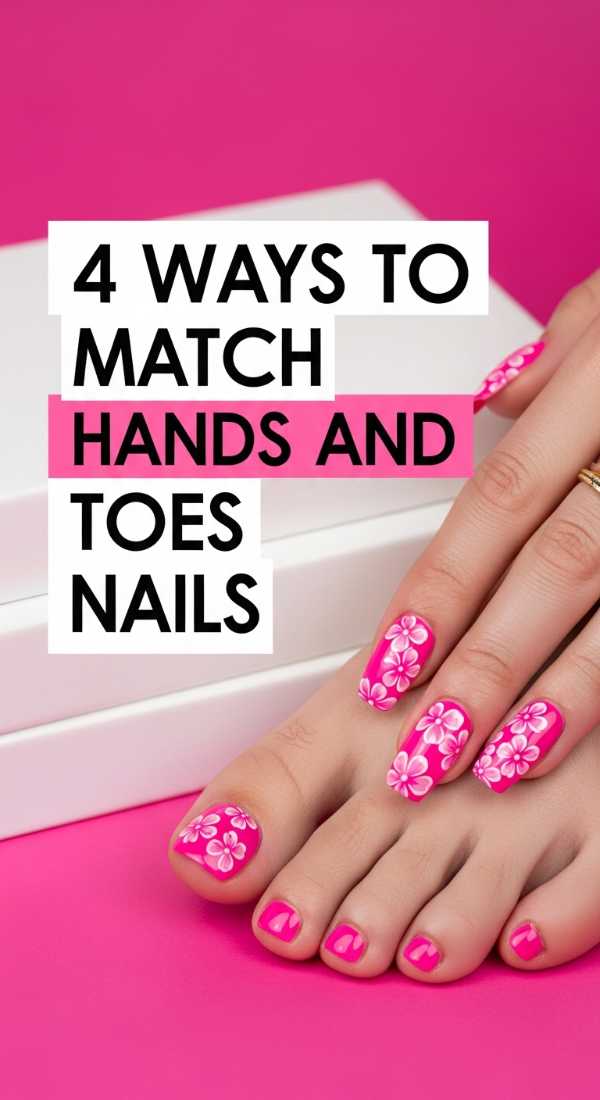
4 Ways to Match Hands and Toes Nails
Why to love this Design:
There is something so incredibly ‘put together’ about a matching mani-pedi. For 2026, we aren’t just doing the exact same color—we’re telling a story that flows from fingers to toes. It’s the ultimate ‘clean girl’ aesthetic for graduation photos.
Essential Elements:
- Coordinating color palette
- Matching glitter or foil
- Consistent finish (all matte or all gloss)
How to Prepare:
- The Classic Match: Use the exact same shade of ‘Graduation White’ or ‘Summer Pink’ on both.
- The Inversion: Try Teal fingers with Coral accents, and Coral toes with Teal accents.
- The Gradient: Move from light pink on fingers to deep fuchsia on toes.
- The Accent Bridge: Keep both neutral, but use the same gold leaf on the ring finger and big toe.
Budget Range
- Matching Polish Set: $15
- Pedicure Tool Kit: $12
- Foot Cream: $10
10 Steps to the Hottest Summer Nails

Why to love this Design:
This is the ‘everything’ manicure. It combines shape, health, and the trendiest ‘2026 chrome-meets-jelly’ look. It’s the high-maintenance look that feels low-maintenance once it’s on. You will feel like an absolute queen stepping into your post-grad life.
Essential Elements:
- Jelly polish (sheer)
- Fine shimmer
- Builder gel (for strength)
- Almond shape
How to Prepare:
- Exfoliate your hands with a sugar scrub.
- Push back cuticles gently—never cut!
- Shape nails into a long, elegant almond.
- Apply a pH bonder for longevity.
- Apply a layer of builder gel for that ‘3D’ plumpness.
- Apply two coats of ‘jelly’ pink or blue polish.
- Dust a tiny amount of unicorn shimmer over the tips.
- Add a single tiny rhinestone near the cuticle of the middle finger.
- Seal with a long-wear gel top coat.
- Massage in a floral-scented hand cream.
Budget Range
- Builder Gel: $18
- Jelly Polish: $11
- Sugar Scrub: $14
Wishing You the Brightest Summer
My loves, as you prepare for these big moments, remember that your nails are just a small reflection of the incredible light you carry inside. Whether you choose the bold neon yellow or the soft sunset aura, wear it with the confidence of someone who has worked hard and earned their moment in the sun. I am so incredibly proud of everything you’ve achieved in 2026. Go out there and shine—your future is as bright as a fresh manicure! Sending you so much love and a gentle hug.