
The Ultimate Guide to Crafting the Perfect Viral Snack Board
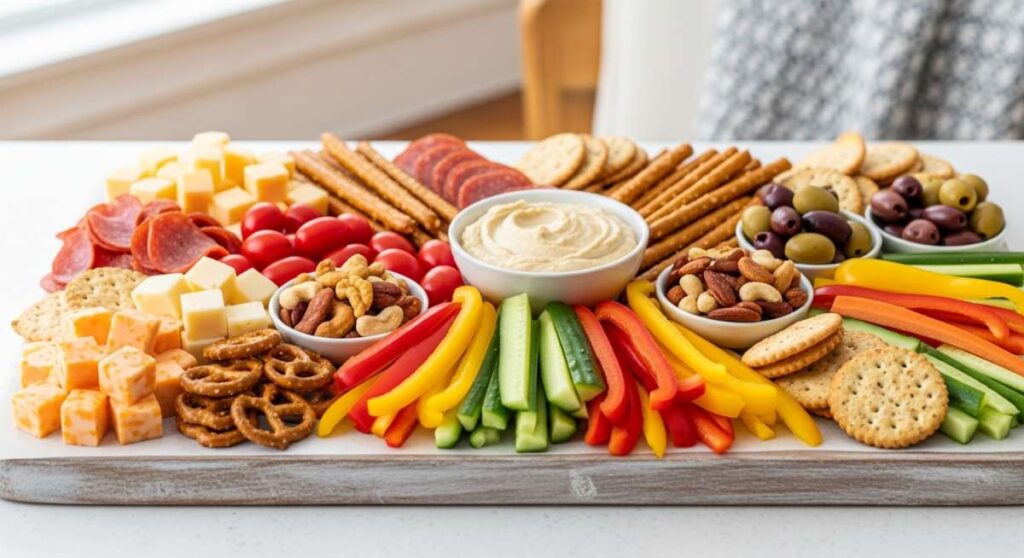
There is something inherently magical about a gathering centered around a beautifully curated spread. It’s more than just food; it’s an invitation to slow down, linger over a glass of something cold, and share stories while picking at a tapestry of colors and textures. In my home, the ‘Viral Snack Board’ has become a symbol of effortless hospitality—the kind where you don’t have to spend all night in the kitchen, but your guests feel like you’ve rolled out the red carpet just for them.
As the sun begins to set and the golden hour light hits the table, there’s nothing quite like the sight of vibrant veggies, savory dips, and delicate sandwiches all nestled together. This guide is my love letter to summer hosting, designed to help you master the art of the multi-functional board. Whether you’re feeding a crowd or just treating yourself to an elevated afternoon, these elements combine to create a lifestyle aesthetic that is as delicious as it is Instagram-worthy.
How to make rotel dip?

Why we love this
Rotel dip is the undisputed king of comfort food, offering a velvety, molten texture that clings perfectly to a salty tortilla chip. The aroma of browned sausage mingled with the sharp, acidic tang of diced tomatoes and green chilies fills the room, instantly signaling that the party has started. Every bite is a harmonious blend of creamy cheese and a subtle, spicy kick that lingers just long enough to make you crave another dip. It’s the kind of dish that brings people together, huddled around the bowl while it’s still bubbling and warm.
Ingredients
- 1 lb ground breakfast sausage or chorizo
- 2 blocks (10 oz each) of sharp cheddar or processed cheese product (cubed)
- 2 cans (10 oz) Rotel Diced Tomatoes and Green Chilies (undrained)
- 1/2 cup whole milk (optional for consistency)
- Fresh cilantro and sliced jalapeños for garnish
How to make it
- Begin by heating a large skillet over medium-high heat until a drop of water sizzles on contact. Crumble the sausage into the pan, using a wooden spoon to break it into small, uniform pieces. Cook for 7-9 minutes, stirring occasionally, until the meat is deeply browned and no pink remains. Drain the excess fat thoroughly to ensure a smooth, non-greasy dip.
- Transfer the browned sausage into a slow cooker set to ‘Low’ or a heavy-bottomed pot over low heat on the stove. Add the cubed cheese and the two cans of undrained Rotel. The juice from the tomatoes is essential for achieving that iconic, pourable consistency.
- Stir the mixture gently and frequently. If using a stovetop, keep the heat low to prevent the cheese from scorching or seizing. You want to see a slow, rhythmic melt where the cubes gradually lose their shape into a glossy river of orange gold.
- Once the cheese is fully melted and the dip is uniform, evaluate the thickness. If it feels too stiff, whisk in 1/4 cup of whole milk at a time until it reaches a velvety, dipping-friendly state.
- Serve immediately in a warmed ceramic bowl, garnished with a sprinkle of fresh cilantro and jalapeño slices for a pop of color and extra heat.
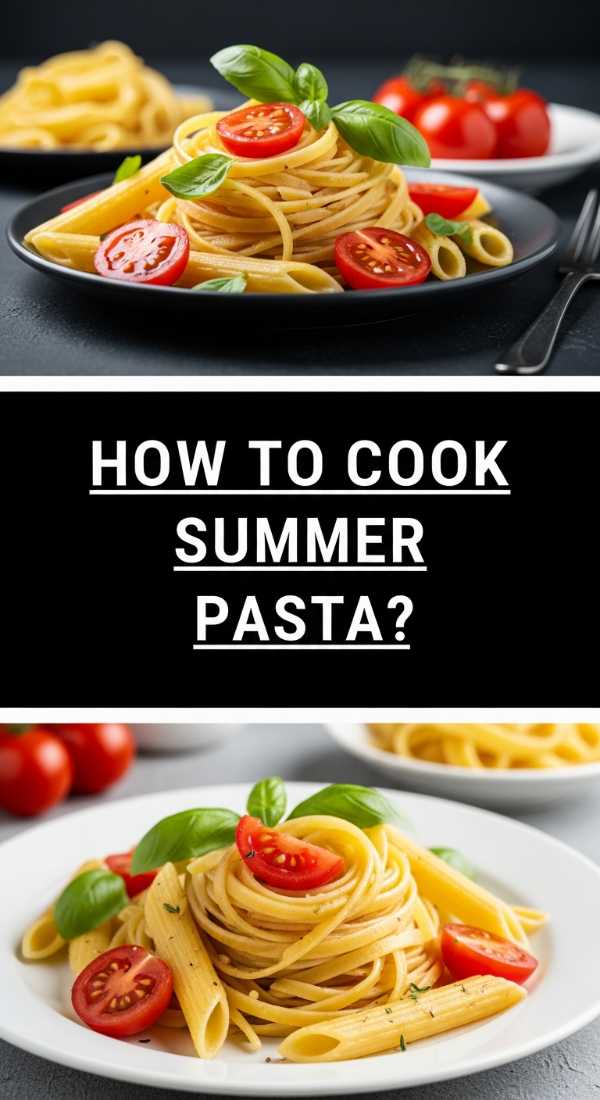
How to cook summer pasta?
Why we love this
Summer pasta is all about the lightness of the season, exchanging heavy cream sauces for the bright, clean flavors of lemon zest and garden-fresh herbs. Imagine the scent of basil leaves being torn by hand, releasing their peppery aroma into the air, while the citrus notes of lemon peel cut through the richness of high-quality olive oil. The texture is a delightful contrast between the firm bite of al dente noodles and the burst of juicy, blistered cherry tomatoes. It feels like a sunny afternoon on a plate, refreshing yet satisfyingly filling.
Ingredients
- 1 lb Linguine or Farfalle
- 2 cups cherry tomatoes, halved
- 4 cloves garlic, thinly sliced
- 1/2 cup extra virgin olive oil
- 1 bunch fresh basil leaves
- Zest and juice of 1 large lemon
- 1/2 cup freshly grated Parmesan cheese
- Red pepper flakes and sea salt
How to make it
- Bring a large pot of heavily salted water to a rolling boil. The water should taste like the sea to properly season the pasta from the inside out. Add the pasta and cook for approximately 8-10 minutes, or until it reaches a perfect al dente texture—firm to the tooth with a slight resistance.
- While the pasta cooks, heat the olive oil in a wide sauté pan over medium-low heat. Add the sliced garlic and a pinch of red pepper flakes. Cook gently for 2-3 minutes until the garlic is golden and fragrant, taking care not to burn it, which would turn the oil bitter.
- Increase the heat to medium and toss in the halved cherry tomatoes. Sauté them for 4-5 minutes until they begin to soften and release their juices, creating a natural, light sauce.
- Reserve one cup of the starchy pasta water before draining the noodles. Transfer the pasta directly into the pan with the tomatoes and garlic.
- Add the lemon zest, lemon juice, and half of the reserved pasta water. Toss vigorously over medium heat for 1-2 minutes, allowing the liquid to emulsify with the oil into a glossy coating. Stir in the fresh basil and Parmesan at the very last second, then serve with a final drizzle of olive oil.
How to make hummingbird food?

Why we love this
Creating your own hummingbird food is a meditative ritual that connects your kitchen directly to the vibrant life of your garden. The simple mixture of sugar and water becomes a shimmering nectar that invites these tiny, iridescent jewels to your window, their wings a frantic, beautiful blur. There is a quiet satisfaction in knowing you are providing a pure, additive-free source of energy that sustains them during the heat of summer. Watching them hover and sip is the ultimate lifestyle reward, bringing a sense of peace and natural wonder to your outdoor space.
Ingredients
- 1 cup white granulated sugar
- 4 cups filtered water
- (Note: Never use honey, brown sugar, or red dye)
How to make it
- In a medium saucepan, combine one cup of white granulated sugar with one cup of the filtered water. It is vital to use plain white sugar, as other sweeteners can contain iron levels that are toxic to hummingbirds or mold too quickly.
- Place the pan over medium heat and stir constantly until the sugar is completely dissolved. You aren’t looking to create a syrup or a caramel; you simply want a clear, uniform solution. Bringing it to a light boil for 1-2 minutes is recommended to help neutralize any impurities in the water or sugar.
- Remove the concentrated mixture from the heat and stir in the remaining three cups of cool filtered water. This speeds up the cooling process and ensures the final ratio is exactly 1 part sugar to 4 parts water, mimicking the natural sucrose levels found in flowers.
- Allow the nectar to cool completely to room temperature. This is a crucial safety step, as hot liquid can warp plastic feeders or harm the birds.
- Fill your clean bird feeders and store any leftover nectar in a sealed glass jar in the refrigerator for up to one week. Remember to change the feeder every 2-3 days in hot weather to prevent fermentation.
How to make summer soup?

Why we love this
A chilled summer soup, like a classic Gazpacho or a creamy corn bisque, is the ultimate refresher when the mercury rises. It offers a sophisticated, cool mouthfeel that contrasts beautifully with the crunch of fresh garnishes like cucumber dice or toasted seeds. The aroma is purely horticultural—the smell of rain on earth, fresh peppers, and vine-ripened tomatoes all blended into a liquid salad. It’s an elegant, vibrant addition to any snack board, served in small shooters or bowls to cleanse the palate between savory bites.
Ingredients
- 6 large ripe tomatoes, cored and chopped
- 1 English cucumber, peeled and chopped
- 1 red bell pepper, seeded and chopped
- 1 small red onion, minced
- 2 cloves garlic
- 2 tbsp sherry vinegar
- 1/3 cup extra virgin olive oil
- Salt and black pepper to taste
How to make it
- Combine the chopped tomatoes, cucumber, bell pepper, red onion, and garlic in a high-powered blender. If your blender is smaller, work in two batches to ensure a consistent texture.
- Pulse the vegetables until the mixture is broken down but still retains some character. For a traditional Gazpacho, you want a balance between a smooth purée and a slight rustic texture.
- With the blender running on low, slowly drizzle in the sherry vinegar and the extra virgin olive oil. The oil will emulsify with the vegetable juices, turning the soup from a deep red to a bright, creamy orange-red.
- Season generously with salt and black pepper. The cold temperature of the soup will dull the flavors slightly, so don’t be afraid to season more than you would a hot soup.
- Pour the mixture into a glass pitcher and refrigerate for at least 4 hours, or ideally overnight. This chilling period is essential for the flavors of the raw vegetables to marry and mellow. Serve in chilled glasses with a sprig of mint or a slice of cucumber.
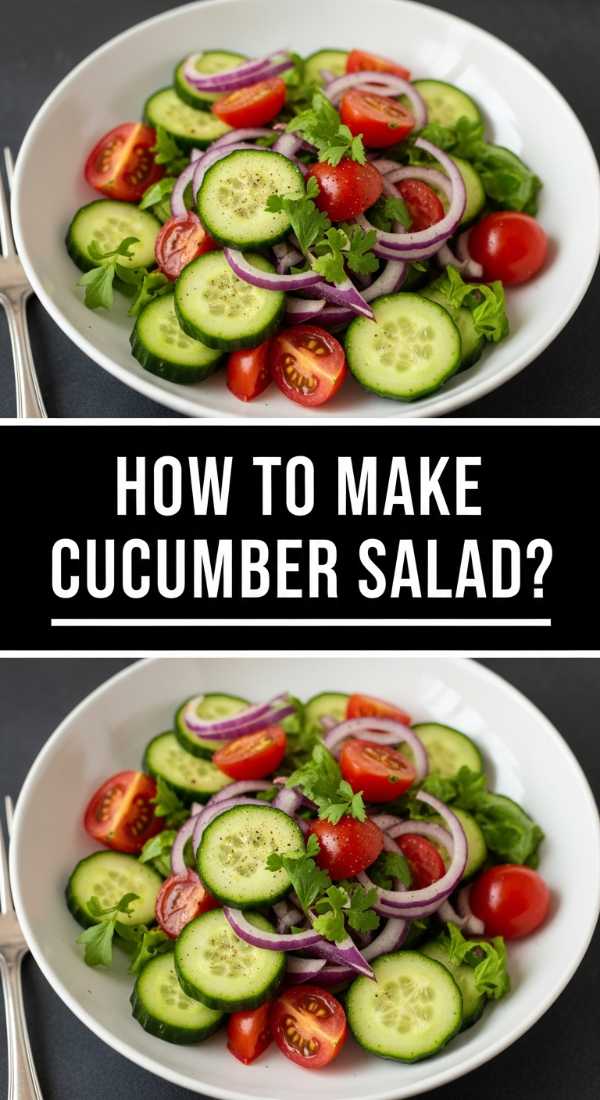
How to make cucumber salad?
Why we love this
Cucumber salad is the crisp, hydrating backbone of a summer snack board, providing a necessary snap and a vinegar-forward zing that cuts through richer elements. The scent is incredibly clean—a mix of fresh dill, sharp red onion, and the watery sweetness of the cucumber itself. As it sits, the cucumbers release a bit of their juice, mingling with the dressing to create a brine that is as refreshing as a cool breeze. It’s a textural delight, moving from the crunch of the skin to the soft, cool center of each translucent slice.
Ingredients
- 2 large English cucumbers, thinly sliced
- 1/2 small red onion, paper-thin half-moons
- 1/2 cup white wine vinegar
- 2 tbsp honey or sugar
- 1/4 cup fresh dill, chopped
- 1 tsp sea salt
- 1/2 tsp cracked black pepper
How to make it
- Start by slicing the cucumbers into very thin rounds. Using a mandoline on a thin setting is highly recommended to achieve those professional, translucent slices that absorb the dressing quickly.
- Place the sliced cucumbers in a colander and sprinkle with the sea salt. Let them sit for about 15 minutes. This ‘sweating’ process draws out excess water, ensuring your salad stays crunchy rather than becoming soggy in the bowl.
- In a small mixing bowl, whisk together the white wine vinegar, honey, and black pepper until the sweetener is fully dissolved. Taste the dressing; it should be sharp but balanced.
- Rinse the salted cucumbers lightly with cold water and pat them very dry with a clean kitchen towel. Transfer them to a large bowl and add the thinly sliced red onions and chopped fresh dill.
- Pour the dressing over the vegetables and toss gently with tongs. Let the salad marinate in the refrigerator for at least 30 minutes before serving on your board. This allows the onions to soften and the dill to infuse the vinegar with its herbal notes.
How to grill summer kabobs?

Why we love this
Grilling kabobs is a sensory journey, from the tactile process of threading colorful ingredients onto skewers to the sizzle and smoke as they hit the hot grates. The aroma is quintessential summer: charred meat, caramelized onions, and the sweet, concentrated scent of roasted peppers. There is something deeply satisfying about the charred, slightly crispy edges of a zucchini slice or a piece of sirloin that has been kissed by the flames. They add a rustic, hand-held element to your snack board that feels both hearty and festive.
Ingredients
- 1 lb protein (chicken breast, steak, or shrimp)
- 1 red onion, cut into chunks
- 1 zucchini, sliced into thick rounds
- 1 bell pepper, cut into squares
- 1/4 cup olive oil
- 3 tbsp soy sauce
- 2 tbsp balsamic vinegar
- 2 cloves garlic, minced
How to make it
- If using wooden skewers, soak them in water for at least 30 minutes prior to grilling to prevent them from catching fire. If using metal skewers, ensure they are clean and lightly oiled.
- Prepare the marinade by whisking the olive oil, soy sauce, balsamic vinegar, and minced garlic in a large bowl. Cut your protein into uniform 1-inch cubes so they cook at the same rate, and toss them in the marinade for at least 1 hour in the fridge.
- Thread the skewers, alternating between the protein and the vegetables. Aim for a tight fit so the ingredients support each other, but don’t pack them so tightly that heat can’t circulate around the meat.
- Preheat your grill to medium-high heat (about 400°F). Brush the grates with a bit of oil. Place the kabobs on the grill and leave them undisturbed for 4-5 minutes to develop those beautiful, dark sear marks.
- Turn the kabobs carefully and cook for another 4-6 minutes, or until the protein reaches its safe internal temperature (165°F for chicken, 145°F for steak). The vegetables should be tender-crisp with visible char. Let them rest for 5 minutes before placing them on the board.
How to make summer drinks?

Why we love this
Summer drinks are the jewel-toned centerpieces of any gathering, offering a cool condensation-beaded glass that feels like a relief against the heat. Whether it’s a sparkling mojito or a fruit-infused lemonade, the aroma of muddled mint and citrus oil is instantly uplifting. The sound of ice clinking against glass is the soundtrack of the season. These drinks provide a botanical sweetness and a sparkling effervescence that cleanses the palate, making every bite of food on the board taste even more vibrant and defined.
Ingredients
- 2 cups fresh fruit (strawberries, peaches, or lemons)
- 1/2 cup fresh herbs (mint or basil)
- 1/4 cup simple syrup or agave
- Sparkling water or Prosecco
- Plenty of crushed ice
How to make it
- Start by creating a fruit base. If making a lemonade or infused water, muddle your chosen fruit with the herbs and simple syrup in the bottom of a large pitcher. Use a firm, twisting motion with your muddler to release the essential oils from the herbs and the juices from the fruit.
- For a smoother drink, strain this fruit mixture through a fine-mesh sieve into a clean carafe, or leave the fruit in for a rustic, ‘viral’ look.
- Fill highball glasses or a large dispenser to the brim with crushed ice. Crushed ice is superior for summer drinks as it chills the liquid faster and creates a beautiful, slushy texture.
- Pour your fruit base over the ice, filling each glass about halfway. Top with chilled sparkling water for a mocktail or a crisp Prosecco for a cocktail.
- Garnish extravagantly. A summer drink isn’t complete without a sprig of fresh mint, a wheel of citrus, or an edible flower pinned to the rim. Stir gently with a long spoon to incorporate the layers without losing the bubbles.
How to make summer desserts?

Why we love this
Summer desserts should feel effortless and bright, focusing on the natural sweetness of peak-season produce rather than heavy, baked sugars. Think of a berry trifle or a fruit tart where the aroma is dominated by the scent of sun-warmed strawberries and sweet cream. The texture is a cloud-like dream—soft whipped topping, juicy fruit, and perhaps a bit of crunch from a graham cracker crumble. It’s the perfect, light-hearted conclusion to a meal, providing a sweet lingering note that feels indulgent yet refreshing under the evening stars.
Ingredients
- 2 cups assorted berries (blueberries, raspberries, blackberries)
- 1 pint heavy whipping cream
- 2 tbsp powdered sugar
- 1 tsp vanilla extract
- Shortcake rounds or crushed butter cookies
How to make it
- Begin by macerating the berries. Toss them in a bowl with a tablespoon of sugar and a squeeze of lemon juice. Let them sit at room temperature for 20 minutes; they will release their natural juices, creating a beautiful, ruby-colored syrup.
- In a chilled metal bowl, combine the heavy whipping cream, powdered sugar, and vanilla extract. Use a hand mixer or a stand mixer to beat the cream on medium-high speed.
- Watch the cream closely. You are looking for ‘soft peaks’—where the cream holds its shape but the tips curl over when you lift the whisk. This takes about 3-5 minutes. Do not overbeat, or it will turn to butter.
- To assemble, use small glass jars or clear cups to show off the layers. Place a layer of crumbled cookies or shortcake at the bottom to provide a textural foundation.
- Spoon a generous layer of the macerated berries over the cake, ensuring some of the syrup soaks in. Top with a huge dollop of the fresh whipped cream and a final berry for decoration. Chill for 1 hour before serving to let the layers settle into a cohesive, melt-in-your-mouth dessert.
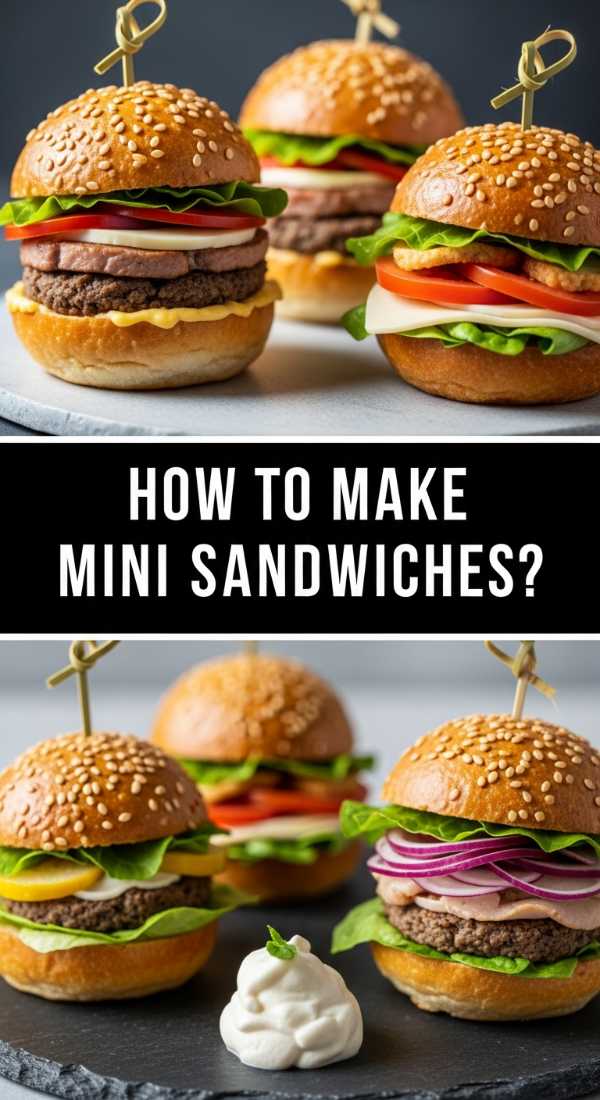
How to make mini sandwiches?
Why we love this
Mini sandwiches, or tea sandwiches, are the epitome of ‘grab-and-go’ elegance on a snack board. They offer a dainty, soft texture that is incredibly comforting—the yielding crumb of fresh bread giving way to a cool, creamy filling like cucumber-dill spread or chicken salad. The aroma of fresh yeast and herbs is subtle and inviting. Because they are bite-sized, they encourage guests to sample different flavors without feeling overfilled, and their uniform, stacked appearance adds a professional, organized aesthetic to your board layout.
Ingredients
- 1 loaf of thin-sliced white or whole wheat bread
- 8 oz cream cheese, softened
- 1 tbsp fresh chives, minced
- 1/2 English cucumber, sliced into paper-thin rounds
- Microgreens for garnish
- Softened butter
How to make it
- Start with very fresh, soft bread. Lay out the slices in pairs on a clean cutting board. Lightly butter each slice all the way to the edges; this acts as a moisture barrier to prevent the bread from becoming soggy once the filling is added.
- In a small bowl, whip the softened cream cheese with the minced chives until light and airy. Spread a generous, even layer of this mixture onto one side of each buttered bread pair.
- Layer the cucumber slices across one piece of bread, overlapping them slightly like shingles so that every bite contains a crunch. Season the cucumbers with a tiny pinch of salt and pepper.
- Close the sandwiches and use a very sharp serrated knife to trim away all the crusts. This is the key to that ‘viral’ aesthetic—perfectly straight, clean edges.
- Cut each large square into four smaller squares or three long rectangles (fingers). For a professional touch, wipe the knife blade between every cut to ensure the edges remain pristine. Top each mini sandwich with a small pinch of microgreens.
How to do meal prep?

Why we love this
Meal prep is the secret language of a stress-free lifestyle, transforming the chaos of the week into a series of organized, colorful containers that promise nourishment and ease. The aroma of roasted vegetables and pre-cooked grains cooling on the counter provides a sense of accomplishment and security. It’s about the tactile joy of chopping once and eating thrice, seeing a rainbow of ingredients ready to be assembled at a moment’s notice. When your prep is done, the act of putting together a viral snack board takes minutes rather than hours, making high-end living feel accessible.
Ingredients
- 3 lbs various proteins (chicken, boiled eggs, chickpeas)
- 5-6 types of seasonal vegetables (carrots, peppers, broccoli)
- 2 large batches of grains (quinoa, farro, or rice)
- 3 homemade dressings or dips
- Stackable glass airtight containers
How to make it
- Dedicate a 2-hour window on a Sunday or Monday for ‘The Big Chop.’ Wash and slice all your raw vegetables at once. Store hard vegetables like carrots in containers with a little water to keep them crisp, while bell peppers should stay dry.
- Use your oven to its full potential by roasting two sheet pans of vegetables and one pan of protein simultaneously at 400°F. Use different seasonings on different sections of the pans to provide variety for the week ahead.
- Boil a large pot of your favorite grain. Once cooked and cooled, fluff it with a fork and store it in a flat container rather than a deep bowl; this prevents the grain from clumping and becoming gummy.
- Prepare your sauces and dressings. Having a ‘hero’ sauce, like a lemon-tahini or a spicy pesto, can transform the same basic ingredients into entirely different meals. Store these in small mason jars.
- Label everything with the date. When it’s time to host or eat, simply pull out your pre-prepped components—the cucumber salad, the grilled kabobs, the dips—and arrange them on your board. You’ve done the hard work already, so now you can enjoy the art of assembly.
Conclusion: The Art of the Shared Table
Crafting the perfect viral snack board is about more than just following recipes; it’s about creating a moment of connection. By combining these diverse elements—from the warmth of the Rotel dip to the crispness of the cucumber salad—you create a landscape of flavor that invites everyone to the table. Remember that the best boards are messy, full, and reflective of the season. So, pour a cold drink, set out your mini sandwiches, and enjoy the beautiful, delicious life you’ve created.