

There is something magical about the way a beautifully arranged food board brings people together. It’s more than just a meal; it’s an invitation to linger, to graze, and to share stories over vibrant colors and incredible flavors. Lately, my social feed has been exploding with these ‘deconstructed’ board ideas that take simple ingredients and turn them into a visual masterpiece, and honestly, I am here for it.
Whether you are hosting a backyard sunset dinner or just want to make a Tuesday night feel a little more special for your family, these ten viral food board ideas are the ultimate answer. They strip away the stress of formal plating and replace it with a relaxed, rustic charm that celebrates fresh, seasonal ingredients. Let’s dive into these delicious spreads that are currently taking the internet by storm.
How to make berry salad?

Why we love this
This berry salad is like capturing a summer afternoon on a plate. The combination of tart blackberries, sweet strawberries, and the surprising salty kick of crumbled feta creates a flavor profile that is both refreshing and sophisticated. As you toss the berries, the scent of fresh, bruised mint fills the air, mingling with the floral notes of honey and the zesty brightness of lime. It’s light, vibrant, and provides that perfect juicy crunch that makes your palate sing during a warm outdoor gathering.
Ingredients
- 2 cups fresh strawberries, hulled and halved
- 1 cup fresh blueberries
- 1 cup fresh raspberries
- 1/2 cup blackberries
- 1/4 cup fresh mint leaves, chiffonade
- 1/4 cup crumbled feta cheese
- 2 tablespoons honey
- 1 tablespoon fresh lime juice
- A pinch of flaky sea salt
How to make it
- Begin by carefully washing all your berries in cold water and patting them completely dry with a paper towel; moisture is the enemy of a crisp salad.
- Hull the strawberries using a small paring knife and slice them into uniform halves or quarters depending on their size to ensure even bites.
- In a small glass bowl, whisk together the honey and fresh lime juice until the honey is fully dissolved and the mixture is translucent and syrupy.
- Place all the berries into a large wooden bowl, being careful not to crush the delicate raspberries, and sprinkle the fresh mint over the top.
- Drizzle the honey-lime dressing evenly over the fruit and use a large silicone spatula to gently fold the berries, ensuring every piece is lightly coated in the glaze.
- Finish by scattering the crumbled feta and a tiny pinch of flaky sea salt over the top, which will balance the sweetness and add a beautiful textural contrast.
How to grill juicy chicken?
Why we love this
There is nothing quite like the aroma of marinated chicken hitting a hot grill—it’s the scent of pure comfort. When done correctly, the exterior develops a gorgeous, caramelized char while the inside remains incredibly tender and dripping with savory juices. The way the smoke infuses into the meat, paired with the bright zing of lemon and earthy herbs, creates a rustic, hearty protein that serves as the perfect centerpiece for a communal grazing board. Each bite is a balance of smoky, salty, and herb-forward goodness.
Ingredients
- 1.5 lbs boneless, skinless chicken thighs
- 1/4 cup extra virgin olive oil
- 3 cloves garlic, minced
- 1 tablespoon fresh rosemary, chopped
- 1 teaspoon smoked paprika
- Juice and zest of one lemon
- Kosher salt and cracked black pepper
How to make it
- In a large resealable bag or shallow dish, combine the olive oil, minced garlic, rosemary, paprika, lemon zest, and lemon juice to create a potent marinade.
- Add the chicken thighs to the marinade, ensuring every nook and cranny is coated; let this sit in the refrigerator for at least 30 minutes, though 2 hours is ideal for deep flavor penetration.
- Preheat your grill to medium-high heat (about 400°F) and lightly oil the grates using a folded paper towel dipped in oil and held with tongs to prevent sticking.
- Place the chicken on the grill and sear for about 5-6 minutes on the first side without moving it; you are looking for those distinct, dark grill marks and for the meat to release easily from the grate.
- Flip the chicken and cook for another 5-7 minutes; use a meat thermometer to ensure the internal temperature reaches exactly 165°F at the thickest part.
- Remove the chicken from the heat and transfer it to a cutting board, letting it rest for at least 8 minutes under a loose tent of foil so the juices can redistribute before you slice it into strips for your board.
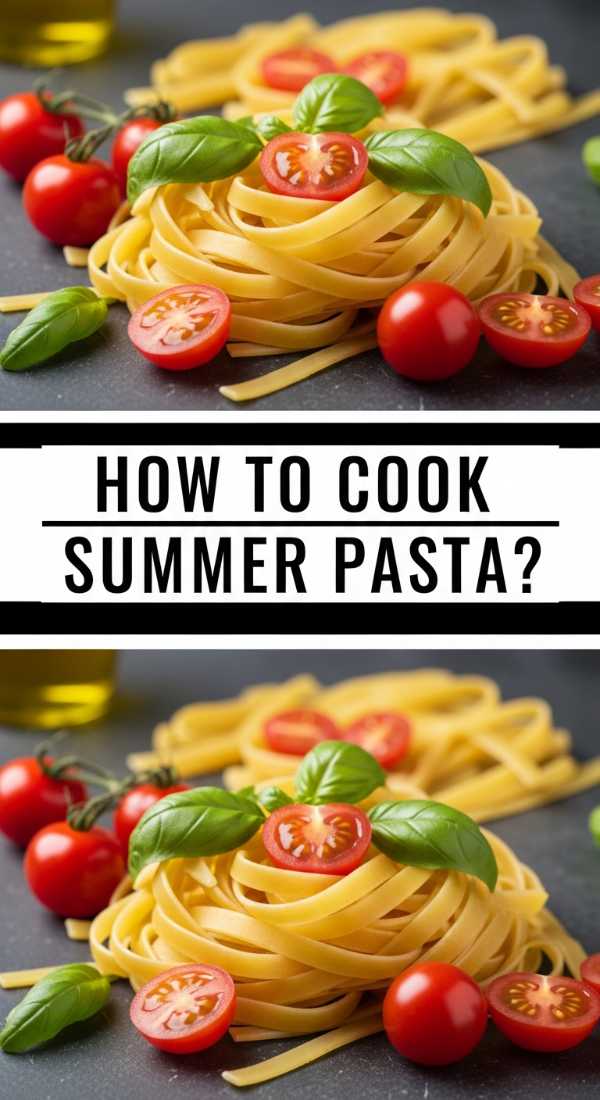
How to cook summer pasta?

Why we love this
Summer pasta is all about celebrating the harvest in its simplest form. Imagine al dente noodles tossed in a light, silken sauce made from the natural juices of bursting cherry tomatoes and high-quality olive oil. The fragrance of garlic sautéing in butter mixed with the peppery aroma of fresh basil is intoxicating. It’s a dish that feels elegant yet grounded, offering a silky texture that coats the tongue and a bright acidity that keeps you coming back for just one more forkful from the board.
Ingredients
- 12 oz spaghetti or linguine
- 2 cups cherry tomatoes, halved
- 3 tablespoons olive oil
- 2 tablespoons unsalted butter
- 4 cloves garlic, thinly sliced
- 1/2 cup fresh basil leaves, torn
- 1/2 cup freshly grated Parmesan cheese
- Red pepper flakes (optional)
How to make it
- Bring a large pot of heavily salted water to a rolling boil; the water should taste like the sea to properly season the pasta from within.
- Cook the pasta until it is just shy of al dente (usually 1-2 minutes less than the package directions), as it will finish cooking in the sauce.
- While the pasta cooks, heat the olive oil and butter in a large skillet over medium heat until the butter starts to foam and smells slightly nutty.
- Add the sliced garlic and red pepper flakes, sautéing for about 1 minute until the garlic is golden around the edges but not brown, which would make it bitter.
- Toss in the cherry tomatoes and a splash of the pasta cooking water; simmer for 5 minutes until the tomatoes begin to collapse and create a light, chunky sauce.
- Transfer the pasta directly into the skillet, add the basil and Parmesan, and toss vigorously over low heat for 2 minutes until the sauce thickens and clings to the noodles perfectly.
How to roast garden veggies?

Why we love this
Roasting vegetables transforms them from humble garden staples into concentrated morsels of sweetness and depth. There is a specific joy in seeing the charred, crispy edges of a Brussels sprout or the tender, caramelized center of a honey-glazed carrot. The textures range from velvety soft to satisfyingly crunchy, and the smell of roasting garlic and thyme throughout the house creates an atmosphere of warmth and abundance. It’s the ultimate colorful addition to any viral food board, offering earthiness and nutritional vibrancy.
Ingredients
- 1 head of broccoli, cut into florets
- 2 large carrots, peeled and sliced diagonally
- 1 bell pepper, sliced into strips
- 1 cup halved Brussels sprouts
- 3 tablespoons avocado oil
- 1 teaspoon dried oregano
- 1/2 teaspoon garlic powder
- Sea salt and black pepper
How to make it
- Preheat your oven to 425°F (220°C); a high temperature is crucial for achieving that desired caramelization without turning the vegetables into mush.
- Place all the prepped vegetables onto a large, rimmed baking sheet, ensuring they are spread out in a single layer; crowding the pan will cause them to steam rather than roast.
- Drizzle the avocado oil over the vegetables and sprinkle with oregano, garlic powder, salt, and pepper; toss with your hands to ensure every piece is evenly coated.
- Place the tray in the center of the oven and roast for 20-25 minutes, pausing halfway through to toss the vegetables with a spatula to ensure even browning.
- Look for visual cues: the broccoli tips should be slightly charred, and the carrots should be easily pierced with a fork while maintaining a slight bite.
- Remove from the oven and immediately transfer to your board while warm, perhaps finishing with a light squeeze of lemon to brighten the earthy flavors.
How to prepare fresh tacos?

Why we love this
A taco board is the ultimate interactive dining experience. There is something so satisfying about the assembly process—the warm, slightly charred corn tortillas, the cool crunch of shredded cabbage, and the creamy richness of sliced avocado. The flavors are a parade of contrasts: spicy, tangy, savory, and fresh all at once. The tactile nature of building your own taco makes for a playful and social meal where the vibrant colors of radishes and cilantro make the board look like a work of art.
Ingredients
- 10-12 small corn or flour tortillas
- 2 cups protein of choice (shredded beef, carnitas, or black beans)
- 1 cup shredded red cabbage
- 1/2 cup fresh cilantro, chopped
- 2 limes, cut into wedges
- 1 avocado, sliced
- 1/2 cup crumbled cotija cheese
- Pickled red onions
How to make it
- Warm your tortillas by placing them directly over a low gas flame for 10 seconds per side using tongs, or in a dry cast-iron skillet, until they are soft, pliable, and show small charred spots.
- Keep the tortillas warm by stacking them inside a clean kitchen towel or a specialized tortilla warmer while you prep the rest of the components.
- Heat your chosen protein in a skillet over medium heat, adding a splash of water or broth if it looks dry, until it is steaming hot and slightly crispy at the edges.
- Arrange the toppings in small, separate bowls or clusters on the board to create a visual ‘map’ for your guests to follow.
- Thinly slice the avocado and squeeze a little lime juice over it immediately to prevent oxidation and keep that bright green color popping.
- Assemble the board by placing the warm tortillas in the center, surrounded by the protein, cabbage, cilantro, and lime wedges, allowing everyone to build their own perfect bite.
How to bake fruit tarts?

Why we love this
Fruit tarts are the jewels of the dessert world. The buttery, flaky crust provides a crisp foundation for the velvety smooth pastry cream, while the glaze-topped fruit adds a burst of natural sweetness. Biting into a well-made tart offers a symphony of textures—the snap of the shortbread-like crust, the melt-in-your-mouth cream, and the juicy give of fresh berries. They are almost too beautiful to eat, with their glossy finish and intricate patterns, making them a stunning sweet end to any food board.
Ingredients
- 1 pre-made or homemade shortcrust pastry shell
- 1 cup heavy cream, whipped
- 1 cup vanilla custard or lemon curd
- 2 cups assorted sliced fruit (kiwi, berries, peaches)
- 1/4 cup apricot preserves (for glaze)
- 1 tablespoon water
How to make it
- Roll out your pastry dough and fit it into mini tart tins or one large tart pan, pricking the bottom with a fork to prevent air bubbles during baking.
- Blind bake the crust at 375°F (190°C) using pie weights for 12-15 minutes, then remove the weights and bake for another 5 minutes until the edges are a pale golden brown.
- Allow the crust to cool completely on a wire rack; filling a warm crust will result in a soggy bottom, which is the ultimate pastry faux pas.
- Fold the whipped heavy cream into your vanilla custard to create a light, airy ‘diplomat cream’ and spread it evenly across the bottom of the cooled shell.
- Arrange your sliced fruit in concentric circles, starting from the outside and working your way in, overlapping them slightly for a professional, floral appearance.
- Heat the apricot preserves with a tablespoon of water in the microwave for 20 seconds, strain out any chunks, and gently brush the warm liquid over the fruit for a high-gloss, viral-worthy finish.
How to sear perfect steak?
Why we love this
A perfectly seared steak is the height of culinary indulgence. The sound of the steak hitting the cast iron—a violent, satisfying hiss—is the promise of a deep, salty crust to come. As the butter melts and the garlic and thyme release their oils, the kitchen is filled with a rich, savory aroma that is impossible to resist. The contrast between the dark, umami-rich exterior and the tender, ruby-red center is a sensory delight that makes any board feel premium and decadent.
Ingredients
- 1 lb Ribeye or New York Strip steak (at least 1.5 inches thick)
- 2 tablespoons high-smoke point oil (like grapeseed)
- 3 tablespoons unsalted butter
- 3 cloves garlic, smashed
- 2 sprigs fresh thyme
- Coarse kosher salt and cracked black pepper
How to make it
- Remove the steak from the refrigerator at least 45 minutes before cooking to bring it to room temperature; this ensures the center cooks evenly without the exterior burning.
- Pat the steak extremely dry with paper towels; any surface moisture will create steam and prevent that iconic golden-brown crust from forming.
- Season aggressively with salt and pepper on all sides, including the edges, just before you are ready to put it in the pan.
- Heat a heavy cast-iron skillet over high heat until the oil is shimmering and just starting to wispy-smoke; place the steak in and press down slightly for maximum contact.
- Sear for 3-4 minutes per side for medium-rare, and in the final 2 minutes, drop in the butter, garlic, and thyme, tilting the pan and spooning the foaming butter over the steak repeatedly (basting).
- Transfer the steak to a board and let it rest for a full 10 minutes; this allows the fibers to relax and the juices to set so they don’t run out when you slice it for serving.
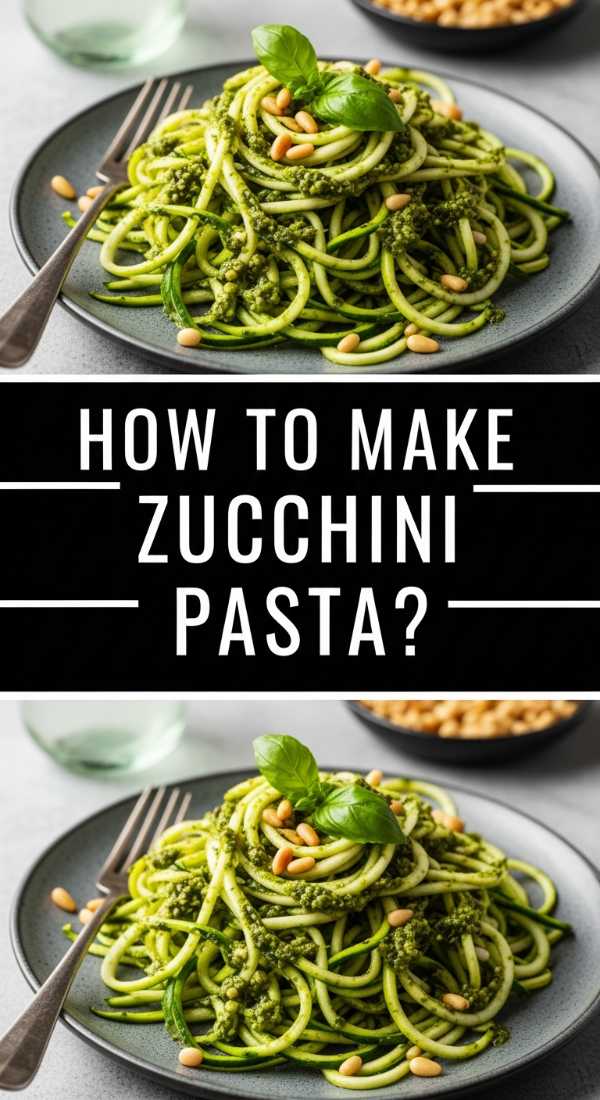
How to make zucchini pasta?
Why we love this
Zucchini pasta, or ‘zoodles,’ is the ultimate light and airy alternative that doesn’t sacrifice flavor. There is a refreshing, garden-fresh quality to these green ribbons that pairs beautifully with bold, punchy sauces like pesto or a spicy marinara. The texture is tender yet has a slight ‘al dente’ snap that feels incredibly clean on the palate. It’s a fantastic way to add volume and vibrant color to your board while keeping things light, healthy, and visually intriguing with those long, elegant curls.
Ingredients
- 3 large zucchini
- 2 tablespoons extra virgin olive oil
- 2 cloves garlic, minced
- 1/4 cup pine nuts, toasted
- 1/4 cup pesto or lemon juice
- Red pepper flakes
- Freshly shaved Pecorino Romano
How to make it
- Use a spiralizer or a julienne peeler to create long, uniform noodles from the zucchini, stopping when you reach the seedy core to avoid excess moisture.
- Place the zucchini ribbons in a colander and sprinkle with a teaspoon of salt; let them sit for 10 minutes to draw out excess water, then gently squeeze them dry with a clean towel.
- In a large sauté pan, heat the olive oil over medium-high heat and add the minced garlic, stirring constantly for 30 seconds until fragrant.
- Add the zucchini noodles to the pan and toss quickly with tongs for only 2-3 minutes; overcooking will turn them into a watery mess, so you want them just heated through.
- Turn off the heat and immediately toss in your pesto or lemon juice, ensuring the noodles are coated but not swimming in liquid.
- Plate the zoodles in ‘nests’ on your board and garnish with the toasted pine nuts, red pepper flakes, and plenty of shaved Pecorino for a salty finish.
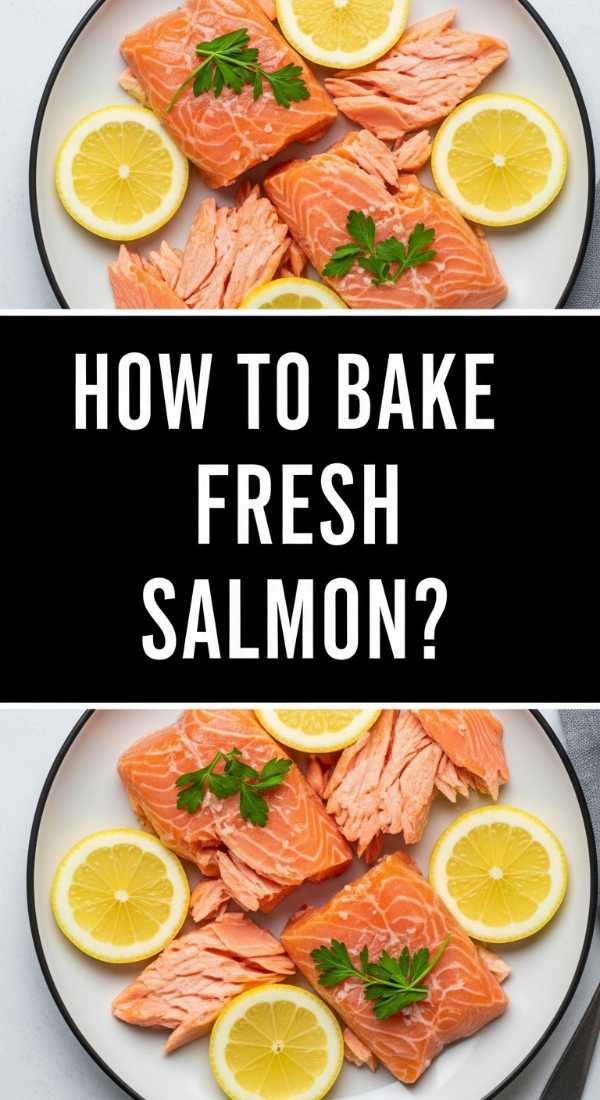
How to bake fresh salmon?

Why we love this
Baking salmon is an exercise in elegance and simplicity. The fish transforms into buttery, flakey perfection that melts in your mouth, especially when paired with a bright citrus glaze. The visual of a whole side of salmon or perfectly cut fillets on a board, garnished with vibrant lemon wheels and sprigs of dill, is enough to stop any scroll. It carries a delicate, clean flavor of the sea that feels light and healthy, yet incredibly satisfying and sophisticated for a group setting.
Ingredients
- 1 lb fresh salmon fillet (center cut)
- 1 tablespoon olive oil
- 1 tablespoon honey
- 1 teaspoon Dijon mustard
- 1 lemon, thinly sliced
- Fresh dill for garnish
- Salt and pepper
How to make it
- Preheat your oven to 400°F (200°C) and line a baking sheet with parchment paper or a silicone mat for easy cleanup and to prevent the delicate skin from sticking.
- In a small bowl, whisk together the olive oil, honey, and Dijon mustard to create a sticky, savory-sweet glaze that will caramelize in the oven.
- Place the salmon fillet on the baking sheet, skin-side down, and season generously with salt and pepper before brushing the glaze over the entire surface.
- Layer the thin lemon slices across the top of the fillet; these will infuse the fish with citrus oils as it bakes and provide a beautiful visual element.
- Bake for 12-15 minutes, depending on the thickness; the fish is done when it is opaque throughout and flakes easily with a fork when gently pressed.
- Carefully transfer the whole fillet to your food board and sprinkle with fresh dill sprigs, allowing guests to flake off their own portions.
How to grill sweet corn?
[IMAGE_10]
Why we love this
Grilled sweet corn is the quintessential taste of summer. There is something deeply primal and satisfying about the combination of charred, smoky kernels and the burst of sugary sweetness inside. When slathered in butter and finished with a dusting of chili and lime, it becomes an explosion of flavor. The texture is a delightful mix of the crispy, blackened exterior and the juicy, tender interior. It’s a messy, hands-on food that encourages a relaxed, fun atmosphere at any gathering.
Ingredients
- 4-6 ears of fresh sweet corn
- 1/4 cup unsalted butter, softened
- 1 teaspoon chili powder
- 1 lime, cut into wedges
- 1/4 cup crumbled cotija cheese (optional)
- Fresh cilantro, chopped
How to make it
- Pull back the husks of the corn but keep them attached at the base to use as a ‘handle,’ and remove as much of the silk as possible before grilling.
- Preheat your grill to high heat (450°F); you want the grates hot enough to sear the kernels quickly before the inside dries out.
- Lightly brush the corn with a tiny amount of oil and place directly onto the hot grates, closing the lid to trap the heat.
- Rotate the corn every 2-3 minutes using tongs; you are looking for an even distribution of dark brown or blackened char marks across all sides.
- Once the kernels are bright yellow and slightly charred (usually after 8-10 minutes), remove from the grill and immediately rub with the softened butter while hot.
- Dust with chili powder, sprinkle with cilantro and cotija, and serve on your board with lime wedges for an extra hit of acidity.
Wrapping Up the Viral Board Trend
Creating a food board is truly an art form that anyone can master. It’s about more than just the recipes; it’s about the intention of gathering and the beauty of shared experiences. I hope these ten ideas inspire you to step into your kitchen, grab a large wooden board, and start arranging. Don’t worry about perfection—the best boards are the ones that look a little messy, a little lived-in, and a lot like love. Happy grazing!
Frequently Asked Questions
How do I keep the food warm on a board?
To keep food warm, I recommend pre-heating your serving board if it is stone or ceramic. For wooden boards, simply assemble the room-temperature items (like salads or fruits) first, and add the hot proteins (like steak or chicken) at the very last second before serving.
What is the best board to use?
A large, food-safe wooden board is usually the best choice for a viral-style look. Look for acacia or walnut for a beautiful grain. If you are serving juicy items like steak or tomatoes, ensure the board has a ‘juice groove’ to prevent messes on your table.