

Why Everyone is Obsessed With These Simple DIY Food Boards
There is something almost primal and deeply comforting about gathering around a table filled with a colorful, scattered array of delicious bites. The rise of the DIY food board isn’t just about aesthetics; it’s about the emotional connection of shared eating, the freedom to pick and choose exactly what you crave, and the low-stress preparation that allows the host to actually enjoy the party. In a world that often feels rushed, these boards invite us to slow down, linger over a glass of wine, and savor the tactile experience of assembling the perfect bite.
From the sizzle of a summer grill to the cool, crisp crunch of a garden-fresh salad, these boards represent a lifestyle shift toward intentionality and effortless elegance. We aren’t just serving dinner anymore; we are creating a sensory landscape that celebrates the seasons. Whether you are hosting a boisterous backyard cookout or a quiet Tuesday night dinner on the patio, these curated collections of flavors bring a sense of wonder and warmth to any occasion.
10 Best Summer Crockpot Recipes
Why we love this
Imagine walking into a home filled with the mouthwatering aroma of slow-simmered pulled pork and tangy BBQ sauce without having to turn on your oven once during a heatwave. The beauty of the summer crockpot board lies in the tender, succulent textures that only low-and-slow cooking can achieve, paired with the vibrant, cooling toppings of a summer day. There is a deep satisfaction in the way the meat yields effortlessly to a fork, releasing clouds of savory steam that promise a meal that is both hearty and refreshing when paired with a cold slaw.
Ingredients
- 4-5 lb Pork Shoulder (Boston Butt)
- 2 cups BBQ Sauce (hickory or honey-based)
- 1/4 cup Apple Cider Vinegar
- 1/4 cup Brown Sugar
- 1 tbsp Smoked Paprika, 1 tbsp Garlic Powder, 1 tsp Salt, 1 tsp Pepper
- Large Brioche Buns
- Pickled Red Onions and Jalapeños
How to make it
- Pat the pork shoulder completely dry with paper towels to ensure the spice rub adheres perfectly. Combine your dry spices (paprika, garlic powder, salt, pepper) and rub generously into every crevice of the meat.
- Place the meat in the slow cooker and whisk together the apple cider vinegar and brown sugar, pouring it around the base of the pork—do not pour it over the top or you will wash away the rub.
- Set the crockpot to LOW for 8 to 10 hours. Avoiding the high heat setting ensures the connective tissues break down into a melt-in-your-mouth texture rather than becoming tough.
- Once the internal temperature reaches 205°F, remove the meat and let it rest for 20 minutes before shredding with two forks.
- Discard excess fat from the pot, return the shredded meat, and fold in your favorite BBQ sauce. Serve on a board with toasted buns and acidic toppings to cut through the richness.
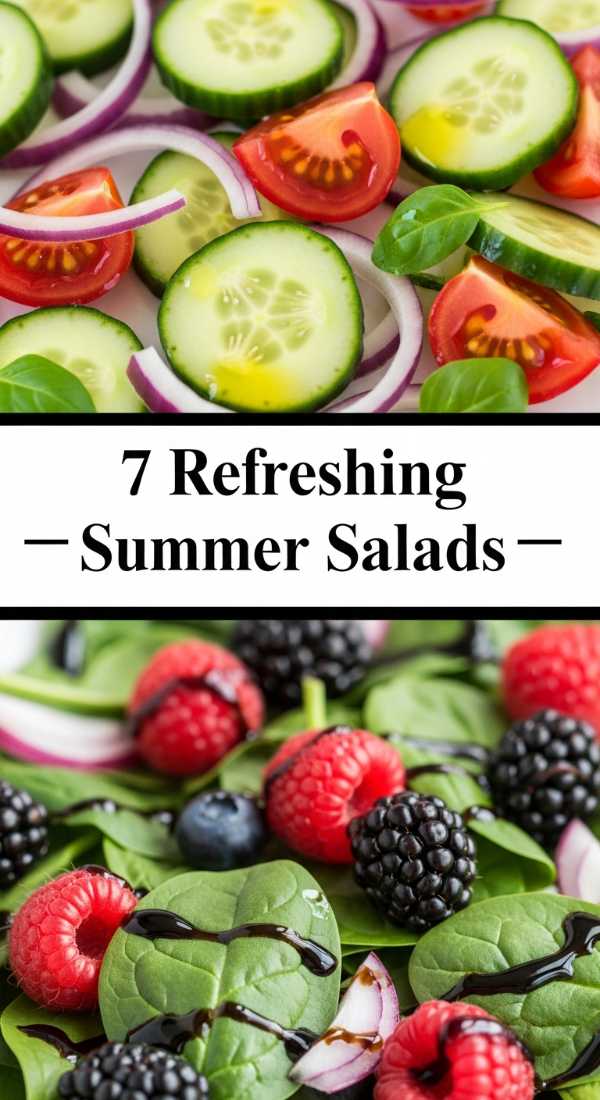
7 Refreshing Summer Salad Recipes
Why we love this
A true summer salad board is a symphony of textures and temperatures, featuring the icy crunch of cucumber against the creamy, velvet-like richness of avocado and crumbled feta. The visual appeal alone is enough to stimulate the appetite, with jewel-toned berries and emerald-green arugula glistening under a light sheen of citrus vinaigrette. Every forkful offers a burst of sunshine, combining the sharp tang of balsamic glaze with the earthy sweetness of garden-grown produce, making it the ultimate palate cleanser for a humid afternoon.
Ingredients
- 4 cups Baby Arugula and Spinach mix
- 2 cups Cubed Watermelon (chilled)
- 1/2 cup Toasted Pine Nuts
- 1 cup Crumbled Feta Cheese
- 1/2 cup Fresh Mint leaves, torn
- 1/4 cup Extra Virgin Olive Oil
- Juice of 2 Fresh Lemons
- Flaky Sea Salt and Cracked Black Pepper
How to make it
- Begin by chilling your watermelon for at least 3 hours prior to assembly; the temperature contrast between the ice-cold fruit and room-temperature nuts is vital for the experience.
- In a small glass jar, emulsify the olive oil and lemon juice by shaking vigorously for 30 seconds until the mixture is thick and opaque. This creates a stable dressing that won’t immediately wilt your greens.
- Layer the greens on a large wooden board as a base, then scatter the watermelon and feta evenly across the surface.
- Toast the pine nuts in a dry pan over medium heat for 2-3 minutes until they release a nutty aroma and turn golden brown, then sprinkle them over the board while still warm.
- Garnish with torn mint and a final drizzle of the lemon vinaigrette right before serving, finishing with a pinch of flaky sea salt to make the watermelon flavors pop.
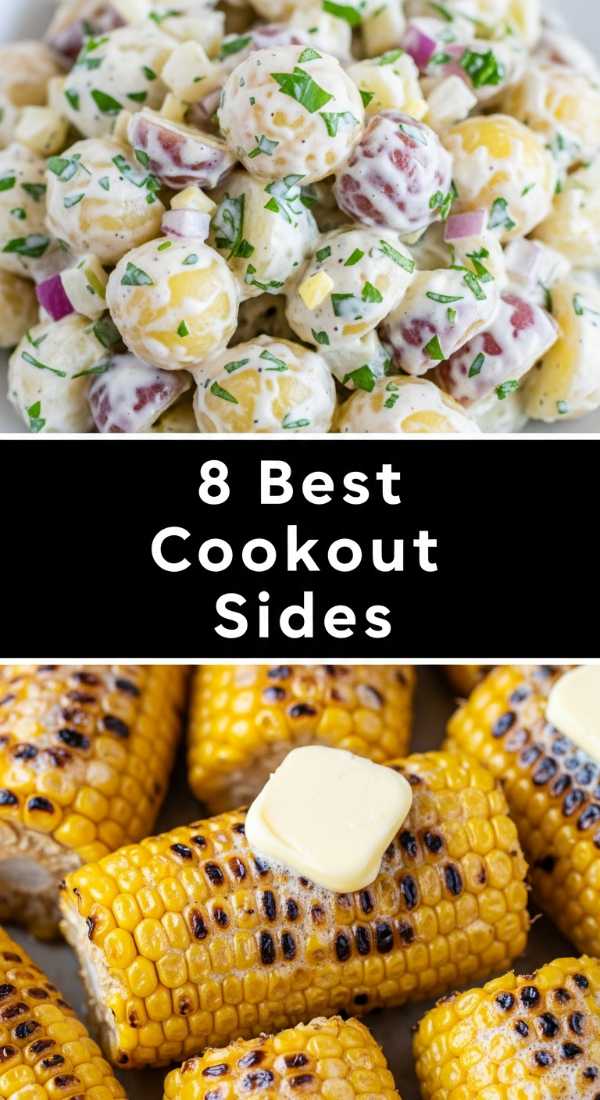
8 Best Cookout Side Dishes
Why we love this
No cookout is complete without the nostalgic, smoky presence of elote-style corn and creamy, herb-flecked potato salad that anchors the meal. There is a specific joy in the charred, blistered kernels of corn coated in a silky layer of lime-scented crema and spicy chili powder, offering a balance of heat and cooling citrus. The aroma of grilled corn mixed with the savory scent of bacon bits in a side dish creates an irresistible atmosphere that reminds us of childhood summers and the simple pleasure of eating with our hands.
Ingredients
- 6 ears of Corn, husks removed
- 1/2 cup Cotija Cheese, crumbled
- 1/2 cup Mexican Crema or Sour Cream
- 1 tbsp Chili Powder (Ancho or Chipotle)
- 1/4 cup Chopped Cilantro
- 2 Fresh Limes, cut into wedges
- 1/2 tsp Smoked Sea Salt
How to make it
- Preheat your grill to medium-high (about 400°F). Lightly oil the grates to prevent the corn sugars from sticking and burning too quickly.
- Place the corn directly onto the grates. Rotate the ears a quarter turn every 2-3 minutes. You are looking for a deep golden color with specific spots of black char for that smoky flavor.
- While the corn is hot, use a pastry brush to coat each ear with a thin, even layer of Mexican crema. The heat will help the cream melt slightly into the kernels.
- Roll the coated corn in the crumbled cotija cheese, pressing slightly so it adheres to the cream.
- Dust with chili powder and cilantro. Arrange on the board with lime wedges, instructing guests to squeeze the lime over the corn just before taking the first bite to activate the spices.
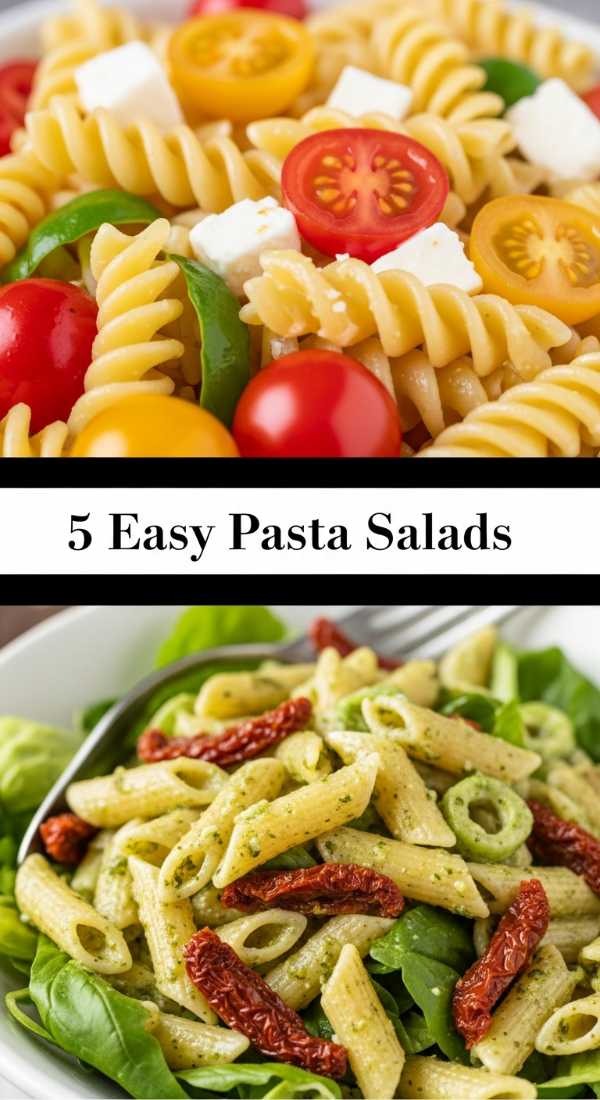
5 Easy Summer Pasta Salads

Why we love this
Pasta salad is the ultimate canvas for summer creativity, bringing together the satisfying chew of al dente rotini with the bright, acidic punch of marinated artichokes and sun-dried tomatoes. We love how the pasta acts like a sponge, soaking up every drop of zesty Italian dressing until each bite is an explosion of herb-infused flavor. It’s the perfect portable dish that actually tastes better as it sits, making it the MVP of food boards that need to withstand an afternoon of grazing in the sun.
Ingredients
- 1 lb Rotini or Fusilli Pasta
- 1 cup Pesto Sauce (basil and pine nut)
- 1 cup Cherry Tomatoes, halved
- 1/2 cup Fresh Mozzarella Pearls
- 1/4 cup Sliced Black Olives
- 1/4 cup Red Onion, finely diced
- Fresh Basil leaves for garnish
How to make it
- Boil a large pot of heavily salted water—it should taste like the sea. Cook the pasta for exactly one minute less than the package instructions to ensure it remains “al dente” and doesn’t get mushy when dressed.
- Drain the pasta and immediately rinse with cold water to stop the cooking process and remove excess starch, which prevents the pasta from clumping.
- In a large bowl, toss the cooled pasta with the pesto while the noodles are still slightly damp; this helps the sauce coat the ridges more effectively.
- Gently fold in the mozzarella pearls, tomatoes, and olives using a silicone spatula to avoid bruising the delicate cheese.
- Transfer to your serving board and let it rest for 20 minutes at room temperature so the flavors can marry. Garnish with whole basil leaves for a fresh aromatic finish.
6 Healthy Summer Dinner Ideas

Why we love this
When the sun is high, dinner should feel light, vibrant, and nourishing, like a Mediterranean-inspired salmon board featuring zesty lemon and roasted asparagus. There is a sophisticated simplicity in the flaky, pink flesh of a perfectly seared fillet paired with the snap of garden-fresh greens and a dollop of Greek yogurt dip. It leaves you feeling energized rather than weighed down, with the clean flavors of garlic and dill lingering on the tongue, making it the quintessential meal for a warm evening on the terrace.
Ingredients
- 4 Salmon Fillets (6 oz each)
- 2 bunches of Thin Asparagus
- 3 tbsp Olive Oil
- 3 Garlic Cloves, minced
- 1 Lemon, thinly sliced
- 1 tsp Dried Oregano
- 1/2 cup Plain Greek Yogurt (for dipping)
How to make it
- Preheat your oven to 400°F (200°C). Line a large sheet pan with parchment paper to ensure easy cleanup and prevent the delicate salmon skin from sticking.
- Snap the woody ends off the asparagus and toss them in olive oil and minced garlic directly on one side of the pan.
- Season the salmon fillets with oregano, salt, and pepper, then place them on the other side of the pan. Top each fillet with two thin lemon slices to infuse the meat with citrus oils during the bake.
- Roast for 12-15 minutes. The salmon is done when it is opaque throughout and flakes easily with a fork, or reaches an internal temperature of 145°F.
- Arrange the roasted components on a board with a bowl of Greek yogurt mixed with a squeeze of lemon and fresh dill, creating a healthy, deconstructed dinner board.
9 Best Summer Party Dips

Why we love this
There is an irresistible social pull to a board centered around a bowl of whipped feta or a vibrant, layered fruit dip. We love the way dips encourage interaction, with guests dipping everything from salty pita chips to crisp apple slices into a pool of creamy, herb-laden goodness. The texture of a well-made dip—whether it’s the airy lightness of a whipped mousse or the chunky, robust bite of a pico de gallo—provides a satisfying contrast that keeps everyone coming back for “just one more” scoop.
Ingredients
- 8 oz Feta Cheese, crumbled
- 1/2 cup Greek Yogurt
- 1 tbsp Honey
- 1 tsp Lemon Zest
- 1/4 cup Toasted Walnuts, crushed
- Pita Bread, sliced into triangles
- Cucumber slices and Radishes for dipping
How to make it
- Place the crumbled feta and Greek yogurt into a food processor. Process on high for 2-3 minutes until the mixture is completely smooth and aerated.
- Add the lemon zest and pulse twice just to incorporate. This adds a bright top note to the salty feta.
- Spread the whipped feta onto a shallow plate or directly onto a section of your food board, creating “swirls” with the back of a spoon to catch the honey.
- Drizzle the honey over the top and sprinkle with the crushed toasted walnuts for a crunch that contrasts the silkiness of the cheese.
- Toast the pita triangles in a pan with a touch of olive oil until they are golden and rigid enough to scoop the thick dip without breaking.
12 Easy Summer Dessert Recipes

Why we love this
A dessert board is a whimsical, sweet finale to a summer day, featuring the bright acidity of macerated strawberries and the buttery, crumbly texture of shortbread. The scent of vanilla bean and fresh-baked sugar cookies wafting through the air is enough to make anyone feel like a kid again, while the presentation of colorful fruits and chocolate drizzles makes it feel like a high-end patisserie offering. It’s a low-pressure way to serve dessert that caters to everyone’s sweet tooth, allowing for endless combinations of fruit, cream, and crunch.
Ingredients
- 1 quart Fresh Strawberries, hulled and sliced
- 2 tbsp Granulated Sugar
- 1 pack of Prepared Shortcake or Angel Food Cake cubes
- 1 can of Heavy Whipping Cream
- 1 tsp Vanilla Extract
- Fresh Mint for garnish
- Dark Chocolate shavings
How to make it
- Place the sliced strawberries in a bowl and toss with the granulated sugar. Let them sit at room temperature for at least 30 minutes; this process, called maceration, draws out the juices to create a natural syrup.
- In a chilled bowl, whip the heavy cream with vanilla extract until stiff peaks form. Avoid over-beating or it will turn into butter; you want it light and cloud-like.
- Cut your cake into bite-sized 1-inch cubes so they are easy for guests to pick up with toothpicks or small tongs.
- Arrange the cake cubes on the board in a decorative pattern, leaving space for a large bowl of the macerated strawberries and a separate bowl of the whipped cream.
- Garnish the entire board with mint leaves and a light dusting of chocolate shavings for a professional, decadent look.
10 Homemade Dutch Bros Drinks

Why we love this
The cult-favorite energy of a Dutch Bros drink can be brought right to your patio with an iced beverage board that is as visually stunning as it is caffeinated. We love the neon swirls of blue raspberry and lime syrups dancing through a glass of icy soda, topped with a creamy “soft top” that mimics the texture of a cold-brew foam. It’s an effervescent, cooling experience that provides a much-needed jolt of energy and a splash of vibrant color to any afternoon gathering, making the DIY barista experience a total blast.
Ingredients
- 1 can (12 oz) Blue Raspberry Energy Drink or Sparkling Water
- 2 tbsp Blue Raspberry Syrup
- 1 tbsp Lime Juice
- 1/2 cup Heavy Cream (whisked for the soft top)
- Ice cubes (plenty!)
- Maraschino Cherries for garnish
How to make it
- Fill a tall glass to the very brim with ice. The more ice you use, the slower it melts, preventing your drink from becoming watered down.
- Pour in the blue raspberry syrup and lime juice first. This ensures the flavor settles at the bottom for a beautiful gradient effect once the liquid is added.
- Slowly pour the energy drink or sparkling water over the ice, leaving about an inch of space at the top of the glass.
- Whisk the heavy cream vigorously by hand or with a small frother for 30 seconds until it is slightly thickened but still pourable—this is the secret “soft top” technique.
- Pour the cream gently over the back of a spoon onto the top of the drink so it floats. Garnish with a cherry and serve with a straw.
7 Quick Summer Lunch Ideas

Why we love this
Lunch in the summertime should be a breeze, and a Caprese-inspired wrap board offers the perfect blend of creamy mozzarella, sun-ripened tomatoes, and pungent basil. There is a refreshing simplicity in the way the balsamic glaze cuts through the richness of the cheese, all tucked inside a soft, chewy tortilla that makes it easy to eat on the go. The aroma of fresh basil is synonymous with garden-side dining, making this board a sophisticated yet incredibly fast way to refuel between pool sessions or garden work.
Ingredients
- 4 Large Flour Tortillas
- 8 oz Fresh Mozzarella, sliced
- 2 Large Heirloom Tomatoes, sliced
- 1 bunch of Fresh Basil leaves
- 2 tbsp Balsamic Glaze
- 1/4 cup Basil Pesto
- Salt and Pepper to taste
How to make it
- Lay the tortillas flat and spread a thin, even layer of pesto across the entire surface to act as a “glue” for the other ingredients.
- Place the mozzarella slices and heirloom tomato slices in a single line down the center of the tortilla, leaving 2 inches at the top and bottom.
- Season the tomatoes generously with salt and pepper; tomatoes need salt to release their full flavor profile.
- Drizzle the balsamic glaze over the cheese and tomatoes, then layer whole basil leaves on top.
- Fold the top and bottom of the tortilla inward, then roll tightly from the side. Slice on a sharp diagonal to show off the beautiful internal layers and arrange on the board with extra glaze for dipping.
8 Best Grill Kabob Recipes
[IMAGE_10]
Why we love this
The air fills with the intoxicating scent of charred peppers and savory marinated beef the moment these skewers hit the grates. There is a primal joy in watching the edges of the meat caramelize into a dark, salty crust while the onions soften and turn translucent and sweet. Every bite offers a contrast of textures, from the snap of a blistered cherry tomato to the tender, juice-filled center of a perfectly medium-rare steak tip. It’s the quintessential flavor of a summer evening, best enjoyed with a cold drink and the sound of cicadas in the distance.
Ingredients
- 1.5 lbs Sirloin Steak, cut into cubes
- 1 Red Bell Pepper and 1 Green Bell Pepper, cubed
- 1 Red Onion, cut into wedges
- 1/2 cup Soy Sauce
- 1/4 cup Olive Oil
- 2 tbsp Worcestershire Sauce
- 3 Garlic Cloves, smashed
How to make it
- In a large resealable bag, combine the soy sauce, olive oil, Worcestershire, and garlic. Add the steak cubes and marinate in the refrigerator for at least 4 hours—this allows the acid to break down the fibers for a more tender bite.
- If using wooden skewers, soak them in water for at least 30 minutes prior to grilling to prevent them from catching fire.
- Thread the meat and vegetables onto the skewers, alternating frequently. Pro tip: Don’t pack them too tightly; leaving a tiny bit of space between items allows the heat to circulate and cook everything evenly.
- Preheat the grill to high heat (450°F). Place the kabobs on the grill and sear for 3 minutes without moving them to develop a crust.
- Turn the skewers every 3 minutes for a total of 9-12 minutes. Rest the meat on the board for 5 minutes before serving to allow the juices to redistribute throughout the steak.
Conclusion
Whether you’re building a board filled with smoky grilled meats or a sweet spread of summer berries, the real magic lies in the community it creates. These simple DIY food boards take the pressure off the host and put the focus back where it belongs: on the food, the flavor, and the people we love. So, grab a board, pick a theme, and start your own summer tradition of grazing under the sun.