
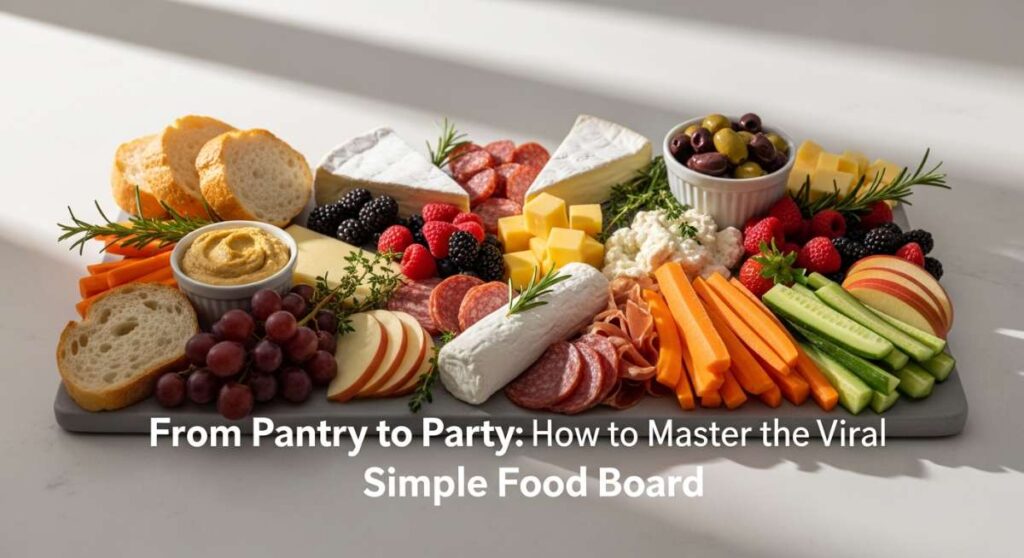
From Pantry to Party: How to Master the Viral Simple Food Board
There is something undeniably magical about the moment you set a beautiful, overflowing food board in the center of a table. It’s more than just a meal; it’s an invitation to linger, to pick, and to share stories over bites of something delicious. I remember the first time I ditched the traditional plated dinner for a ‘viral’ simple food board—the tension in the room just melted away. No one was worried about formal seating or passing heavy platters. Instead, we were all gathered around, laughing and reaching for our favorite morsels in a way that felt organic and deeply human.
The secret to the viral success of these boards isn’t about spending hours in the kitchen or having professional catering skills. It’s about the art of assembly and the joy of abundance. Whether you are hosting a sun-soaked backyard bash or a quiet afternoon by the pool, mastering the food board means turning everyday ingredients from your pantry into a visual and culinary feast. Today, I’m sharing my favorite ways to bring this trend to life, covering everything from zesty pasta salads to the most refreshing summer cocktails, all served up board-style for that perfect social-media-ready look.
10 Best Fresh Summer Desserts for Parties
Why we love this
Nothing captures the essence of a warm July evening like a board piled high with the season’s sweetest offerings. The vibrant contrast between ruby-red strawberries, deep purple blackberries, and clouds of whipped mascarpone creates a visual masterpiece that smells like pure sunshine. When you take a bite, the coolness of the cream cuts through the tartness of the fruit, while a drizzle of local honey adds a floral depth that lingers on the tongue. It’s a sensory experience that feels indulgent yet light enough to keep the party going long after the sun goes down.
Ingredients
- Fresh strawberries, blueberries, and raspberries
- Macerated peaches with a hint of basil
- Mascarpone cheese and heavy cream
- Local wildflower honey
- Shortbread cookies or graham crackers
- Fresh mint leaves for garnish
- Lemon zest
How to make it
- Begin by preparing your whipped cream base: in a chilled glass bowl, combine 1 cup of mascarpone with 1/2 cup of heavy cream and a tablespoon of powdered sugar. Use a hand mixer on medium-high speed until soft peaks form—look for a thick, velvety texture that holds its shape.
- Wash and thoroughly dry all your berries. This is crucial because any excess water will make the board soggy; pat them gently with a lint-free towel until completely dry.
- Macerate the peaches by slicing them thinly and tossing them with a teaspoon of sugar and finely chiffonaded basil. Let them sit for 15 minutes until they develop a glossy, syrupy coating.
- Select a large wooden board and place the bowl of whipped mascarpone in the center to act as your focal point.
- Arrange the berries in clusters around the bowl, varying the colors to create a gradient effect. Place the shortbread cookies in the gaps to provide a crunchy vessel for the fruit and cream.
- Finishing touches are key: zest a fresh lemon over the entire board for a bright aroma, drizzle the honey in a zig-zag pattern over the fruit, and tuck in sprigs of fresh mint to fill any remaining small spaces.
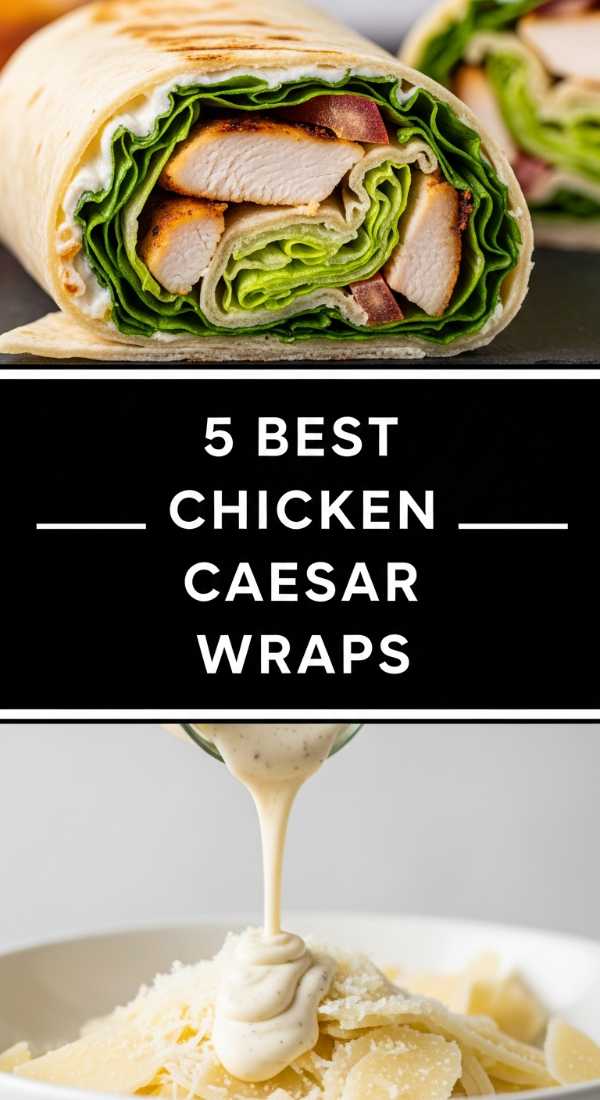
5 Best Chicken Caesar Wraps for Lunch

Why we love this
The Chicken Caesar wrap is a classic for a reason, but serving it on a board takes it from a boring lunch to a communal event. We love the crunch of the romaine lettuce paired with the savory, salty punch of parmesan and the smoky char of grilled chicken. The aroma of garlic and toasted flour tortillas fills the air, making everyone reach for seconds. It’s the ultimate texture-filled bite—creamy, crisp, and substantial—perfect for a mid-day gathering where you want something filling but fresh enough to avoid the afternoon slump.
Ingredients
- Grilled chicken breast strips
- Large flour tortillas
- Romaine lettuce hearts, chopped
- Creamy Caesar dressing (high quality or homemade)
- Shaved Parmesan cheese
- Crispy bacon bits
- Croutons for extra crunch
- Lemon wedges
How to make it
- Start by grilling your chicken breasts over medium-high heat (about 375°F) until the internal temperature reaches 165°F. Let the meat rest for at least 10 minutes before slicing into thin strips to ensure the juices stay locked in.
- Lightly toast your flour tortillas directly over a low gas flame or in a dry pan for 15 seconds per side. You want them pliable and warm, not stiff or burnt.
- In a large mixing bowl, toss the chopped romaine with half of the Caesar dressing and the shaved parmesan. Do this just before serving so the lettuce stays incredibly crisp and doesn’t wilt.
- Lay out a tortilla, spread a thin layer of extra dressing, add a handful of the salad mix, and top with several chicken strips and bacon bits.
- Roll the wraps tightly by folding in the sides first and then rolling from the bottom. Slice each wrap on a sharp diagonal to reveal the beautiful layers inside.
- Arrange the halved wraps on a flat board, scattering extra croutons and lemon wedges around them. The lemon is vital—a quick squeeze right before eating brightens all the heavy savory flavors.
7 Best Summer Crockpot Meals You Need
Why we love this
Summer and crockpots are a secret match made in heaven because they keep the house cool while delivering incredibly tender, melt-in-your-mouth meats. Think of a ‘Pulled Pork Slider Board’ where the meat is so succulent it practically falls apart at the touch of a fork. The aroma of slow-simmered spices and tangy vinegar-based BBQ sauce wafts through the kitchen, creating an atmosphere of home-cooked comfort. It’s that perfect combination of rustic, smoky flavor and effortless preparation that allows the host to actually enjoy the party.
Ingredients
- 4 lbs Pork butt or shoulder
- Dry rub (brown sugar, paprika, garlic powder, salt, pepper)
- Apple cider vinegar
- Your favorite BBQ sauce
- Mini brioche buns
- Creamy coleslaw
- Pickle chips
How to make it
- Rub the pork shoulder generously with your dry rub mixture, pressing it into the meat to form a crust.
- Place the meat in the crockpot and pour 1/2 cup of apple cider vinegar around the base. Cover and cook on ‘Low’ for 8 to 10 hours. Do not rush this on ‘High’—the low and slow method is what breaks down the connective tissue for that signature texture.
- Once the meat is fork-tender, remove it to a large tray and shred it using two forks. Discard any excess large pieces of fat.
- Return the shredded pork to the pot and toss with 1 cup of BBQ sauce, letting it warm through for another 20 minutes to absorb the flavors.
- To assemble the board, place a large bowl of the warm pork in the center. Surround it with toasted mini brioche buns (split and buttered, then toasted under a broiler until golden brown).
- Add small bowls of cold, crunchy coleslaw and tangy pickle chips to the board so guests can build their own sliders with the perfect balance of hot and cold, soft and crunchy.
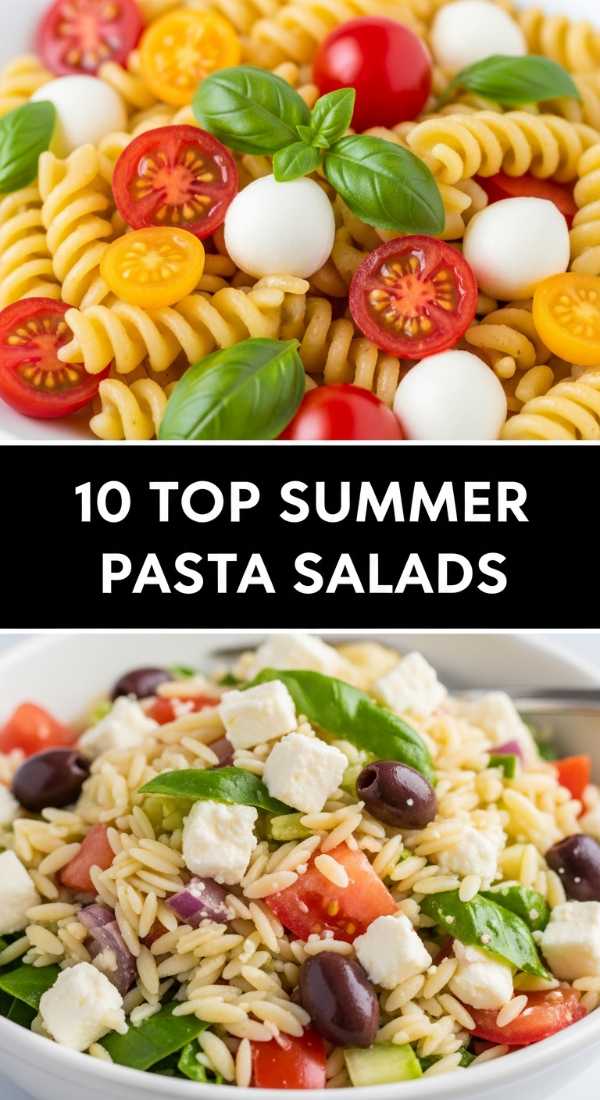
10 Top Summer Pasta Salads for Cookouts

Why we love this
A pasta salad board is a celebration of geometry and color. We love the way different shapes—like rotini or farfalle—hold onto zesty vinaigrettes, ensuring every forkful is a burst of Mediterranean flavor. The scent of fresh oregano and sun-ripened tomatoes is intoxicating, and the texture varies from the soft bite of pasta to the creamy crumble of feta and the snap of fresh cucumbers. It is the ultimate refreshing side dish that feels like a main event when presented with a variety of toppings for guests to customize.
Ingredients
- Rotini or Fusilli pasta
- English cucumbers, diced
- Cherry tomatoes, halved
- Kalamata olives
- Feta cheese crumbles
- Red onion, thinly sliced
- Red wine vinaigrette (olive oil, red wine vinegar, dried oregano, Dijon mustard)
How to make it
- Boil your pasta in heavily salted water until it is just *al dente*. Overcooking pasta for salad is a common mistake; it needs to be firm enough to hold up against the dressing. Drain and immediately rinse with cold water to stop the cooking process and remove excess starch.
- Whisk your dressing together: 3 parts olive oil to 1 part red wine vinegar, a teaspoon of Dijon to emulsify, and plenty of oregano. Pour half of it over the cold pasta and toss.
- Prep your vegetables with precision—ensure the cucumbers and tomatoes are bite-sized so they distribute evenly.
- On a large, rimmed board or platter, spread the dressed pasta as a base layer.
- Arrange rows of the different toppings—olives, feta, onions, and cucumbers—across the top of the pasta. This creates a striking ‘striped’ visual effect that is very popular on social media.
- Just before serving, drizzle the remaining dressing over the top and garnish with fresh parsley. This ensures the pasta is moist and flavorful right when people start digging in.
5 Best Summer Grilling Recipes for Families

Why we love this
There is no smell quite like the scent of woodsmoke and searing protein on a hot afternoon. A grilling board brings the ‘pitmaster’ vibe to the table in a family-style format. We love the charred edges of a perfectly grilled burger or a marinated chicken thigh, paired with the caramelized sweetness of grilled corn. The texture is all about that ‘crust’—the Maillard reaction that creates a savory, salty exterior while keeping the inside juicy and tender. It’s a hearty, soulful way to eat that feels inherently celebratory.
Ingredients
- Ground beef patties (80/20 fat ratio for juiciness)
- Chicken thighs (skin-on)
- Corn on the cob
- Zucchini and bell pepper planks
- Avocado oil (high smoke point)
- Sea salt and cracked black pepper
How to make it
- Preheat your grill to high heat (450°F). Clean the grates thoroughly and oil them lightly using a folded paper towel dipped in oil held by tongs.
- Season your beef patties with only salt and pepper right before they hit the grill. Cook for 4 minutes per side for a perfect medium, only flipping once. Never press down on the patties with a spatula, as this squeezes out the essential juices.
- For the chicken thighs, start them skin-side down over direct heat for 5 minutes to crisp the skin, then move them to the cooler side of the grill to finish cooking through (internal temp 165°F).
- Lightly coat the corn and vegetables in oil and salt. Grill the corn until charred spots appear (about 10 minutes, rotating frequently) and the veggies until they have clear grill marks but still retain some ‘snap’.
- Place the meats on one side of a massive wooden board and the charred vegetables on the other.
- Allow the meat to rest on the board for 5 minutes before calling everyone to the table; this allows the fibers to relax and reabsorb the juices, ensuring every bite is moist.
8 Top Refreshing Summer Cocktails for Parties

Why we love this
A cocktail board is the ultimate ‘cool factor’ for any party. We love the interactive nature of a DIY spritz or mojito station where the air is filled with the mist of expressed citrus oils and the sharp, clean scent of smashed mint. The sound of ice clinking against glass and the fizz of soda water creates an instant holiday mood. It’s a visual treat of sparkling glassware, translucent liquids, and pops of bright green and pink from fruit garnishes—a total thirst-quencher for the eyes and the palate.
Ingredients
- Prosecco or sparkling rosé
- Premium Gin or Vodka
- Fresh lime and lemon wedges
- Cucumber ribbons
- Fresh mint and basil leaves
- Simple syrup or agave
- Club soda or tonic water
- Fresh berries
How to make it
- Prepare your ‘garnishes’ first to keep them fresh. Use a vegetable peeler to create long, elegant ribbons of cucumber and place them in a small bowl of ice water to stay crisp.
- Create a ‘muddle station’ on the board with a small mortar and pestle or a dedicated muddler, along with a bowl of fresh mint leaves and lime wedges.
- Place your base spirits and mixers in beautiful glass decanters or keep them in their original high-end bottles for a rustic look.
- Fill a large, insulated bucket with ‘clear ice’—large cubes or crushed ice—and place it on the board. Clear ice melts slower and looks much more professional.
- Arrange various glasses—coupes, highballs, and wine glasses—around the ingredients.
- To make a ‘Viral Spritz’: Fill a glass with ice, add 3 oz of Prosecco, 2 oz of a bitter liqueur or fruit syrup, and a splash of soda. Garnish with a cucumber ribbon and a sprig of mint. The board allows guests to experiment with their own ratios!
10 Best Easy Picnic Food Ideas
Why we love this
Picnic boards are all about portability and the charm of ‘finger foods’ eaten on a blanket. We love the variety of textures—from the snap of a cold snap pea to the creamy richness of a brie cheese and the salty crunch of a marcona almond. The aroma is subtle and fresh, dominated by the scent of outdoor air and perhaps a hint of crusty baguette. It’s a relaxed, low-pressure way to eat where everything is pre-portioned and ready to be enjoyed without the need for heavy cutlery.
Ingredients
- Miniature quiches or savory tarts
- Prosciutto-wrapped melon
- Assorted hard and soft cheeses
- Grapes and dried apricots
- Baguette slices, toasted
- Hummus or spinach dip
- Snap peas and baby carrots
How to make it
- Focus on ‘containment’ for portability. Use small jars or ramekins to hold dips and loose items like nuts or olives so they don’t roll around the board during transport.
- Wrap your melon slices in very thin prosciutto. The saltiness of the ham against the cold, watery sweetness of the melon is a classic picnic flavor profile.
- Slice your baguette on a deep bias and toast the slices in a 350°F oven for 5 minutes with a brush of olive oil until they are ‘crostini-like’—this prevents them from getting soft if they sit out.
- Arrange the heavier items (like cheese blocks and dip jars) first to anchor the board.
- Fill the spaces with ‘hand-friendly’ produce like snap peas and grapes. These act as palate cleansers between the richer cheeses and meats.
- If traveling, pack the board items in airtight containers and assemble ‘on-site’ at the picnic to ensure the crackers stay crunchy and the cheese doesn’t ‘sweat’ in the sun.
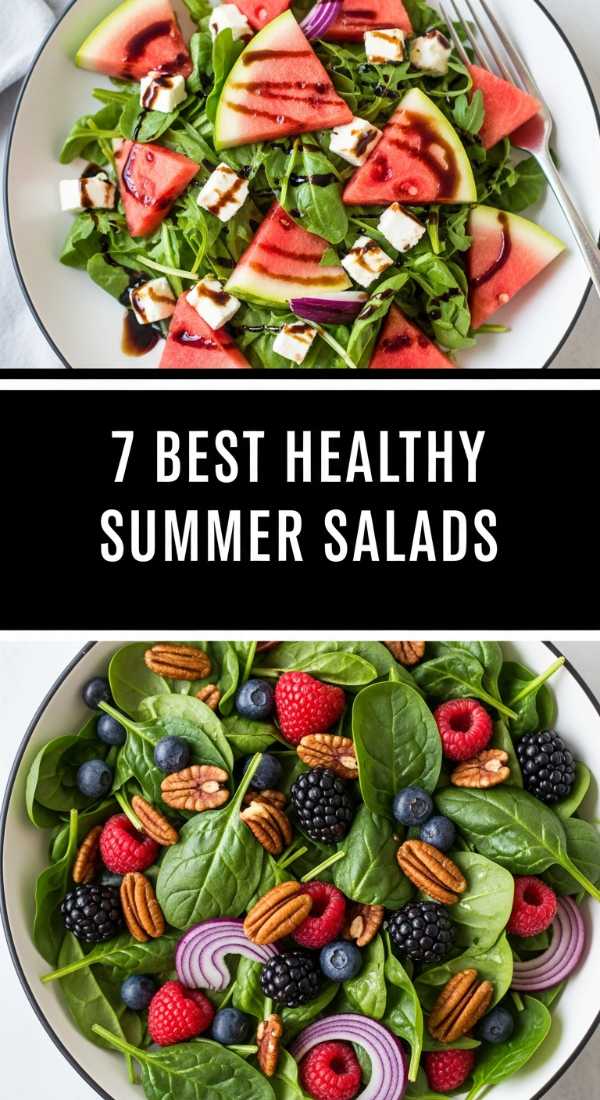
7 Best Healthy Summer Salads You’ll Love
Why we love this
Healthy doesn’t have to mean boring, and a salad board proves it by highlighting the natural beauty of plants. We love the vibrant jewel tones of a watermelon and feta salad or a massaged kale and quinoa spread. The aroma is earthy and bright, thanks to handfuls of fresh herbs like cilantro and mint. The texture is a delightful journey—tender greens, crunchy toasted seeds, and the juicy burst of seasonal fruit. It’s the kind of meal that leaves you feeling energized and glowing from the inside out.
Ingredients
- Watermelon cubes (chilled)
- Arugula or baby spinach
- Toasted pepitas or sunflower seeds
- Feta cheese or goat cheese
- Balsamic glaze
- Thinly sliced radishes
- Fresh cilantro and mint
How to make it
- Start with a base of greens. If using kale, ‘massage’ it with a little olive oil and salt for 2 minutes—this breaks down the tough fibers and makes it much more palatable and tender.
- Cube your watermelon into uniform 1-inch squares. Pat them with a paper towel to remove excess moisture; you want the juice to stay inside the fruit, not pool on the board.
- Toast your seeds in a dry pan over medium heat for 3-5 minutes until they are fragrant and slightly golden. This step is essential for adding a ‘nutty’ depth to the salad.
- Lay the greens across the board in a thin layer, then scatter the watermelon cubes and radish slices over the top.
- Crumble the cheese over the entire board and finish with a heavy dusting of the toasted seeds and torn herbs.
- Drizzle the balsamic glaze in a very fine stream across the board just as you are sitting down to eat. The acidity of the balsamic perfectly balances the sweetness of the fruit and the salt of the cheese.
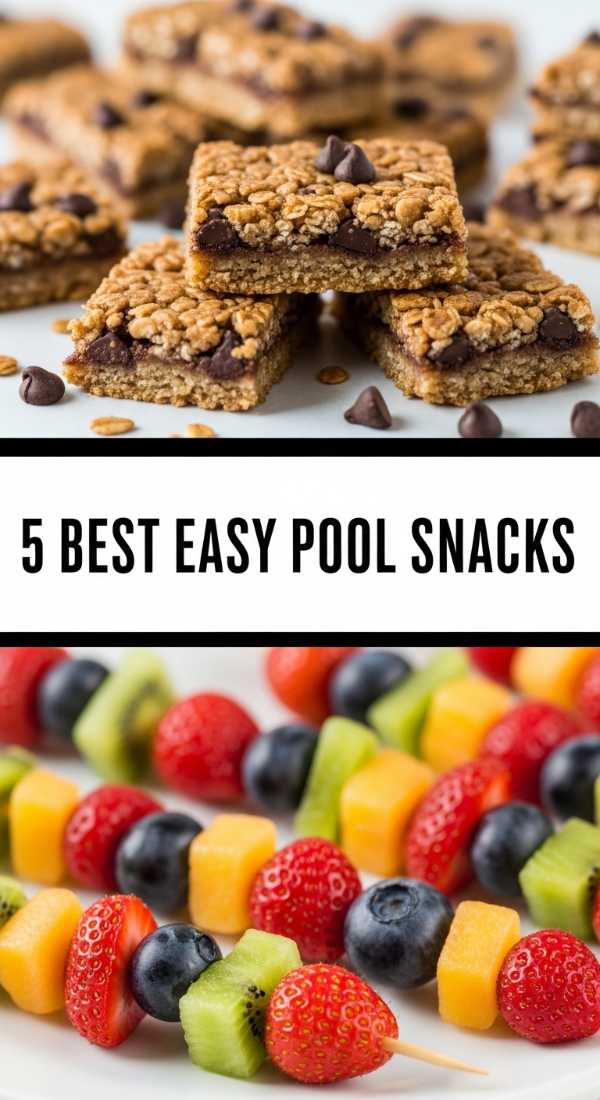
5 Best Easy Pool Snacks for Kids
Why we love this
Keeping kids fed at the pool requires snacks that are hydrating, easy to grab with wet hands, and visually exciting. We love a snack board that looks like a rainbow! The smell is all about fresh citrus and salty crackers. The textures range from the ‘pop’ of frozen grapes to the creamy smoothness of yogurt dip. It’s a stress-free way to manage hunger spikes without having to stop the fun, and because it’s shared, kids often find themselves trying new fruits they might ignore on a plate.
Ingredients
- Frozen grapes (red and green)
- Orange slices and kiwi rounds
- Cheese sticks (cut into ‘coins’)
- Whole grain crackers
- Greek yogurt with a swirl of honey (for dipping)
- Pretzel rods
How to make it
- Freeze your grapes at least 4 hours in advance. This turns them into ‘natural popsicles’ that stay cold even in the summer heat and provide a wonderful icy texture.
- Slice the oranges and kiwis into rounds. Leaving the skin on the oranges makes them easier for small hands to hold without getting too sticky.
- Cut cheese sticks into small ‘coins’ rather than leaving them whole; this makes the board look more abundant and is easier for kids to graze on.
- Place a bowl of honey-swirled yogurt in the center. This provides a bit of protein to keep their energy stable throughout the afternoon.
- Arrange the crackers and pretzel rods around the fruit. Keep them slightly separated from the wet fruit slices to maintain their crunch.
- Use a plastic or melamine board instead of wood or slate for pool-side safety—it’s lightweight, shatterproof, and easy to wipe down.
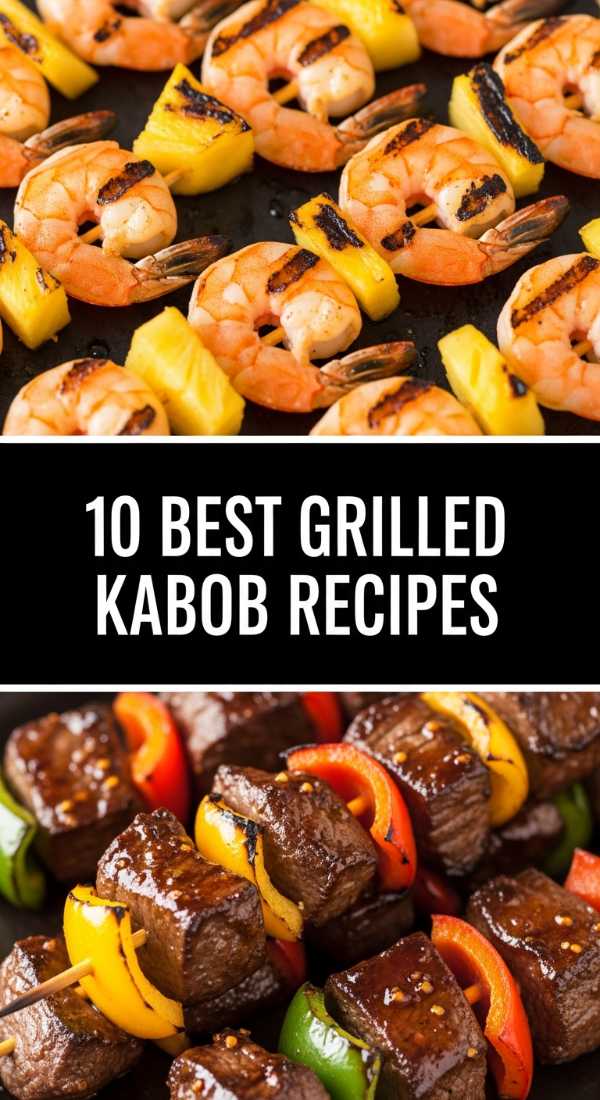
10 Best Grilled Kabob Recipes This Summer
[IMAGE_10]
Why we love this
Kabobs are the quintessential ‘party on a stick.’ We love the rhythm of building them—alternating colors and textures to create a customized skewer. The smell of charring onions and peppers mixed with marinating steak or shrimp is the ultimate sign of a successful cookout. The texture is a contrast of the tender, juicy centers of the meat and the slightly crispy, blackened edges of the vegetables. It’s a fun, interactive way to eat that encourages guests to pick their favorite combinations from a beautifully arranged board.
Ingredients
- Sirloin steak tips or jumbo shrimp
- Red onion, cut into chunks
- Bell peppers (red, yellow, green)
- Pineapple chunks
- Cherry tomatoes
- Zesty marinade (soy sauce, ginger, garlic, sesame oil)
- Metal or soaked wooden skewers
How to make it
- If using wooden skewers, soak them in water for at least 30 minutes. This prevents them from catching fire on the grill.
- Marinate your protein for at least 2 hours in the refrigerator. For steak, a mix of soy, garlic, and ginger tenderizes the meat perfectly. For shrimp, keep the marinade time to 30 minutes so the acid doesn’t ‘cook’ the seafood.
- Thread the skewers, alternating between meat and vegetable. Pro tip: Leave a tiny bit of space between each item so the heat can circulate and cook everything evenly. If they are packed too tight, the middles will stay raw while the outsides burn.
- Grill over medium-high heat (400°F). For steak kabobs, grill for 3-4 minutes per side. For shrimp, they only need about 2 minutes per side until they turn opaque and pink.
- Watch for the ‘flare-ups’ caused by dripping marinade; move the skewers to a different part of the grill if the flames get too high.
- Slide the finished skewers onto a long board and garnish with sesame seeds or chopped scallions. Serve with a side of the reserved (and boiled!) marinade as a dipping sauce.
Conclusion
Mastering the viral simple food board is truly about embracing the beauty of imperfection and the joy of shared experiences. Whether you’re piling up grilled kabobs or arranging a delicate berry dessert, the goal is the same: to create a space where people feel welcome to gather and enjoy. These boards take the stress out of hosting and replace it with a creative, sensory-driven approach to food that your friends and family will be talking about long after the summer fades. So, grab your favorite board, raid the pantry, and start building your own masterpiece!