
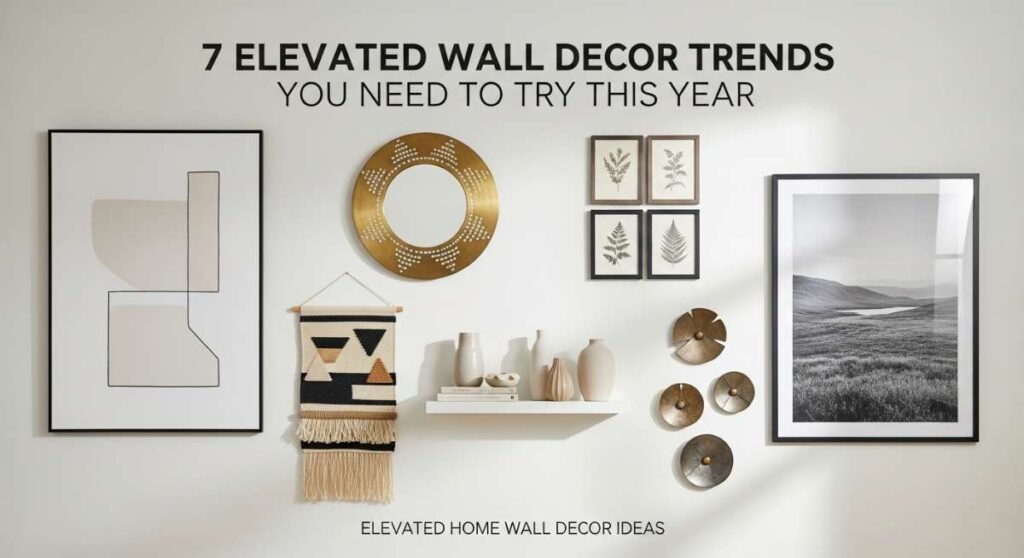
There is something so incredibly intimate about the walls we choose to surround ourselves with. They are the silent witnesses to our morning coffees, our late-night conversations, and the slow, beautiful unfolding of our daily lives. When we leave a wall blank, we leave a part of our home’s story unwritten, but when we choose to decorate with intention, we breathe life into the very structure of our sanctuary.
This year, home decor isn’t just about filling space; it’s about creating an atmosphere that resonates with who you are. We are moving away from the mass-produced and leaning into textures that beg to be touched, arrangements that tell a story, and greenery that brings the calming pulse of nature indoors. It’s about that ‘wow’ factor that greets you at the door and the cozy, wrapped-in-a-blanket feeling that follows you up the stairs.
Whether you are staring at a dauntingly large empty wall or looking to turn a functional stairwell into a design feature, I’ve curated the most elevated trends to help you transform your space. Let’s dive into these ten soulful ways to elevate your home through thoughtful wall decor.
How to Arrange a Stunning Gallery Wall for a Personal Home Feel
Why we love this
A gallery wall is like a visual diary of your life’s most cherished moments, curated with a designer’s eye. We love how it allows for a beautiful collision of memories—the scent of old parchment from a vintage map mixed with the crisp texture of modern photography. When you stand before a well-composed gallery, you feel a sense of organized chaos that is deeply grounding, offering a tactile warmth that single pieces often lack. It creates a focal point that invites guests to linger, leaning in to see the details of a hand-drawn sketch or the grain of a weathered wooden frame.
Essential Elements:
- A mix of frame sizes (at least 3 different scales)
- Cohesive color palette (e.g., all black frames or varied wood tones)
- Acid-free matting for a professional look
- A central ‘anchor’ piece of art
- Painter’s tape and brown craft paper
- High-quality picture hanging hooks
How to make it
- Begin by gathering all your pieces on a large floor space to ‘dry fit’ the arrangement. This is your preparation phase where you balance the visual weight. Place your largest piece slightly off-center to act as the anchor.
- Trace each frame onto brown craft paper and cut them out, labeling which piece of art they represent. This prevents ‘scorching’ your walls with unnecessary holes.
- Use painter’s tape to stick your paper templates onto the wall. Aim for a consistent 2 to 3-inch gap between frames. Check for ‘doneness’ by standing back 10 feet; the arrangement should feel balanced but not perfectly symmetrical.
- Measure the distance from the top of the frame to the hanging wire/hook. Mark this exact spot on your paper templates.
- Drive your nails or hooks through the paper at the marked spots, then rip the paper away to reveal a perfectly placed grid.
- Hang your pieces and use a spirit level to ensure every line is crisp. For a professional finish, add small clear bumpers to the back corners of the frames to keep them from shifting over time.
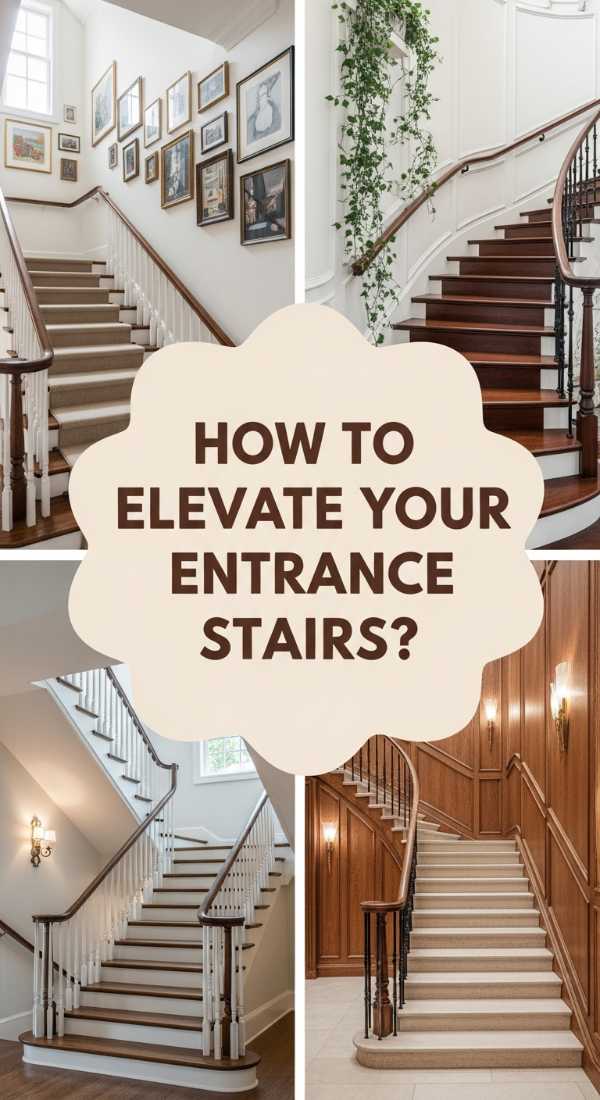
How to Elevate Your Entrance Stairs for an Instant Wow Factor
Why we love this
The entrance staircase is the ‘first handshake’ of your home, and elevating it transforms a transition zone into a grand architectural statement. We adore the way a carefully styled staircase wall leads the eye upward, creating a sense of soaring height and rhythmic movement. Imagine the soft, filtered light catching the edges of metallic frames or the rich, earthy scent of polished wood as you ascend. It provides a sophisticated welcome that tells anyone entering that every corner of this home is curated with love and intention.
Essential Elements:
- Oversized statement art
- Coordinated wall molding or wainscoting
- Dimmable wall sconces
- High-contrast paint (e.g., charcoal or deep navy)
- Long-form photography or vertical prints
How to make it
- Analyze the ‘flow’ of the stairs. The ‘heat level’ of your design should increase as you move up. Start by painting the staircase wall in a slightly deeper hue than the surrounding foyer to create depth.
- Install wall molding or picture frame wainscoting. This provides a structural ‘crust’ to the wall that makes even simple art look expensive. Measure meticulously so the boxes follow the angle of the stairs perfectly.
- Install hardwired or battery-operated LED sconces at shoulder height. The visual cue for completion here is a soft, warm glow that washes down the wall, highlighting textures.
- Select art that follows the diagonal line of the staircase. Hang pieces so the center of each frame is approximately 57-60 inches from the stair tread directly below it.
- Incorporate varied textures—think a heavy oil painting followed by a glass-encased charcoal sketch—to keep the eye engaged during the climb.
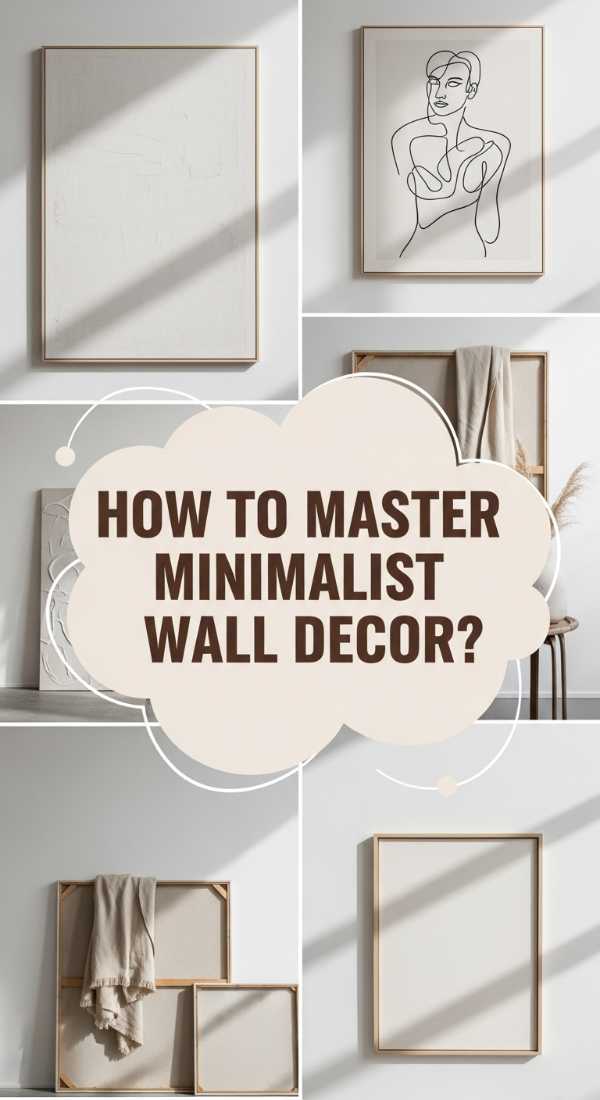
How to Master Large Wall Decor for a Clean Minimalist Aesthetic
Why we love this
There is a profound sense of peace that comes from a single, massive piece of art commanding a room. This minimalist approach strips away the noise, leaving you with a sense of clarity and breathability. We love the way a large canvas, perhaps with a subtle impasto texture, catches the afternoon sun, casting soft shadows that change throughout the day. It feels intentional, expensive, and incredibly calm—like a deep breath for your interior design. It allows the architecture of the room to shine while providing one powerful, emotive soul to the space.
Essential Elements:
- Oversized canvas or framed print (minimum 40×60 inches)
- Floating frame in a natural wood or matte metal
- Recessed directional lighting
- Minimalist color story (monochromatic or muted earth tones)
- Heavy-duty wall anchors
How to make it
- Selection is the most critical prep step. Choose a piece that fills about 60-75% of the available wall space. A piece that is too small will look ‘under-cooked’ and lonely.
- Locate the studs in your wall using a stud finder. For a piece this size, ‘doneness’ requires absolute structural security; you cannot rely on drywall alone.
- Position the art so the horizontal center is at eye level (standard 57-60 inches). If hanging over a sofa, ensure there is an 8-12 inch gap between the bottom of the frame and the top of the furniture.
- Install a dedicated ‘art light’ or adjust existing track lighting to hit the canvas at a 30-degree angle. This prevents glare and brings out the physical texture of the paint or paper.
- Keep the surrounding wall completely clear. The ‘technique’ here is restraint; the negative space around the art is just as important as the art itself.
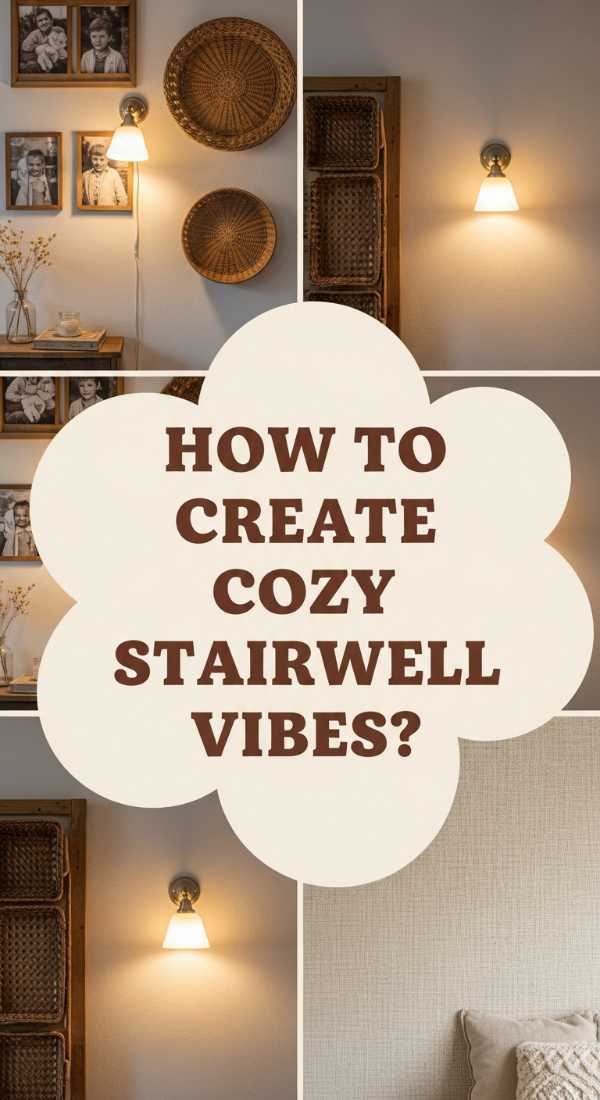
How to Create Cozy Stairwell Vibes for a Welcoming Indoor Atmosphere

Why we love this
Turning a stairwell into a cozy nook is the ultimate way to maximize the ‘hygge’ in your home. We love the combination of soft textiles and warm wood tones that transform a cold passage into a vertical gallery of comfort. Think of the way a woven wall hanging dampens the echoes of footsteps, creating a hushed, serene environment. The aroma of a nearby scented candle on a landing console, combined with the visual warmth of sepia-toned family photos, makes the simple act of moving between floors feel like a gentle hug.
Essential Elements:
- Textured wall hangings or macrame
- Soft-focus family portraiture
- Warm-toned LED strip lighting for handrails
- Small landing furniture (like a slim console or stool)
- Natural materials (wool, jute, linen)
How to make it
- Soften the ‘edges’ of the stairwell by layering soft materials. Start by hanging a large, high-quality textile or tapestry on the largest vertical stretch of the wall to improve acoustics.
- Install ‘invisible’ LED warmth. Run a dimmable LED strip underneath the handrail. This provides a low-heat, ambient glow that guides the way without being harsh.
- Curate a series of photos in warm wood frames. Use ‘sepia’ or ‘warm vintage’ filters on your prints to ensure a cohesive, cozy color palette.
- Add a ‘resting point’ if space allows. A small wooden shelf or slim console on a landing can hold a small lamp or a vase of dried lavender, adding scent to the visual experience.
- Check the visual cues: if the space feels clinical, add more fabric or warm wood. If it feels cluttered, increase the spacing between elements.
How to Style Boho Wall Accents for a Relaxed Living Room
Why we love this
Boho wall decor is all about the soul of the artisan and the beauty of the handmade. We love the layered, tactile nature of this trend—the way a collection of seagrass baskets adds a dimensional curve to a flat wall, or how a fringed wall hanging introduces movement and softness. It smells like sun-drenched grass and feels like a relaxed afternoon. This style invites you to kick off your shoes and stay a while, offering a curated yet effortless aesthetic that celebrates global influences and organic shapes.
Essential Elements:
- Woven seagrass or rattan baskets
- Macrame or fiber art
- Brass accents (like moon phase mirrors)
- Dried botanical arrangements in wall pockets
- Command hooks for damage-free hanging on textured surfaces
How to make it
- Start with your largest fiber piece as the ‘base ingredient.’ Center it above the main seating area to establish the height and texture.
- Layer in the ‘spices’—in this case, your woven baskets. Group them in odd numbers (3, 5, or 7) and overlap their edges slightly to create a sense of depth and 3D visual interest.
- Incorporate organic ‘heat’ by adding brass elements. These catch the light and prevent the boho look from feeling too flat or earthy.
- Integrate nature by hanging a ‘wall pocket’ filled with dried pampas grass or eucalyptus. This adds a subtle scent and a soft, feathery texture that contrasts beautifully with the rigid baskets.
- Step back and look for ‘visual flow.’ The arrangement should feel like it is ‘growing’ across the wall rather than being boxed in. Adjust placements until the eye moves smoothly from one texture to the next.
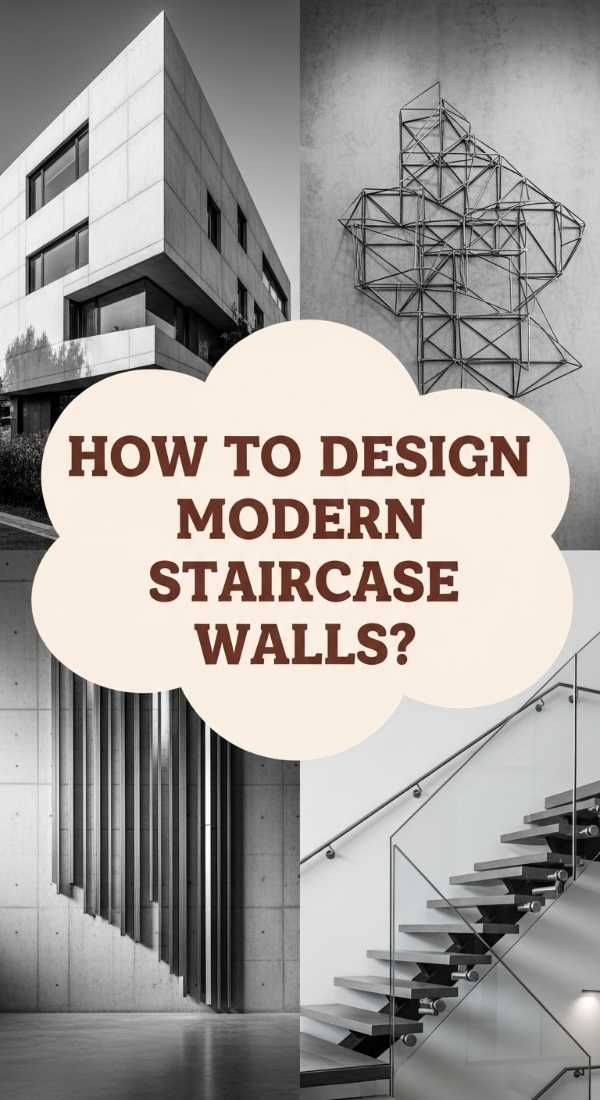
How to Design Modern Staircase Walls for a Sleek Architectural Look
Why we love this
Modern staircase design is where precision meets art. We love the clean, sharp lines and the high-contrast drama that this style brings to a home. It feels architectural and deliberate, often using black-and-white photography or geometric shapes to emphasize the structure of the stairs themselves. The tactile experience here is smooth and cool—think matte black metal, polished glass, and crisp white mats. It’s a look that feels perpetually ‘on-trend’ and gives your home a sophisticated, gallery-like edge that is both bold and timeless.
Essential Elements:
- Black and white architectural photography
- Uniform thin-profile metal frames
- Grid layout patterns
- Minimalist handrail hardware
- Cool-toned gallery lighting
How to make it
- The ‘prep’ for a modern look is all about math. Measure your wall and calculate a perfect grid pattern. For a modern look, the spacing between frames must be identical (exactly 1.5 or 2 inches).
- Choose high-contrast prints. Black and white photos with lots of ‘negative space’ work best to maintain the sleek aesthetic.
- Use a laser level—this is the professional tip for ‘precision cooking.’ A standard level is fine, but a laser line ensures that every frame in the grid is perfectly aligned across the diagonal incline.
- Mount the frames using ‘cleat’ hangers rather than wires. Cleats ensure the frames cannot tilt or shift, maintaining that ‘just-installed’ look forever.
- Final ‘seasoning’: Install cool-white LED spotlighting that hits the center of the grid, creating sharp shadows and emphasizing the geometric order of the display.
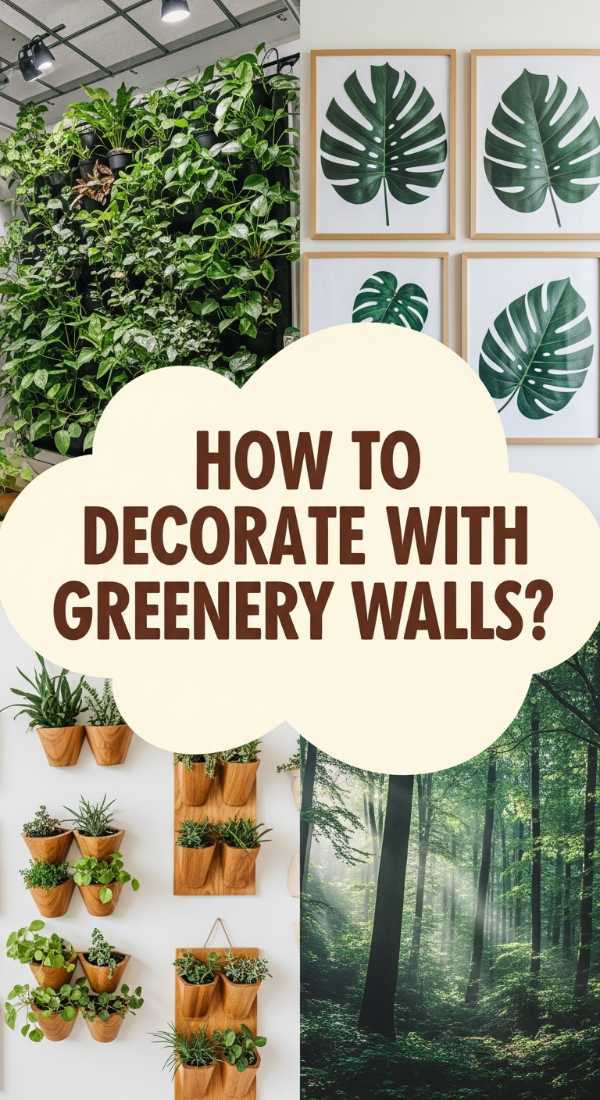
How to Bring Nature Indoors with Large Greenery Wall Displays

Why we love this
There is nothing quite as refreshing as a ‘living’ wall. Bringing large-scale greenery onto your vertical surfaces transforms a room into a lush conservatory. We love the oxygen-rich, earthy aroma of fresh plants and the vibrant pop of emerald green against a neutral wall. It’s a sensory feast; the rustle of leaves in a light breeze and the various textures from waxy fiddle leaf figs to trailing ivy create a dynamic, ever-changing piece of art. It bridges the gap between the indoors and the wild, creating a sanctuary of growth and vitality.
Essential Elements:
- Wall-mounted planters or ‘living wall’ pockets
- Trailing plants (Pothos, Philodendron)
- Architectural plants (Staghorn ferns)
- Consistent light source (natural or grow lights)
- Moisture-resistant wall backing
How to make it
- Evaluate your ‘climate.’ Check the light levels of your wall at different times of day. This dictates your ‘ingredients’—low-light plants for dark corners, succulents for sunny spots.
- Install a moisture barrier. If using real plants, apply a clear waterproof film or a thin sheet of acrylic to the wall behind your planters to prevent water damage or ‘rot.’
- Secure heavy-duty wall anchors. Wet soil is heavy, so ensure your mounting system can handle the weight at full ‘doneness.’
- Arrange your ‘texture.’ Place larger, structural plants like Staghorn ferns in the center and surround them with trailing vines that will eventually ‘drape’ over the edges, softening the display.
- Maintenance is your ‘slow-cooking’ phase. Set a schedule for misting and pruning to ensure the greenery remains vibrant and doesn’t become overgrown or ‘wilted.’
How to Curate Vintage Stair Decor for a Timeless Antique Aesthetic
![]()
Why we love this
Vintage stair decor feels like a journey through time. We love the ‘found’ quality of this trend—the way a chipped gilt frame or a yellowed botanical print carries a sense of history and mystery. The scent of old books and the weight of solid brass hardware add a layer of soulful luxury that modern items simply can’t replicate. It’s about the ‘perfectly imperfect’—the scratches and patina that tell a story of longevity. It turns a simple staircase into a curated museum of personal taste and historical appreciation.
Essential Elements:
- Ornate, mismatched vintage frames
- Oil paintings with visible brushstrokes
- Antique brass sconces
- Shadow boxes for 3D heirlooms
- Dusk-to-dawn vintage-style bulbs
How to make it
- Source your ‘ingredients’ from flea markets and estate sales. Look for frames with character—don’t worry about the art inside; you can always swap it for a vintage-style print or an old map.
- Clean but don’t ‘over-process.’ Keep the patina on brass and the slight wear on wood frames to maintain the ‘aged’ flavor.
- Create a ‘staggered’ layout. Unlike the modern grid, vintage displays thrive on varying heights and styles. Group them so they look like they were collected over decades rather than bought in one day.
- Incorporate a few shadow boxes. These allow you to ‘cook’ with 3D objects—a set of old keys, a dried flower from a special event, or an antique pocket watch.
- Visual cue for completion: The wall should feel ‘rich’ and ‘layered.’ If it looks too thin, add more small frames. Use warm, ‘Edison-style’ bulbs in your sconces to cast an amber, historical glow over the collection.
How to Layer Textures on Empty Walls for Added Visual Interest
Why we love this
Layering textures is the ‘secret sauce’ of high-end interior design. We love how this technique takes a flat, boring wall and gives it a physical presence you can almost feel without touching. By mixing wood, metal, fabric, and paper, you create a rich visual tapestry that absorbs and reflects light in different ways. It’s about the contrast: the coldness of a metal clock against the warmth of a reclaimed wood panel, or the softness of a canvas against a hard brick wall. This approach adds ‘flavor’ and complexity to any room, making it feel finished and professional.
Essential Elements:
- 3D wall panels (wood or plaster)
- Mixed media art pieces
- Metal wall sculptures
- Textured wallpaper or lime wash paint
- Layered lighting (ambient and task)
How to make it
- Start with your ‘base layer.’ Apply a textured finish to the wall, such as a lime wash paint or a subtle grasscloth wallpaper. This ‘sears’ the background with character.
- Install a structural element. A set of vertical wood slats or a reclaimed beam provides a ‘bone’ for the wall.
- Layer on your ‘garnish.’ Hang a metal or wire sculpture over the wood or wallpaper. The ‘technique’ here is depth—ensure the sculpture sits an inch or two off the wall to create shadows.
- Incorporate light as a texture. Use a wash of light from a floor lamp to highlight the bumps and ridges of your textured wall.
- The visual cue for ‘doneness’ is balance. If one side feels too ‘heavy’ with wood, add a reflective metal element to the other side to ‘deglaze’ the visual weight.
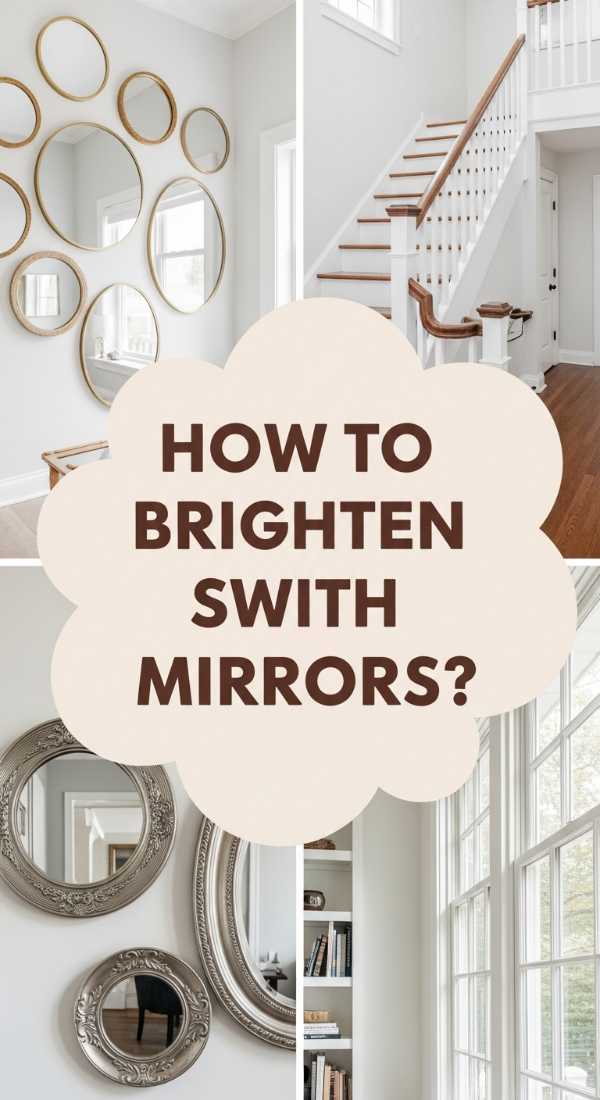
How to Brighten Dark Stairwells with Strategic Mirror Placement
[IMAGE_10]
Why we love this
Mirrors are the magicians of the design world, especially in narrow or dark stairwells. We love the way they capture a stray beam of light and bounce it into a shadow-filled corner, instantly making the space feel twice as large and significantly brighter. There is a crisp, clean energy to a mirrored wall—it reflects the beauty of the surrounding decor while adding a sparkling, polished finish. It turns a claustrophobic transition into a bright, airy gallery, providing a refreshing ‘palate cleanser’ for the eyes as you move through your home.
Essential Elements:
- Large-scale floor mirrors or wall-mounted statement mirrors
- Mirrored gallery sets (small varied shapes)
- Beveled edges for extra light refraction
- Light-colored wall paint (soft whites or pale greys)
- Positioning relative to windows or light fixtures
How to make it
- Identify your ‘light source.’ The ‘prep’ involves finding where the most natural light enters the foyer or landing.
- Position the mirror ‘opposite’ the light. This is the professional ‘technique’ to maximize brightness. Placing a mirror where it can reflect a window is like doubling your light ‘dosage.’
- Choose the right ‘cut.’ For a dark stairwell, use mirrors with beveled edges. The angles of the glass act like prisms, catching light and throwing it in multiple directions.
- For a ‘wow factor,’ create a mirror gallery. Mix different shapes—circles, ovals, and rectangles—to break up the linear lines of the stairs. This creates a ‘shimmer’ effect rather than just a reflection.
- Visual cue for ‘doneness’: Stand at the bottom of the stairs. If the space feels ‘open’ and you can see a reflection of light or greenery from another room, your ‘prep’ is perfect. Wipe clean with a microfiber cloth for a streak-free, professional finish.
Creating Your Own Elevated Sanctuary
Wall decor is so much more than an after-thought; it is the heartbeat of your home’s aesthetic. By taking the time to layer textures, play with scale, and bring in elements of nature and history, you transform your living space into a true reflection of your soul. Remember, there are no hard rules—only techniques to help your personal style shine through. Whether you start with a single statement mirror or a floor-to-ceiling gallery, the goal is to create a home that feels like you. Happy decorating!
Frequently Asked Questions
Q: How high should I hang my wall decor?
A: The golden rule is ‘eye level,’ which is typically 57 to 60 inches from the floor to the center of the piece. In stairwells, measure this distance from the stair tread directly below the art.
Q: Can I mix different metal finishes in my wall accents?
A: Absolutely! Mixing metals (like brass and matte black) adds depth and a ‘collected’ feel. Just try to keep one metal as the dominant ‘base’ and use others as ‘accents.’
Q: What is the best way to hang heavy items on drywall?
A: Always try to find a stud. If a stud isn’t available, use high-quality toggle bolts or threaded drywall anchors rated for at least twice the weight of your item.
Q: How do I choose art for a very small space?
A: Don’t be afraid to go large! One oversized piece can actually make a small space feel bigger and less cluttered than several small pieces.