

From Pastel Dreams to Neon Beams: 2026 Spring & Summer Nail Masterclass
Hello, my beautiful souls. Can you feel it? That first whisper of a warm breeze dancing through your window, carrying the scent of blooming jasmine and the promise of endless golden hours. As we transition from the quiet huddle of winter into the vibrant energy of 2026, I wanted to wrap you in a cloud-soft embrace and share something that has been making my heart flutter lately: the magic of a fresh manicure.
This season isn’t just about color; it’s about storytelling on your fingertips. We are moving from the soft, ethereal ‘Pastel Dreams’ of early April into the high-octane ‘Neon Beams’ of August. Whether you are prepping for a magical prom night or just want to feel the Tuscan sun while sitting at your desk, I’ve curated this masterclass just for you, my loves. Let’s dive into the artistry together.
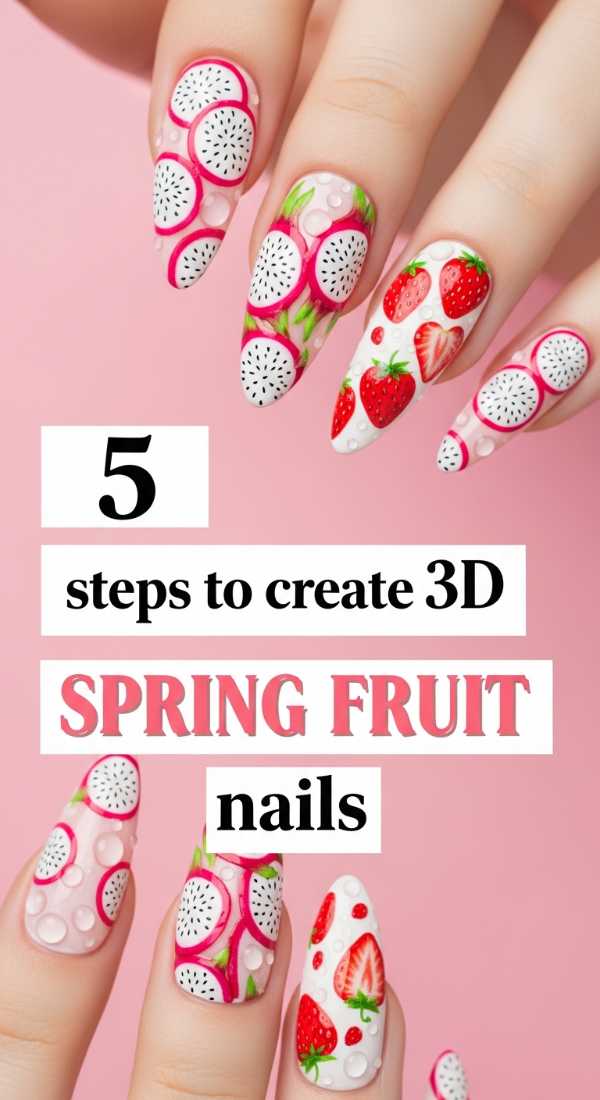
The Sweetest Harvest: 3D Spring Fruit Nails
Why to love this Design:
There is something so incredibly playful and tactile about 3D fruit. It’s like carrying a little piece of a sunny orchard with you. These nails are conversation starters—they invite touch and bring a sense of childlike joy to your sophisticated spring wardrobe.
Essential Elements:
- Clear 3D Builder Gel
- Micro-brushes for detailing
- Vibrant red and peach gel polishes
- Tiny green leaf decals
How to Prepare:
- Apply a sheer nude base coat and cure.
- Paint small circles of color (strawberries or peaches) using a detail brush.
- Cure the color, then take a dollop of 3D builder gel and place it directly over the fruit shape to create a dome.
- Use a toothpick to poke tiny ‘seeds’ or texture into the wet 3D gel.
- Cure for 60 seconds and seal the surrounding area with a high-shine top coat.
Budget Range
- Nail Reserve 3D Sculpting Gel: $15
- Beetles Fruit Tones Polish Set: $20
- Detail Brush Kit: $10
Midnight Elegance: 4 Ways to Style Black and Gold Prom Nails

Why to love this Design:
Prom is your night to shine, and nothing says ‘main character energy’ like the contrast of deep obsidian and liquid gold. It’s a look that feels grounded yet expensive, perfect for dancing under the stars.
Essential Elements:
- Matte Black Polish
- Gold Leaf Flakes
- Metallic Gold Striper Pen
- Gold Caviar Beads
How to Prepare:
- The Gold Ombre: Sponge gold glitter from the tips downward over a black base.
- The French Frame: Use a gold striper to outline the very edge of a matte black nail.
- The Marbled Gilded Look: Swirl black and gold polish together on a palette before transferring to the nail.
- The Royal Accent: Apply a single gold 3D charm on the ring finger over a glossy black finish.
Budget Range
- Modelones Matte Top Coat: $8
- 18K Gold Leaf Foil: $12
- Holler and Glow Black Polish: $7
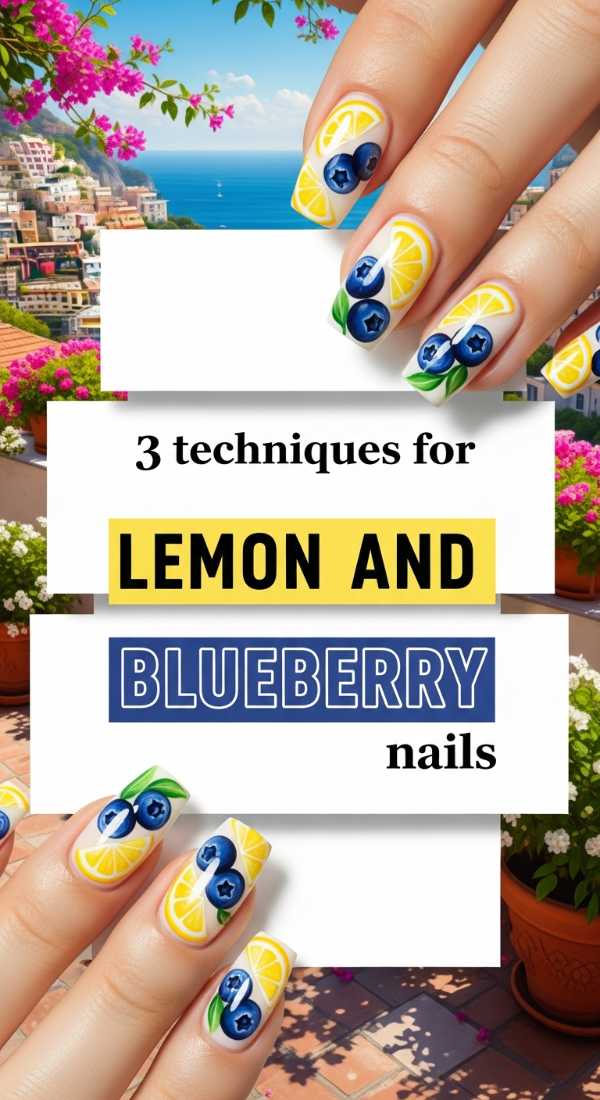
The Amalfi Aesthetic: 3 Techniques for Lemon and Blueberry Nails
Why to love this Design:
This look is a love letter to the Mediterranean. The mix of tart lemon yellow and deep berry blue creates a visual balance that is both refreshing and incredibly chic for an outdoor brunch.
Essential Elements:
- Primary Yellow and Cobalt Blue gel
- Dotting tool
- White base polish for ‘porcelain’ effect
How to Prepare:
- The Porcelain Stamp: Paint white nails and use a fine brush to create blue ’tile’ patterns around tiny lemon slices.
- The Fruit Cluster: Use a dotting tool to group three blue dots for berries and one elongated yellow stroke for lemons.
- The Alternating Gradient: Keep the thumb and pinky solid blue, with hand-painted fruit art on the middle fingers.
Budget Range
- Essie ‘Butler Please’ Blue: $10
- OPI ‘Exotic Birds Do Not Tweet’ Yellow: $11
- Dotting Tool Set: $5
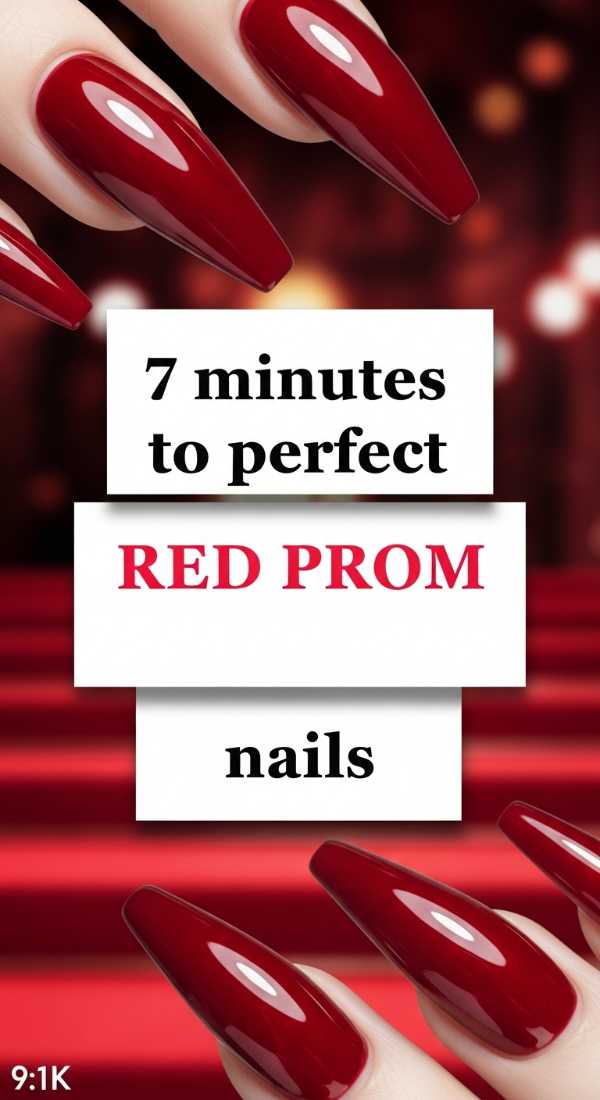
The Seven-Minute Sizzle: Perfect Red Prom Nails
Why to love this Design:
Sometimes, simplicity is the ultimate sophistication. A classic red nail is timeless, bold, and takes exactly seven minutes to execute when you’re rushing to put on your corsage.
Essential Elements:
- High-pigment Crimson Polish
- Fast-dry Top Coat
- Cuticle Oil for that instant glow
How to Prepare:
- Prep: Clean nails with alcohol to ensure zero oils (1 min).
- Base: Apply a thin layer of 2-in-1 base/color (2 mins).
- Second Coat: Ensure full opacity with a slightly thicker second layer (2 mins).
- Top: Seal with a ‘dry in 60 seconds’ top coat (1 min).
- Finish: Swipe cuticle oil for the camera-ready shine (1 min).
Budget Range
- Sally Hansen Insta-Dri Red: $6
- Seche Vite Fast Dry Top Coat: $9
- CND SolarOil: $12
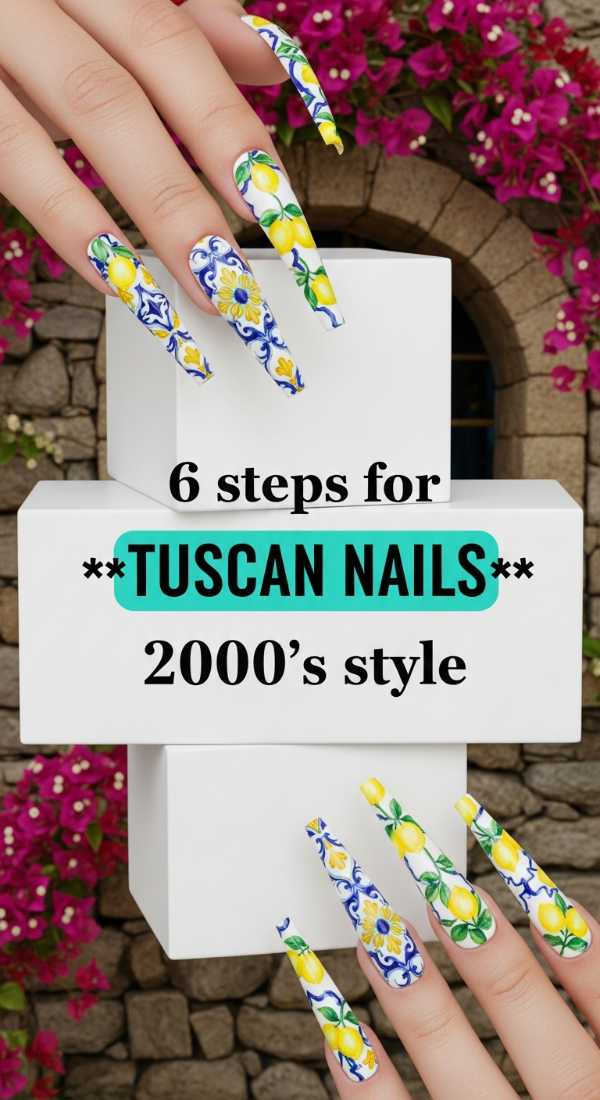
Y2K Under the Sun: 6 Steps for Tuscan Nails 2000s Style
Why to love this Design:
This is where the rustic charm of Italy meets the ‘Brat’ aesthetic of the early 2000s. Think warm terracotta tones paired with butterfly charms and square tips. It’s nostalgic, earthy, and totally unique.
Essential Elements:
- Terracotta and Burnt Orange shades
- Mini butterfly decals
- Butterfly-shaped chunky glitter
- Square-shaped nail tips
How to Prepare:
- Shape your nails into a sharp, medium-length square.
- Apply a warm terracotta base color.
- Place a holographic butterfly decal in the center of the accent nail.
- Add ‘aura’ circles using a lighter peach sponge in the middle of each nail.
- Apply 2000s-style ‘starburst’ stickers using a silver pen.
- Finish with a thick ‘plumping’ gel top coat.
Budget Range
- Zoya Terracotta Polish: $12
- Y2K Butterfly Decal Pack: $8
- Makartt Square Tips: $15
Island Goddess: 8 Tips for a Tropical Nail Set
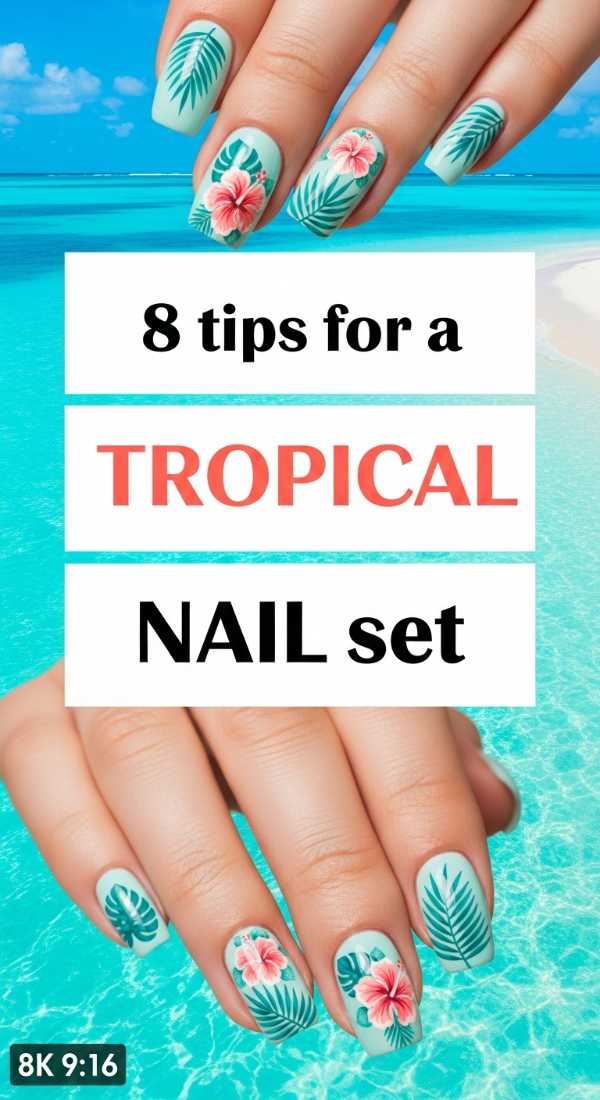
Why to love this Design:
A tropical set is an instant vacation. Even if you’re just grabbing an iced coffee, these vibrant colors and botanical patterns make every movement feel like a breeze through palm leaves.
Essential Elements:
- Neon Pink and Teal polish
- Stamping plates with leaf patterns
- Matte and Glossy contrast top coats
How to Prepare:
- Mix your neons; don’t be afraid to clash pink with orange.
- Use a sponge to create a ‘sunset’ vertical ombre.
- Stamp dark green palm fronds over the ombre.
- Add a ‘wet look’ using drops of top coat over a matte base for ‘dew’ effects.
- Keep the shape long (coffin or almond) for maximum canvas space.
- Incorporate one sandy-textured glitter nail.
- Use gold studs to represent ‘coconuts’ or seeds.
- Seal with UV protection top coat to prevent neon fading.
Budget Range
- Orly Neon Heat Collection: $15/bottle
- Tropical Stamping Plate: $10
- Born Pretty Texture Gel: $9
The Golden Hour Glow: 3 Ways to Wear Butter Yellow Nails Chrome

Why to love this Design:
Butter yellow is the breakout star of 2026. Adding a chrome finish turns a soft, creamy look into something futuristic and ‘expensive-looking’ that catches the light beautifully.
Essential Elements:
- Pale Yellow Polish
- White Chrome Powder
- No-wipe Top Coat
How to Prepare:
- The Glazed Butter: Apply yellow polish, top coat, then rub white chrome powder over the entire surface.
- The Chrome Tip: Keep the base creamy yellow and only apply chrome powder to the French tips.
- The Reverse Aura: Chrome the base of the nail and fade into a matte butter yellow at the tips.
Budget Range
- DND ‘Butter’ Gel: $14
- Artdone Chrome Powder: $10
- Kupa No-Wipe Top Coat: $18
Ethereal Dreams: 5 Steps to Get Lavender Sparkle Nails
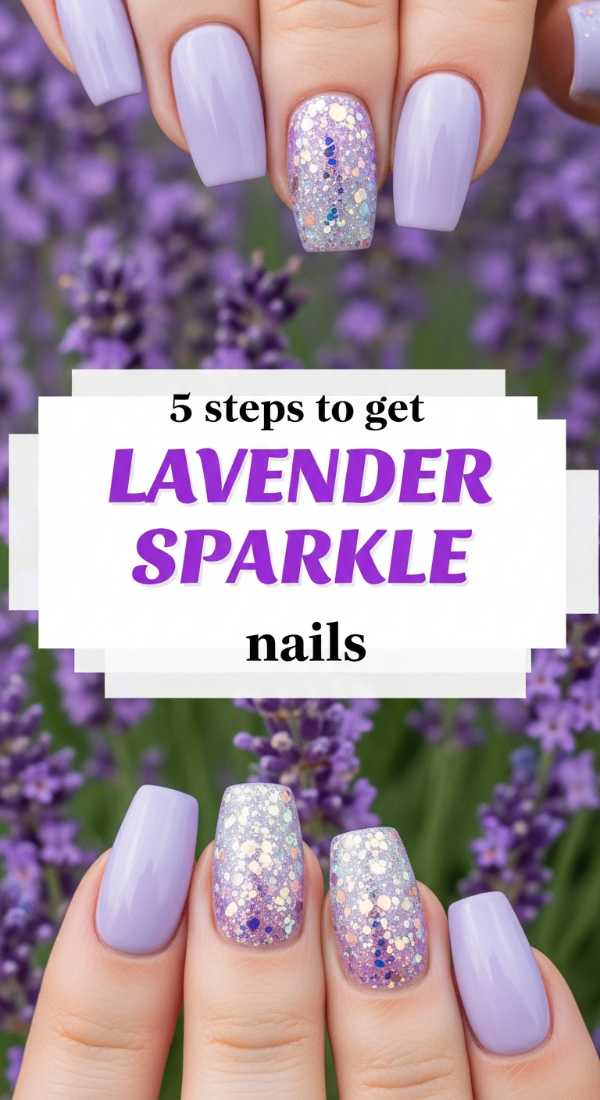
Why to love this Design:
Lavender is the color of peace. Adding a sprinkle of holographic glitter makes it feel like you’ve dipped your fingers into a galaxy of wildflowers. It’s soft, feminine, and deeply soothing.
Essential Elements:
- Soft Lavender Cream Polish
- Fine Holographic Glitter
- Lavender-tinted sheer syrup polish
How to Prepare:
- Apply two coats of creamy lavender polish.
- While the second coat is tacky, dust fine glitter near the cuticles.
- Apply a ‘syrup’ (translucent) purple coat over the glitter to ‘bury’ it (the sandwich technique).
- Add a few tiny white hand-painted stars.
- Finish with a high-gloss top coat for a glass-like finish.
Budget Range
- Olive & June ‘Bold & Unshaken’: $9
- Holographic Loose Glitter: $6
- Canmake Colorful Nails (Lavender): $10
The Dark Side of Spring: 4 Ideas for Gothic Spring Nails

Why to love this Design:
Who says spring has to be all sunshine? For my loves who prefer the shadows, gothic spring combines moody blacks and purples with delicate floral lace. It’s romantic, mysterious, and edgy.
Essential Elements:
- Deep Plum and Black polish
- Lace water decals
- Small dried pressed flowers (dark tinted)
How to Prepare:
- The Sheer Black Veil: Mix black polish with top coat for a translucent look, then add black floral stickers.
- The Dried Wilted Rose: Encapsulate dark red dried flowers in clear builder gel.
- The Matte Lace: Use a matte top coat over a black base with glossy lace stamping.
- The Victorian Goth: Add tiny silver frames around dark purple centerpieces.
Budget Range
- Cirque Colors ‘Memento Mori’: $14
- Pressed Dried Flowers: $11
- Lace Nail Decals: $5
The Harmony Rule: 2 Rules for Hands and Toes Nails Matching
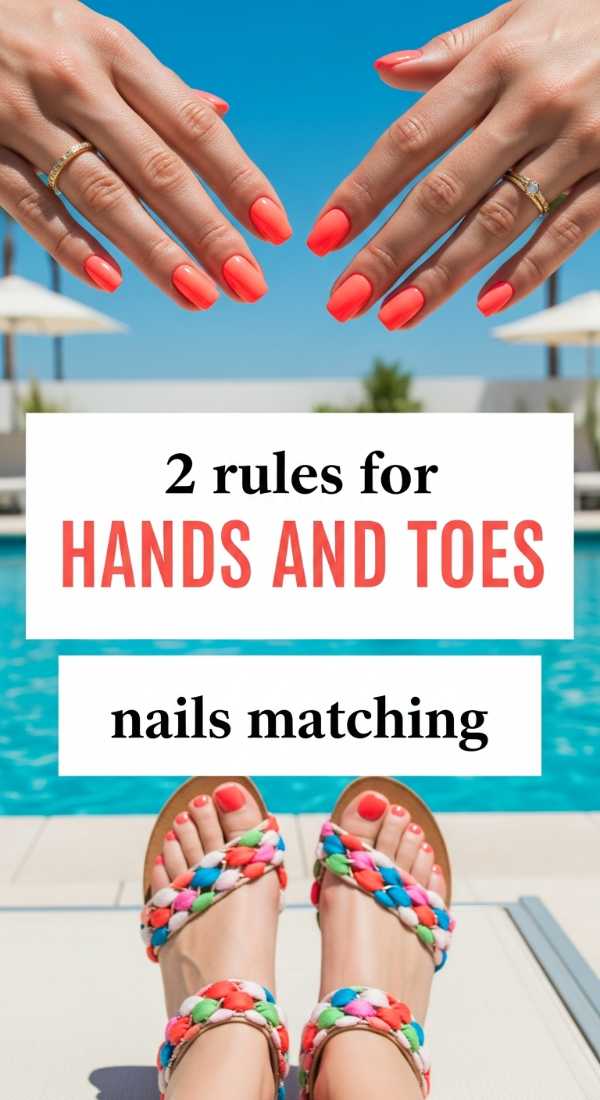
Why to love this Design:
There is an undeniable sense of ‘put-togetherness’ when your mani and pedi are in sync. It’s the ultimate form of self-care that makes you feel polished from head to toe.
Essential Elements:
- Coordinating Polish Colors
- Consistent Top Coat Finish (Both matte or both glossy)
How to Prepare:
- Rule 1: The ‘Sister, Not Twin’ Philosophy: Never use the exact same art on both. If your hands have lemons, keep your toes a solid, matching ‘lemon juice’ yellow.
- Rule 2: The Texture Anchor: If you use chrome on your hands, use a tiny chrome accent or a matching shimmer on your toes to tie the look together without being overwhelming.
Budget Range
- Matching Essie Gel Couture Sets: $18
- Pedicure Separators: $3
- Foot File: $10
Carry the Light With You
As you step out into the world with your new, beautiful nails, remember that these are more than just colors on a canvas. They are a reflection of your mood, your dreams, and the vibrant life you are building for yourself. Whether you chose the neon tropical vibes or the soft lavender sparkles, I hope every time you look down at your hands, you feel a little spark of magic. Go shine, my loves!