
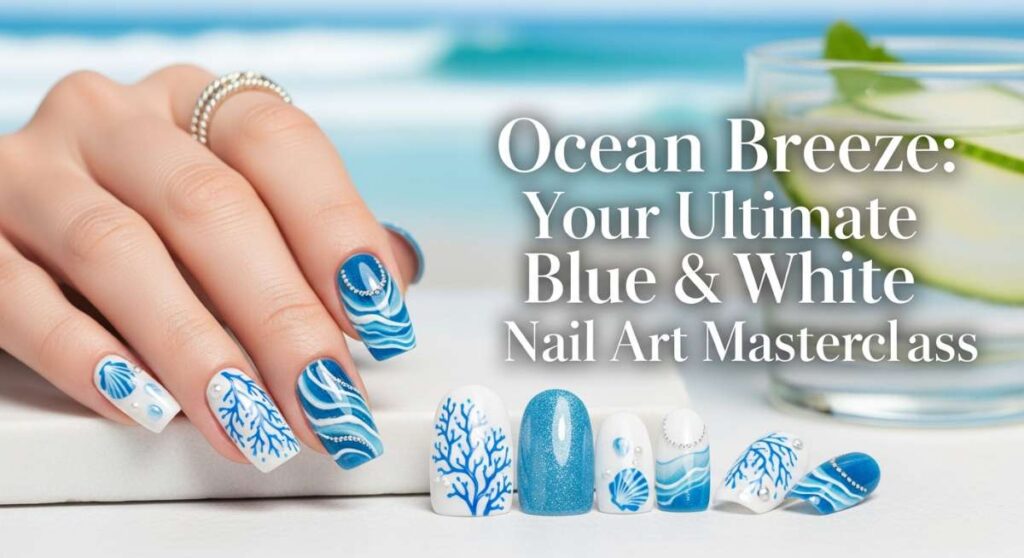
Ocean Breeze: Your Ultimate Blue & White Nail Art Masterclass
Hello, my loves. There is something so incredibly healing about the color blue, isn’t there? It reminds me of those slow Sunday mornings when the sky is a perfect, pale canvas, or the way the ocean whispers against the shore when you’re the only one there to listen. I wanted to bring that sense of peace, that ‘cloud-soft’ embrace, right to your fingertips today. We’re diving deep into a world of cobalt, azure, and crisp white linens.
Painting your nails isn’t just a beauty routine—it’s a ritual of self-love. It’s those twenty minutes where the world stops, the phone is face-down, and you’re just creating something beautiful for yourself. Whether you’re a pro with a striper brush or just starting your journey, I’ve gathered my favorite blue and white inspirations to help you feel like you’re carrying a little piece of the Mediterranean breeze with you everywhere you go.
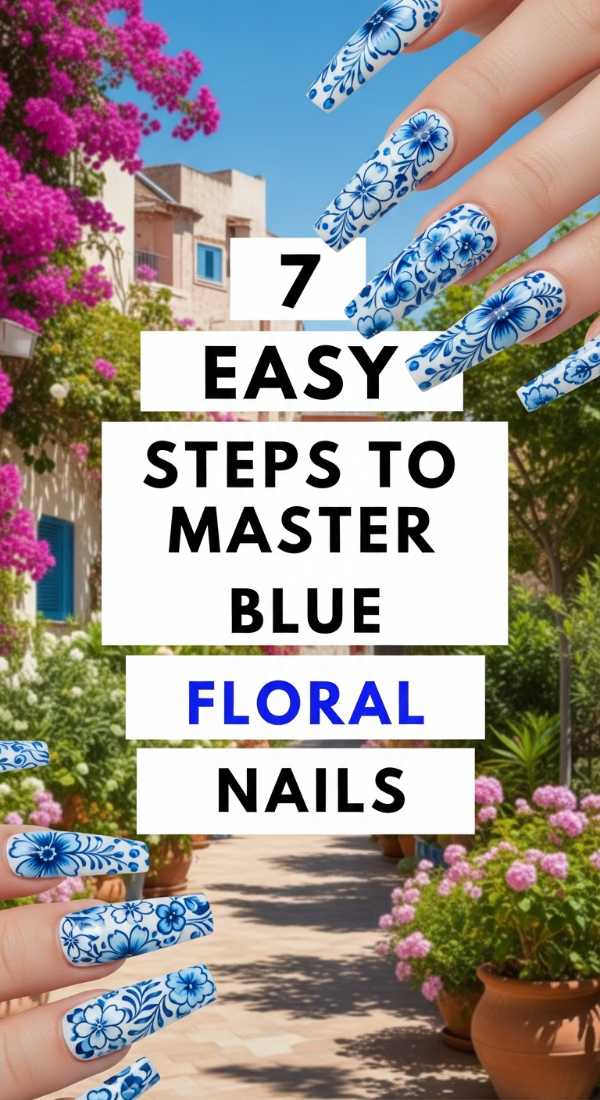
7 Easy Steps to Master Blue Floral Nails
Why to love this Design:
There is a romantic, vintage soul to blue florals that reminds me of heirloom china and secret cottage gardens. It’s delicate yet intentional, giving your hands a soft, feminine grace that feels like a constant bouquet of fresh blooms.
Essential Elements:
- Soft white base polish
- Cornflower blue acrylic paint or polish
- Ultra-fine dotting tool
- Glossy top coat
How to Prepare:
- Apply a nourishing base coat to protect your natural nails.
- Paint two thin layers of crisp white polish and let them dry completely.
- Use a dotting tool to place five small blue dots in a circle.
- Drag the center of each dot inward with a toothpick to create petals.
- Add a tiny yellow or gold dot in the center of the flower.
- Add small green leaf accents if you’re feeling adventurous.
- Seal with a high-shine top coat for a porcelain finish.
Budget Range
- Essie ‘Blanc’ White Polish – $10
- Nail Art Dotting Tool Set – $6
- Olive & June ‘Joe’ Light Blue – $9
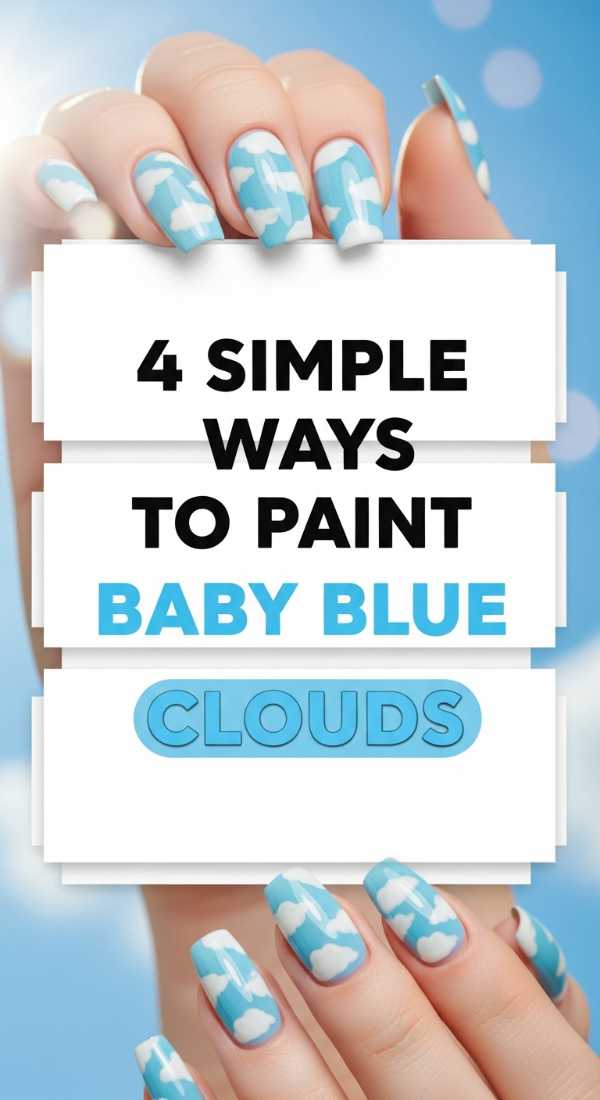
4 Simple Ways to Paint Baby Blue Clouds
Why to love this Design:
This design is like a deep breath for your soul. Looking down at your hands and seeing tiny, fluffy clouds against a pastel sky is an instant mood lifter. It’s whimsical, dreamy, and surprisingly forgiving for beginners.
Essential Elements:
- Baby blue polish
- Opaque white polish
- Small makeup sponge
- Matte or glossy top coat
How to Prepare:
- Paint your nails with two coats of baby blue and let dry.
- Dip the corner of a makeup sponge into white polish.
- Dab three overlapping circles to form the ‘fluff’ of the cloud.
- Softly blend the bottom of the cloud into the blue for a realistic effect.
Budget Range
- OPI ‘It’s a Boy!’ Blue – $11
- Wedge Makeup Sponges – $4
- Sally Hansen White On – $5
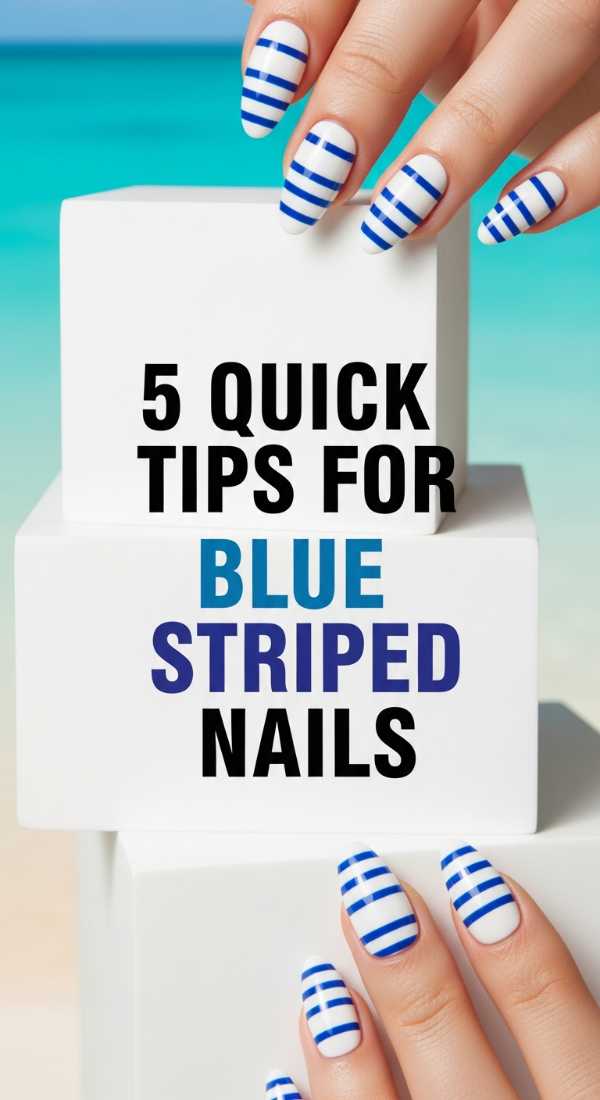
5 Quick Tips for Blue Striped Nails
Why to love this Design:
Stripes are the ultimate ‘cool girl’ staple. They feel preppy, nautical, and incredibly organized. There’s a certain satisfaction in those clean, straight lines that makes you feel like you have your whole life together, even on a Tuesday.
Essential Elements:
- Navy blue polish
- White striper tape or a long-hair brush
- Steady surface for your elbow
How to Prepare:
- Start with a clean white base.
- Place thin strips of nail tape horizontally across the nail.
- Paint over the entire nail with navy blue.
- Peel the tape off immediately while the polish is still wet.
- Clean up the edges with a brush dipped in acetone.
Budget Range
- Zoya ‘Sailor’ Navy – $12
- Nail Striping Tape Roll – $5
- Clean-up Brush – $7
6 Ways to Apply Royal Blue Chrome
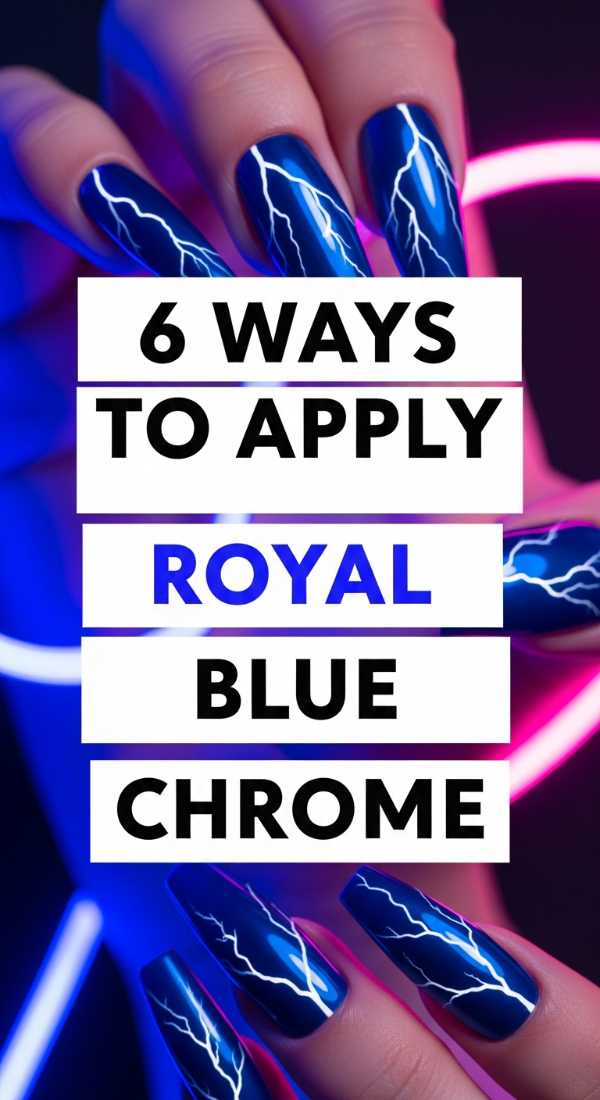
Why to love this Design:
If you want to feel like a modern-day mermaid or a high-fashion icon, royal blue chrome is your calling. It’s electric, futuristic, and has a liquid-metal finish that catches every single light beam in the room.
Essential Elements:
- No-wipe gel top coat
- Blue chrome powder
- Silicone applicator or eyeshadow sponge
- LED/UV lamp
How to Prepare:
- Apply a black or dark blue gel base and cure.
- Apply the no-wipe top coat and cure for 30 seconds (it should stay slightly tacky).
- Rub the chrome powder onto the nail in circular motions.
- Burnish until it looks like a mirror.
- Dust off excess powder with a soft brush.
- Top with a final gel layer and cure fully.
Budget Range
- Beetles Gel Polish Set – $15
- Artdone Chrome Powder – $8
- SunUV LED Lamp – $25
3 Steps to Achieve White Marble Nails
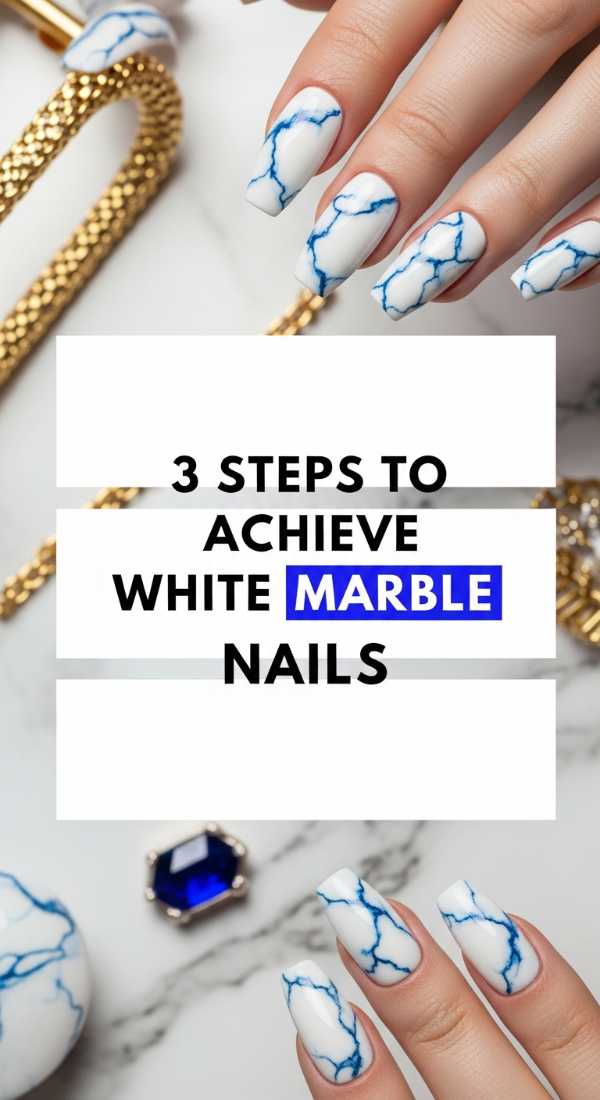
Why to love this Design:
Marble is the epitome of luxury. It’s sophisticated and timeless, turning your nails into miniature pieces of Italian stone. The way the blue veins dance through the white is purely hypnotic.
Essential Elements:
- White polish
- Grey or light blue polish for veining
- Acetone and a thin detail brush
How to Prepare:
- Apply two coats of white and let dry.
- Draw thin, shaky lines with the blue/grey polish.
- Dab the lines with a brush dipped in acetone to blur and soften the edges.
Budget Range
- Essie ‘Gel Couture’ White – $13
- Deborah Lippmann ‘Grey Day’ – $20
- Pure Acetone – $4
8 Tips for Baby Blue Velvet Nails

Why to love this Design:
Velvet nails are all about texture and magic. They use magnetic particles to create a 3D effect that looks like crushed velvet moving under the surface. It’s cozy, soft, and totally mesmerizing to look at.
Essential Elements:
- Magnetic ‘Cat Eye’ blue polish
- Strong neodymium magnet
- Clear base and top coat
How to Prepare:
- Apply the magnetic polish in one thick coat.
- Immediately hold the magnet 0.5cm away from the nail for 10-15 seconds.
- Move the magnet to the sides to ‘push’ the velvet shimmer to the center.
- Cure or dry quickly to lock the particles in place.
- Always work one nail at a time.
- Repeat for a second layer for more depth.
- Do not wiggle the magnet; keep it steady.
- Finish with a high-gloss top coat to enhance the 3D look.
Budget Range
- Mooncat ‘Millennia’ Magnetic – $16
- Dual-ended Nail Magnet – $5
- Seche Vite Fast Dry Top Coat – $9
5 Hacks for Royal Blue Tile Patterns
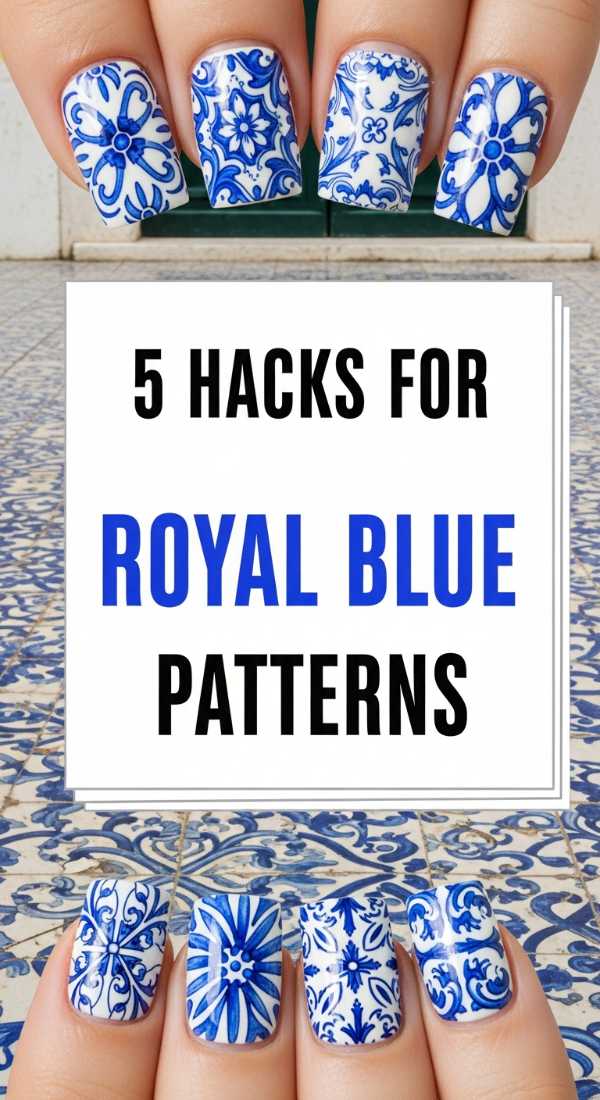
Why to love this Design:
Think of the sun-drenched terraces of Portugal or Greece. These geometric tile patterns feel like a vacation on your hands. They are intricate, artistic, and tell a story of craftsmanship.
Essential Elements:
- Stamping plate with geometric designs
- Stamper and scraper
- Highly pigmented blue stamping polish
How to Prepare:
- Apply a white base coat.
- Apply blue polish to the stamping plate.
- Scrape the excess at a 45-degree angle.
- Pick up the image with a rolling motion of the stamper.
- Press the image onto the nail firmly.
Budget Range
- Maniology Stamping Kit – $18
- MoYou London Plates – $10
- Born Pretty Stamping Polish – $6
4 Simple Steps to Blue Ombre Nails
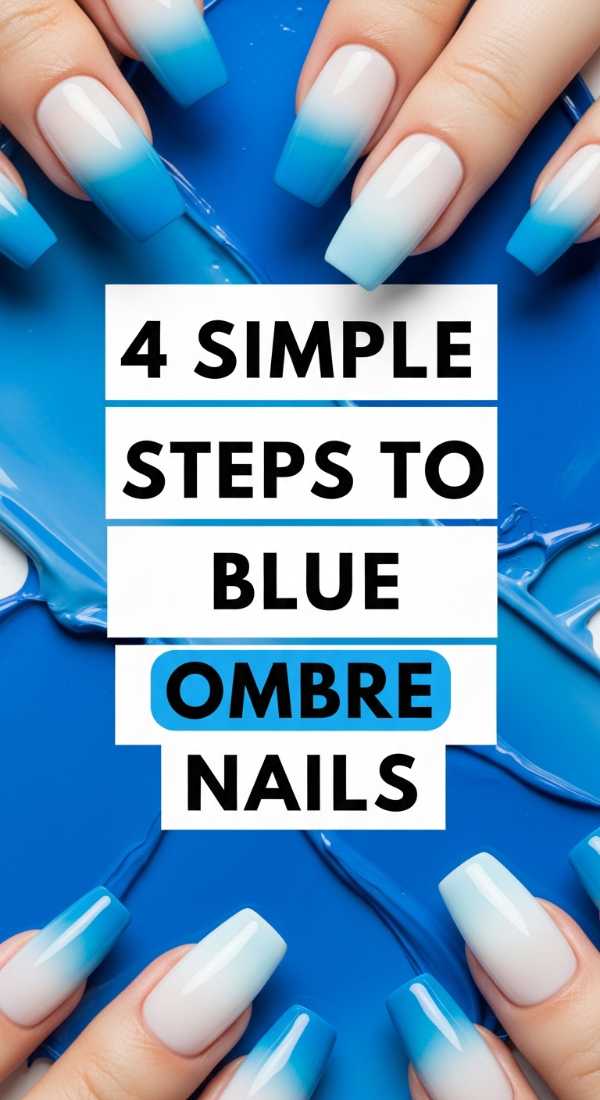
Why to love this Design:
The ombre is a classic for a reason—it’s the perfect gradient that mimics the horizon. It transitions from a deep, mysterious blue to a light, airy white, representing the full spectrum of the sky.
Essential Elements:
- Dark blue polish
- Light blue or white polish
- Latex barrier (optional)
- Sponge
How to Prepare:
- Paint your nail with the lightest color.
- Paint stripes of the dark and light colors onto a makeup sponge.
- Dab the sponge repeatedly onto the nail.
- Repeat until the blend is seamless and smooth.
Budget Range
- Orly ‘Midnight Show’ – $12
- Liquid Latex Barrier – $8
- Wedge Sponges – $3
10 Tricks for Royal Blue Star Art
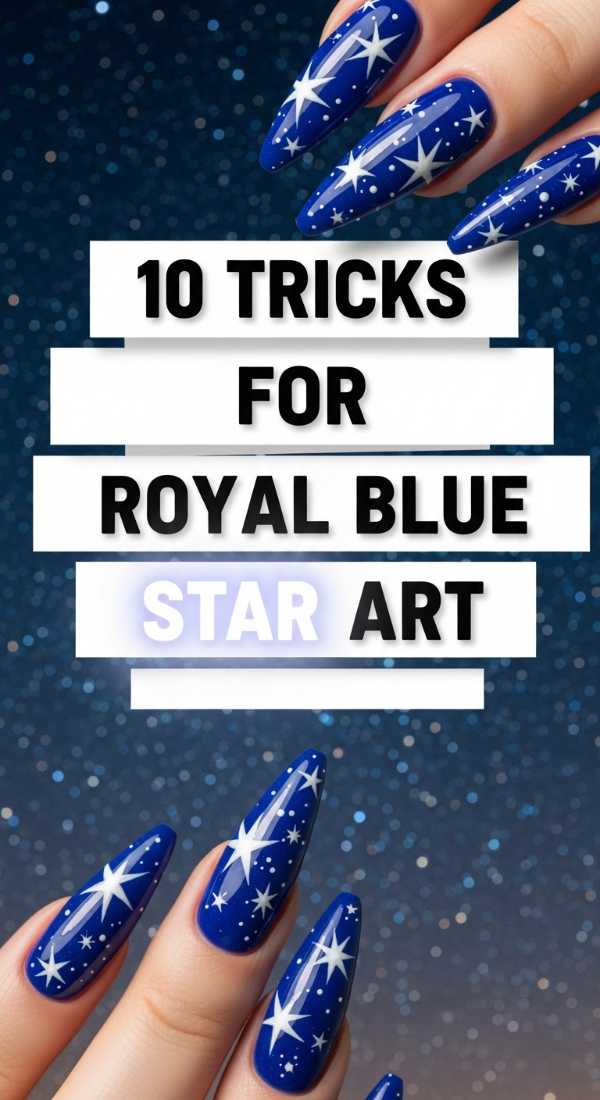
Why to love this Design:
Stars are a reminder that even in the darkest nights, there is light. This design is magical and bold, perfect for someone who wants to carry a bit of the cosmos with them. It feels celebratory and bright.
Essential Elements:
- Deep navy/royal blue polish
- Gold or silver star decals
- Tweezers
How to Prepare:
- Apply a dark blue base.
- Use tweezers to pick up star decals.
- Place them randomly or in a constellation pattern.
- Press down firmly.
- Seal with two coats of top coat.
- Use a toothpick for tiny hand-painted dots.
- Add a touch of glitter for a nebula effect.
- Keep the star placement balanced.
- Ensure the base is dry before applying decals.
- Finish with a matte top coat for a ‘night sky’ feel.
Budget Range
- Holo Taco ‘Galaxy’ Collection – $14
- Star Nail Stickers – $4
- Revlon ‘Royal’ Polish – $6
6 Steps for Blue Negative Space Nails
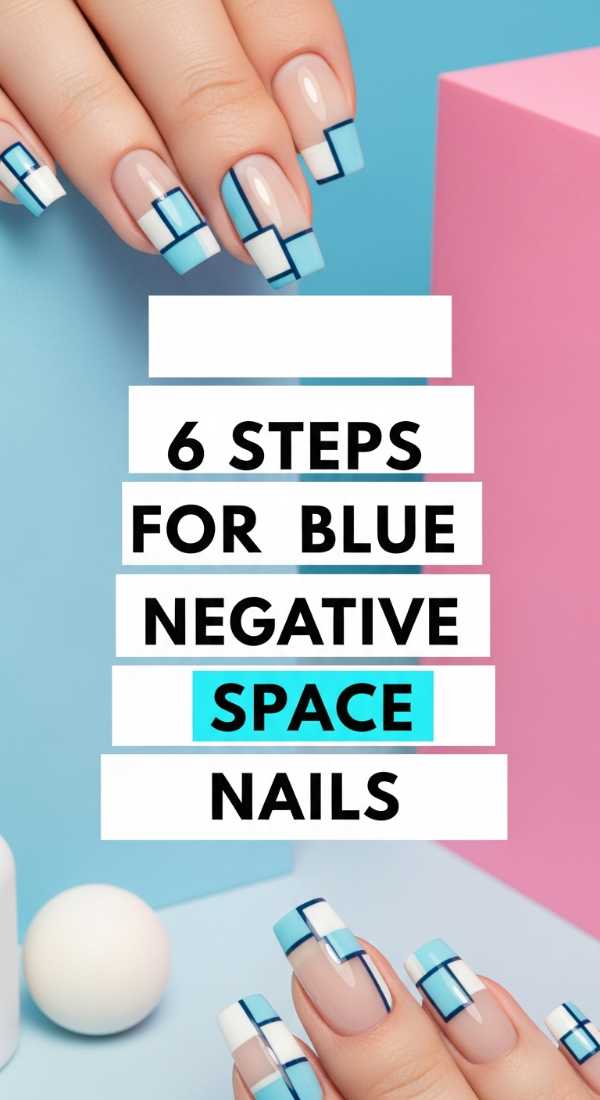
Why to love this Design:
Negative space is for the minimalist who loves a modern edge. By leaving parts of the natural nail exposed, the blue pops with a graphic intensity that is both chic and incredibly clean.
Essential Elements:
- Nail tape or stencils
- Vibrant blue polish
- High-quality top coat
How to Prepare:
- Apply a clear base coat.
- Place tape in a V-shape or half-moon.
- Paint the blue polish over the open area.
- Remove tape immediately.
- Clean lines with a brush.
- Seal with top coat.
Budget Range
- Scotch Tape – $3
- Essie ‘Butler Please’ – $10
- OPI ‘Alpine Snow’ – $11
Embracing Your Inner Artist
My loves, I hope these designs make you feel as refreshed as a seaside walk. Remember, nail art is not about perfection—it’s about the joy of the process and the way it makes you feel when you catch a glimpse of your hands throughout the day. Don’t be afraid to smudge, to try again, or to make these designs uniquely yours. You are the artist of your own life, down to the very tips of your fingers. Stay soft, stay inspired, and keep shining.