
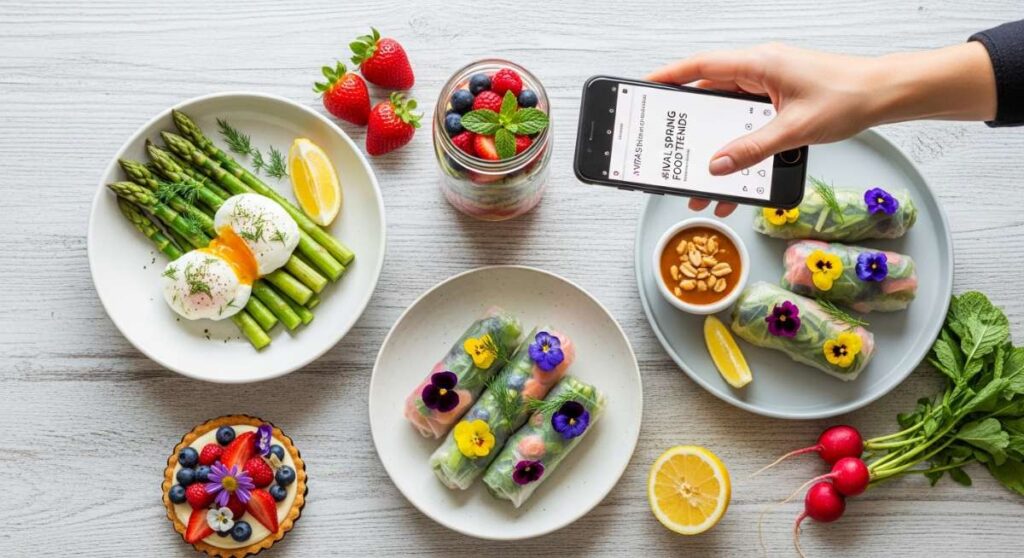
Oh, my loves, can you feel it? The air is finally softening, and that golden, honey-hued light is beginning to spill through our kitchen windows earlier and earlier each morning. It is a season of rebirth, a time to dust off the winter blues and embrace the vibrant, playful energy that only spring can bring to our tables and our hearts. I’ve been spending my afternoons scrolling through our favorite feeds, and the creativity blossoming in the culinary world right now is nothing short of a cloud-soft embrace.
I have gathered ten of the most enchanting, viral recipes and ideas that are currently taking the internet by storm, curated just for you to bring a little extra sparkle to your home. From the sweet indulgence of a cookie that tastes like a warm hug to the crisp, fresh crunch of garden-inspired bowls, there is something here for every mood and every celebration. Let’s dive into these beautiful trends together, shall we? Grab a cup of tea and let’s explore the flavors that are making this season so incredibly special.
Viral Cinnamon Roll Cheesecake Cookies

Why we love this
Imagine the cozy, spiced warmth of a fresh cinnamon roll married perfectly with the creamy, decadent richness of a classic cheesecake. These cookies are a total sensory experience, offering a soft, buttery base that shatters into a tangy, velvety center with every single bite. They have gone viral for a reason: they look like a professional bakery masterpiece but feel like a homemade treasure. It is the ultimate comfort treat that transitions beautifully from chilly spring mornings to breezy outdoor afternoon tea parties.
Ingredients
- 1 cup softened unsalted butter
- 3/4 cup brown sugar and 1/2 cup granulated sugar
- 2 cups all-purpose flour
- 1 teaspoon cinnamon and 1/2 teaspoon baking soda
- 8 oz softened cream cheese
- 1/2 cup powdered sugar
- 1 teaspoon vanilla extract
How to make it
- Begin by whipping your softened cream cheese, powdered sugar, and vanilla together until it forms a cloud-like, smooth filling, then scoop small dollops onto a tray and freeze for 30 minutes.
- In a separate bowl, cream your butter and sugars until fluffy, then gently fold in the flour, cinnamon, and baking soda to create a soft, fragrant cookie dough.
- Take a portion of dough, flatten it in your palm, place a frozen cheesecake dollop in the center, and carefully wrap the dough around it until sealed.
- Roll the dough balls in a cinnamon-sugar mixture for that signature sparkle and bake at 350°F for 10-12 minutes until the edges are just golden.
- Allow them to cool on the pan for at least 10 minutes so the cheesecake center sets into a creamy, dreamy surprise.
Healthy Roasted Sweet Potato Bowls

Why we love this
There is something so grounding about a bowl filled with the colors of the earth, especially when it is as nourishing as it is beautiful. These roasted sweet potato bowls are the epitome of vibrant health, balancing the natural sweetness of the potatoes with savory proteins and crunchy greens. They are the perfect “glow-up” meal for those days when you want to feel energized and light, yet completely satisfied. Every forkful feels like a gentle promise to your body that you are fueling it with the very best ingredients.
Ingredients
- 2 large sweet potatoes, cubed
- 2 cups fresh kale or baby spinach
- 1 cup cooked quinoa or farro
- 1 can chickpeas, drained and rinsed
- 1 avocado, sliced
- Tahini dressing (tahini, lemon, maple syrup)
- Olive oil, salt, and smoked paprika
How to make it
- Toss your cubed sweet potatoes and chickpeas in olive oil, salt, and a generous dusting of smoked paprika, then spread them on a baking sheet.
- Roast the mixture at 400°F for about 25-30 minutes, or until the potatoes are tender and the chickpeas have developed a delightful little crunch.
- While roasting, massage your kale with a touch of lemon juice and salt to soften the texture and remove any bitterness.
- Assemble your bowls by layering the grains at the base, followed by the massaged greens, the roasted sweet potato mix, and the creamy avocado slices.
- Drizzle the homemade lemon-tahini dressing generously over the top and finish with a sprinkle of hemp seeds or crushed nuts for extra texture.
Crispy Golden Cheesy Chicken Wraps

Why we love this
We all have those busy spring evenings where we want something quick, but we refuse to sacrifice that satisfying, crunchy goodness we crave. These cheesy chicken wraps are a viral sensation because they take humble pantry staples and turn them into a golden, melty masterpiece in minutes. The contrast between the toasted, crisp tortilla and the gooey, savory interior is enough to make anyone’s heart skip a beat. It’s the kind of effortless lunch or dinner that makes you feel like a kitchen wizard without the stress.
Ingredients
- 2 cups cooked shredded chicken
- 1 cup shredded cheddar or Mexican blend cheese
- 1/2 cup sour cream or Greek yogurt
- 1/4 cup buffalo sauce or ranch
- 4 large flour tortillas
- Butter or oil for pan-frying
- Fresh cilantro and green onions
How to make it
- In a medium mixing bowl, combine your shredded chicken with the cheese, sour cream, and your choice of sauce until everything is perfectly coated and creamy.
- Lay your tortillas flat and place a generous portion of the chicken mixture in the center, folding in the sides and rolling them up tightly.
- Heat a large skillet over medium heat with a small amount of butter or oil to ensure a perfectly even, golden-brown crust.
- Place the wraps seam-side down in the pan and cook for 3-4 minutes per side, pressing down slightly to help the cheese melt and the tortilla crisp.
- Slice them on a diagonal to show off that beautiful melty interior and serve with extra dipping sauce and a sprinkle of fresh herbs.
Slow Cooker Cheesy Meat Lasagna

Why we love this
Even as the weather warms, there is a deep, soul-level comfort in a lasagna that has been bubbling away, filling your home with the scent of garlic and herbs. Using a slow cooker for lasagna is the ultimate lifestyle hack, as it creates incredibly tender noodles and a rich, deep sauce that you just can’t get from a quick bake. It is the perfect “set it and forget it” meal for a lazy Sunday afternoon spent gardening or reading a book. Each layer is a soft, cheesy embrace that brings the whole family together at the dinner table.
Ingredients
- 1 lb ground beef or Italian sausage
- 1 jar (24 oz) of your favorite marinara sauce
- 15 oz ricotta cheese
- 2 cups shredded mozzarella cheese
- 1/2 cup grated Parmesan
- 1 egg (to bind the ricotta)
- 1 box no-boil lasagna noodles
How to make it
- Brown your meat in a skillet until fully cooked, drain the excess fat, and stir in the marinara sauce to create a hearty, thick base.
- In a small bowl, whisk together the ricotta cheese, half of the Parmesan, and the egg to create a smooth, seasoned cheese filling.
- Spread a thin layer of meat sauce at the bottom of your slow cooker, followed by a layer of noodles (break them to fit the shape of the pot).
- Layer on more sauce, a portion of the ricotta mixture, and a handful of mozzarella; repeat these layers until all ingredients are used, ending with a thick layer of cheese.
- Cover and cook on low for 3 to 4 hours until the noodles are tender and the cheese is bubbly and golden around the edges.
Mother’s Day Floral Cake Designs

Why we love this
With Mother’s Day just around the corner, these floral-inspired cake designs are taking over our social feeds with their breathtaking, ethereal beauty. There is something so poetic about using edible petals and delicate buttercream blooms to celebrate the women who nurture us. Whether you use real pansies or pipe intricate roses, these cakes are more than just a dessert; they are a heartfelt, edible bouquet. They represent the delicate beauty of spring and the deep love we feel for the matriarchs in our lives.
Ingredients
- 1 prepared vanilla or lemon sponge cake
- 4 cups vanilla buttercream frosting
- Edible flowers (violas, pansies, or marigolds)
- Piping bags and assorted floral tips
- Gel food coloring (pastel pinks, yellows, and greens)
- Offset spatula for smoothing
How to make it
- Start by applying a thin “crumb coat” of frosting to your cake and chilling it for 20 minutes to ensure a perfectly smooth final surface.
- Apply a generous final layer of pastel-colored buttercream, using your offset spatula to create a rustic, textured look or a sleek, modern finish.
- If using fresh edible flowers, ensure they are washed and dried, then gently press them into the sides and top of the cake in a cascading pattern.
- For piped flowers, tint small batches of frosting and use a petal tip to create delicate blooms directly onto the cake or on parchment paper to freeze and apply later.
- Finish with a light dusting of powdered sugar or a few sprigs of fresh mint to mimic leaves, creating a stunning garden-scape on a plate.
Easy Sourdough Discard Crackers

Why we love this
For my sourdough-loving friends, this trend is a total game-changer for reducing waste while creating something absolutely addictive and artisanal. These crackers are incredibly thin, shatteringly crisp, and carry that sophisticated tang that only sourdough can provide. They are the perfect addition to a spring charcuterie board, pairing beautifully with soft cheeses and seasonal fruits. It’s a simple, rustic process that makes you feel deeply connected to the traditional art of baking while producing a snack that everyone will beg for.
Ingredients
- 1 cup sourdough discard (unfed)
- 1/4 cup melted butter or olive oil
- 1 cup all-purpose flour
- 1 tablespoon dried herbs (rosemary or thyme)
- 1/2 teaspoon sea salt (plus extra for topping)
- 1/2 teaspoon garlic powder
How to make it
- In a medium bowl, stir together the sourdough discard, melted butter, flour, herbs, and seasonings until a soft, slightly tacky dough forms.
- Divide the dough into two pieces and roll each one out directly onto a sheet of parchment paper until it is paper-thin (the thinner, the better!).
- Lightly brush the top of the dough with a tiny bit more oil or water and sprinkle with extra sea salt or even a bit of everything bagel seasoning.
- Use a pizza cutter to score the dough into squares or rectangles, which will make them much easier to break apart once they are baked.
- Bake at 350°F for 20-25 minutes, keeping a close eye on them until they are golden brown and completely crisp, then let them cool before snapping apart.
Elegant Tea Party Sandwiches

Why we love this
Spring is the season of garden parties and afternoon teas, and nothing says “refined elegance” quite like a tray of perfectly manicured finger sandwiches. These aren’t your average lunchbox bites; they are dainty, colorful, and packed with fresh, sophisticated flavors like cucumber, dill, and smoked salmon. They evoke a sense of timeless charm and encourage us to slow down and savor the company of our loved ones. Each tiny sandwich is a little celebration of the season’s lightest and brightest ingredients, served with a side of grace.
Ingredients
- 1 loaf of thin-sliced white or whole wheat bread
- 8 oz softened cream cheese
- 1 English cucumber, thinly sliced
- 2 tablespoons fresh dill, chopped
- 1 tablespoon lemon zest
- Smoked salmon or thinly sliced radishes
- Salt and white pepper to taste
How to make it
- Mix your softened cream cheese with the fresh dill, lemon zest, salt, and pepper until it is light, airy, and full of citrusy fragrance.
- Remove the crusts from all your bread slices using a sharp knife to ensure perfectly clean, straight edges for that classic tea party look.
- Spread a generous layer of the herbed cream cheese onto two slices of bread, then layer your thinly sliced cucumbers or salmon in the middle.
- Press the sandwiches together gently and cut them into three long fingers, small squares, or even decorative triangles.
- Keep them covered with a slightly damp paper towel until ready to serve to prevent the bread from drying out, ensuring they stay soft and fresh.
Homemade Crispy Mozzarella Sticks

Why we love this
There is a reason why the “cheese pull” video trend never dies—it is pure, unadulterated joy in food form. Making mozzarella sticks at home is a viral favorite because you can achieve a level of crunch and cheesiness that frozen versions simply can’t touch. These are the ultimate crowd-pleaser for spring movie nights or backyard gatherings, offering a nostalgic snack with a gourmet, homemade twist. Watching that golden crust break open to reveal a molten, stretchy center is a moment of pure kitchen magic that never gets old.
Ingredients
- 12 pieces of string cheese (mozzarella sticks)
- 1 cup all-purpose flour
- 2 eggs, beaten
- 2 cups Italian seasoned breadcrumbs
- 1/2 cup grated Parmesan cheese
- Oil for frying
- Marinara sauce for dipping
How to make it
- The most important step: freeze your string cheese for at least 1 hour before starting to prevent them from melting too quickly in the oil.
- Set up a breading station with three bowls: one with flour, one with the beaten eggs, and one with a mix of breadcrumbs and Parmesan.
- Dredge each cheese stick in flour, dip it thoroughly in the egg, and then coat it generously in the breadcrumb mixture, pressing firmly to adhere.
- For an extra-thick crust, dip the coated stick back into the egg and then into the breadcrumbs a second time (the double-dredge method).
- Fry the sticks in 350°F oil for just 1-2 minutes until they are perfectly golden, then drain on a wire rack and serve immediately while hot.
Fresh Spring Vegetable Soup

Why we love this
When the first sprouts of asparagus and peas appear at the market, this fresh vegetable soup is the first thing I think of making. It is a bowl of pure liquid sunshine, light enough for a warm day but hearty enough to feel like a proper meal. The vibrant green color is so aesthetically pleasing that it practically begs to be photographed and shared with the world. It’s a wonderful way to celebrate the arrival of new produce and give your body a gentle, hydrating boost after the heavy meals of winter.
Ingredients
- 1 bunch asparagus, trimmed and chopped
- 1 cup fresh or frozen peas
- 2 leeks, white parts only, sliced
- 2 cloves garlic, minced
- 4 cups vegetable broth
- 1/2 cup heavy cream or coconut milk (optional)
- Fresh mint and lemon juice for finishing
How to make it
- Sauté your sliced leeks and garlic in a bit of butter or olive oil in a large pot until they are soft, translucent, and smelling heavenly.
- Add the chopped asparagus and vegetable broth, bring the mixture to a gentle simmer, and cook for about 8-10 minutes until the veggies are tender.
- Stir in the peas during the last 2 minutes of cooking to keep their bright green color and snappy texture perfectly intact.
- Use an immersion blender to purée the soup until it is completely smooth and silky, then stir in the cream if you’re looking for a richer finish.
- Finish with a squeeze of fresh lemon juice and a few torn mint leaves to brighten the flavors and add a refreshing spring aroma.
Fruit Infused Spring Refreshers

Why we love this
Hydration has never looked so glamorous or tasted so delightfully sweet as it does with these fruit-infused spring refreshers. These drinks are all about the visual appeal—clear glass pitchers filled with colorful berries, citrus slices, and fresh herbs dancing in sparkling water. They are the perfect alcohol-free alternative for any spring gathering, offering a sophisticated and healthy way to stay cool. Every sip feels like a splash of garden-fresh goodness, making the simple act of drinking water feel like a luxurious self-care ritual.
Ingredients
- 1 liter sparkling water or club soda
- 1 cup sliced strawberries or raspberries
- 1/2 cucumber, thinly sliced
- A handful of fresh mint or basil leaves
- 1 lemon or lime, sliced
- Honey or agave (optional sweetener)
- Plenty of ice
How to make it
- In a large glass pitcher, layer your sliced fruits, cucumber, and herbs to create a beautiful, colorful base for your drink.
- Use a long spoon to gently muddle the fruit and herbs at the bottom, just enough to release their natural juices and fragrant oils.
- Fill the pitcher halfway with ice cubes, which will help keep the fruit submerged and ensure your refresher stays ice-cold for serving.
- Pour the sparkling water over the top, stirring gently to combine the flavors without losing all of those lovely, dancing bubbles.
- Serve in tall glasses with an extra sprig of mint and a straw, letting everyone enjoy the crisp, clean taste of a spring garden in a glass.
Embracing the Season of Flavor
My loves, I hope these trends inspire you to step into your kitchen with a renewed sense of wonder and joy. Spring is such a fleeting, beautiful season, and there is no better way to honor it than by creating something delicious to share with those you hold dear. Whether you’re baking a floral cake for a special mom or simply sipping on a fruit-infused water, remember that the magic is in the details and the love you pour into every dish. Go forth and create something beautiful today!