

Why This Viral Simple Food Board Is the Only Hack You Need
Have you ever walked into a room and felt an immediate sense of warmth just by looking at the dinner table? For years, I struggled to find that perfect balance between being a ‘Pinterest mom’ and actually enjoying the company of my friends. I used to spend hours sequestered in the kitchen, missing the laughter and the stories, until I discovered the magic of the simple food board—a viral trend that has completely transformed the way I host and eat.
The beauty of this concept lies in its versatility and its ability to turn a standard meal into a communal experience. It’s about more than just food; it’s about the textures, the vibrant colors, and the shared joy of picking your favorite bites from a curated spread. Whether you are hosting a festive gathering or just trying to make Tuesday night feel special, these ten foundational recipes will turn your board into a masterpiece that everyone will be talking about for weeks.
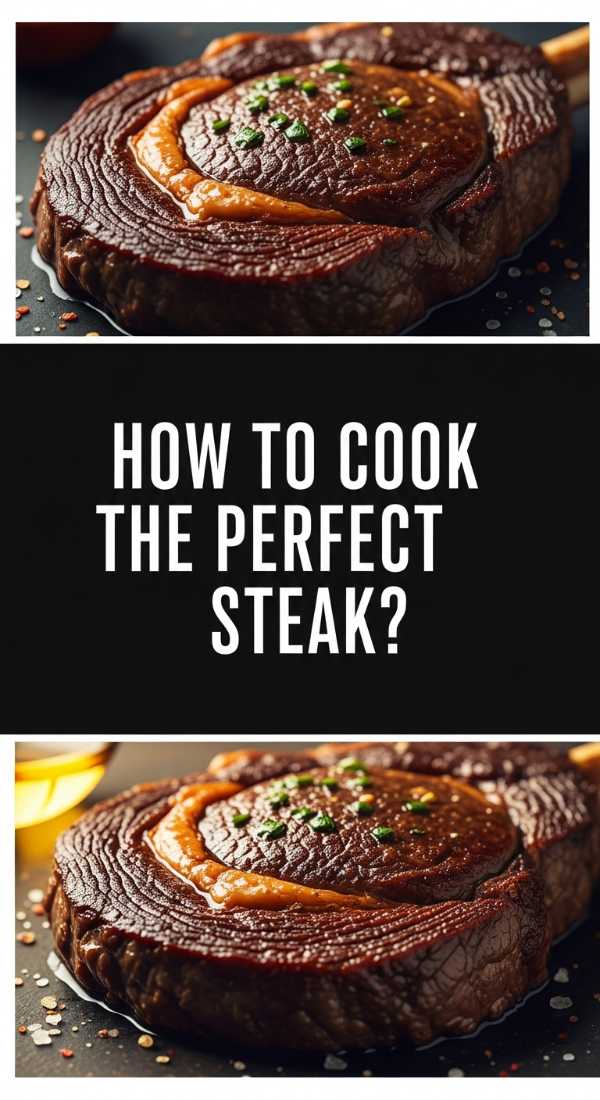
How to cook perfect steak?
Why we love this
There is nothing quite as primal and satisfying as a perfectly cooked steak, boasting a deeply caramelized crust that gives way to a butter-tender, pink center. When you slice into it, the aroma of seared protein and browned butter fills the air, promising a rich, savory explosion of flavor in every bite. The contrast between the salty, crunchy exterior and the melt-in-your-mouth interior creates a culinary symphony that feels like a luxury restaurant experience right in your own dining room. It is the ultimate centerpiece for any high-end food board, commanding attention and rewarding the palate.
Ingredients
- 2 thick-cut Ribeye or New York Strip steaks
- 2 tablespoons high-smoke point oil (grapeseed or avocado)
- 3 tablespoons unsalted butter
- 4 cloves garlic, smashed
- Fresh rosemary and thyme sprigs
- Flaky sea salt and cracked black pepper
How to make it
- Remove steaks from the refrigerator 45 minutes before cooking to reach room temperature, ensuring an even cook. Pat them completely dry with paper towels; moisture is the enemy of a good sear.
- Season aggressively with kosher salt and black pepper on all sides, including the edges.
- Heat a heavy cast-iron skillet over high heat until it is wisps of smoke start to appear. Add the oil and swirl to coat.
- Carefully lay the steaks away from you into the pan. Sear for 3-4 minutes without moving them until a deep brown crust forms.
- Flip the steaks and immediately add the butter, garlic, and herbs to the pan.
- As the butter melts and foams, tilt the pan and use a large spoon to continuously baste the steaks with the hot, aromatic butter for another 3 minutes.
- Check the internal temperature with a meat thermometer: 130°F (54°C) for medium-rare.
- Remove to a cutting board and let rest for at least 10 minutes before slicing against the grain to keep the juices locked inside.
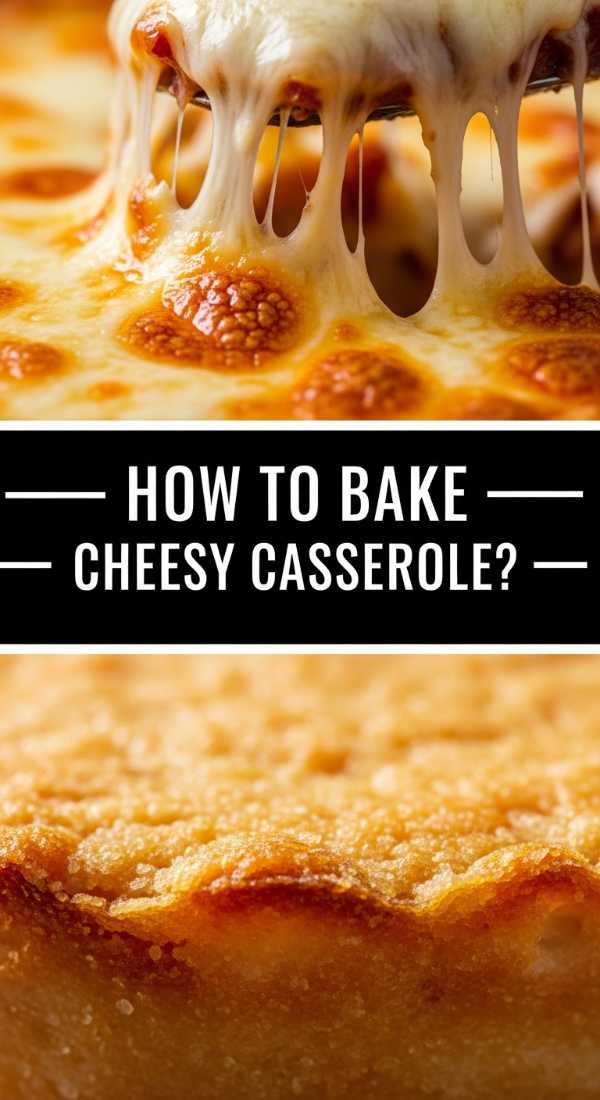
How to bake cheesy casserole?
Why we love this
A cheesy casserole is the ultimate hug in food form, offering a bubbly, golden-brown canopy that hides a treasure trove of creamy textures beneath. As it bakes, the kitchen fills with the scent of toasted cheese and savory cream, a smell that instantly signals comfort and home. Each scoop pulls long, gooey strings of melted mozzarella and cheddar, coating every morsel of pasta or vegetable in a velvety, rich sauce. It’s a crowd-pleaser that brings a sense of rustic charm to your food board, inviting everyone to dig in for a second helping.
Ingredients
- 1 lb cooked pasta (rotini or penne)
- 2 cups shredded sharp cheddar cheese
- 1 cup shredded mozzarella
- 2 cups whole milk
- 1/4 cup all-purpose flour
- 1/4 cup butter
- 1/2 teaspoon smoked paprika
- 1 cup Panko breadcrumbs tossed with melted butter
How to make it
- Preheat your oven to 375°F (190°C) and lightly grease a large baking dish.
- In a saucepan, melt the butter over medium heat. Whisk in the flour and cook for 1-2 minutes until it smells slightly nutty but hasn’t browned.
- Gradually whisk in the milk, stirring constantly to avoid lumps. Continue cooking until the sauce thickens enough to coat the back of a spoon.
- Remove from heat and stir in 1.5 cups of the cheddar and all the mozzarella until smooth. Season with salt, pepper, and paprika.
- Fold the cooked pasta into the cheese sauce until every piece is fully submerged and coated.
- Transfer the mixture to the baking dish and top with the remaining cheddar and the buttered Panko breadcrumbs.
- Bake for 20-25 minutes until the sauce is bubbling around the edges and the breadcrumbs are a deep golden brown. Let sit for 5 minutes before serving to allow the sauce to set.
How to grill juicy burgers?

Why we love this
The sound of a burger patty hitting a hot grill is the quintessential anthem of summer, bringing with it the smoky, charred aroma that defines outdoor dining. A truly juicy burger should have a slightly craggy, caramelized exterior that protects a succulent, moist interior that drips with flavor the moment you take a bite. When paired with a toasted, pillowy brioche bun and crisp toppings, it provides a textural playground of soft, crunchy, and savory elements. These sliders or full-sized patties add a playful, casual energy to your food board that guests find irresistible.
Ingredients
- 1.5 lbs ground beef (80/20 lean-to-fat ratio is essential)
- 1 tablespoon Worcestershire sauce
- 1 teaspoon garlic powder
- Salt and freshly ground black pepper
- Slices of American or Swiss cheese
- Brioche buns, split and buttered
How to make it
- Gently mix the ground beef with Worcestershire sauce and garlic powder. Do not overwork the meat, or the burgers will become tough and dense.
- Form the meat into patties about 3/4 inch thick. Use your thumb to make a small indentation in the center of each patty; this prevents them from puffing up into balls on the grill.
- Preheat your grill to high heat (around 450°F). Clean and oil the grates to prevent sticking.
- Season the outside of the patties generously with salt and pepper right before they go on the grill.
- Place patties on the grill and sear for 4 minutes without pressing down on them (pressing squeezes out the juices!).
- Flip the burgers and immediately place a slice of cheese on each. Close the grill lid for 2-3 minutes to melt the cheese and reach medium doneness (160°F internal).
- Toast the buttered buns on the edge of the grill for 30 seconds until golden.
- Let the patties rest for 2 minutes before assembling to ensure the juices redistribute through the meat.
How to make creamy pasta?

Why we love this
There is a sophisticated elegance to a bowl of creamy pasta that feels like a warm embrace for the soul, with its silky sauce clinging to every curve of the noodle. The aroma of garlic sautéed in butter combined with the sharp, salty tang of freshly grated Parmesan creates an intoxicating scent that draws everyone to the kitchen. Each forkful should be smooth and luxurious, with a richness that is balanced by a hint of black pepper or fresh herbs. It serves as a beautiful, flowing element on a food board, acting as a decadent base for meats or vegetables.
Ingredients
- 1 lb Fettuccine or Pappardelle
- 1 cup heavy cream
- 1/2 cup unsalted butter
- 1.5 cups freshly grated Parmesan cheese
- 3 cloves garlic, minced
- Fresh parsley, chopped
- Reserved pasta water
How to make it
- Bring a large pot of heavily salted water to a boil. Cook the pasta until it is just shy of al dente (usually 1-2 minutes less than the package directions).
- While the pasta cooks, melt the butter in a large skillet over medium-low heat. Add the minced garlic and sauté for 1 minute until fragrant but not browned.
- Pour in the heavy cream and bring to a gentle simmer. Let it reduce slightly for 3-4 minutes.
- Before draining the pasta, reserve at least 1 cup of the starchy pasta water. This is the secret to a smooth sauce.
- Add the hot pasta directly into the skillet with the cream. Sprinkle the Parmesan cheese over the top.
- Toss vigorously with tongs, adding the reserved pasta water a splash at a time. The starch in the water emulsifies with the cheese and fat to create a glossy, clingy sauce.
- Continue tossing until the sauce thickens and coats the noodles perfectly. Season with salt and lots of cracked black pepper.
- Garnish with fresh parsley and serve immediately while the sauce is at its creamiest.
How to fry crispy chicken?

Why we love this
Crispy fried chicken is a masterpiece of texture, offering a loud, satisfying crunch that shatters to reveal steaming, tender meat that is seasoned to the bone. The golden-brown ridges of the breading trap pockets of spice and savory oils, ensuring that every mouthful is an explosion of flavor. It has a nostalgic, festive quality that reminds us of picnics and family reunions, making it a high-energy addition to any viral food board. The contrast between the hot, spiced coating and a cool dipping sauce makes it an addictive snack that vanishes in minutes.
Ingredients
- 2 lbs chicken thighs or drumsticks
- 2 cups buttermilk
- 2 cups all-purpose flour
- 1/2 cup cornstarch (for extra crunch)
- 1 tablespoon paprika, 1 teaspoon cayenne, 1 tablespoon garlic powder
- 1 quart vegetable oil for frying
How to make it
- Marinate the chicken in buttermilk and a pinch of salt for at least 4 hours (or overnight) to tenderize the meat.
- In a large bowl, whisk together the flour, cornstarch, and all the spices. This dry mix is where the flavor lives.
- Dredge each piece of chicken in the flour mixture, pressing firmly to ensure the coating sticks. Shake off the excess and dip it back into the buttermilk, then back into the flour for a ‘double-dredge’ that creates those iconic craggy bits.
- Heat the oil in a deep heavy-bottomed pot or Dutch oven to 350°F (175°C). Use a kitchen thermometer to maintain this temperature.
- Carefully lower 3-4 pieces of chicken into the oil. Do not overcrowd the pot, as this drops the oil temperature and leads to greasy chicken.
- Fry for 12-15 minutes, turning occasionally, until the crust is a deep mahogany brown and the internal temperature reaches 165°F.
- Drain the chicken on a wire rack rather than paper towels; the rack allows air to circulate, keeping the bottom just as crispy as the top.
How to sear tender steak?

Why we love this
Searing a tender steak is all about the art of the ‘Maillard reaction,’ creating those complex, savory flavors that only come from high-heat contact. This method focuses on a quick, intense sear that locks in all the natural juices, resulting in a cut of meat that feels remarkably supple and elegant on the tongue. The addition of aromatic herbs and garlic during the final moments of cooking infuses the meat with an earthy depth that lingers long after the meal is over. It’s a refined technique that elevates the steak from a simple protein to the star of your food board presentation.
Ingredients
- 2 Filet Mignon or Top Sirloin steaks
- High-quality sea salt
- 2 tablespoons avocado oil
- 4 tablespoons unsalted butter
- Fresh rosemary
How to make it
- Salt your steaks 24 hours in advance and leave them uncovered in the fridge if possible; this ‘dry brines’ the meat for maximum tenderness.
- Pat the steaks dry and let them sit at room temperature for 30 minutes.
- Heat a stainless steel or cast-iron pan until it is screaming hot. Add the oil.
- Place the steaks in the pan. For a tender cut like filet, sear for exactly 2.5 minutes per side for a perfect medium-rare.
- In the final minute of cooking, add the butter and rosemary.
- Tilt the pan and spoon the foaming butter over the steak continuously. This ‘aromatic bath’ adds a professional finish and helps cook the sides.
- Remove the steak when the internal temp hits 125°F (it will rise to 130-135°F while resting).
- Rest the meat for 8 minutes. This allows the fibers to relax, ensuring every bite is as tender as possible.
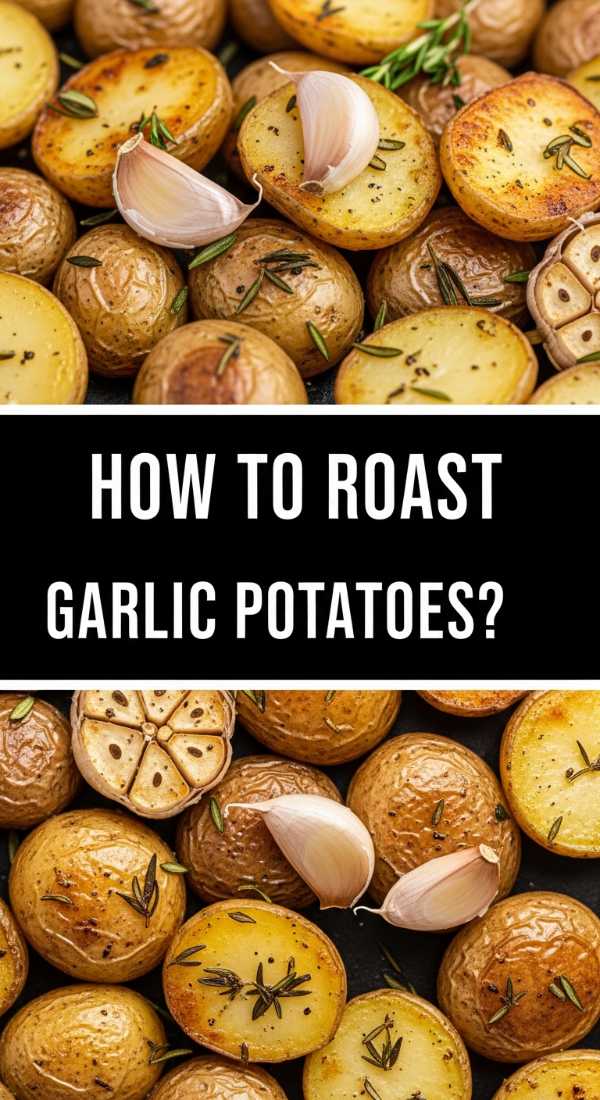
How to roast garlic potatoes?
Why we love this
Roast garlic potatoes are the ultimate side dish, featuring a glass-like crispy skin that cracks open to reveal a fluffy, cloud-like interior that tastes of pure comfort. The roasted garlic becomes sweet and mellow in the oven, perfuming the potatoes with a rich, caramelized flavor that is far superior to raw garlic. Every golden edge provides a salty crunch, making them incredibly moreish and the perfect vessel for soaking up juices from other items on your board. They bring a rustic, earthy aesthetic that grounds the more decadent elements of your spread.
Ingredients
- 2 lbs Yukon Gold or Russet potatoes, cubed
- 1/4 cup extra virgin olive oil
- 1 entire head of garlic, cloves peeled and smashed
- 1 teaspoon dried oregano
- 1 teaspoon sea salt
- Fresh parsley for garnish
How to make it
- Preheat your oven to 425°F (220°C). Place a large baking sheet inside while it heats; a hot pan ensures the potatoes start crisping immediately.
- Parboil the potato cubes in salted water for 5-7 minutes until the edges are just soft. Drain and shake them vigorously in the pot to ‘rough up’ the edges—this creates more surface area for crisping.
- In a large bowl, toss the potatoes with olive oil, smashed garlic, oregano, and salt until thoroughly coated.
- Carefully spread the potatoes onto the preheated baking sheet in a single layer. Do not crowd them, or they will steam instead of roast.
- Bake for 20 minutes, then use a spatula to flip them.
- Continue roasting for another 15-20 minutes until they are deep golden brown and audibly crunchy when moved.
- Toss with fresh parsley and an extra pinch of salt before serving hot.
How to smoke barbecue ribs?

Why we love this
There is a profound soulfulness to smoked barbecue ribs, with their signature pink smoke ring and a glaze that is both sticky, sweet, and provocatively spicy. The meat should be so tender that it gently tugs away from the bone, releasing a deep, woody aroma that speaks of hours of patience and low-temperature magic. The combination of a dry rub’s spice and the wet lacquer of the sauce creates layers of flavor that evolve with every bite. Adding a rack of these to your food board provides a dramatic, ‘wow-factor’ centerpiece that feels like a true celebration of craft.
Ingredients
- 2 racks of Baby Back Ribs
- 1/2 cup brown sugar
- 2 tablespoons paprika, 1 tablespoon black pepper, 1 tablespoon salt, 1 teaspoon cumin
- 1 cup your favorite BBQ sauce
- Apple juice in a spray bottle
How to make it
- Remove the silver skin membrane from the back of the ribs using a paper towel for grip; this allows the smoke to penetrate the meat.
- Combine the sugar and spices to create a dry rub. Coat the ribs generously on all sides, pressing the spices into the meat.
- Prepare your smoker or grill for indirect heat at a steady 225°F (107°C) using hickory or applewood chips.
- Place the ribs on the grate, bone-side down. Smoke for 3 hours, spraying with apple juice every 45 minutes to keep them moist.
- Wrap the ribs tightly in heavy-duty aluminum foil with a splash of apple juice inside. Return to the smoker for 2 more hours; this ‘Texas Crutch’ tenderizes the meat.
- Unwrap the ribs and brush them with a thick layer of BBQ sauce.
- Place them back on the heat for 30-60 minutes until the sauce has ‘tacked up’ and become a shiny, sticky glaze.
- Let the ribs rest for 15 minutes before slicing between the bones.
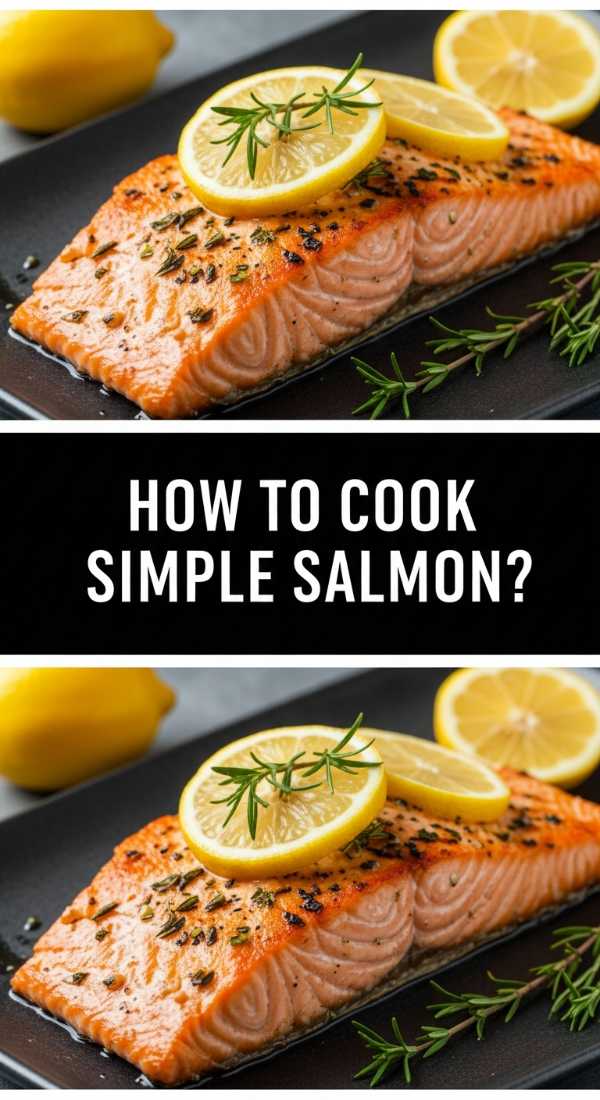
How to cook simple salmon?
Why we love this
Simple salmon is a testament to the idea that the best ingredients need very little intervention to shine, offering a clean, buttery flavor and a delicate, flaky texture. When cooked correctly, the skin becomes as crisp as a cracker while the flesh remains moist and translucent, vibrating with the brightness of fresh lemon and herbs. It’s a lighter, more refreshing addition to a food board that provides a healthy balance to heavier meats and cheeses. The vibrant pink hue of the fish adds a stunning pop of color that makes the entire board look professional and thoughtfully curated.
Ingredients
- 4 Salmon fillets (skin-on)
- 2 tablespoons olive oil
- 1 lemon, thinly sliced
- Fresh dill and parsley
- Kosher salt and cracked pepper
How to make it
- Take the salmon out of the fridge 15 minutes before cooking. Pat the skin extremely dry—any moisture will prevent it from getting crispy.
- Season both sides with salt and pepper.
- Heat olive oil in a non-stick or well-seasoned stainless steel skillet over medium-high heat.
- Place the salmon fillets in the pan skin-side down. Press down gently with a spatula for the first 30 seconds to ensure the skin makes full contact with the heat.
- Cook for 5-6 minutes on the skin side without moving the fish. You will see the color change creeping up the sides of the fillet.
- Carefully flip the salmon. Cook for only 1-2 more minutes. The goal is an internal temperature of 125°F for a moist, medium-rare center.
- Remove from the pan and squeeze fresh lemon juice over the top immediately.
- Garnish with fresh dill and serve. The skin should be salty and crisp enough to eat like a chip.
How to bake apple pie?

Why we love this
Baking an apple pie is like capturing the essence of autumn in a buttery, flaky crust, releasing a nostalgic scent of cinnamon and warm sugar that makes any house feel like a home. The filling should be a harmonious mix of tart, firm apples bathed in a thick, amber syrup that oozes slightly when sliced. The crust provides a golden, sculptural frame that is both tender and crisp, offering a satisfying snap before melting away. It’s the perfect sweet finale for your food board, providing a rustic elegance that encourages guests to linger over coffee and conversation.
Ingredients
- 6-7 large Granny Smith or Honeycrisp apples, peeled and sliced
- 3/4 cup sugar
- 2 tablespoons all-purpose flour
- 1 tablespoon cinnamon, 1/4 teaspoon nutmeg
- Double pie crust (homemade or high-quality store-bought)
- 1 egg (for egg wash)
- 1 tablespoon butter, cubed
How to make it
- Preheat your oven to 425°F (220°C).
- In a large bowl, toss the sliced apples with sugar, flour, cinnamon, and nutmeg. Let them sit for 10 minutes to release their juices.
- Roll out the bottom crust and fit it into a 9-inch pie plate. Fill it with the apple mixture, heaping them slightly in the center. Dot the top of the apples with small cubes of butter.
- Roll out the second crust and place it over the apples. You can do a full cover with air vents cut in, or a lattice design for a more viral, ‘aesthetic’ look.
- Crimp the edges of the top and bottom crusts together to seal in the steam.
- Brush the entire top crust with a beaten egg and sprinkle with a little extra sugar for sparkle and crunch.
- Bake at 425°F for the first 15 minutes, then reduce the heat to 375°F (190°C) and bake for another 40-45 minutes.
- If the edges are browning too fast, cover them with foil. The pie is done when the crust is deep golden and the filling juices are bubbling through the vents.
- Crucial step: Let the pie cool for at least 2 hours before slicing so the filling can set properly!
Conclusion
Creating a viral simple food board is about more than just following recipes; it’s about embracing the joy of variety and the beauty of shared meals. By mastering these ten foundational dishes, you have the tools to create a stunning, flavorful, and memorable spread that caters to every craving. Remember, the ‘hack’ isn’t just the board itself—it’s the way it brings people together to celebrate good food and even better company. So, grab your largest platter, start cooking, and watch your dining room turn into the most popular spot in town!