
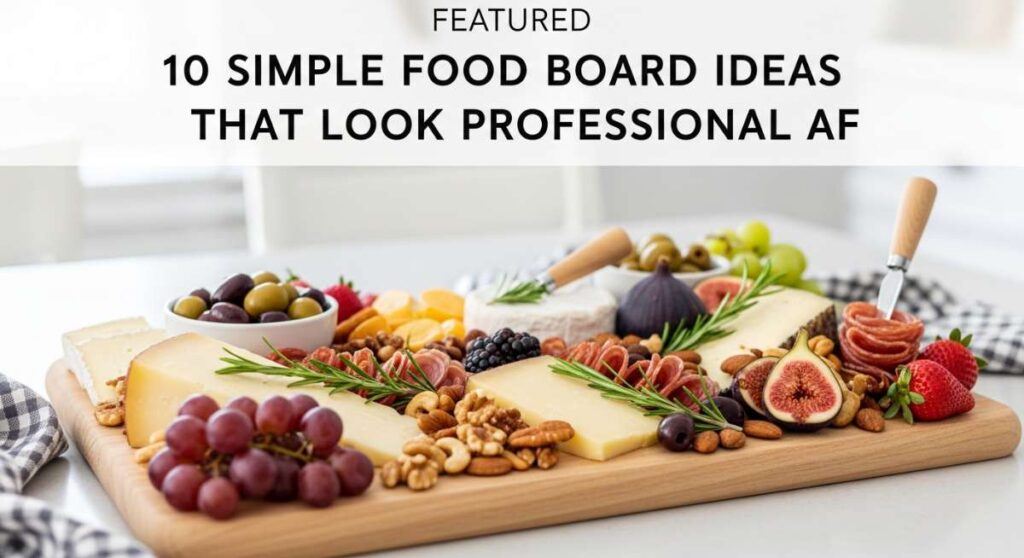
There is something inherently magical about a perfectly curated food board. You know the ones I mean—the ones that stop your scroll on Pinterest and make you wonder if you need a professional catering degree just to host a casual Friday night dinner. For the longest time, I felt like my hosting game was stuck in the ‘chips-in-a-bag’ phase, but I’ve realized the secret isn’t in complex recipes; it’s all in the assembly. A food board isn’t just a meal; it’s a conversation starter, a centerpiece, and a total vibe shifter that makes your guests feel incredibly special from the moment they walk through the door.
Today, I’m sharing my ultimate guide to creating food boards that look professional AF without the stress. Whether you’re huddled around a campfire, hosting a sophisticated baby shower, or just trying to eat a little healthier on a Tuesday, these ten ideas are designed to be foolproof and visually stunning. We’re going beyond the basic cheese and crackers to explore themes that range from smoky BBQ spreads to delicate Japanese-inspired platters. Grab your favorite wooden board and let’s get styling!
HOW TO COOK PROTEIN FOODS?

Why we love this
A protein-focused board is the ultimate crowd-pleaser for the meat lovers in your life, offering a hearty and satisfying experience that feels like a steakhouse dinner transformed into a social event. Imagine the rich, savory aroma of perfectly seared ribeye mingling with the herbal notes of fresh rosemary and the sharp tang of a spicy chimichurri. The texture is a symphony of crispy, caramelized crusts and tender, juicy interiors that practically melt on the tongue. It’s a rustic, masculine-yet-refined aesthetic that anchors a party with its robust flavors and high-quality ingredients.
Ingredients
- Prime Ribeye or New York Strip steak
- Chicken thighs with skin-on
- Smoked kielbasa or artisanal sausages
- Fresh rosemary and thyme sprigs
- Maldon flaky sea salt
- Roasted garlic cloves
- Dijon mustard and chimichurri sauce
How to make it
- Begin by tempering your meats; take them out of the fridge at least 45 minutes before cooking so they reach room temperature, ensuring an even cook throughout.
- Pat the steak and chicken bone-dry with paper towels to ensure a superior crust; moisture is the enemy of a good sear.
- Preheat a heavy cast-iron skillet over high heat until it is wisps of smoke are rising, then add a high-smoke-point oil like grapeseed.
- Place the steak in the pan, searing for 3-4 minutes per side without moving it, then add a knob of butter and aromatics, basting the meat continuously until the internal temperature reaches 130°F for medium-rare.
- Let the meats rest for at least 10 minutes on a wire rack before slicing against the grain to preserve all those precious juices.
- Arrange the sliced proteins in fan shapes on your board, garnishing with charred rosemary and bowls of dipping sauces.
HOW TO GRILL BBQ FOODS?

Why we love this
Nothing screams ‘summer’ like the smoky, charred goodness of a BBQ board, evoking memories of backyard hangouts and golden hour sunsets. The sensory experience is dominated by the sticky, sweet-and-spicy glaze of ribs that pull cleanly away from the bone, paired with the crunch of charred corn. The deep mahogany hues of the grilled meats contrasted against bright red peppers and yellow corn make this board a visual masterpiece. It’s messy, it’s tactile, and it’s deeply comforting, making everyone feel right at home as they dig in with their hands.
Ingredients
- Baby back ribs
- Chicken wings
- Corn on the cob
- Bell peppers and red onions
- Homemade or high-quality BBQ sauce
- Pickled jalapeños and red onions
- Honey butter for the corn
How to make it
- Set up your grill for two-zone cooking: create a hot direct-heat side and a cooler indirect-heat side by stacking coals or adjusting gas burners.
- Season your ribs with a dry rub 24 hours in advance, then cook them on the indirect side at 275°F for about 3 hours until they are tender but not falling apart.
- For the wings, start them on the hot side to crisp the skin, then move them to the cool side to finish cooking through, tossing them in sauce only in the last 5 minutes to prevent sugar-burn.
- Grill the corn directly over the flames, rotating every 2 minutes until charred spots appear and the kernels look translucent and plump.
- Glaze your proteins one final time right before pulling them off the heat to create a glossy, professional finish.
- Cluster the ribs and wings in the center of the board, surrounding them with the grilled veggies and small pots of extra sauce.
HOW TO MAKE JAPANESE FOODS?

Why we love this
The Japanese-inspired food board is an exercise in elegance, balance, and precision, offering a light yet flavor-packed alternative to traditional heavy platters. We love the vibrant pop of orange salmon against the pale green of wasabi and the deep black of nori sheets. The flavors are a masterclass in umami—salty soy, sweet mirin, and the clean, oceanic taste of fresh fish. It feels like a sophisticated spa day on a plate, providing a variety of textures from the creamy avocado to the snap of pickled ginger and the chewy bite of seasoned rice.
Ingredients
- Sashimi-grade salmon or tuna
- Sushi rice (seasoned with rice vinegar, sugar, and salt)
- Cucumber and avocado slices
- Edamame with sea salt
- Nori sheets (cut into small rectangles)
- Pickled ginger and wasabi
- Soy sauce and spicy mayo
How to make it
- Rinse your sushi rice under cold water at least 5 times until the water runs completely clear, then cook with a 1:1.1 water ratio for a firm texture.
- While hot, fold in a mixture of rice vinegar, sugar, and salt using a wooden paddle to avoid smashing the grains, then let it cool to room temperature.
- Using a very sharp Yanagiba or chef’s knife, slice your chilled fish into uniform 1/4-inch thick slices, pulling the knife in one single long stroke toward you.
- Prepare “hand-roll” components by slicing cucumbers and avocados into thin matchsticks and cutting nori into accessible squares.
- Assemble the board by placing mounds of rice in small bowls or shaped into small rectangles (nigiri-style) alongside the fish and veggies.
- Garnish with microgreens or sesame seeds to give it that high-end restaurant aesthetic.
HOW TO PREPARE SUMMER FOODS?

Why we love this
A Summer board is essentially sunshine on a platter, celebrating the peak ripeness of the season’s most colorful produce. It’s the feeling of a cool breeze on a humid day, featuring hydrating textures like crisp watermelon, juicy peaches, and snap peas that literally pop when you bite them. The aroma is fresh and herbaceous, thanks to generous helpings of mint and basil. This board is perfect for those days when it’s too hot to turn on the oven, offering a refreshing and light meal that keeps everyone energized and cool.
Ingredients
- Watermelon wedges
- Fresh peaches or nectarines
- Heirloom tomatoes
- Burrata or fresh mozzarella balls
- Snap peas and radishes
- Prosciutto di Parma
- Fresh basil leaves and balsamic glaze
How to make it
- Select your produce at peak ripeness; for tomatoes, this means they should feel heavy for their size and have a slight give when pressed.
- Slice the heirloom tomatoes into thick rounds and season immediately with flaky salt to draw out their juices and enhance their natural sweetness.
- For the peaches, slice them into wedges and lightly grill them for 60 seconds per side to caramelize the sugars and add a smoky depth.
- Place the burrata in the center of the board, breaking the outer skin slightly so the creamy stracciatella interior spills out beautifully.
- Wrap thin ribbons of prosciutto around the melon wedges or breadsticks to add a salty contrast to the sweet fruit.
- Finish the board with a heavy drizzle of high-quality extra virgin olive oil and a scatter of torn basil leaves.
HOW TO EAT DEBLOATING FOODS?
Why we love this
This board is a gift to your body, focusing on ingredients that soothe the digestive system while still feeling indulgent and ‘fancy.’ We love how it prioritizes function without sacrificing flavor, using hydrating cucumbers, anti-inflammatory ginger, and fermented foods that are rich in probiotics. The palette is bright and clean—think greens, whites, and soft yellows. It leaves you feeling light and nourished rather than sluggish, making it the perfect choice for a mid-week reset or a post-holiday gathering where everyone is craving something ‘clean.’
Ingredients
- English cucumbers (sliced into rounds)
- Celery sticks and fennel bulbs
- Asparagus spears (lightly steamed)
- Fermented sauerkraut or kimchi
- Grilled pineapple (contains bromelain for digestion)
- Lemon wedges and fresh ginger slices
- Hummus or Greek yogurt dip
How to make it
- Steam the asparagus for only 2-3 minutes until bright green and still snappy, then immediately plunge into an ice bath to stop the cooking and preserve the color.
- Slice the fennel bulb very thin using a mandoline to make it easier to digest and release its subtle anise-like flavor.
- Prepare a ‘digestive dip’ by mixing Greek yogurt with grated ginger, lemon juice, and a pinch of turmeric.
- Arrange the fermented foods in small ceramic ramekins to keep their juices from running into the fresh vegetables.
- Cut the pineapple into long spears and grill them briefly; the heat activates enzymes that help break down proteins in your gut.
- Style the board by layering the green veggies in a circular pattern, using the lemon and ginger as functional garnishes.
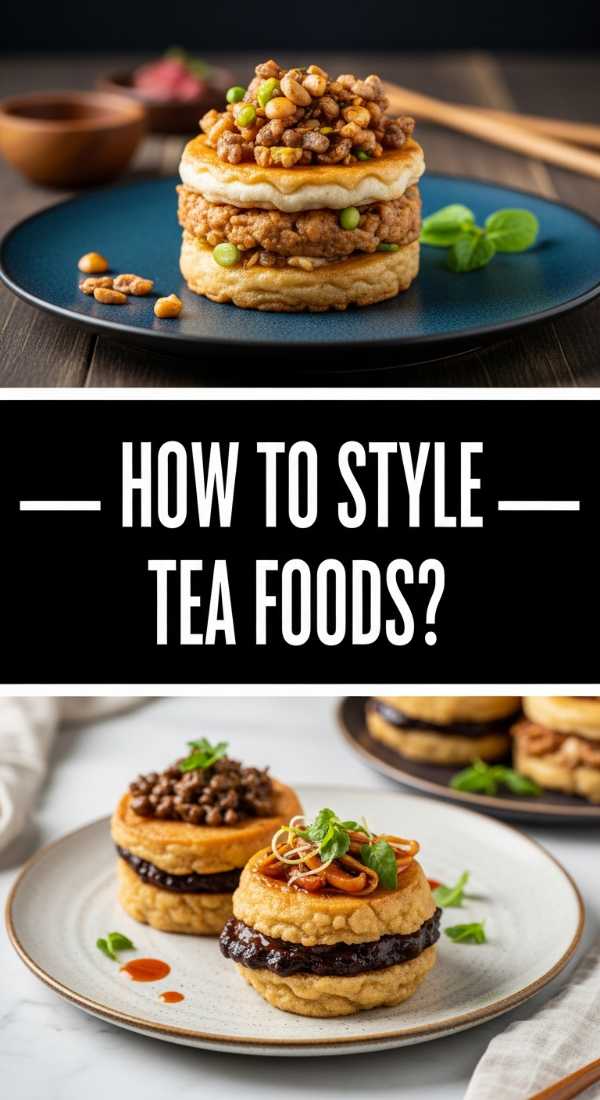
HOW TO STYLE TEA FOODS?
Why we love this
A tea board is pure whimsy and charm, transporting you to a quaint English garden or a high-end parlor. It’s all about the delicate balance between sweet and savory, featuring buttery scones, crustless sandwiches, and jewel-like pastries. The sensory experience is soft and refined—the crumbling of a warm scone, the silky texture of clotted cream, and the floral scent of Earl Grey. It’s the ultimate way to celebrate a friendship or a quiet afternoon, making the act of ‘snacking’ feel like a high-art ceremony.
Ingredients
- Mini scones (plain or raisin)
- Clotted cream and strawberry jam
- Cucumber and mint tea sandwiches
- Smoked salmon and cream cheese pinwheels
- Macarons or petit fours
- Fresh berries
- Edible flowers for garnish
How to make it
- For the sandwiches, use very fresh white bread, spread a thin layer of butter to the very edges to prevent sogginess, and remove the crusts with a serrated knife for a clean edge.
- Slice the sandwiches into precise triangles or ‘fingers’ exactly 1 inch wide for that classic professional look.
- If baking scones, ensure your butter is ice-cold and grate it into the flour to create those signature flaky layers.
- Place the clotted cream and jam in matching small bowls, using a spoon to create a ‘swirl’ or well in the center of each.
- Layer the board starting with the heaviest items (scones) and filling the gaps with the lighter sandwiches and colorful macarons.
- Intersperse the edible flowers and berries throughout the board to create a lush, garden-like aesthetic.
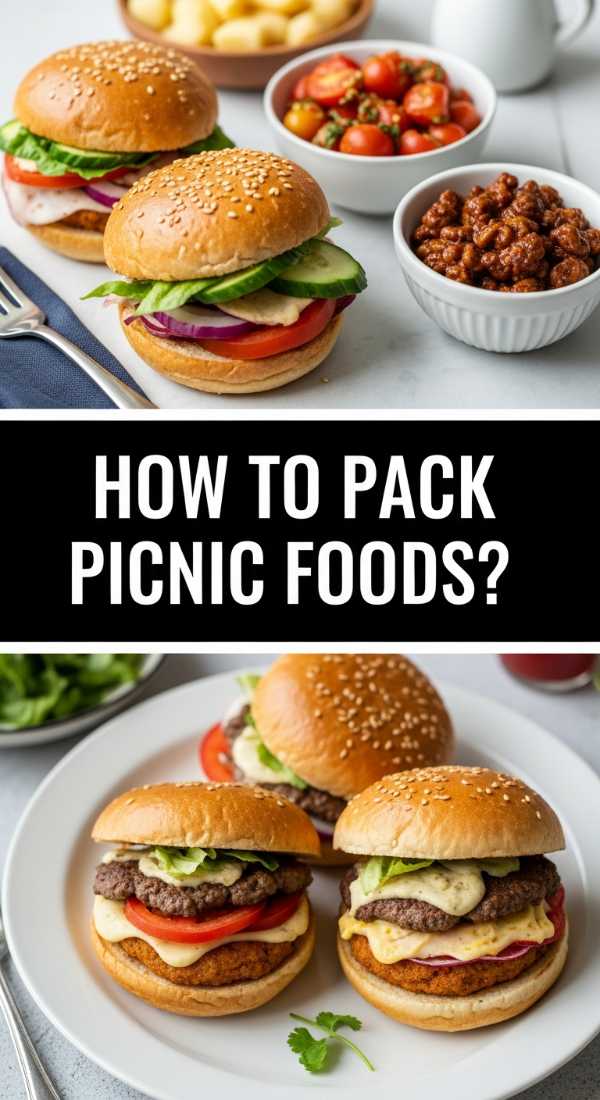
HOW TO PACK PICNIC FOODS?
Why we love this
The picnic board is the hero of the great outdoors, designed for portability and durability without losing an ounce of style. We love the rustic, ‘packable’ nature of these ingredients—sturdy cheeses that don’t sweat, crusty baguettes that hold their shape, and jars filled with colorful salads. It’s the feeling of freedom and adventure, smelling the fresh air while tearing into a loaf of bread by hand. This board is all about the joy of sharing a meal on a blanket, where the simplicity of the food matches the beauty of the landscape.
Ingredients
- Hard cheeses (Manchego, Aged Cheddar)
- Cured meats (Salami, Soppressata)
- A whole baguette or sourdough loaf
- Grapes and dried apricots
- Marinated olives and cornichons
- Pre-mixed pasta salad in a jar
- Nut mix (almonds, walnuts)
How to make it
- Focus on ‘temperature-stable’ foods; avoid soft cheeses like Brie which can become unappetizingly runny in the sun.
- Pre-slice the hard cheeses into triangles but leave the salami in larger chunks to be sliced on-site to keep it from drying out.
- Pack wet items like olives and pickles in leak-proof jars with a bit of their brine to maintain freshness.
- For the bread, don’t slice it beforehand; wrap it in a clean tea towel to keep the crust crunchy and the inside soft.
- When assembling on your portable board or blanket, use the baguette as a natural ‘divider’ between the meats and the fruits.
- Ensure you pack small bamboo picks or forks so guests can grab items without needing a full cutlery set.
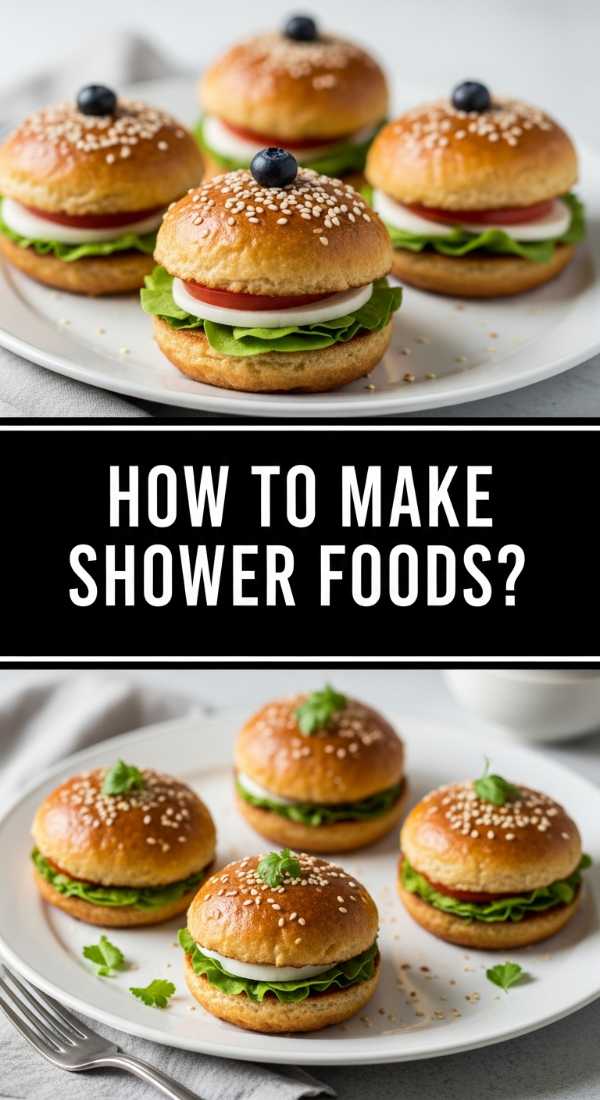
HOW TO MAKE SHOWER FOODS?
Why we love this
Shower boards (for babies or brides) are all about elegance, soft aesthetics, and ease of eating while socializing. This is where finger foods shine, featuring bite-sized portions that are as beautiful as they are delicious. We love the pastel color palette often found here—creamy whites, soft pinks from shrimp or ham, and the pale greens of asparagus. The atmosphere is one of celebration and daintiness, where every item looks like a tiny, edible gift. It’s designed to be navigated with a glass of bubbly in one hand and a napkin in the other.
Ingredients
- Chilled shrimp cocktail
- Caprese skewers (tomato, basil, mozzarella)
- Mini quiches or frittata bites
- Deviled eggs with chives
- Goat cheese crostini with honey
- Sparkling grapes (rolled in sugar)
- Prosciutto-wrapped asparagus
How to make it
- For the deviled eggs, use a piping bag with a star tip to fill the whites; this instantly elevates them from ‘picnic side’ to ‘professional hors d’oeuvre.’
- Thread your Caprese skewers consistently: tomato, folded basil leaf, then mozzarella, ensuring they all face the same direction for visual symmetry.
- Prepare the shrimp by poaching them in a liquid seasoned with lemon, bay leaves, and peppercorns, then chill them immediately in an ice bath.
- Toast the crostini in the oven at 350°F for 8 minutes until golden but not brown, providing a sturdy base for the goat cheese.
- Arrange the items in rows or concentric circles on a marble or white ceramic board to enhance the clean, sophisticated look.
- Add a few sprigs of fresh herbs like dill or parsley to fill any small gaps and add a pop of life.
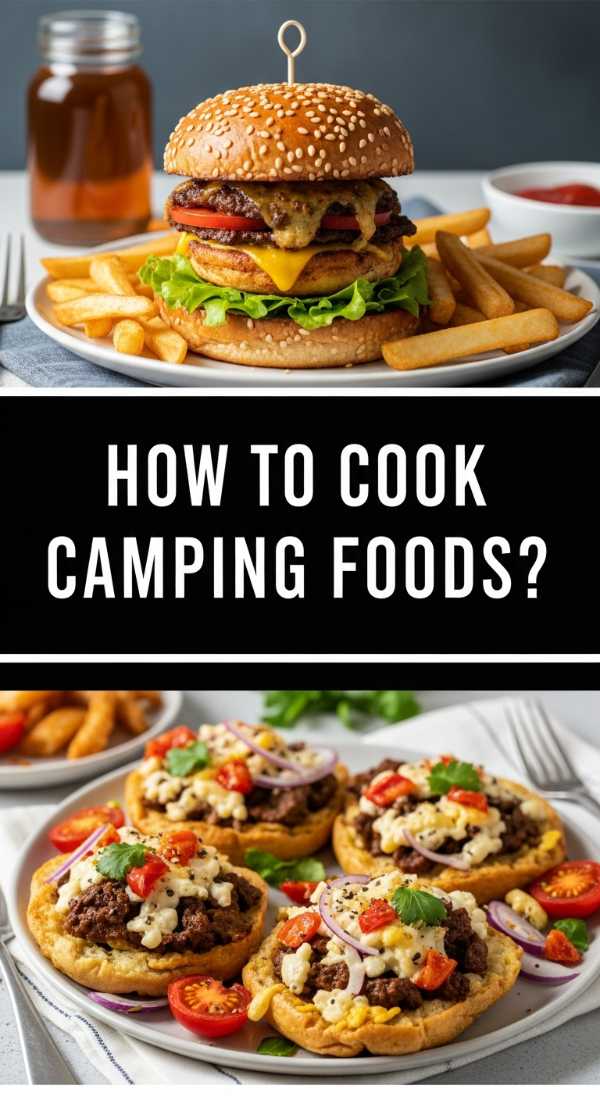
HOW TO COOK CAMPING FOODS?

Why we love this
The camping board is the ultimate ‘glamping’ flex, bringing the sophistication of a charcuterie spread to the rugged outdoors. It’s built around the heat of the fire and the utility of cast iron, featuring warm, comforting elements like melted cheese and toasted bread. The aroma is a heady mix of woodsmoke and melting fat, creating a cozy, communal vibe. We love how this board turns the chore of camp cooking into a shared activity, where everyone can customize their own ‘fire-to-table’ snack while the stars come out.
Ingredients
- Wheel of Camembert or Brie (for melting)
- Thick-cut bacon or pancetta
- Pre-cooked baby potatoes
- Sourdough slices
- Apples and pears
- Walnuts and honey
- Fresh rosemary
How to make it
- Place the wheel of cheese in a small cast-iron skillet or wrap it in heavy-duty foil, scoring the top in a crosshatch pattern and tucking in rosemary sprigs.
- Set the skillet on a grate over low embers (not direct flames) for about 10-15 minutes until the center is completely molten.
- Cook the bacon in another skillet until extra crispy, then use the rendered fat to toast your sourdough slices until they are charred and fragrant.
- Reheat the baby potatoes on the edge of the fire until the skins are crispy and the insides are fluffy.
- Assemble the board by placing the hot skillet of cheese in the middle and surrounding it with the bacon, potatoes, and sliced fruit for dipping.
- Drizzle the whole board with honey to balance the smoky, salty flavors of the fire-cooked items.
HOW TO PREP COOKOUT FOODS?
[IMAGE_10]
Why we love this
A cookout board is the ultimate high-energy spread, designed for large groups and big appetites. It takes the classic burger-and-dog components and arranges them in a way that feels intentional and upscale rather than chaotic. The sensory profile is a mix of hot and cold—sizzling burger patties, crisp lettuce, cold pickles, and soft, toasted buns. It’s the definition of ‘interactive dining,’ allowing guests to build their own masterpieces. The vibrant reds of ketchup and tomatoes alongside the golden hues of toasted buns make it a visual feast that screams American summer.
Ingredients
- Ground chuck burger patties
- Gourmet hot dogs or bratwurst
- Brioche buns
- Sliced sharp cheddar and swiss cheese
- Leaf lettuce, sliced tomatoes, and red onions
- Pickle spears and relish
- Secret sauce (mayo, mustard, ketchup, spices)
How to make it
- Shape your burger patties with a slight indentation in the center using your thumb; this prevents them from puffing up into balls on the grill.
- Season the patties generously with salt and pepper only seconds before they hit the grill to prevent the meat from becoming tough.
- Grill over high heat for 4 minutes per side for a medium finish, adding the cheese in the final 60 seconds and closing the grill lid to ensure a perfect melt.
- Toast the buns on the grill’s upper rack until they are lightly golden; this provides a structural barrier against the burger juices.
- On the board, create a ‘veg’ section with neatly stacked lettuce and shingled tomatoes, and a ‘protein’ section with the hot meats.
- Place all condiments in matching jars with small spoons to avoid messy squeeze bottles cluttering your beautiful professional layout.
Conclusion
Creating a food board that looks professional AF doesn’t require a culinary degree—it just requires a bit of heart and an eye for detail. By focusing on high-quality ingredients, varied textures, and thoughtful arrangement, you can turn a simple meal into a memorable event. Remember, the best boards are the ones that reflect your personal style and make your guests feel welcome. So, the next time you’re planning a gathering, skip the individual plates and go for the board. Your guests (and your Instagram feed) will thank you!