

Why This 3-Ingredient Food Board Is Going Viral on TikTok
There is something undeniably magical about the way a simple snack board can transform a mundane Tuesday afternoon into a moment of pure, unadulterated joy. Last week, as I was scrolling through my feed, I stumbled upon a 3-ingredient food board that seemed to capture the collective heart of the internet—it wasn’t just about the food; it was about the ease, the aesthetic, and the invitation to slow down. It reminded me of those childhood summers where the simplest treats felt like the grandest feasts, shared with friends under the shade of a backyard oak tree.
We live in a world that often demands complexity, but this viral trend is a beautiful rebellion against that noise. By focusing on high-quality ingredients and effortless presentation, we reclaim our time and our sanity. Whether you are hosting a last-minute gathering or just want to treat yourself to a beautiful solo lunch, mastering the art of the ‘simple board’ is a gateway to a more inspired, flavorful life. Let’s dive into the world of baking and treats that complement this lifestyle perfectly.
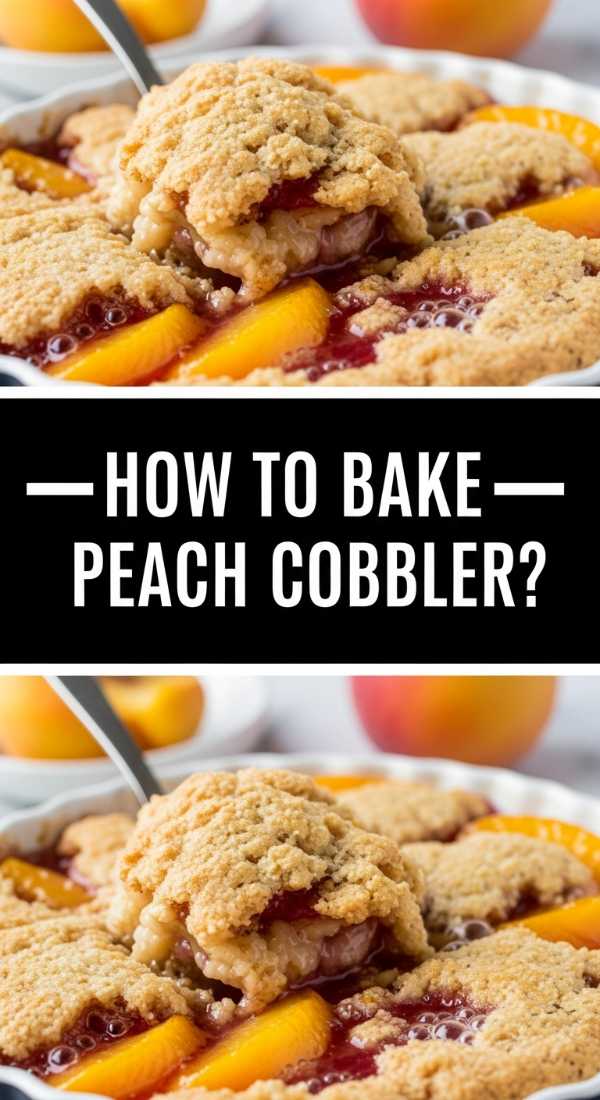
How to bake peach cobbler
Why we love this
There is nothing quite like the aroma of a peach cobbler wafting through the house on a humid July evening; it is the scent of nostalgia and caramelized sugar. When you break through that golden-brown, slightly salty biscuit topping, you are met with a gush of bubbling, syrupy peaches that have softened into a velvety, honey-like consistency. Each bite is a masterclass in textures—the soft, yielding fruit contrasting against the crisp, sugary edges of the crust, creating a warm embrace that practically begs for a melting scoop of cold vanilla bean ice cream to balance the heat.
Ingredients
- 6-8 large ripe peaches, sliced
- 1 cup granulated sugar (divided)
- 1 cup all-purpose flour
- 1 tablespoon baking powder
- 1/2 cup salted butter, melted
- 1 teaspoon ground cinnamon
- 1/2 cup whole milk
How to make it
- Preheat your oven to 375°F (190°C) and lightly grease a 9×13 inch baking dish.
- In a large bowl, toss the sliced peaches with 1/2 cup of sugar and the cinnamon until every slice is glistening and coated. Let them sit for 10 minutes to macerate and release their natural juices.
- In a separate mixing bowl, whisk together the flour, the remaining 1/2 cup of sugar, and the baking powder.
- Slowly pour the milk and melted butter into the dry ingredients, stirring gently with a wooden spoon until just combined. Be careful not to overmix, as you want a tender, cake-like crumb.
- Spread the peach mixture evenly into the bottom of your prepared baking dish, ensuring the juices are poured in as well.
- Drop dollops of the batter over the peaches. It doesn’t need to cover them completely; the batter will spread as it bakes.
- Bake for 40-45 minutes. You are looking for a deep golden-brown crust and a bubbling, thick fruit syrup around the edges. If the top browns too quickly, tent it loosely with foil for the final 10 minutes.
How to make lemon tarts

Why we love this
A lemon tart is like capturing a sunbeam in a pastry shell, offering a bright, zesty explosion that awakens the palate instantly. The contrast between the buttery, shortbread-like crust that snaps cleanly and the silky, luscious lemon curd is a sensory delight that feels sophisticated yet accessible. As you take a bite, the initial sharp tang of the citrus is mellowed by the richness of the butter and eggs, leaving a lingering sweetness that makes it impossible to stop at just one slice.
Ingredients
- 1 1/2 cups all-purpose flour
- 1/2 cup powdered sugar
- 3/4 cup cold unsalted butter, cubed
- 4 large eggs
- 1 cup granulated sugar
- 2/3 cup fresh lemon juice
- 2 tablespoons lemon zest
How to make it
- Start by making the crust: Pulse flour and powdered sugar in a food processor, then add cold butter until the mixture looks like coarse crumbs.
- Press the dough firmly into a 9-inch tart pan with a removable bottom. Freeze for 15 minutes to prevent shrinking.
- Bake the crust at 350°F (175°C) for 15-20 minutes until lightly golden. Set aside to cool slightly.
- For the filling, whisk the eggs, granulated sugar, lemon juice, and zest in a medium bowl until completely smooth and pale yellow.
- Carefully pour the lemon mixture into the pre-baked crust.
- Bake for another 20 minutes. The edges should be set, but the center should still have a slight, jell-like jiggle when moved.
- Cool completely on a wire rack, then refrigerate for at least 2 hours before dusting with extra powdered sugar and serving.
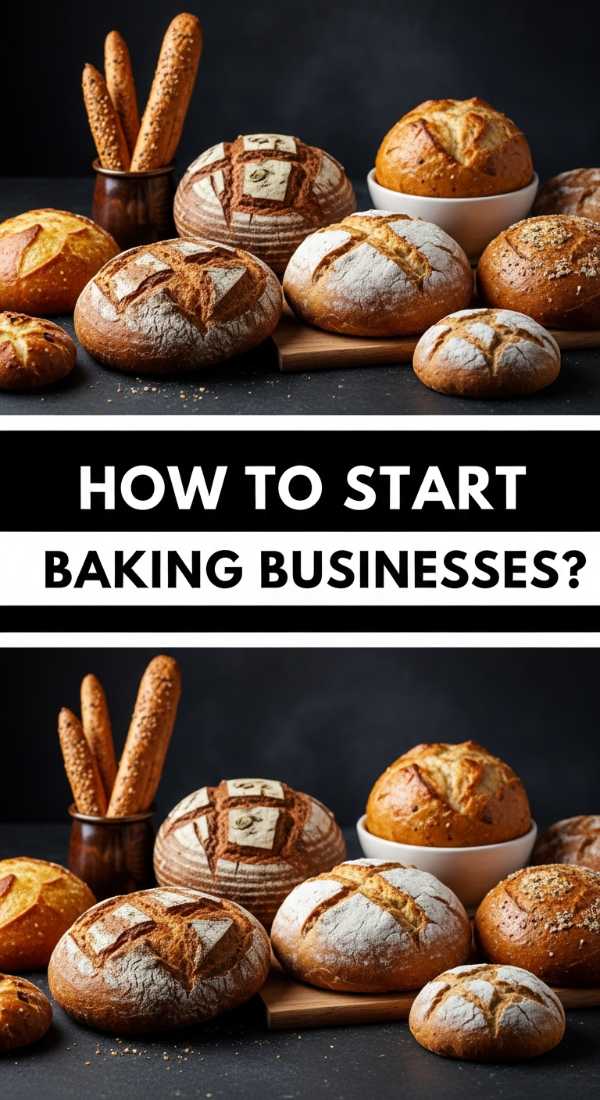
How to start baking businesses
Why we love this
Turning a passion for flour and sugar into a thriving business is the ultimate dream for many, blending the precision of science with the freedom of artistic expression. There is a profound sense of fulfillment that comes from seeing your creations become a part of someone else’s celebration, from birthdays to weddings. The journey involves more than just recipes; it’s about building a brand that smells like home and looks like luxury, creating a community of loyal customers who value the craft behind every knead and whisk.
Ingredients
- A signature menu of 3-5 perfected recipes
- A business license and health department permits
- Branding assets (logo, color palette, social media handles)
- Quality packaging materials (boxes, ribbons, labels)
- A dedicated workspace (home kitchen or rented commissary)
How to make it
- Research local cottage food laws to understand what you can legally sell from your home kitchen and obtain the necessary certifications.
- Define your niche—will you focus on vegan treats, hyper-realistic cakes, or rustic breads? Having a specialty makes your marketing much more effective.
- Develop a pricing strategy that accounts for ingredients, labor, electricity, and packaging; never undervalue your time.
- Take high-quality, brightly lit photos of your products and set up an Instagram or TikTok page to showcase your process and finished goods.
- Start small by selling to friends or at local farmers’ markets to build a portfolio and gather testimonials.
- Invest in a simple website or ordering system to streamline customer inquiries and payments.
How to design baking tattoos

Why we love this
Baking tattoos are a beautiful, permanent tribute to the craft of creation, acting as a visual love letter to the tools and ingredients that define a baker’s life. Whether it’s a delicate sprig of wheat or a vintage stand mixer, these designs carry a whimsical charm and a sense of dedication that is deeply personal. Seeing a whisk or a rolling pin etched in ink serves as a constant reminder of the patience, heat, and heart required to turn raw elements into something nourishing and beautiful.
Ingredients
- A collection of reference photos (vintage mixers, flour dust, botanical herbs)
- A clear idea of the tattoo style (fine line, traditional, watercolor)
- A reputable tattoo artist specializing in your chosen style
- Aftercare balm and unscented soap
How to make it
- Begin by identifying the tool or ingredient that resonates most with your journey—perhaps it’s the exact whisk your grandmother used.
- Decide on the placement; forearms are popular for bakers as the art is visible while you work the dough.
- Sketch out a rough concept or create a mood board to show your artist, focusing on line weight and whether you want color or black-and-grey.
- Book a consultation to discuss how the design will flow with your body’s natural curves and how it might age over time with kitchen exposure.
- On the day of the appointment, ensure you are well-hydrated and have eaten a meal to maintain steady blood sugar.
- Follow the artist’s aftercare instructions religiously, keeping the area clean and moisturized to ensure the ink remains vibrant and crisp.
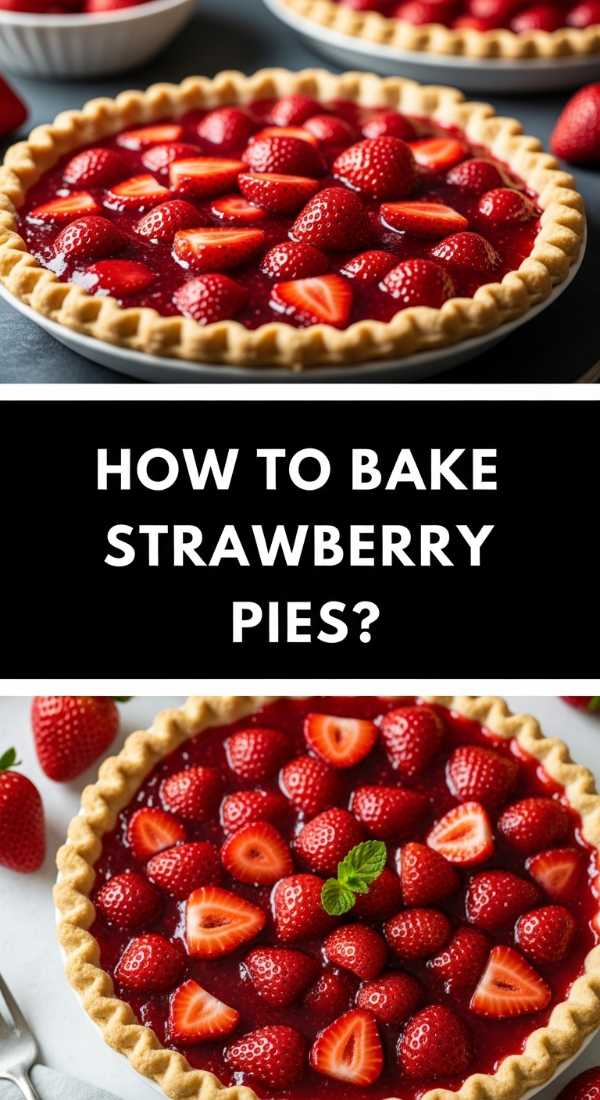
How to bake strawberry pies
Why we love this
A fresh strawberry pie is a vibrant celebration of late spring, boasting a glossy, ruby-red filling that looks like a collection of jewels tucked inside a flaky, buttery crust. The flavor is a perfect harmony of bright acidity and concentrated sweetness, enhanced by the subtle floral notes of the berries as they bake. When sliced, the pie should hold its shape just enough to reveal the layers of fruit, offering a mouthfeel that is both tender and crisp, making it the undisputed star of any garden party or picnic.
Ingredients
- 2 deep-dish pie crusts (homemade or store-bought)
- 2 lbs fresh strawberries, hulled and halved
- 3/4 cup granulated sugar
- 1/4 cup cornstarch
- 1 tablespoon lemon juice
- 1 egg (for egg wash)
- Coarse sparkling sugar for topping
How to make it
- Preheat your oven to 400°F (200°C). Place one pie crust into your pie plate and chill while you prepare the filling.
- In a large bowl, gently toss the strawberries with the sugar, cornstarch, and lemon juice. The cornstarch is crucial here to thicken the juices and prevent a soggy bottom.
- Pour the strawberry mixture into the chilled crust, mounding them slightly in the center.
- Top with the second crust. You can do a full top with steam vents or a classic lattice pattern for a more professional look.
- Crimp the edges tightly to seal in the juices. Brush the top of the crust with a beaten egg and sprinkle generously with coarse sugar.
- Bake for 45-55 minutes. If the crust edges darken too fast, cover them with a pie shield or foil.
- Let the pie cool for at least 4 hours—this is the hardest part, but it’s essential for the filling to set properly!
How to sell luxury cakes

Why we love this
Luxury cakes are the haute couture of the culinary world, where flavor profiles meet architectural brilliance to create an unforgettable centerpiece. There is an incredible thrill in the meticulous process of stacking, leveling, and smoothing Swiss meringue buttercream until it looks like polished marble. To sell these is to sell an experience; it’s about the heavy weight of the cake, the intricate hand-painted details, and the way the sponge melts on the tongue, leaving behind notes of premium vanilla bean and high-fat European butter.
Ingredients
- High-quality ingredients (Valrhona chocolate, organic extracts)
- Professional-grade cake scrapers and turntables
- Elegant, sturdy cake boards and tall transport boxes
- A curated portfolio of high-end cake designs
- Contract templates and booking software
How to make it
- Master the “foundation” by perfecting a sturdy yet moist sponge that can support the weight of multiple tiers without collapsing.
- Learn advanced decorating techniques like sugar flowers, gold leaf application, or ganache drips to elevate your aesthetic above standard bakeries.
- Invest in professional photography; luxury clients buy with their eyes first, and your feed should look like a high-end magazine.
- Network with wedding planners, florists, and venue managers to get on preferred vendor lists.
- Create a seamless client experience, from the initial tasting box (which should be packaged beautifully) to the final delivery and setup.
- Price your work based on the hours of artistry involved, not just the ingredients; luxury is as much about the skill as it is the cake itself.
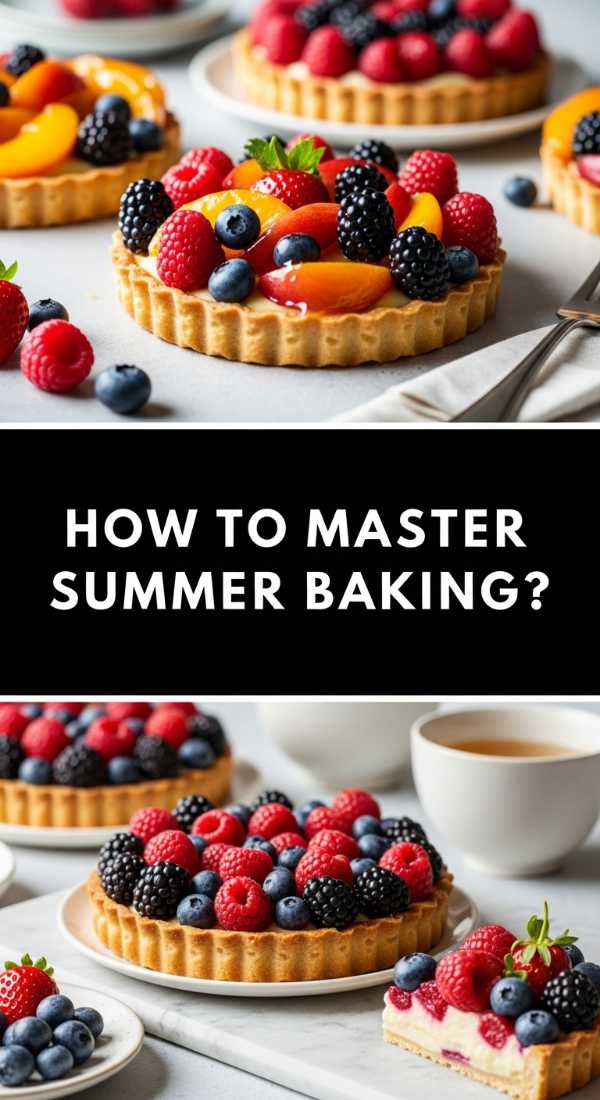
How to master summer baking
Why we love this
Summer baking is all about honoring the bounty of the season without letting the heat defeat you—it’s a delicate dance of timing and temperature. We love it for the way it forces us to be lighter with our flavors, leaning into stone fruits, berries, and herbs like basil or thyme. There’s a rustic, effortless charm to a summer bake; it’s less about perfect piping and more about the juice of a peach bubbling over the edge of a crust, signifying a season of abundance and leisure.
Ingredients
- Seasonal fruits (cherries, apricots, blueberries)
- Fresh garden herbs
- Heavy cream for whipping
- Good quality sea salt
- Cornmeal or semolina for added texture
How to make it
- Bake during the coolest parts of the day—either early morning or late evening—to keep your kitchen temperature manageable and your doughs from melting.
- Keep your fats (butter, lard, or shortening) ultra-cold. In summer, it’s helpful to even chill your flour and mixing bowl in the freezer for 10 minutes before starting.
- Lean into “naked” cakes or rustic galettes that don’t require heavy frosting, which can easily weep or melt in the humidity.
- Use cornstarch or tapioca starch in your fruit fillings to account for the extra moisture found in peak-season produce.
- Incorporate citrus zests and juices to provide a refreshing acidic counterpoint to the heat of the oven and the sweetness of the fruit.
- Store finished bakes in airtight containers in the fridge if your home is particularly warm, but bring them to room temp for 20 minutes before serving for the best flavor.
How to find baking inspiration
Why we love this
Inspiration is the secret ingredient that turns a standard recipe into a work of art, and finding it is a journey through the senses. It might come from the color palette of a sunset, the intricate patterns of a vintage quilt, or the scent of a spice market in a far-off city. When you are truly inspired, baking stops being a chore and becomes a form of meditation, where the rhythm of the whisk and the transformation of the dough offer a profound connection to your own creativity.
Ingredients
- A Pinterest board or physical scrapbook
- Cookbooks from diverse cultures
- A visit to a local botanical garden or art museum
- Seasonal produce calendars
How to make it
- Step away from the screen and head to a local farmers’ market; let the colors and smells of the seasonal harvest dictate your next project.
- Read old family recipes and think about how you can modernize them with new techniques or unexpected flavor pairings like miso and chocolate.
- Follow artists—not just bakers—on social media to observe how they use light, shadow, and texture in their work.
- Keep a “flavor journal” where you write down interesting combinations you taste in restaurants or see in travel documentaries.
- Practice “free baking” once a month where you don’t follow a recipe and instead rely on your intuition and what’s in your pantry to see what emerges.
- Collaborate with other creators; sometimes a conversation with a florist or a potter can spark an idea for a cake texture or a plate presentation.
How to bake berry galettes

Why we love this
The galette is the pie’s effortlessly cool, French cousin—rustic, unpretentious, and breathtakingly beautiful in its imperfection. We love the way the edges of the pastry are simply folded over the fruit, creating a rugged frame that highlights the vibrant berries within. The crust is intentionally flaky and crisp, providing a savory, buttery backbone to the jammy, concentrated sweetness of the baked berries, making it the perfect dessert for those who love the taste of a pie but crave a higher crust-to-fruit ratio.
Ingredients
- 1 1/4 cups all-purpose flour
- 1/2 cup cold butter, cubed
- 2 tablespoons ice water
- 2 cups mixed berries (raspberries, blackberries, blueberries)
- 3 tablespoons honey or maple syrup
- 1 tablespoon cornstarch
How to make it
- Combine flour and butter in a bowl, rubbing the butter into the flour with your fingertips until it resembles coarse crumbs with some pea-sized pieces remaining.
- Add ice water one tablespoon at a time until the dough just holds together when pressed. Wrap in plastic and chill for at least 30 minutes.
- Preheat oven to 400°F (200°C) and line a baking sheet with parchment paper.
- In a bowl, gently stir the berries with the honey and cornstarch until they are evenly coated.
- Roll the chilled dough out into a rough 12-inch circle on the parchment paper. Don’t worry if the edges are jagged.
- Pile the berries in the center, leaving a 2-inch border of dough all around.
- Fold the edges of the dough up and over the berries, pleating as you go to create a rustic border.
- Brush the crust with water or milk and bake for 30-35 minutes until the pastry is deep golden and the berry juices are bubbling and thick.
How to bake golden bread

Why we love this
There is a primal satisfaction in baking a loaf of golden bread, where a few humble ingredients transform through the power of fermentation into a crusty, airy masterpiece. The sound of a freshly baked loaf ‘singing’ (crackling) as it cools on the rack is music to a baker’s ears. The interior should be soft and pillowy, with a slight tang from the yeast, while the exterior boasts a shatteringly crisp, sun-kissed crust that provides a robust, toasted flavor with every bite.
Ingredients
- 3 cups bread flour (high protein)
- 1 1/2 cups warm water (110°F)
- 1 teaspoon active dry yeast
- 2 teaspoons sea salt
- 1 tablespoon honey (optional for extra gold color)
How to make it
- Whisk the yeast and honey into the warm water and let it sit for 5-10 minutes until it becomes foamy and active.
- In a large bowl, mix the flour and salt. Pour in the yeast mixture and stir until a shaggy dough forms.
- Turn the dough onto a floured surface and knead for 8-10 minutes. You want the dough to be smooth, elastic, and pass the “windowpane test” (stretchable enough to see light through without tearing).
- Place in a greased bowl, cover, and let rise in a warm, draft-free spot for 1-2 hours, or until doubled in size.
- Gently deflate the dough and shape it into a round boule or a long batard. Place on a baking sheet, cover, and let rise again for 45 minutes.
- Preheat your oven to 450°F (230°C). For a professional crust, place a pan of hot water on the bottom rack to create steam.
- Score the top of the loaf with a sharp knife and bake for 25-30 minutes. The loaf should sound hollow when tapped on the bottom and have a vibrant, golden-brown hue.
Conclusion: The Joy of the Simple Board Lifestyle
In the end, whether you are crafting a viral 3-ingredient board or spending hours perfecting a golden loaf of bread, the goal is the same: to find beauty in the process and connection in the sharing. Baking and hosting shouldn’t be about perfection; they should be about the textures, the aromas, and the memories made around the table. I hope these recipes and tips inspire you to get into the kitchen, turn on some music, and create something that makes your heart—and your stomach—full.