

The Future of Polish: Breaking Down Spring 2026’s Hottest Nail Trends
Hello, my loves! As the frost finally begins to melt away and the first gentle whispers of Spring 2026 start to tickle our windows, there’s a collective exhale we all share. It’s that time of year when we shed our heavy wool coats and look toward the light, and for me, that renewal always starts at the tips of my fingers. Nails aren’t just an accessory; they are a soft, rhythmic ritual—a way for us to paint our intentions for the season ahead.
This spring feels different, doesn’t it? It’s a cloud-soft embrace of both the bold and the delicate. We are moving away from the harshness of the past and leaning into textures and colors that feel like a warm hug. Whether you’re sipping a lavender latte or tucking into a new book by the park, your manicure should tell the story of your soul’s transition into the sun. Let’s walk through the trends that are going to define our most beautiful season yet.
4 Easy Steps to Get Butter Yellow Nails
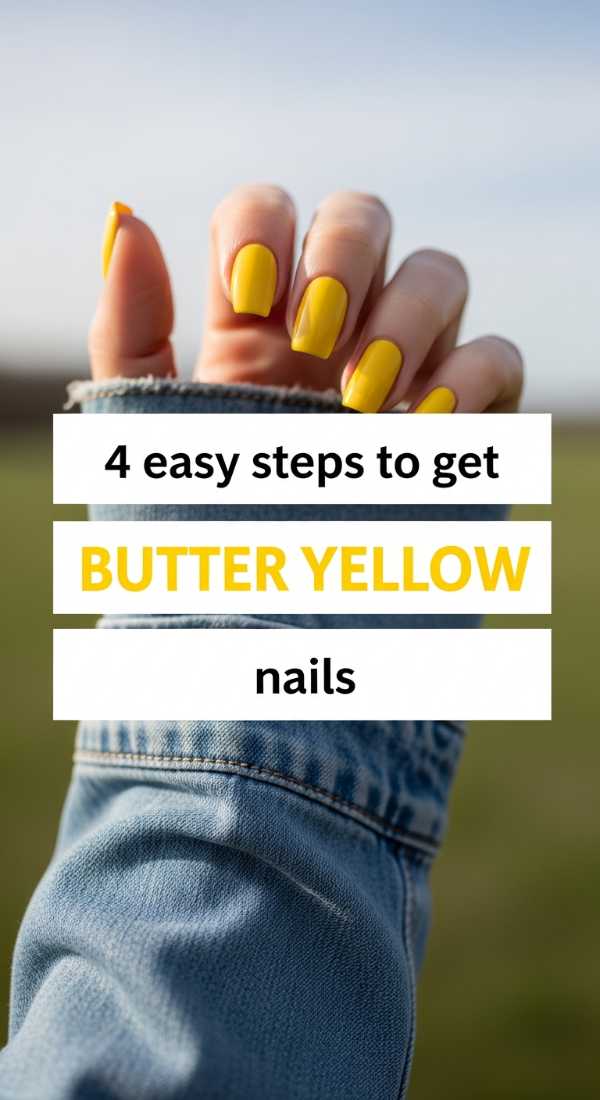
Why to love this Design:
Butter yellow is the color of quiet joy. It’s not a loud, neon lemon; it’s the shade of a melting pat of butter on warm toast or the softest morning sunlight. It’s incredibly flattering on every skin tone and brings a sense of calm optimism to your day-to-day life.
Essential Elements:
- Creamy Pastel Yellow Polish
- Ridge-filling Base Coat
- High-gloss Top Coat
- Nail Buffer
How to Prepare:
- Gently buff the nail surface to ensure a smooth canvas for this pale pigment.
- Apply a ridge-filling base coat to prevent any streaking.
- Layer two thin, even coats of butter yellow, letting each dry fully.
- Seal with a glossy top coat to give it that ‘creamy’ finish.
Budget Range
- Essie ‘Soothe Bolt’ ($10)
- OPI ‘Blind Date with a Buttercup’ ($11)
- Olive & June ‘JLR’ ($9)
5 Simple Ways to Style Tuscan Pucci Nails

Why to love this Design:
Inspired by the swirling, Mediterranean patterns of the Italian coast, Tuscan Pucci nails are for the wanderlust soul. They combine earthy terracotta with vibrant azures, making your hands look like a piece of vintage wearable art.
Essential Elements:
- Fine Detailing Brush
- Terracotta, Cream, and Azure Polish
- Matte Top Coat
- Wooden Cuticle Stick
How to Prepare:
- Start with a neutral cream base to make the colors pop.
- Use a detailing brush to draw organic, wavy ‘C’ shapes in terracotta.
- Nestle azure blue swirls inside the terracotta lines.
- Fill small gaps with dots of gold or white.
- Finish with a matte top coat for a sophisticated, fabric-like texture.
Budget Range
- Zoya ‘Cory’ ($12)
- Sally Hansen ‘Wild Card’ ($7)
- Nail Art Brush Set ($5 at drugstores)
3 Secrets for Perfect French Spring Nails
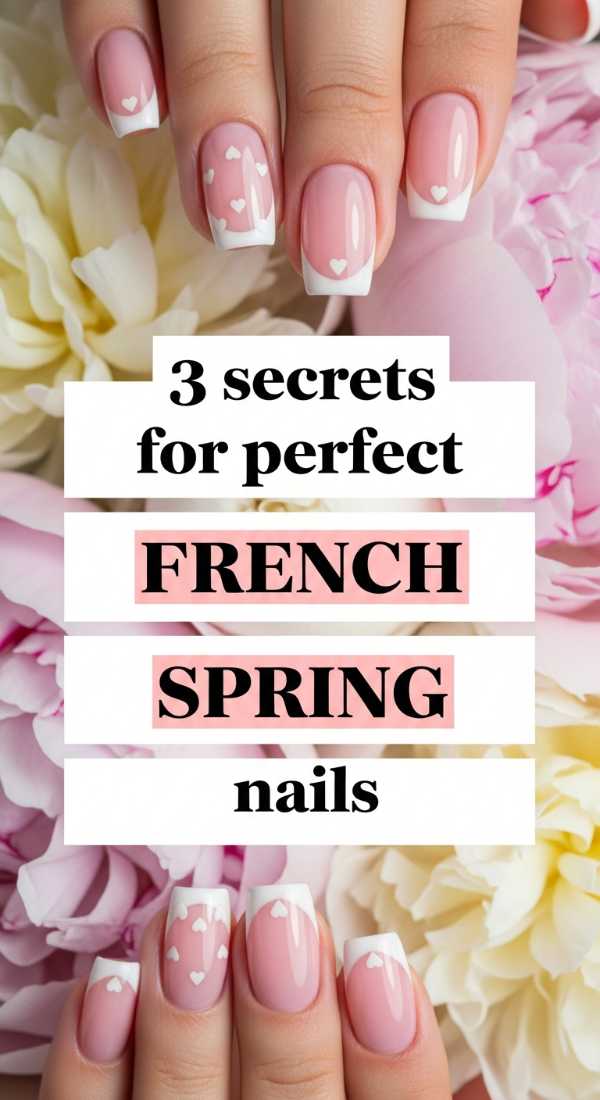
Why to love this Design:
The French manicure is a timeless love letter to elegance, but for Spring 2026, we are giving it a ‘micro’ twist. It’s about the thinnest line possible—just a hint of color that makes your nails look polished and perpetually ‘clean-girl’ aesthetic.
Essential Elements:
- Sheer Pink Base
- Pastel Mint or Lilac for tips
- Silicone Nail Stamper
How to Prepare:
- Secret 1: Use a silicone stamper. Apply a thin layer of polish to the stamper and gently press your nail tip in for a perfect micro-line.
- Secret 2: Always use a sheer, jelly-like pink for the base to mimic a natural nail bed.
- Secret 3: Wrap the tip with a top coat to prevent the thin line from chipping.
Budget Range
- Silicone Stamper ($6)
- Cirque Colors ‘Rose Jelly’ ($14)
- Essie ‘Mint Candy Apple’ ($10)
6 Tips for Flawless Short Square Nails
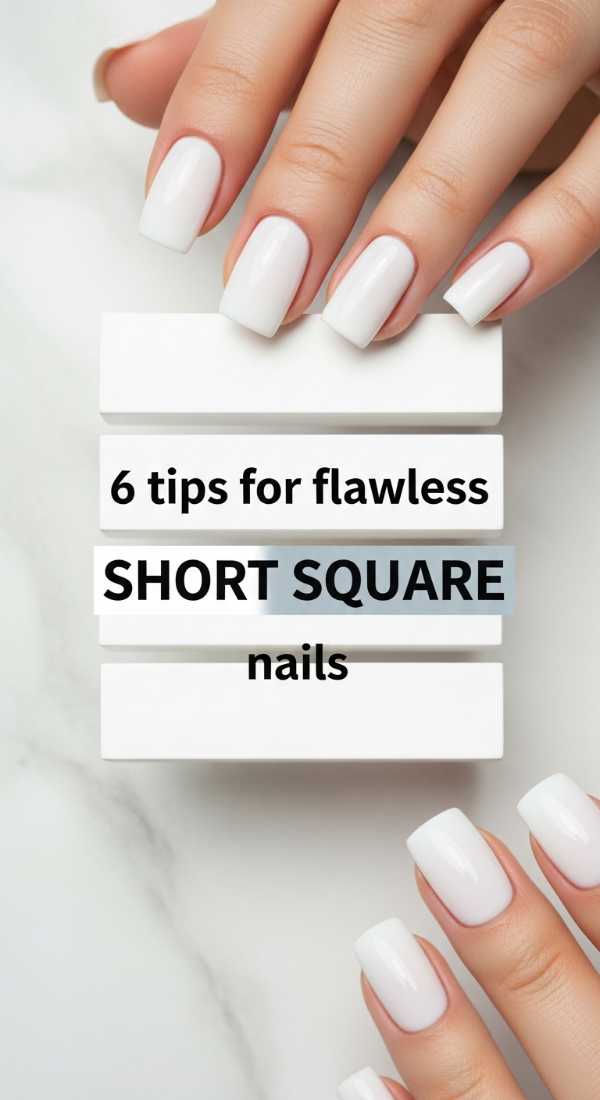
Why to love this Design:
There is something so incredibly chic and ‘quiet luxury’ about a short square nail. It’s practical, modern, and looks effortlessly cool with oversized linen shirts and gold jewelry. It’s the ultimate ‘low-maintenance’ high-fashion look.
Essential Elements:
- Glass Nail File
- Nail Strengthener
- Cuticle Oil
How to Prepare:
- File in one direction only to prevent splitting.
- Keep the sides straight and only round the very corners slightly to prevent snagging.
- Use a glass file for the smoothest edge possible.
- Apply a strengthener twice a week.
- Massage cuticle oil daily to keep the short frame looking healthy.
- Choose a single-color ‘power’ shade like deep forest green or soft beige.
Budget Range
- Mont Bleu Glass Nail File ($12)
- CND SolarOil ($9)
- Orly ‘Bonder’ Base ($15)
7 Steps to Create Vibrant Orange Spring Nails
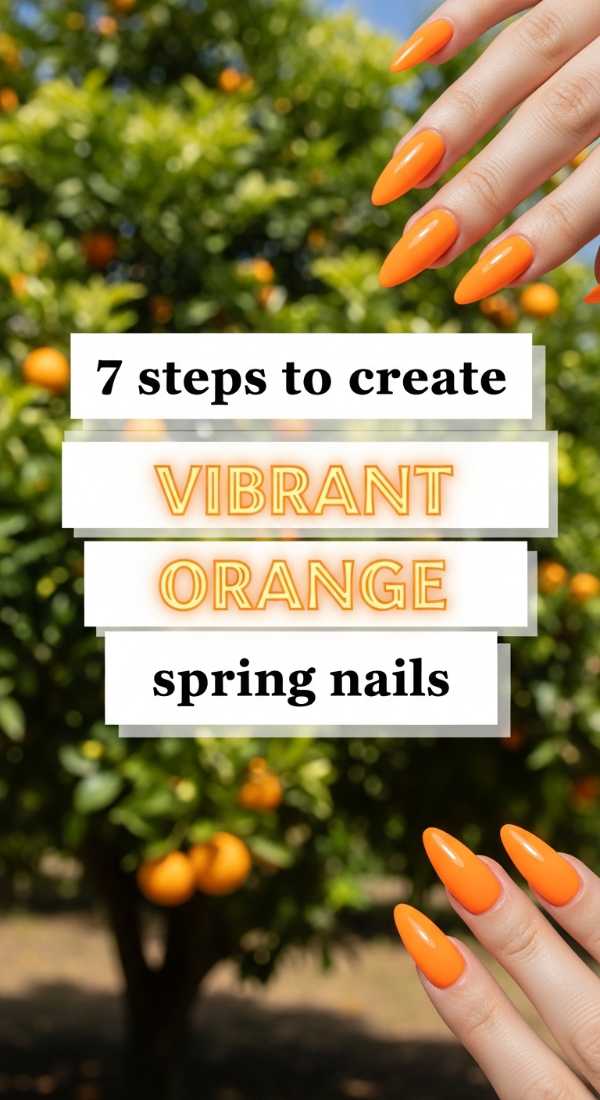
Why to love this Design:
Vibrant orange is the energy boost we all need after a long winter. It’s the color of citrus and sunsets, radiating warmth and confidence. It’s a bold choice that says you are ready to be seen and celebrated.
Essential Elements:
- Opaque Orange Polish
- White Base Polish (optional)
- Cleanup Brush
- Acetone
How to Prepare:
- Apply a coat of white polish first to make the orange look neon-bright.
- Apply the first coat of orange with three strokes: middle, side, side.
- Wait 3 minutes.
- Apply the second coat for full opacity.
- Use a cleanup brush dipped in acetone to perfect the line near the cuticle.
- Seal with a UV-protectant top coat to prevent fading.
- Moisturize your hands immediately after to contrast the bright hue with soft skin.
Budget Range
- Lights Lacquer ‘GRL PWR’ ($13)
- Sinful Colors ‘Cloud 9’ ($3)
- Holler and Glow Cleanup Pen ($4)
5 Ways to Rock Baddie Black Spring Nails

Why to love this Design:
Who says black is only for winter? In Spring 2026, ‘Baddie Black’ is about the high-shine, vinyl look. It provides a stunning contrast against floral spring dresses, adding a touch of edge to an otherwise soft season.
Essential Elements:
- Jet Black Cream Polish
- Ultra-glossy ‘Plumping’ Top Coat
- Pointed ‘Stiletto’ or Long ‘Coffin’ shapes
How to Prepare:
- Opt for a longer nail shape to lean into the ‘baddie’ aesthetic.
- Ensure your cuticles are pushed back perfectly—black shows every flaw!
- Apply two thin coats of the darkest black you can find.
- Add a ‘plumping’ top coat that mimics the look of gel.
- Pair with silver chunky rings to complete the vibe.
Budget Range
- Seche Vite Top Coat ($9)
- Manucurist ‘Licorice’ ($14)
- Kiss PowerFlex Nail Glue ($4)
4 Techniques for Stunning Teal Spring Nails

Why to love this Design:
Teal is the bridge between the earth and the sea. It’s a sophisticated, cooling color that feels incredibly fresh for spring. It’s for the woman who wants something more unique than blue but more grounded than green.
Essential Elements:
- Deep Teal Polish
- Cosmetic Sponge (for ombre)
- Gold Leaf Flakes
How to Prepare:
- The Solid Method: Apply two coats of teal for a deep, jewel-toned look.
- The Ombre Technique: Use a sponge to blend teal into a clear base for a ‘sea glass’ effect.
- The Accent: Add gold leaf flakes to the ring finger for a touch of luxury.
- The Velvet Finish: Use a magnetic teal polish to create depth and movement.
Budget Range
- ILNP ‘Sirene’ ($12)
- Sally Hansen ‘In-Teal-Igence’ ($8)
- Gold Leaf Kit ($6 on Amazon)
8 Easy Tricks for Spring Abstract Nails

Why to love this Design:
Abstract nails are the ultimate form of self-expression because there are no rules! It’s like a tiny gallery on your fingertips. It’s playful, artistic, and completely unique to you.
Essential Elements:
- Dotting Tools
- Striper Brushes
- 3-4 Contrasting Spring Colors
How to Prepare:
- Start with a clear base to let the ‘negative space’ breathe.
- Think in shapes: circles, lines, and blobs.
- Use a dotting tool to create ‘pollen’ clusters.
- Use a striper brush for ‘grass’ lines.
- Don’t aim for symmetry; let each nail be different.
- Keep colors in the same family (e.g., all pastels).
- Add a tiny swipe of silver glitter for ‘dew’.
- Seal it all with a thick top coat to level out the different layers of polish.
Budget Range
- Nail Art Dotting Tools ($4)
- Holo Taco ‘Silver Flake’ ($11)
- Barry M Gelly Hi-Shine ($6)
5 Steps to Apply Classic Spring Red Nails

Why to love this Design:
A cherry red is the ‘red lipstick’ of nails. It’s classic, it’s romantic, and it never goes out of style. In spring, it reminds us of blooming tulips and fresh berries. It’s a timeless choice for the romantic at heart.
Essential Elements:
- Blue-toned Red Polish (for a vintage feel)
- Base Coat
- Patience!
How to Prepare:
- Apply a base coat to prevent the red pigment from staining your natural nails.
- Apply the first coat very thinly—it will look patchy, and that’s okay!
- The second coat is where the magic happens; apply with a slightly heavier hand.
- Clean the ‘smile line’ with a brush for a professional look.
- Finish with a quick-dry spray so you can get back to your day without smudging.
Budget Range
- Dior Vernis ‘999’ ($30)
- Revlon ‘Cherries in the Snow’ ($6)
- OPI ‘Big Apple Red’ ($11)
3 Methods to Prep Summer Toe Nails

Why to love this Design:
As we transition into sandal weather, our toes deserve a little extra love! Prepping now ensures your feet feel as soft as a cloud when the first warm weekend hits.
Essential Elements:
- Epsom Salts
- Foot File or Pumice Stone
- Heavy Foot Cream
How to Prepare:
- The Soak: 15 minutes in warm water with Epsom salts to soften the skin.
- The Slough: Use a foot file on dry-ish skin (it’s more effective than soaking wet skin!) to remove calluses.
- The Moisture Seal: Apply a thick urea-based cream and wear cotton socks overnight for a deep-hydration treatment.
Budget Range
- Dr Teal’s Epsom Salts ($5)
- Colossal Foot File ($8)
- Eucerin Roughness Relief ($12)
Embracing Your Inner Glow
As we look forward to the blooming season of 2026, remember that your nails are just a reflection of the beauty you already carry inside. Whether you choose the fiery energy of vibrant orange or the quiet serenity of butter yellow, I hope these rituals bring a little spark of joy to your morning. You deserve this moment of self-care, my loves. Take a deep breath, pick up that brush, and paint your own spring story. I can’t wait to see what you create!