
Creating Magic: How to Design Your Own Whimsical Garden Oasis
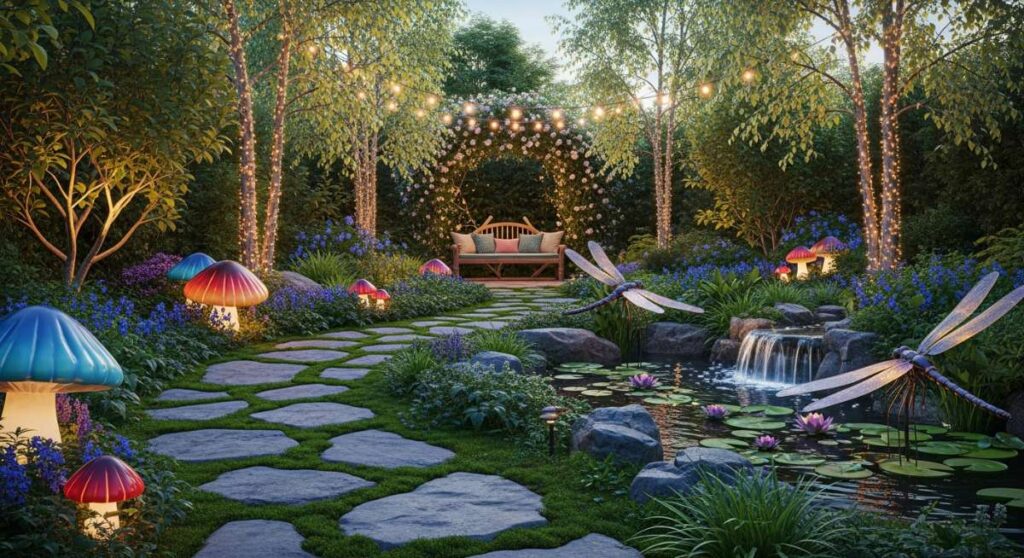
Have you ever stepped into a garden and felt, just for a moment, like you’d crossed the threshold into another world? There’s a specific kind of magic in a whimsical garden—it’s in the way the sunlight catches a hidden glass bauble, the scent of crushed thyme underfoot, and the gentle chime of bells hidden in the trees. It’s a space that doesn’t just grow plants; it grows dreams, offering a sanctuary from the frantic pace of the modern world.
Designing your own whimsical oasis isn’t about following strict landscaping rules or spending a fortune at a nursery. It’s about leaning into your own sense of wonder and play. Whether you have a sprawling backyard or a tiny balcony, you can layer in textures, colors, and handmade elements that tell a story. Today, I’m sharing my favorite ways to transform an ordinary patch of earth into a fairytale retreat that feels uniquely yours.
How to Build a Whimsical Mushroom Wonderland for an Enchanting Secret Garden
Why we love this
There is something inherently storybook-like about mushrooms nesting in the shade of a large oak or tucked between ferns. This wonderland approach brings a tactile, earthy charm to the garden, combining the velvet texture of natural moss with the bright, glossy finish of ceramic or concrete fungi. The aroma of damp earth and woodsmoke mingles here, creating a sensory experience that feels like stepping directly into the pages of a Victorian children’s novel. It provides a playful focal point that captures the imagination of children and adults alike.
Essential Elements:
- Terracotta or ceramic bowls for mushroom caps
- Wooden logs or PVC pipes for stems
- Weatherproof outdoor paint (red, white, and earthy tones)
- Live sheet moss or Scotch moss
- Solar-powered fairy lights
- Smooth river stones
How to make it
- Select your ‘stems’ by cutting wooden logs to varying heights, ranging from 6 inches to 1.5 feet, ensuring the base is cut at a perfectly level 90-degree angle for stability.
- Invert your terracotta bowls and sand the exterior surface with 120-grit sandpaper to create a ‘tooth’ for the paint to adhere to, then wipe away any dust with a damp cloth.
- Apply a base coat of vibrant outdoor acrylic paint to the bowl; for a classic look, use a deep crimson. Once dry, use a round sponge brush to dab white ‘polka dots’ of varying sizes across the surface.
- Apply a heavy-duty outdoor construction adhesive to the top of the log stem and firmly press the center of the inverted bowl onto it, holding it for 60 seconds to ensure a secure bond.
- Dig a shallow hole in a shaded garden corner, place the mushroom stem inside, and pack the soil tightly around the base to prevent tipping.
- Drape live moss around the base of the stems and weave tiny copper wire fairy lights between the mushrooms to create a mystical glow that activates at dusk.
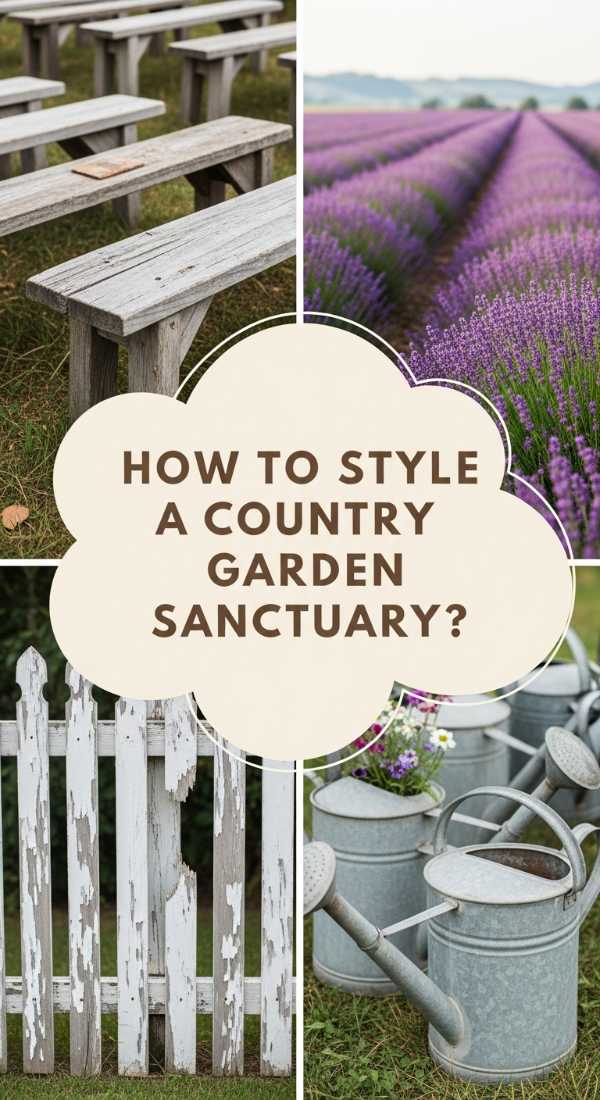
How to Style a Country Garden Sanctuary for a Peaceful Morning Escape

Why we love this
A country sanctuary is the ultimate antidote to a busy lifestyle, focusing on soft colors and the gentle rustle of leaves. Imagine sitting here at dawn, the air cool and smelling of lavender and dewy grass, while the sun slowly warms the weathered wood of your favorite bench. The visual palette is soft-focus provided by climbing roses and overflowing perennial borders creates a sense of privacy and peace, making it the perfect spot for a quiet cup of coffee or a long-awaited chapter of a book.
Essential Elements:
- Aged wooden or wrought iron bench
- Climbing roses or Clematis
- Gravel or cobblestone flooring
- Vintage linen outdoor cushions
- Large galvanized steel planters
- Bird bath or small stone fountain
How to make it
- Clear a 6×6 foot area in a sun-dappled corner of your yard, removing all grass and leveling the soil with a garden rake until perfectly flat.
- Lay down a heavy-duty landscape fabric to prevent weed growth, securing it with U-shaped garden staples every 12 inches along the perimeter.
- Spread a 2-inch layer of pea gravel or crushed limestone over the fabric, tamping it down firmly with a hand tamper or a heavy flat board to create a stable walking surface.
- Position your bench as the central anchor, ensuring it faces the sunrise; check the levelness of the seat and adjust the gravel underneath as needed.
- Install a trellis directly behind the bench and plant ‘New Dawn’ roses or another climbing variety at the base, weaving the primary canes through the trellis structure.
- Add comfort by layering weather-resistant cushions in muted tones like sage or oatmeal, and place a small side table nearby to hold your morning tea.
How to Create DIY Garden Art for a Personalized Outdoor Haven
Why we love this
Personalized garden art turns a standard outdoor space into a gallery of your own soul. The clinking sound of a handmade wind chime made from vintage spoons or the sparkle of a glass mosaic stepping stone adds layers of interest that can’t be bought at a big-box store. These pieces catch the light and the breeze, providing dynamic movement and a touch of the unexpected among the static greenery, reminding you of the creative hands that shaped the space.
Essential Elements:
- Found objects (vintage keys, glass beads, driftwood)
- Fishing line or thin copper wire
- Concrete mix for stepping stones
- Glass gems or broken china shards
- Outdoor-grade epoxy resin
- Sealant spray
How to make it
- Gather a collection of colorful glass shards or vintage china pieces and wrap them in a thick towel, gently tapping with a hammer to create smaller, irregular mosaic tiles.
- Mix a batch of high-strength concrete in a bucket until it reaches the consistency of thick peanut butter, ensuring no dry pockets of powder remain.
- Pour the concrete into a circular plastic mold (an old cake pan works perfectly) and vibrate the mold gently to release trapped air bubbles.
- Once the concrete has set for about 30 minutes and is firm but tacky, press your mosaic pieces into the surface, leaving small gaps between them for a traditional grout look.
- Let the stone cure in a cool, dry place for 48 hours before popping it out of the mold; then apply a clear UV-resistant outdoor sealer to protect the colors from fading.
- Intersperse these stones along a wood-mulch path, ensuring they are flush with the ground level to avoid trip hazards.
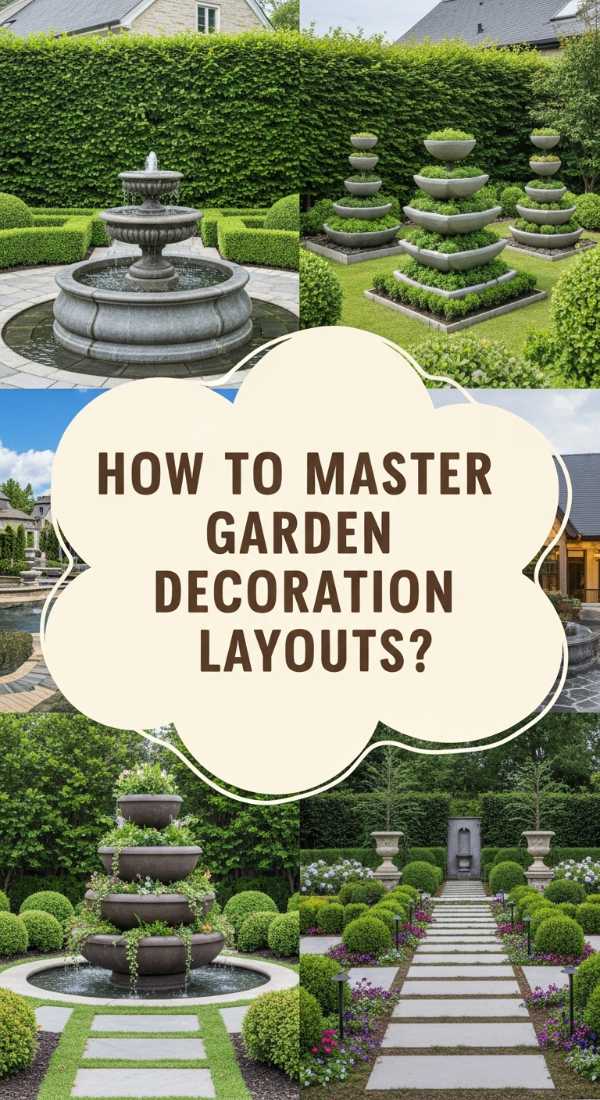
How to Master Garden Decoration Layouts for a Professional Landscape Look

Why we love this
There is a profound sense of satisfaction in a garden that feels balanced and intentional. Professional layouts use the concept of ‘rhythm’ and ‘repetition’ to guide the eye comfortably through the space, preventing it from feeling cluttered. When you master the layout, the garden feels larger and more cohesive, with each ornament and plant working in harmony to create a ‘flow’ that feels as natural as the growth of the plants themselves.
Essential Elements:
- Graph paper or a digital garden planner
- Measurement tape
- Focal point (large urn, statue, or tree)
- Symmetry markers (matching pairs of pots)
- Path edging materials
How to make it
- Measure the total dimensions of your garden space and plot them on graph paper, noting the direction of the sun and any existing permanent structures like fences or trees.
- Identify a ‘primary focal point’—something substantial like a tall stone pillar or a weeping cherry tree—and place it at the end of a sightline from your main window or patio.
- Apply the ‘Rule of Three’ by grouping smaller decorative items in odd numbers, varying their heights to create a triangular visual silhouette that feels dynamic yet grounded.
- Define your walking paths by using contrasting textures; for example, if you have a lush lawn, use hard-edged brick or dark metal borders to create clear, clean lines for the eye to follow.
- Create ‘hidden rooms’ by using tall grasses or trellises to block direct views, forcing the visitor to turn a corner and discover a new decorative scene.
- Walk the path several times during different times of day to see how shadows fall on your layout, adjusting the placement of tall items to ensure they don’t shade out smaller sun-loving plants.
How to Curate Outdoor Garden Elements for a Cozy Alfresco Living Area
Why we love this
A cozy alfresco area extends the footprint of your home and invites you to live outdoors. We love the contrast between the wildness of the garden and the structured comfort of an outdoor living room. The warmth of a flickering fire pit, the softness of an outdoor rug under bare feet, and the ambient glow of overhead bistro lights create an atmosphere of intimacy and relaxation that is unparalleled for evening entertaining or quiet reflection.
Essential Elements:
- Propane or wood-burning fire pit
- All-weather wicker or teak seating
- Outdoor area rug (polypropylene)
- Edison-style bistro string lights
- Large outdoor throw blankets
- Low-voltage path lighting
How to make it
- Choose a level area at least 10 feet away from any structures or low-hanging branches to safely house your fire pit.
- Lay down a large, weather-resistant outdoor rug to define the ‘living room’ zone; secure the corners with heavy decorative planters to prevent wind lift.
- Arrange your seating in a semi-circle around the fire pit, leaving at least 3 feet of clearance for legroom and safe movement around the heat source.
- Install 4×4 wooden posts in the corners of your area if you lack trees, and string bistro lights in a ‘zig-zag’ pattern overhead at a height of at least 8 feet.
- Add ‘soft’ elements like oversized floor pillows and baskets of rolled-up blankets to encourage guests to stay long after the sun goes down.
- Install low-wattage LED path lights leading from the house to the seating area to ensure safe passage during the night without ruining the ambient ‘firelight’ mood.
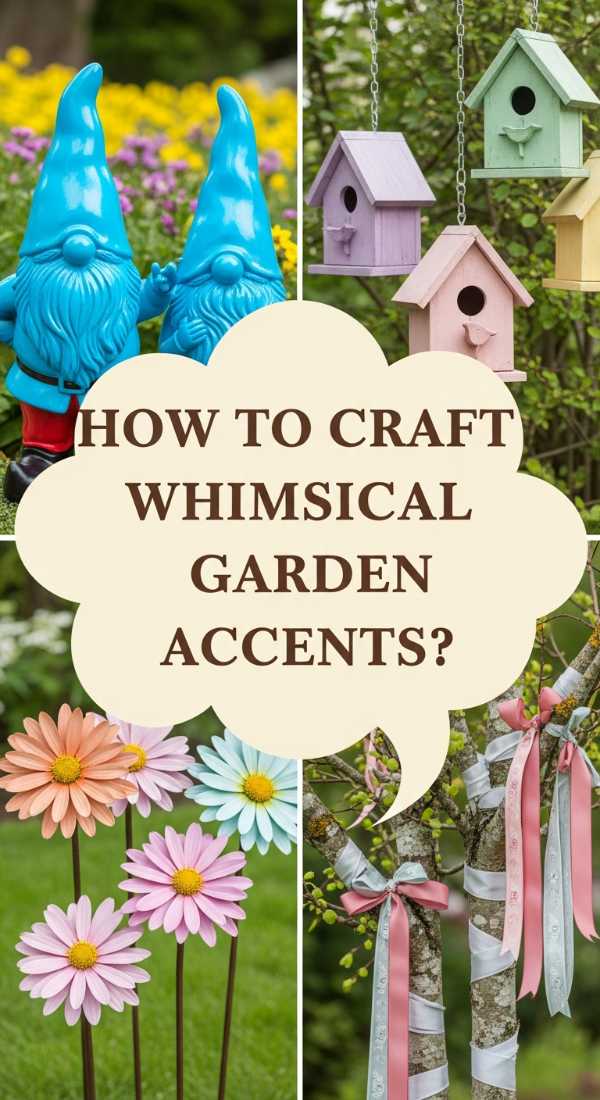
How to Craft Whimsical Garden Accents for a Playful Backyard Vibe

Why we love this
Playful accents are the ‘jewelry’ of the garden—they add sparkle and personality without being overly formal. We love this approach because it encourages a sense of humor; a tiny fairy door at the base of a tree or a brightly painted birdhouse adds a layer of whimsy that sparks joy. These accents engage the senses, from the bright pops of primary colors to the delicate sounds of wind chimes, making every walk through the garden feel like a treasure hunt.
Essential Elements:
- Miniature ‘fairy’ doors and windows
- Brightly colored birdhouses
- Hand-painted river rocks
- Reflective garden globes (gazing balls)
- Whimsical weather vanes
How to make it
- Select a theme or color palette to keep the whimsy from looking chaotic; for example, use ‘jewel tones’ like cobalt, emerald, and magenta for all your accents.
- Find a large, smooth tree trunk and attach a miniature wooden door using small finishing nails, then surround the ‘entrance’ with pebbles and tiny succulent plants.
- Paint a series of birdhouses in contrasting colors and mount them at different heights on fence posts or 1×1 wooden stakes driven into the flower beds.
- Strategically place ‘gazing balls’ (reflective spheres) in the center of hosta or fern patches to reflect the sky and give the illusion of more space and light in shady areas.
- Scatter hand-painted rocks with uplifting words or tiny insect illustrations along the edges of your garden paths, partially hiding them under foliage for a ‘seek and find’ effect.
- Ensure all accents are coated with a high-quality outdoor varnish to prevent the colors from chipping or fading under harsh UV exposure.
How to Sculpt DIY Mushroom Sculptures for a Fairytale Garden Path

Why we love this
Sculpting your own garden elements adds a unique, artisanal touch that prefabricated items simply can’t match. These concrete mushrooms are satisfyingly heavy and durable, eventually growing a fine patina of lichen or moss that makes them look as if they’ve been part of the landscape for centuries. They provide a sturdy, permanent architectural element that guides the visitor along a path with fairytale charm, standing tall against the elements year-round.
Essential Elements:
- Quick-setting concrete mix
- Plastic bowls of various sizes (for molds)
- Cardboard tubes or PVC pipe (for stems)
- Rebar or long metal stakes
- Release agent (cooking spray or vegetable oil)
- Wire brush for texturing
How to make it
- Generously coat the inside of your plastic bowls and the inside of your cardboard tubes with a release agent to ensure the concrete doesn’t stick once cured.
- Mix the concrete to a stiff, clay-like consistency; it should hold its shape when squeezed in your hand without dripping excess water.
- Fill the bowls to the brim with concrete, tapping the sides to level the surface, then insert a 12-inch piece of rebar into the center, leaving 6 inches protruding.
- Fill your stem tubes with concrete and immediately slide them over the protruding rebar in the bowls, pressing them down into the ‘cap’ concrete to create a single fused piece.
- Allow the sculptures to cure undisturbed for 24-48 hours. Once hardened, carefully peel away the cardboard and pop the caps out of the plastic bowls.
- Use a wire brush to roughen the surface for a more natural, stone-like texture, then bury the bottom 4 inches of the stem directly into the ground along your garden path.
How to Implement Garden Decor Ideas for a Lush Green Paradise

Why we love this
A lush green paradise focuses on the depth and variety of foliage rather than just floral color. We love the calming, cooling effect of layered greens—from the silvery sage of lamb’s ear to the deep forest green of hostas. This approach creates a temperate microclimate in your yard, where the air feels fresher and more humid. Incorporating stone and water elements among the greenery enhances this feeling, making the garden feel like a hidden tropical grotto or a misty forest glen.
Essential Elements:
- Large-leafed plants (Hostas, Gunnera, or Ferns)
- Natural stone boulders
- Small pond kit or disappearing fountain
- Organic mulch (pine bark or cedar)
- Drip irrigation system
How to make it
- Identify the ‘greenest’ corner of your yard and install a simple disappearing water fountain; the sound of trickling water is essential for the ‘paradise’ atmosphere.
- Plant your largest-leafed species (like ‘Sum and Substance’ Hostas) at the back of the border to create a wall of green, then layer smaller ferns and mosses toward the front.
- Nestle large natural boulders among the plants, burying the bottom 1/3 of the stone so it looks like it is emerging naturally from the earth.
- Apply a 3-inch layer of dark brown organic mulch over the entire area to retain moisture and provide a dark visual background that makes the green foliage ‘pop’.
- Install a hidden drip irrigation system under the mulch to ensure the plants receive consistent hydration, which is vital for maintaining that ‘lush’ look during dry spells.
- Prune any yellowing leaves immediately to maintain a vibrant, healthy appearance, and use a nitrogen-rich organic fertilizer once a month during the growing season.
How to Enhance Country Garden Spaces for a Charming Rustic Atmosphere
Why we love this
Rustic charm is all about celebrating the beauty of imperfection and the passage of time. We love the use of reclaimed materials like weathered barn wood, rusted metal, and cracked stoneware, which feel grounded and authentic. It’s a style that embraces the ‘wildness’ of nature, where flowers are allowed to spill over edges and metal items develop a beautiful copper or iron patina. It feels lived-in, warm, and completely unpretentious, inviting guests to relax and stay a while.
Essential Elements:
- Reclaimed wooden crates or barrels
- Rusted metal garden stakes or arches
- Native wildflower seed mixes
- Antique garden tools for decoration
- Natural hemp rope for fencing
How to make it
- Source reclaimed wine barrels or wooden apple crates and drill 1/2-inch drainage holes in the bottom before filling them with high-quality potting soil.
- Plant a mixture of native wildflowers and ‘spiller’ plants like ivy or creeping jenny to create a soft, overflowing look that blurs the lines of the container.
- Incorporate ‘found’ rustic objects, like an old rusty bicycle or a weathered wooden ladder, using them as supports for climbing plants like sweet peas or morning glories.
- Create a simple boundary using rough-hewn wooden stakes and thick hemp rope, swagging the rope loosely between the posts for a vintage farm aesthetic.
- Hang antique garden tools—like old trowels or rusted hand rakes—on a garden shed wall or fence as a decorative homage to traditional gardening.
- Allow some ‘controlled wildness’ by letting self-seeding plants like poppies or borage grow in the gaps between your stepping stones for an effortless, rustic feel.
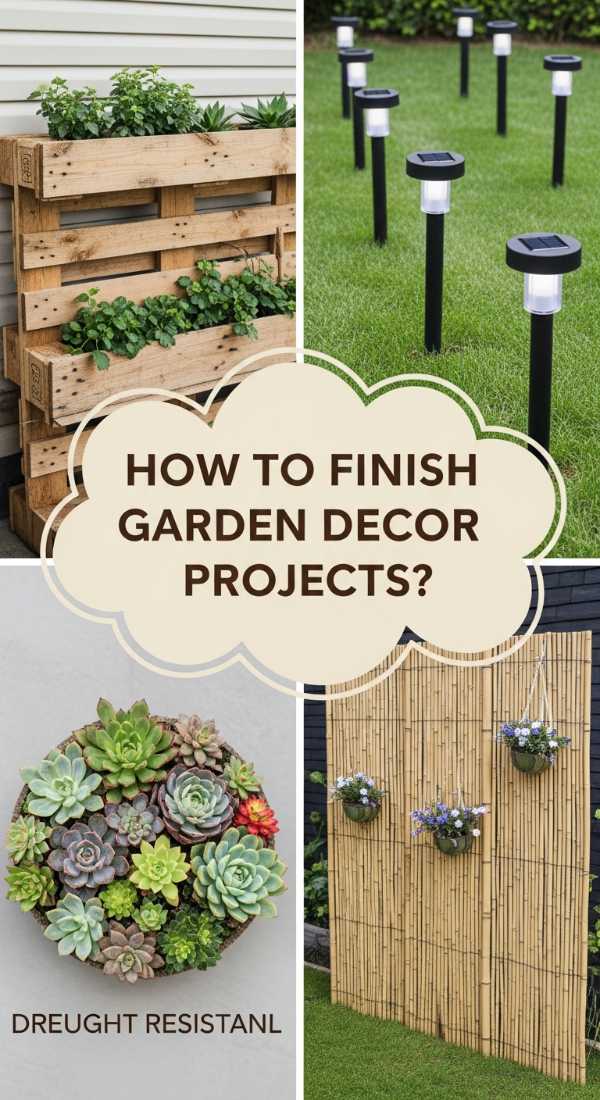
How to Finish Garden Decor Projects for a Sustainable Modern Backyard
[IMAGE_10]
Why we love this
Sustainability and modern design go hand-in-hand to create a garden that is as responsible as it is beautiful. We love the clean lines of recycled metal edging and the eco-friendly nature of drought-tolerant planting. Finishing your projects with sustainability in mind—using solar power and reclaimed materials—ensures that your sanctuary doesn’t come at the cost of the environment. It results in a sleek, sophisticated look that requires less water and maintenance over the long term.
Essential Elements:
- Solar-powered LED lighting
- Drought-tolerant native plants
- Recycled glass or rubber mulch
- Rain barrel for water collection
- Composite decking (made from recycled plastic)
How to make it
- Install a high-capacity rain barrel at the base of your house gutter downspouts, ensuring it has a secure mesh screen to prevent debris and mosquitoes from entering.
- Replace traditional wood mulch with recycled glass mulch in modern colors like sea-foam or charcoal to provide a permanent, sparkling ground cover that doesn’t decompose.
- Upgrade all your lighting to high-efficiency solar LEDs; place the panels in the sunniest spots and run the wired lights to your shadiest decorative zones.
- Swap out high-maintenance annuals for native perennials that are adapted to your local climate, which will significantly reduce your need for supplemental watering and fertilizers.
- Seal any wooden surfaces with a zero-VOC, eco-friendly sealant to protect the wood from rot without leaching harmful chemicals into the surrounding soil.
- Finish the look by using clean, geometric lines for your garden beds, using recycled steel edging to create sharp, modern borders that define the space.
Conclusion: Embracing Your Own Garden Magic
Your garden is a living, breathing extension of your home, and adding whimsical elements is the best way to make it feel like a true retreat. By combining structured design with playful, handmade touches, you create a space that offers surprises at every turn. Don’t be afraid to experiment, to let things get a little wild, and to infuse your personality into every corner. After all, the most magical gardens aren’t the ones that are perfect—they’re the ones that feel loved. Happy gardening!