

Hello, my loves! Welcome back to our cozy little corner of the internet. Today, I want to talk about something that makes my heart flutter—the magic of creating food that doesn’t just taste like a dream, but looks like one too. We’ve all seen those mesmerizing videos that stop us mid-scroll, and I’m here to tell you that you can create that same ‘viral’ sparkle right in your own kitchen with a sprinkle of love and a dash of creativity.
Sharing a meal is one of the softest ways we say ‘I love you,’ and when we make something beautiful, we’re sharing a piece of our soul. Whether you’re prepping for a busy week or hosting a sun-drenched garden party, these recipes are designed to be your aesthetic companions. Let’s dive into these ten viral-worthy ideas that will have your friends, family, and followers begging for a seat at your table.
The Secret To The World’s Best Dumpling Lasagna

Why we love this
There is a special kind of magic that happens when we combine two of the world’s most beloved comfort foods into one spectacular dish. This dumpling lasagna is the ultimate fusion that breaks the internet every time because it is unexpected, incredibly easy, and deeply satisfying. The way the silky dumpling skins mimic traditional pasta while hiding a savory surprise inside creates a texture that is absolutely heavenly. It is the perfect cozy dinner for those rainy evenings when you want a warm embrace in the form of a meal.
Ingredients
- 2 bags of frozen pork or vegetable dumplings
- 1 jar of high-quality marinara sauce
- 2 cups shredded mozzarella cheese
- 1/2 cup grated parmesan
- Fresh basil leaves for garnish
- 1 tablespoon red pepper flakes
How to make it
- Preheat your oven to 375°F (190°C) and lightly grease a standard 9×13 inch baking dish with olive oil or butter.
- Spread a thin layer of marinara sauce across the bottom of the dish to prevent the dumplings from sticking during the bake.
- Arrange a single layer of frozen dumplings over the sauce, packing them closely together so they form a solid base.
- Pour more marinara sauce over the dumplings until they are mostly covered, then sprinkle with half of the mozzarella and parmesan.
- Repeat the layers once more with the remaining dumplings, sauce, and the rest of the cheese to create a beautiful stack.
- Cover the dish with foil and bake for 25 minutes, then remove the foil and bake for another 15 minutes until the cheese is bubbly and golden.
- Let it rest for 5 minutes before garnishing with fresh basil and red pepper flakes, then serve it with a smile to your hungry guests.
How To Make Perfect Flaky Strawberry Scones At Home

Why we love this
Nothing quite compares to the scent of fresh strawberries and sweet butter wafting through a sun-drenched kitchen on a slow Saturday morning. These scones are the definition of cloud-soft baking, featuring delicate, flaky layers that practically melt on your tongue with every single bite. They feel like a refined treat from a high-end bakery, yet they are infused with the warmth and love that only home-baked goods can provide. Sharing these with your favorite people over a pot of tea is a beautiful way to celebrate the simple joys of life.
Ingredients
- 2 cups all-purpose flour
- 1/3 cup granulated sugar
- 1 tablespoon baking powder
- 1/2 cup cold unsalted butter, cubed
- 1/2 cup heavy cream (plus extra for brushing)
- 1 cup fresh strawberries, diced small
- 1 teaspoon vanilla extract
How to make it
- Line a baking sheet with parchment paper and preheat your oven to 400°F (200°C) to ensure a perfectly golden rise.
- In a large bowl, whisk together the flour, sugar, and baking powder until well combined and light.
- Use a pastry cutter or your fingertips to work the cold butter into the flour until the mixture resembles coarse crumbs.
- Gently fold in the diced strawberries, being careful not to crush them so they stay vibrant and juicy.
- Whisk the vanilla into the heavy cream and pour it into the dry ingredients, stirring just until a shaggy dough forms.
- Turn the dough onto a floured surface, gently pat into a circle about 1-inch thick, and cut into 8 even wedges.
- Brush the tops with extra cream, bake for 18-20 minutes until golden, and let them cool slightly before enjoying their flaky goodness.
Flavorful Sweet Potato Taco Bowl For Healthy Meal Prep

Why we love this
Eating well should always feel like a celebration of color and vitality, and this sweet potato taco bowl is the perfect embodiment of that philosophy. It is a vibrant, nutrient-dense meal that brings a burst of sunshine to your lunch break, making healthy eating feel like a true indulgence. The combination of roasted sweet potatoes and fresh toppings creates a balance of flavors that is both grounding and energizing for your busy day. This recipe is a viral favorite because it proves that meal prep can be both aesthetically pleasing and incredibly delicious.
Ingredients
- 2 large sweet potatoes, cubed
- 1 can black beans, rinsed and drained
- 1 cup cooked quinoa or brown rice
- 1 avocado, sliced
- 1/2 cup corn kernels
- Lime wedges and fresh cilantro
- Taco seasoning (cumin, chili powder, garlic powder)
How to make it
- Toss the cubed sweet potatoes with olive oil and taco seasoning, then spread them on a baking sheet.
- Roast the potatoes at 400°F (200°C) for about 25-30 minutes until they are tender and have slightly caramelized edges.
- While the potatoes roast, prepare your base of quinoa or brown rice and warm the black beans in a small saucepan.
- Divide the grains into four meal-prep containers or bowls, creating a clean and organized base for your toppings.
- Add a generous portion of the roasted sweet potatoes, followed by the black beans, corn, and creamy avocado slices.
- Garnish each bowl with a handful of fresh cilantro and place a lime wedge on the side for a bright, zesty finish.
- Drizzle with your favorite hot sauce or a dollop of Greek yogurt before sealing the containers for a week of joyful lunches.
The Best Baked Tilapia Recipe For Keto Dinner

Why we love this
Finding a dinner recipe that is both light and satisfying can sometimes feel like a challenge, but this baked tilapia is a total game-changer. It is a cloud-soft protein option that absorbs flavors beautifully, making it a sophisticated yet simple choice for anyone following a keto lifestyle. The herb-butter topping creates a luxurious finish that feels like dining at a five-star seafood restaurant in the comfort of your own home. It’s the kind of meal that leaves you feeling nourished and light, perfect for a peaceful evening of self-care and good food.
Ingredients
- 4 tilapia fillets
- 4 tablespoons butter, melted
- 2 cloves garlic, minced
- 1 teaspoon dried oregano
- 1/2 teaspoon paprika
- Fresh lemon slices
- Salt and black pepper to taste
How to make it
- Preheat your oven to 400°F (200°C) and lightly grease a glass baking dish to ensure the fish doesn’t stick.
- Pat the tilapia fillets dry with a paper towel, which helps the seasonings adhere and ensures a better texture after baking.
- In a small bowl, whisk together the melted butter, minced garlic, oregano, and paprika to create a flavorful basting liquid.
- Place the fillets in the baking dish and brush both sides generously with the garlic butter mixture.
- Season with salt and pepper, then place a fresh lemon slice on top of each fillet for a bright, citrusy infusion.
- Bake for 12-15 minutes, or until the fish is opaque and flakes easily with a fork, being careful not to overcook it.
- Serve immediately with a side of steamed greens or a crisp salad for a perfectly balanced and elegant keto-friendly dinner.
Master Professional Sushi Recipes In Your Own Kitchen

Why we love this
There is something incredibly empowering about mastering the art of sushi-making within the sanctuary of your own beautiful kitchen space. This process is like a form of edible meditation, requiring focus and gentleness as you roll together fresh, vibrant ingredients into stunning little works of art. It’s a viral sensation because it turns dinner into an interactive experience that you can share with your loves, creating memories along with the meal. Plus, the pride you feel when you slice into a perfect roll is a feeling that truly can’t be beat.
Ingredients
- 2 cups sushi rice, seasoned with rice vinegar and sugar
- Nori sheets (seaweed)
- Sashimi-grade salmon or tuna
- 1 cucumber, julienned
- 1 avocado, thinly sliced
- Soy sauce, wasabi, and pickled ginger
How to make it
- Place a sheet of nori on a bamboo rolling mat, ensuring the rough side is facing up to catch the rice.
- Wet your hands slightly and spread a thin, even layer of sushi rice over the nori, leaving about an inch of space at the top.
- Arrange your fillings—fish, cucumber, and avocado—in a neat horizontal line across the center of the rice.
- Using the bamboo mat, slowly roll the nori over the fillings, tucking it tightly as you go to create a firm cylinder.
- Apply a small amount of water to the top edge of the nori to seal the roll perfectly before removing it from the mat.
- Use a very sharp, damp knife to slice the roll into 6 or 8 even pieces, wiping the knife between cuts for a clean finish.
- Arrange the sushi beautifully on a platter with ginger and wasabi, and enjoy the professional-quality feast you created yourself.
Stunning Wildflower Cupcakes For Your Next Baby Shower
Why we love this
These wildflower cupcakes are like a soft, sweet garden party in every single bite, making them the ultimate showstopper for any special occasion. The delicate floral designs are surprisingly easy to achieve, yet they look like they’ve been crafted by a professional pastry chef with a poetic soul. They bring a sense of whimsy and ethereal beauty to the dessert table, capturing the hearts of everyone who sees them before they even take a taste. It’s a wonderful way to celebrate new beginnings and the blooming beauty of life with those you cherish most.
Ingredients
- 12 vanilla cupcakes, cooled completely
- 2 cups vanilla buttercream frosting
- Gel food coloring (pink, yellow, and green)
- Edible pearls or sprinkles
- Piping bags and various flower tips
How to make it
- Divide your buttercream into three bowls and tint them with the gel colors to create soft, pastel wildflower shades.
- Fit your piping bags with flower tips (like a petal tip or a star tip) and fill them with the colored frosting.
- Starting from the center of the cupcake, pipe small petals or rosettes to mimic the look of wildflowers in a meadow.
- Use the green frosting and a leaf tip to add small, delicate leaves between the flowers for a realistic and organic touch.
- Add a few edible pearls to the centers of some flowers to give them a touch of sparkle and a refined, elegant finish.
- Arrange the finished cupcakes on a vintage platter or a tiered stand to create a breathtaking floral display for your guests.
- Keep them in a cool place until serving so the delicate frosting ‘petals’ stay perfectly in place for their big debut.
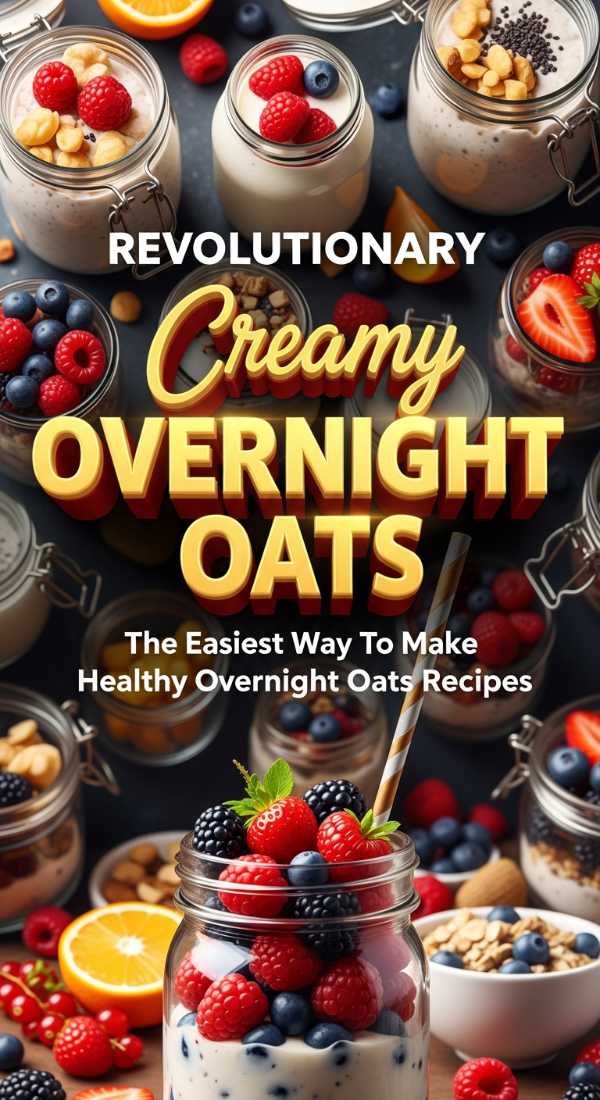
Creamy Overnight Oats Recipes For Busy Mornings

Why we love this
Mornings can be a whirlwind, but having a jar of creamy overnight oats waiting for you feels like a gift from your past self. This recipe is a staple for the modern, busy woman because it combines effortless preparation with a nutrient-packed punch that keeps you fueled and focused. The texture is thick and decadent, almost like having dessert for breakfast, but with all the goodness your body craves to start the day. It’s the ultimate ‘set it and forget it’ meal that makes your morning routine feel significantly more graceful and calm.
Ingredients
- 1/2 cup rolled oats
- 1/2 cup almond milk or oat milk
- 1/4 cup Greek yogurt
- 1 tablespoon chia seeds
- 1 teaspoon honey or maple syrup
- Fresh berries and nuts for topping
How to make it
- In a clean glass jar or airtight container, combine the rolled oats, milk, Greek yogurt, and chia seeds.
- Stir in your sweetener of choice, ensuring everything is well-mixed so the oats can absorb the liquid evenly.
- Seal the jar tightly and place it in the refrigerator for at least 6 hours, or ideally, overnight for the best texture.
- In the morning, give the oats a good stir; if they seem too thick, add a splash more milk to reach your desired consistency.
- Top your oats with a handful of fresh berries, crunchy nuts, or even a sprinkle of granola for a lovely contrast in texture.
- You can enjoy them straight from the jar at home or grab them as you head out the door for a nourishing meal on the go.
- Experiment with different flavors like cocoa powder or peanut butter to keep your morning ritual exciting and delicious every week.
The Best Moist Strawberry Banana Bread Recipe

Why we love this
This strawberry banana bread is a beautiful twist on a classic favorite, bringing a pop of color and a burst of berry sweetness to every slice. It is incredibly moist and tender, with the strawberries creating little pockets of jam-like goodness throughout the loaf. Baking this bread is a soulful experience that fills your home with the most comforting aroma imaginable, inviting everyone to the kitchen for a warm slice. It is the perfect companion for your afternoon coffee or a thoughtful homemade gift to drop off on a neighbor’s doorstep.
Ingredients
- 3 ripe bananas, mashed
- 1/2 cup melted butter
- 3/4 cup sugar
- 1 egg, beaten
- 1 teaspoon vanilla extract
- 1.5 cups all-purpose flour
- 1 cup fresh strawberries, chopped
How to make it
- Preheat your oven to 350°F (175°C) and grease a standard loaf pan thoroughly to ensure the bread releases easily after baking.
- In a large mixing bowl, stir the mashed bananas together with the melted butter until the mixture is smooth and creamy.
- Mix in the sugar, beaten egg, and vanilla extract, blending well to create a sweet and fragrant base for your bread.
- Gently fold in the flour until just combined, being careful not to overmix, which keeps the texture light and airy.
- Carefully fold in the chopped strawberries, distributing them evenly so every slice has a touch of berry magic.
- Pour the batter into the loaf pan and bake for 50-60 minutes, or until a tester inserted into the center comes out clean.
- Let the bread cool in the pan for 10 minutes before transferring it to a wire rack to cool completely before slicing and serving.
High Protein Cottage Cheese Lunch Ideas For Work

Why we love this
Cottage cheese has made a major comeback in the wellness world, and for good reason—it’s a versatile, high-protein powerhouse that makes lunch feel light yet sustaining. These lunch ideas are perfect for the working woman who wants to stay energized without feeling weighed down during her afternoon meetings. The creamy texture of the cheese pairs beautifully with both savory and sweet toppings, allowing you to customize your meal based on your mood. It’s a simple, aesthetic way to nourish your body and keep your health goals on track while you’re conquering your day.
Ingredients
- 1 cup low-fat cottage cheese
- Cucumber and cherry tomatoes (savory)
- Everything bagel seasoning (savory)
- Sliced peaches and honey (sweet)
- A handful of walnuts or almonds
How to make it
- Start with a base of high-quality, creamy cottage cheese in a portable glass container or a beautiful ceramic bowl.
- For a savory version, top the cheese with diced cucumbers, halved cherry tomatoes, and a generous sprinkle of everything bagel seasoning.
- For a sweet version, layer on fresh sliced peaches or berries and drizzle with a touch of honey or maple syrup.
- Add a handful of nuts or seeds to either version to provide a satisfying crunch and an extra boost of healthy fats.
- Keep the toppings in a separate small container if you prefer to keep them extra fresh until the very moment you’re ready to eat.
- Pair your cottage cheese bowl with some whole-grain crackers or a side of fresh fruit for a complete and balanced lunch.
- This meal is best enjoyed chilled, so keep it in the office fridge until your lunch break for the most refreshing experience.
Epic Lemonade Bar Ideas For Your Summer Party
[IMAGE_10]
Why we love this
A lemonade bar is the ultimate expression of summer hospitality, offering a refreshing and interactive way for your guests to cool down and mingle. It’s a visual delight, filled with jars of brightly colored fruits, fragrant herbs, and sparkling glassware that captures the golden light of a summer afternoon. This idea is a viral hit because it transforms a simple drink into a customizable experience that makes every guest feel special and cared for. It’s about creating an atmosphere of joy and celebration that lingers in the memory long after the sun goes down.
Ingredients
- Large dispensers of classic lemonade
- Fresh garnishes: mint, basil, and rosemary
- Fruit mix-ins: sliced strawberries, blueberries, and lemon wheels
- Flavored syrups: lavender, peach, or raspberry
- Plenty of ice and sparkling water
How to make it
- Set up a dedicated table with a beautiful tablecloth and arrange your lemonade dispensers at varying heights for visual interest.
- Place small, clear bowls filled with different fresh fruits and herbs along the table so guests can easily see their options.
- Include a variety of flavored syrups in pretty glass bottles with labels, allowing guests to create their own unique flavor profiles.
- Provide plenty of ice in an insulated bucket and offer both flat and sparkling water for those who like a little extra fizz.
- Set out rows of clean glassware—mason jars or vintage tumblers work beautifully—and colorful paper straws to complete the look.
- Add a few floral arrangements or strings of fairy lights to the table to create a whimsical and inviting ‘bar’ atmosphere.
- Encourage your guests to get creative with their concoctions, and don’t forget to take a few photos of the beautiful setup before the party starts!
Wrapping Up With Love
Creating food that goes viral isn’t just about the likes or the shares, my loves—it’s about the joy of sharing something beautiful with the world. I hope these recipes inspire you to step into your kitchen with a light heart and a creative spirit. Remember, the secret ingredient is always a little bit of your own unique magic. Go forth and create something stunning today! I can’t wait to see what you make.