
Why Simple Food Boards are Taking Over Your Social Media Feed
Have you ever scrolled through your feed and stopped dead in your tracks at the sight of a perfectly messy, yet incredibly intentional spread of snacks? There’s something deeply nostalgic and comforting about a food board that calls to us. It’s not just about the cheese or the crackers; it’s about the permission to graze, to linger over a conversation, and to enjoy a meal that feels more like an experience than a chore. In a world that feels increasingly fast-paced, these boards represent a return to slow living and the simple joy of sharing a table with those we love.
The magic of the viral food board lies in its accessibility. You don’t need to be a Michelin-starred chef to assemble something that looks like art. Whether it’s a vibrant array of summer fruits or a decadent melted dip, these spreads invite everyone to dig in without the formality of a plated dinner. They capture a specific kind of ‘human’ energy—warm, inclusive, and effortlessly beautiful. Let’s dive into the core components that turn a simple gathering into a viral-worthy feast.
How to make rotel dip?

Why we love this
Imagine a bowl of liquid gold, swirling with the smoky heat of green chilis and the savory depth of browned sausage. This dip is the ultimate comfort food, offering a velvety texture that clings to every salty crevice of a sturdy tortilla chip. As you pull a chip through the molten cheese, the aroma of spices and melted dairy fills the air, creating a sensory experience that is both indulgent and deeply satisfying. It’s the kind of dish that disappears in minutes because every bite is a perfect balance of creamy, spicy, and salty goodness.
Ingredients
- 1 lb Ground breakfast sausage or lean ground beef
- 1 block (16 oz) Velveeta or processed cheese, cubed
- 2 cans (10 oz each) Ro*Tel Original Diced Tomatoes and Green Chilies
- 1/2 cup Whole milk (optional for consistency)
- Fresh cilantro and jalapeños for garnish
How to make it
- Place a large skillet over medium-high heat. Add the ground sausage or beef, breaking it apart with a wooden spoon or spatula into small, uniform crumbles. Cook until the meat is completely browned and no pink remains, which usually takes about 7-10 minutes.
- Once the meat is cooked, drain the excess fat carefully into a heat-safe container. This step is crucial to prevent the dip from becoming oily.
- Lower the heat to medium-low. Add the cubed cheese to the skillet. Stir constantly to ensure the cheese melts evenly without scorching on the bottom. If the mixture seems too thick, slowly whisk in small amounts of milk until you reach a silky, pourable consistency.
- Open the cans of Ro*Tel but do not drain them; the juice from the tomatoes provides essential acidity and flavor. Pour them into the cheese mixture and stir until fully integrated.
- Continue to heat for another 5 minutes, allowing the flavors to marry. Serve immediately in a warm bowl or a small slow cooker to keep it melted throughout the party.
How to cook summer pasta?

Why we love this
Summer pasta is like a garden on a plate, celebrating the peak ripeness of the season with every forkful. The texture of the pasta should be perfectly al dente, providing a firm bite that contrasts beautifully with the soft, blistered skins of cherry tomatoes that burst with sweetness. The scent of fresh basil leaves being torn over the warm noodles releases an intoxicating herbal aroma that signals freshness and vitality. It is a light yet filling meal that feels elegant enough for a patio dinner party but simple enough for a Tuesday night at home.
Ingredients
- 1 lb Spaghetti or Linguine
- 2 cups Cherry tomatoes, halved
- 4 cloves Garlic, thinly sliced
- 1/4 cup Extra virgin olive oil
- 1 bunch Fresh basil, torn
- 1/2 tsp Red pepper flakes
- Freshly grated Parmesan cheese
How to make it
- Bring a large pot of heavily salted water to a rolling boil. Add your pasta and cook for exactly one minute less than the package instructions indicate for ‘al dente.’ Before draining, reserve 1 cup of the starchy pasta water.
- While the pasta cooks, heat the olive oil in a wide skillet over medium heat. Add the sliced garlic and red pepper flakes. Cook for about 2 minutes, or until the garlic is fragrant and just beginning to turn a pale golden color—be careful not to burn it, as bitter garlic will ruin the sauce.
- Toss in the cherry tomatoes with a pinch of salt. Sauté them for 5-6 minutes, pressing down on a few with your spoon to release their juices, creating a light, natural sauce.
- Transfer the cooked pasta directly into the skillet with the tomatoes. Pour in half of the reserved pasta water and toss vigorously. The starch in the water will emulsify with the oil to create a glossy sauce that coats every strand.
- Turn off the heat, fold in the fresh basil, and top with a generous dusting of Parmesan. Serve immediately while the herbs are still bright green.
How to mix summer coffee?

Why we love this
There is nothing quite like the first sip of a perfectly layered summer coffee on a humid morning. The clink of ice cubes against glass provides a refreshing soundtrack as the dark, bold coffee swirls into a cloud of creamy milk. The texture is smooth and cold, cutting through the heat of the day with a caffeine kick that feels like a crisp breeze. Hints of vanilla or caramel dance on the palate, making the drink feel like a decadent treat rather than just a morning necessity, turning a routine caffeine fix into a moment of pure bliss.
Ingredients
- 1 cup Strong cold brew coffee or chilled espresso
- 1 tbsp Simple syrup or flavored syrup (vanilla or salted caramel)
- 1/2 cup Half-and-half or oat milk
- Ice cubes (coffee ice cubes are best to prevent dilution)
- Optional: Whipped cold foam for topping
How to make it
- Fill a tall glass to the brim with large ice cubes. If you want to keep the flavor intense, use pre-frozen coffee cubes instead of water ice.
- Pour your chilled coffee or espresso over the ice, leaving about two inches of space at the top of the glass.
- Add your chosen syrup. For a viral look, drizzle the syrup down the inner sides of the glass before adding the coffee to create ‘streaks’ of sweetness.
- Slowly pour the milk or cream over the top. Watch as the cream cascades down through the dark coffee in beautiful, marble-like ribbons.
- For the professional finish, use a handheld milk frother to whip a small amount of milk in a separate container until it forms a thick foam. Spoon this over the top of the drink and sprinkle with a dash of cinnamon or cocoa powder.
How to grill chicken kabobs?

Why we love this
Grilling chicken kabobs brings out a smoky, charred depth that you simply cannot achieve in an oven. The contrast between the tender, juice-dripping pieces of marinated chicken and the slightly softened, caramelized edges of bell peppers and onions is a culinary delight. Each bite offers a variety of textures—from the snap of a grilled veggie to the melt-in-your-mouth quality of the meat. The aroma of charcoal and sizzling fat wafting through the backyard is the quintessential scent of summer, promising a meal that is as healthy as it is flavorful.
Ingredients
- 1.5 lbs Chicken breast or thighs, cut into 1-inch cubes
- 2 Bell peppers (different colors), cut into chunks
- 1 Red onion, cut into wedges
- 1/4 cup Olive oil, 3 tbsp Lemon juice, 3 cloves Garlic (for marinade)
- 1 tsp Dried oregano and 1 tsp Smoked paprika
- Metal or wooden skewers
How to make it
- In a large bowl, whisk together the olive oil, lemon juice, minced garlic, oregano, and paprika. Toss the chicken cubes in the marinade, cover, and refrigerate for at least 30 minutes (or up to 4 hours) to allow the acid to tenderize the meat.
- If using wooden skewers, soak them in water for at least 20 minutes to prevent them from catching fire on the grill.
- Thread the ingredients onto the skewers, alternating between chicken, pepper, and onion. Don’t crowd them too tightly; a little space ensures the heat can circulate and cook the meat evenly.
- Preheat your grill to medium-high heat (about 400°F). Lightly oil the grates to prevent sticking.
- Place the kabobs on the grill and cook for 12-15 minutes, turning every 3-4 minutes. You are looking for a nice char on the vegetables and an internal temperature of 165°F for the chicken. Rest the kabobs for 5 minutes before serving to keep the juices inside the meat.
How to flavor fresh lemonade?

Why we love this
Fresh lemonade is the ultimate thirst quencher, a vibrant balance of puckering tartness and sugary sweetness that dances on the tongue. When you infuse it with fresh fruits or herbs, it transforms into a sophisticated beverage that looks as good as it tastes. The sight of muddled berries or sprigs of mint floating in a crystal-clear pitcher suggests a level of care and craft that bottled juice simply can’t match. It’s cold, zesty, and carries the bright, sunny essence of citrus that makes you want to sit on a porch swing and watch the world go by.
Ingredients
- 1 cup Freshly squeezed lemon juice (about 6-8 lemons)
- 3/4 cup Granulated sugar
- 4 cups Cold water
- 1 cup Fresh strawberries, raspberries, or peaches (for flavoring)
- Handful of fresh mint or lavender
How to make it
- Start by making a simple syrup. Combine the sugar and 1 cup of the water in a small saucepan. Heat over medium until the sugar is completely dissolved, then let it cool. This ensures your lemonade isn’t grainy.
- In a large pitcher, combine the lemon juice, the cooled simple syrup, and the remaining 3 cups of cold water. Stir well.
- To flavor, take your chosen fruit (like strawberries) and muddle them in the bottom of a bowl until they are smashed and juicy. Strain the pulp through a fine-mesh sieve into the lemonade pitcher if you want a clear drink, or leave it in for a rustic look.
- Add fresh herbs like mint by gently slapping the leaves between your palms to release the oils before dropping them into the pitcher.
- Chill the lemonade for at least an hour. Serve in glasses filled with ice, garnished with a fresh lemon wheel and a sprig of the herb you used.
How to brew sun tea?

Why we love this
Sun tea is a lesson in patience and the gentle power of nature. Unlike boiled tea, which can sometimes turn bitter from the high heat, sun tea has a remarkably smooth, mellow flavor profile that feels soft on the palate. The process of watching the water slowly darken into a deep amber hue over several hours under the golden sun is hypnotic and rewarding. When served over plenty of ice, the tea feels incredibly pure and light, capturing the very essence of a long, lazy summer afternoon where time seems to stand still.
Ingredients
- 8 Individual tea bags (black tea is traditional, but green or hibiscus works too)
- 1 gallon Purified water
- Fresh lemon slices
- Optional: Honey or agave for sweetening
- Fresh sprigs of mint
How to make it
- Clean a one-gallon glass jar thoroughly. Avoid using plastic, as the sun’s heat can cause plastic flavors to leach into the tea.
- Fill the jar with room-temperature purified water. Place the tea bags into the water, allowing the strings to hang over the rim of the jar so you can easily remove them later.
- Secure the lid and place the jar in a spot that receives direct, uninterrupted sunlight for at least 3 to 5 hours. You will see the color gradually diffuse from the bags.
- Once the tea has reached your desired strength, bring the jar inside and remove the tea bags immediately. Do not leave them in for more than 5 hours to avoid bacterial growth.
- Stir in any sweeteners while the tea is still slightly warm from the sun. Refrigerate immediately. Serve over ice with lemon and mint for a classic, refreshing experience.
How to prep summer lunch?

Why we love this
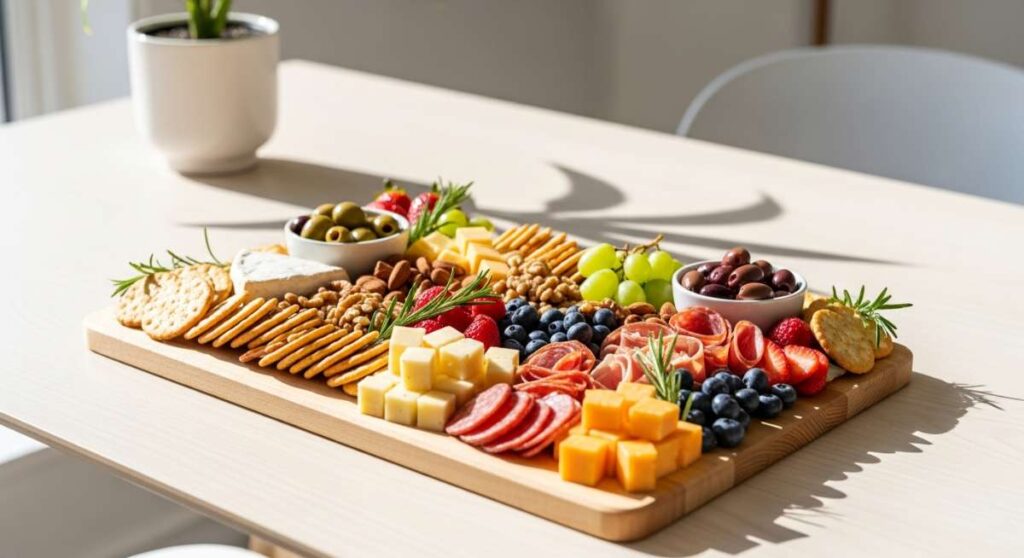
A great summer lunch should be a celebration of crunch and freshness that doesn’t leave you feeling weighed down in the heat. It’s about the snap of a cold cucumber, the creamy richness of a ripe avocado, and the saltiness of a light deli meat or chickpea salad. The beauty of a ‘board-style’ lunch is the variety; you can nibble on different textures and flavors, keeping the meal interesting and light. It’s a colorful, vibrant way to fuel your afternoon that feels more like a picnic than a standard midday break.
Ingredients
- Sliced baguette or whole-grain crackers
- Hummus or whipped feta dip
- Fresh sliced cucumbers, radishes, and carrots
- Prosciutto or turkey breast slices
- A handful of mixed olives and nuts
- Seasonal grapes or melon slices
How to make it
- Start with a clean wooden board or a large flat plate. Place your small bowls of ‘wet’ ingredients first—the hummus, whipped feta, or olives—to act as anchors for the layout.
- Arrange the protein, such as folded prosciutto or turkey, in a fan shape near one of the corners. This makes it easy for guests (or just you!) to grab a single portion.
- Place the sliced baguette or crackers in a curving line across the board, following the natural flow of the other items.
- Fill the remaining gaps with the freshest produce you have. Slice radishes thinly so they look like little jewels, and cut cucumbers into long spears for dipping.
- Add the fruit last to provide pops of color and a sweet counterpoint to the salty meats and cheeses. Keep the board in the fridge until the very moment you are ready to eat to ensure everything stays crisp.
How to bake summer desserts?
Why we love this
Summer desserts are all about letting the natural sweetness of fruit take center stage. There is a rustic charm to a golden-brown crust yielding to a bubbling, jammy center of peaches or berries. The scent of warm sugar and cooked fruit wafting from the oven is enough to make anyone’s mouth water. Whether it’s a tart or a crumble, the texture of a buttery, flaky pastry paired with a cold scoop of vanilla bean ice cream creates a ‘hot-meets-cold’ sensation that is the hallmark of a perfect seasonal treat. It’s messy, sweet, and utterly delightful.
Ingredients
- 2 cups Fresh seasonal fruit (blueberries, peaches, or blackberries)
- 1 cup All-purpose flour
- 1/2 cup Rolled oats
- 1/2 cup Brown sugar
- 1/2 cup Cold butter, cubed
- 1 tsp Cinnamon and a pinch of salt
How to make it
- Preheat your oven to 375°F (190°C). Grease a medium-sized baking dish with a bit of butter or non-stick spray.
- In a large bowl, toss your fresh fruit with a tablespoon of sugar and a teaspoon of flour. This helps thicken the juices as they bake so the dessert isn’t watery. Spread the fruit evenly in the bottom of the dish.
- In a separate bowl, combine the flour, oats, brown sugar, cinnamon, and salt. Add the cold, cubed butter. Use a pastry cutter or your fingers to work the butter into the dry ingredients until the mixture resembles coarse crumbs.
- Sprinkle the crumble topping generously over the fruit. Do not press it down; you want it to stay light and airy so it gets crunchy.
- Bake for 30-35 minutes until the fruit juices are bubbling around the edges and the topping is a deep golden brown. Let it cool for at least 15 minutes before serving so the filling can set properly.
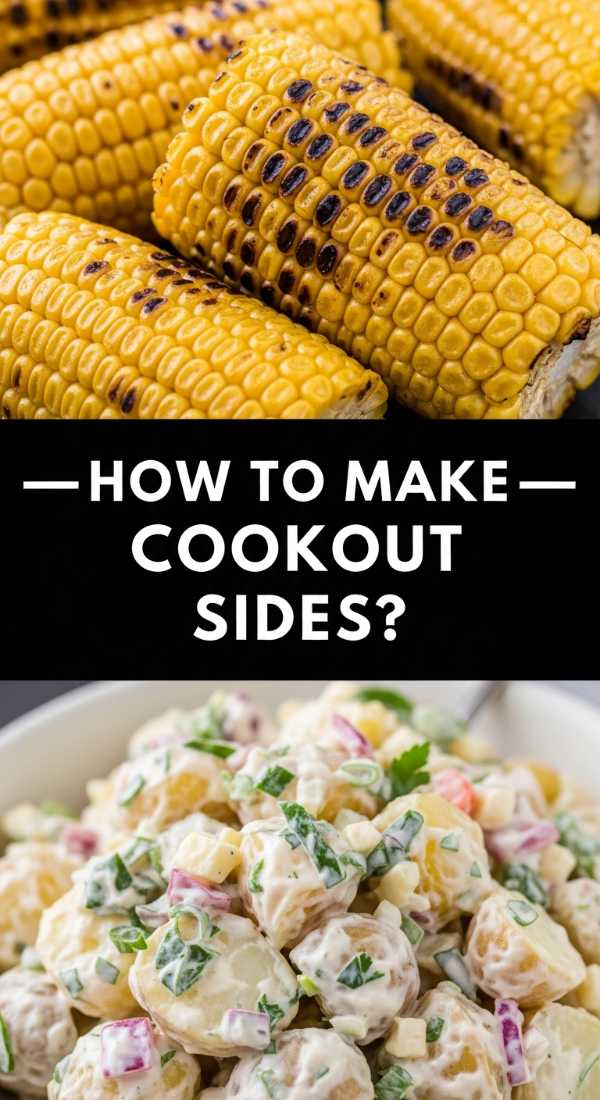
How to make cookout sides?
Why we love this
Cookout sides are the unsung heroes of the backyard barbecue, providing the necessary balance to smoky grilled meats. We love the creamy, tangy zip of a well-made potato salad or the crunch of a vinegar-based slaw. These dishes are often served cold, offering a refreshing temperature contrast to the hot grill items. They carry the flavors of nostalgia—picnics at the park, family reunions, and long July 4th weekends. A good side dish is hearty, flavorful, and capable of standing up to the bold flavors of BBQ sauce and charcoal smoke.
Ingredients
- 1 lb Yukon Gold potatoes (for potato salad)
- 1/2 cup Mayonnaise and 2 tbsp Yellow mustard
- 2 stalks Celery, finely chopped
- 1/2 Red onion, minced
- 2 Hard-boiled eggs, chopped
- Paprika and fresh dill for garnish
How to make it
- Wash and peel the potatoes (or leave skins on for a rustic feel). Cut them into bite-sized 1-inch cubes. Place them in a pot of cold salted water and bring to a boil.
- Cook the potatoes for about 10-12 minutes. You want them tender enough that a fork slides in easily, but not so soft that they turn into mashed potatoes. Drain and let them cool completely.
- In a large mixing bowl, whisk together the mayonnaise, mustard, salt, pepper, and a splash of pickle juice if you have it. This creates the creamy base.
- Fold in the cooled potatoes, chopped celery, red onion, and hard-boiled eggs. Use a gentle folding motion so you don’t break the potatoes apart too much.
- Cover and refrigerate for at least 2 hours. This ‘resting’ period is vital as the potatoes absorb the flavors of the dressing. Sprinkle with paprika and dill just before serving for a professional look.
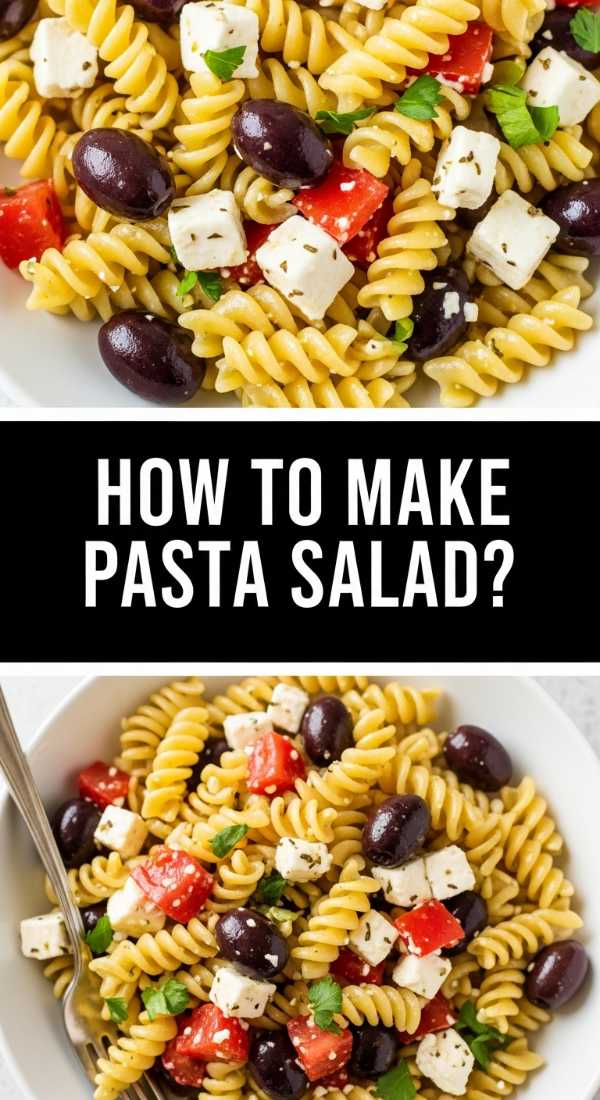
How to make pasta salad?
[IMAGE_10]
Why we love this
Pasta salad is the ultimate versatile dish, a cold and refreshing medley that brings together various textures in one bowl. The chewiness of the rotini pasta holds onto the zesty vinaigrette, while the crunch of fresh peppers and the silkiness of fresh mozzarella pearls provide a delightful mouthfeel. It is a dish that actually tastes better the next day, making it the king of meal prep. It’s bright, colorful, and packed with Mediterranean-inspired flavors that feel both healthy and satisfying, perfect for a sunny lunch or a side at a busy gathering.
Ingredients
- 1 lb Rotini or Fusilli pasta
- 1/2 cup Italian vinaigrette dressing
- 1 cup Cherry tomatoes, halved
- 1/2 cup Cucumber, diced
- 1/2 cup Black olives, sliced
- 1 cup Mini mozzarella pearls
- 1/4 cup Salami or pepperoni, diced
How to make it
- Boil the pasta in salted water until it is slightly past al dente—since it will be served cold, the pasta firms up in the fridge, so a slightly softer cook is better here. Drain and rinse with cold water immediately to stop the cooking process.
- In a very large bowl, combine the cooled pasta with half of the Italian dressing. Toss well to coat; the pasta will soak up this initial layer of flavor.
- Add the halved cherry tomatoes, diced cucumbers, olives, mozzarella pearls, and meat. These additions provide the ‘viral’ look of a multi-colored, textured bowl.
- Pour the remaining dressing over the mixture and toss again. Season generously with salt, pepper, and perhaps a pinch of dried oregano or red pepper flakes for an extra kick.
- Chill in the refrigerator for at least one hour before serving. Give it one final toss right before it hits the table to redistribute the dressing that may have settled at the bottom.
Conclusion
In the end, the trend of simple food boards and vibrant summer dishes is about more than just aesthetics; it’s about the feeling of abundance and the joy of sharing. These recipes are designed to be low-stress and high-reward, allowing you to spend less time in the kitchen and more time enjoying the sunshine with your favorite people. Whether you’re layering a summer coffee or assembly a massive pasta salad, remember that the best ingredient is always the laughter and conversation that happens around the food.