

There is something almost magical about the moment your friends gather around a table, the air thick with laughter and the irresistible aroma of a meal made with love. I used to spend hours stressed in the kitchen, missing out on the best conversations, until I discovered the secret of the ‘Ultimate Food Board.’ It’s not just a meal; it’s an experience that invites everyone to lean in, pick their favorites, and savor every bite together. This isn’t your average charcuterie—this is a curated spread of warm, comforting, and viral-worthy dishes that turn a simple dinner into a core memory.
Sharing food has always been my love language, and these specific recipes are the ones my guests request time and time again. They are the building blocks of a hosting style that feels effortless but looks like it took all day. From the sound of the perfect crunch to the sight of steam rising from a slow-cooked roast, every element on this board is designed to delight the senses and make your guests feel truly pampered. Let’s dive into the dishes that will make you the host of the year.
How to cook crispy chicken?

Why we love this
There is nothing quite as satisfying as the audible crackle of a perfectly fried piece of chicken. Imagine biting through a seasoned, golden-brown crust that shatters to reveal meat so succulent and juicy it practically melts in your mouth. The contrast between the salty, peppery exterior and the tender interior creates a sensory harmony that is both nostalgic and deeply decadent, making it the undeniable star of any party platter. It fills the room with a warm, savory scent that draws everyone to the kitchen before the timer even goes off.
Ingredients
- 4 lbs chicken thighs and drumsticks
- 2 cups buttermilk
- 3 cups all-purpose flour
- 2 tbsp smoked paprika
- 1 tbsp garlic powder
- 1 tsp cayenne pepper
- Salt and black pepper to taste
- Peanut or vegetable oil for frying
How to make it
- Begin by marinating the chicken in buttermilk, salt, and pepper for at least 4 hours, or ideally overnight in the refrigerator; this step is crucial for breaking down fibers and ensuring maximum juiciness.
- In a large shallow bowl, whisk together the flour, paprika, garlic powder, cayenne, and extra salt/pepper to create your seasoned dredge.
- Remove chicken from the buttermilk, letting the excess drip off, then coat thoroughly in the flour mixture, pressing the flour into the skin to create those coveted craggly bits.
- Fill a heavy-bottomed cast iron skillet or Dutch oven with about 2 inches of oil and heat to exactly 350°F (175°C) using a kitchen thermometer to maintain consistency.
- Carefully place 3-4 pieces of chicken in the oil, ensuring you do not overcrowd the pan, which would drop the temperature and lead to greasy results.
- Fry for about 12-15 minutes, turning occasionally, until the coating is a deep mahogany gold and the internal temperature reaches a safe 165°F.
- Drain on a wire rack—not paper towels—to allow air circulation and keep the bottom from getting soggy.
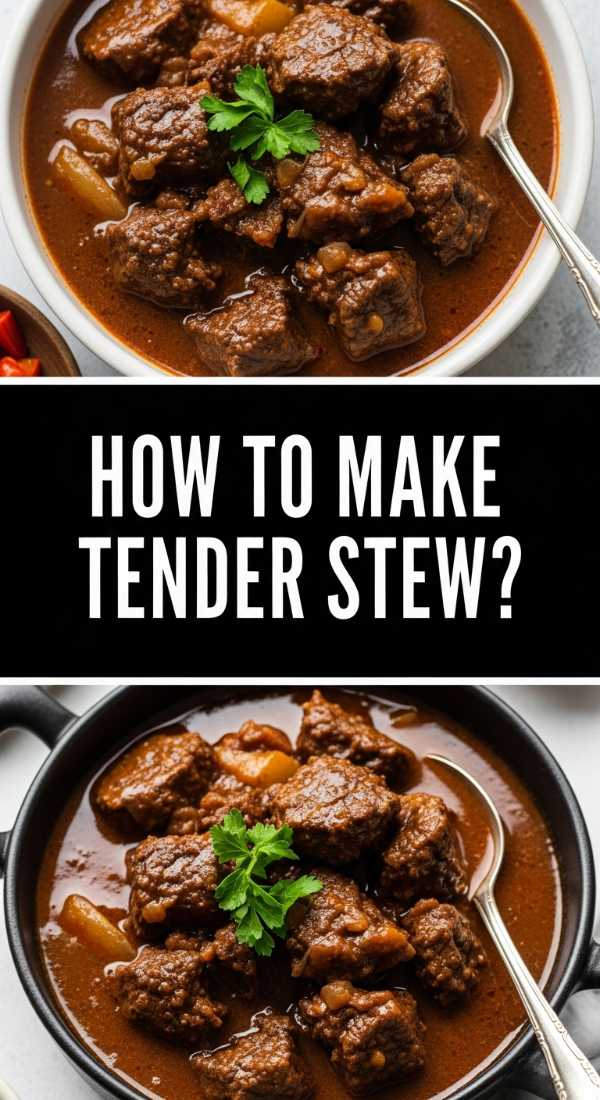
How to make tender stew?
Why we love this
A great stew is like a warm hug in a bowl, offering a rich depth of flavor that only comes from patience and the slow melding of ingredients. The beef becomes so extraordinarily tender that it falls apart with the mere suggestion of a fork, swimming in a velvety, dark mahogany gravy that smells of red wine, thyme, and earthy root vegetables. Each spoonful offers a complex layer of umami that coats the palate, providing a sense of rustic comfort that feels both sophisticated and soul-warming on a chilly evening.
Ingredients
- 3 lbs beef chuck roast, cubed
- 1/4 cup flour
- 2 tbsp olive oil
- 1 large onion, chopped
- 3 carrots, sliced
- 2 stalks celery, chopped
- 4 cloves garlic, minced
- 2 cups dry red wine
- 3 cups beef bone broth
- 2 tbsp tomato paste
- Fresh thyme and bay leaves
How to make it
- Toss the beef cubes in flour, salt, and pepper until evenly coated, which will help thicken the stew later.
- Heat olive oil in a large heavy pot over medium-high heat and sear the beef in batches until a dark, caramelized crust forms on all sides; do not rush this, as the brown bits (fond) provide the main flavor.
- Remove the beef and add the onions, carrots, and celery to the pot, sautéing until softened and the onions are translucent.
- Stir in the garlic and tomato paste, cooking for 2 minutes until the paste darkens slightly to a brick-red color.
- Deglaze the pan by pouring in the red wine, scraping the bottom vigorously with a wooden spoon to release all the flavorful browned bits.
- Return the beef to the pot, add the broth, thyme, and bay leaves, and bring to a very gentle simmer.
- Cover tightly and cook on low heat for 2.5 to 3 hours, checking occasionally to ensure it remains at a bare simmer—bubbles should just barely break the surface—until the meat is butter-tender.
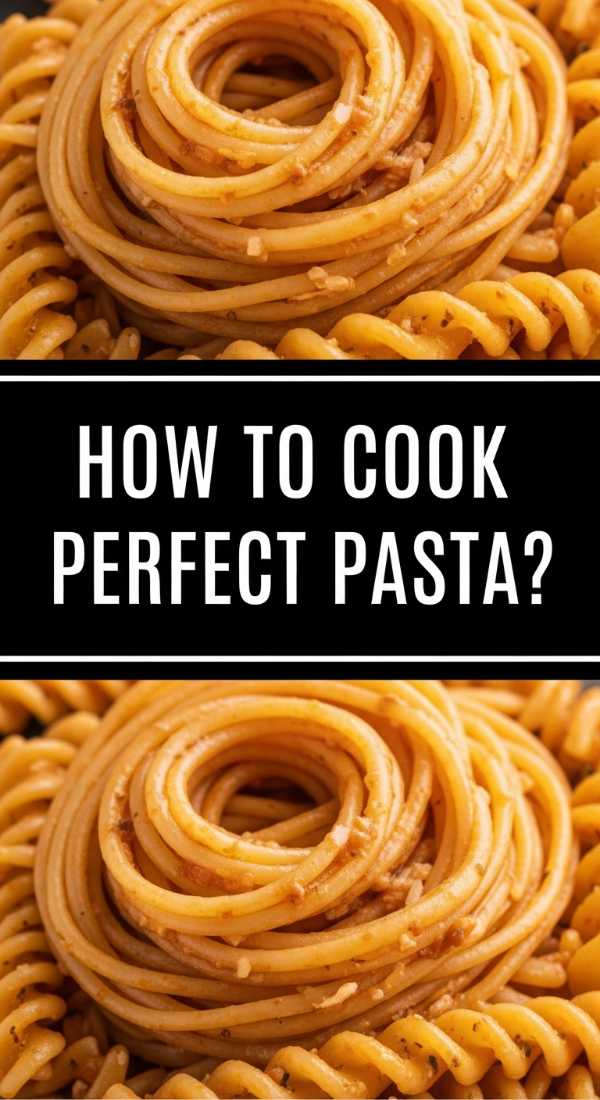
How to cook perfect pasta?
Why we love this
Perfectly cooked pasta is a testament to the beauty of simplicity, where the texture is the true hero of the dish. There is a specific joy in the ‘al dente’ bite—that slight resistance at the center of the noodle that prevents it from becoming mushy and allows it to hold onto a glossy, emulsified sauce. When tossed with high-quality olive oil or a bright marinara, the pasta takes on a silky sheen and a wheaty aroma that transports you straight to a sun-drenched terrace in Italy, making every forkful feel like a celebration.
Ingredients
- 1 lb high-quality dried pasta (like bronze-cut spaghetti)
- 6 quarts water
- 2 tbsp sea salt
- 1 cup reserved pasta water
- Your choice of sauce (pesto, marinara, or aglio e olio)
How to make it
- Fill a large stockpot with 6 quarts of cold water and bring it to a rolling, aggressive boil over high heat.
- Add the sea salt once the water is boiling; the water should taste almost like the ocean to properly season the pasta from the inside out.
- Add the pasta all at once and stir immediately to prevent the noodles from sticking together or to the bottom of the pot.
- Maintain a high boil throughout the cooking process, stirring occasionally to ensure even heat distribution.
- Begin testing the pasta 2 minutes before the package directions suggest; you are looking for a firm center with no raw white ring in the middle.
- Crucial Step: Before draining, dip a measuring cup into the pot to reserve 1 cup of the starchy, salty pasta water.
- Drain the pasta and immediately toss it into a pan with your warmed sauce, adding the reserved water a tablespoon at a time while tossing over medium heat to create a creamy, clinging emulsion.
How to sear buttery salmon?

Why we love this
Searing salmon is an art form that results in a stunning contrast of textures: a glass-like, salty-crisp skin and a center that is pink, moist, and incredibly buttery. As the fish hits the hot pan, it releases a delicate, nutty fragrance that signals a meal that is both healthy and indulgent. The way the flakes gently separate under the pressure of a fork, releasing their natural oils, creates a mouthfeel that is remarkably smooth and rich, making it a sophisticated addition to any viral food board.
Ingredients
- 4 salmon fillets (6 oz each), skin-on
- 1 tbsp grapeseed or canola oil
- 2 tbsp unsalted butter
- 2 cloves garlic, smashed
- Fresh lemon slices
- Sprig of rosemary or thyme
- Kosher salt
How to make it
- Pat the salmon fillets extremely dry with paper towels; any moisture on the skin will cause it to steam rather than crisp.
- Season the skin side generously with salt just seconds before placing it in the pan to prevent the salt from drawing out moisture.
- Heat a stainless steel or cast iron skillet over medium-high heat until the oil is shimmering and just starting to wisps of smoke.
- Place the fillets skin-side down in the pan, pressing down firmly with a spatula for 10 seconds to ensure the skin makes full contact with the heat.
- Lower the heat to medium and cook for about 4-5 minutes without moving the fish, until the skin is golden and releases easily from the pan.
- Flip the fillets and add the butter, garlic, and herbs to the pan, tilting the skillet to spoon the foaming, flavored butter over the fish for another 1-2 minutes.
- Remove from heat when the internal temperature is 125°F for a perfect medium-rare center.
How to bake fudgy brownies?

Why we love this
A truly fudgy brownie is a chocolate lover’s dream, characterized by a dense, almost truffle-like interior and a delicate, paper-thin crinkle top that shimmers under the light. The aroma of high-quality cocoa and melted butter filling the kitchen is intoxicating, promising a decadent treat that is heavy on the tongue and rich in cocoa intensity. Each bite is a journey through textures—from the slightly chewy edges to the gooey, molten-adjacent center that leaves a lingering, bittersweet chocolate finish on the palate.
Ingredients
- 1 cup unsalted butter, melted
- 2 cups granulated sugar
- 4 large eggs
- 1 tbsp vanilla extract
- 1 cup Dutch-process cocoa powder
- 1 cup all-purpose flour
- 1/2 tsp salt
- 1 cup semi-sweet chocolate chunks
How to make it
- Preheat your oven to 325°F (165°C) and line an 8×8 inch baking pan with parchment paper, leaving an overhang for easy removal.
- In a large bowl, whisk the melted butter and sugar vigorously for 2 minutes; this incorporation of air is what creates the iconic shiny, crackly top.
- Add the eggs one at a time, whisking thoroughly after each addition until the batter looks glossy and smooth.
- Gently fold in the vanilla extract, cocoa powder, flour, and salt using a rubber spatula; do not overmix at this stage, or the brownies will become cakey rather than fudgy.
- Stir in the chocolate chunks, which will create pockets of melted chocolate throughout the bake.
- Spread the batter evenly into the prepared pan and smooth the top.
- Bake for 35-40 minutes, or until a toothpick inserted into the center comes out with a few moist crumbs attached—if it comes out clean, they are overbaked!
How to braise juicy roast?

Why we love this
Braising a roast is the ultimate exercise in slow-motion culinary magic, transforming a tough cut of meat into a succulent, fork-tender masterpiece that drips with flavor. The meat sits in a fragrant bath of aromatics, absorbing the essence of onions, garlic, and herbs until it reaches a state of literal perfection where it collapses at the touch of a spoon. The result is deeply savory, with a concentrated liquid that functions as a natural au jus, filling your home with an inviting, rustic scent that feels like the epitome of home-cooked luxury.
Ingredients
- 4 lb chuck roast or brisket
- 2 tbsp vegetable oil
- 2 large onions, quartered
- 1 head of garlic, halved crosswise
- 2 cups beef stock
- 1/2 cup balsamic vinegar
- 3 sprigs rosemary
- Salt and cracked black pepper
How to make it
- Generously season the roast on all sides with salt and pepper, letting it sit at room temperature for 30 minutes to ensure even cooking.
- Heat oil in a heavy Dutch oven over high heat and sear the roast until a deep, dark brown crust forms on all surfaces (about 5 minutes per side).
- Remove the meat and toss in the onions and garlic, letting them char slightly in the rendered fat.
- Pour in the balsamic vinegar to deglaze, using a whisk to scrape up the caramelized bits from the bottom of the pot.
- Return the roast to the pot and pour in beef stock until the liquid reaches about halfway up the side of the meat.
- Add the rosemary, cover with a tight-fitting lid, and place in a 300°F (150°C) oven.
- Cook for 3 to 4 hours, turning the meat once halfway through, until the roast is tender enough to be pulled apart with two forks.
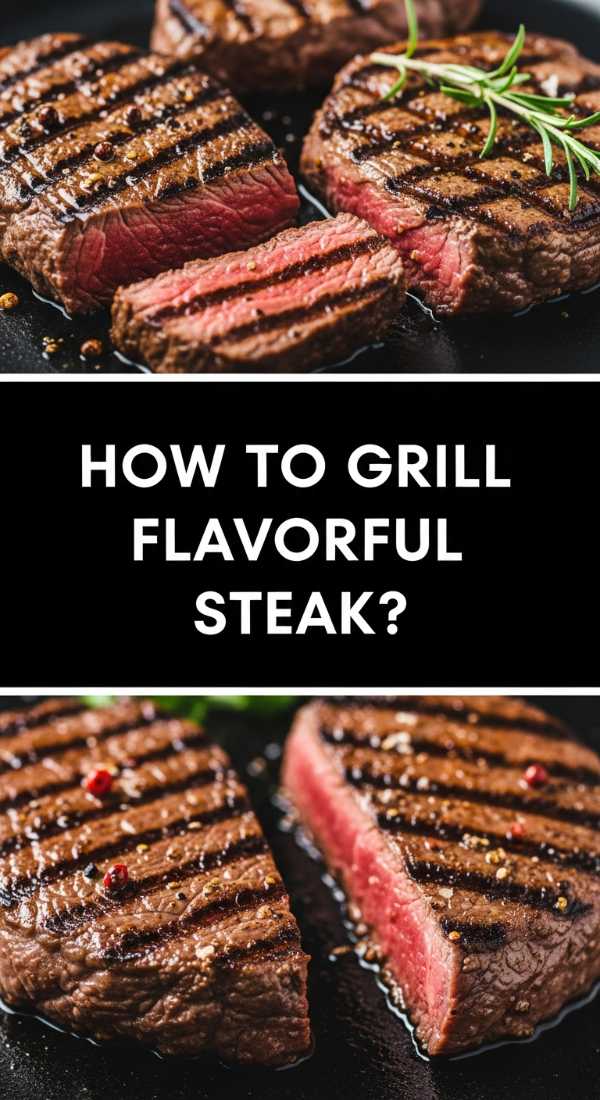
How to grill flavorful steak?
Why we love this
There is a primal, exhilarating quality to a perfectly grilled steak, with its charred, smoky exterior and contrasting cool, ruby-red center. The Maillard reaction creates a complex crust of salt and fire, while the interior remains incredibly tender and bursting with savory juices that pool on the plate. When the fat renders against the high heat of the grates, it creates a tantalizing aroma that is the hallmark of summer hosting, offering a robust and meaty flavor profile that pairs perfectly with a glass of bold red wine.
Ingredients
- 2 thick-cut Ribeye or New York Strip steaks (1.5 inches thick)
- 2 tbsp avocado oil (high smoke point)
- Kosher salt and coarse black pepper
- 3 tbsp butter
- 2 cloves garlic, crushed
How to make it
- Take the steaks out of the refrigerator at least 45 minutes before grilling to bring them to room temperature; this ensures the center cooks through without the outside burning.
- Pat the steaks dry and season very aggressively with salt and pepper; much of the seasoning falls off during the grilling process.
- Preheat your grill to high heat (450°F-500°F) and clean the grates thoroughly.
- Place the steaks on the hottest part of the grill and leave them undisturbed for 4 minutes to develop a thick, charred crust.
- Flip the steaks using tongs (never a fork, which pierces the meat and leaks juices) and grill for another 3-4 minutes for medium-rare.
- In the final minute, place a dollop of butter and crushed garlic on top of each steak, letting it melt and coat the meat.
- Remove the steaks and let them rest on a warm plate for at least 10 minutes; this allows the fibers to relax and the juices to redistribute for a tender bite.
How to flip fluffy pancakes?

Why we love this
The perfect pancake is a cloud-like marvel—light, airy, and boasting a uniform golden-brown surface that practically begs for a drizzle of maple syrup. As they cook on the griddle, they release a sweet, buttery scent that evokes lazy Sunday mornings and cozy kitchen gatherings. The texture should be spongy yet delicate, melting away instantly on the tongue while providing the perfect canvas for fresh berries or a pat of melting butter, making them the ultimate crowd-pleaser for a brunch-themed board.
Ingredients
- 2 cups all-purpose flour
- 2 tsp baking powder
- 1/2 tsp baking soda
- 2 tbsp sugar
- 1/2 tsp salt
- 1 3/4 cups buttermilk
- 2 large eggs
- 4 tbsp melted butter
How to make it
- In a large bowl, whisk the dry ingredients together. In a separate bowl, whisk the buttermilk, eggs, and melted butter.
- Gently fold the wet ingredients into the dry using a spatula, stopping as soon as the flour streaks disappear—lumps are your friend and are essential for a light texture!
- Heat a non-stick griddle over medium heat and lightly grease with a tiny bit of butter or oil.
- Pour 1/4 cup of batter for each pancake, leaving space between them for easy flipping.
- Watch for the visual cue: flip only when the bubbles that form on the surface pop and stay open, and the edges look set and matte rather than shiny.
- Flip in one smooth motion and cook the second side for only 1-2 minutes until lightly browned.
- Keep the pancakes warm in a 200°F oven on a wire rack to maintain their fluffiness while you finish the batch.
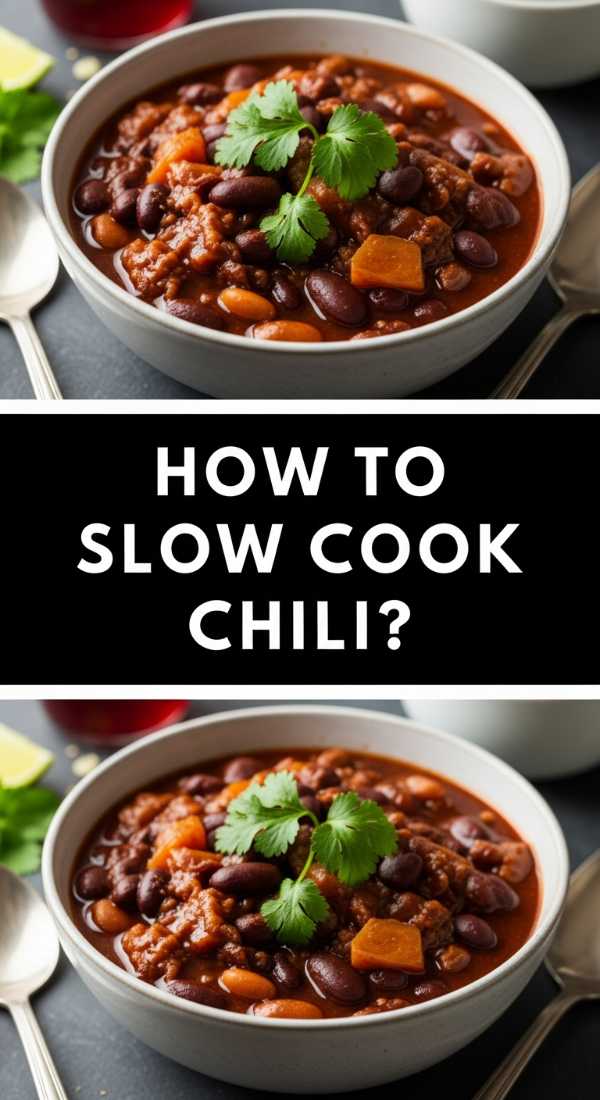
How to slow cook chili?
Why we love this
Slow-cooked chili is a symphony of spice and heartiness, where every hour of cooking deepens the complexity of the heat and the richness of the base. The texture is thick and chunky, with beans that are tender but not mushy and ground meat that has fully absorbed the smoky essence of cumin and chili powder. It’s a vibrant, colorful dish that smells of campfire and comfort, offering a slow-burning warmth that lingers pleasantly, making it the perfect centerpiece for an interactive board filled with toppings like lime, cilantro, and sour cream.
Ingredients
- 2 lbs ground beef or turkey
- 1 large onion, diced
- 3 tbsp chili powder
- 1 tbsp ground cumin
- 2 cans (15 oz) kidney beans, drained
- 1 can (28 oz) crushed tomatoes
- 1 cup beef broth
- 2 tbsp tomato paste
How to make it
- In a large skillet over medium-high heat, brown the ground meat with the diced onions until the meat is no longer pink and the onions are soft.
- Drain any excess grease from the skillet to ensure the chili isn’t oily.
- Transfer the meat mixture to your slow cooker and add the chili powder, cumin, and tomato paste, stirring well to ‘bloom’ the spices against the warm meat.
- Pour in the crushed tomatoes, beef broth, and kidney beans, stirring to combine all the ingredients.
- Set the slow cooker to ‘Low’ and let it cook for 6 to 8 hours; this long duration allows the acidity of the tomatoes to mellow and the flavors to unify.
- If the chili is too thin after 6 hours, remove the lid for the final 30 minutes to allow some moisture to evaporate.
- Taste and adjust salt only at the very end, as the flavors concentrate significantly during the slow cooking process.
How to saute garlic shrimp?
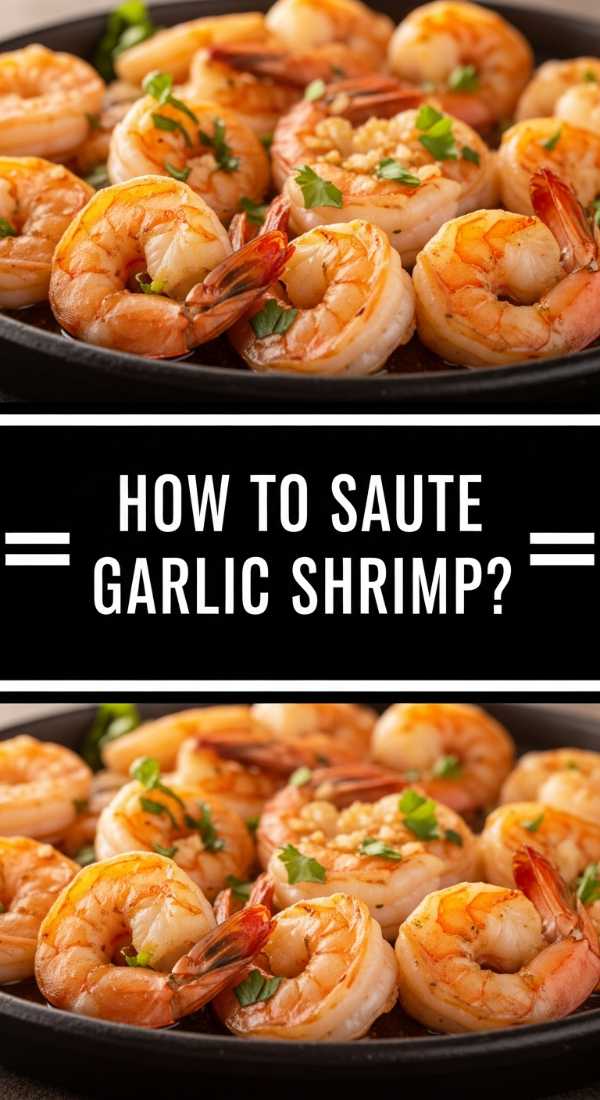
Why we love this
Sautéed garlic shrimp is a dish of instant gratification, offering a bright, briny flavor profile that feels light yet incredibly flavorful. The shrimp should have a distinct ‘snap’ when you bite into them, coated in a shimmering glaze of garlic-infused butter and bright lemon zest. The aroma of sizzling garlic hitting the pan is universally loved, creating an immediate mouth-watering effect for anyone nearby. It’s a fast, elegant addition to a food board that provides a pop of pink color and a refreshing citrus finish.
Ingredients
- 1 lb large shrimp, peeled and deveined
- 4 cloves garlic, thinly sliced
- 3 tbsp unsalted butter
- 1 tbsp olive oil
- 1/2 tsp red pepper flakes
- Fresh parsley, chopped
- Juice of half a lemon
How to make it
- Ensure the shrimp are completely dry by patting them with paper towels; this allows them to sear rather than steam in their own juices.
- Heat the olive oil and 1 tablespoon of butter in a large skillet over medium-high heat until the butter stops foaming.
- Add the shrimp in a single layer, making sure they don’t overlap, and cook for about 1-2 minutes until the bottom side turns pink and opaque.
- Flip the shrimp and immediately add the remaining 2 tablespoons of butter, the sliced garlic, and the red pepper flakes.
- Cook for only 1 more minute, swirling the pan so the garlic softens and scents the butter without browning or becoming bitter.
- Remove the pan from the heat the moment the shrimp turn into a ‘C’ shape (an ‘O’ shape means they are overcooked and rubbery).
- Finish with a squeeze of fresh lemon juice and a shower of parsley to brighten the richness of the garlic butter.
Conclusion
Hosting shouldn’t feel like a chore; it should feel like a gift you give to your favorite people. By mastering these viral-worthy techniques and presenting them on a beautiful, communal food board, you take the pressure off yourself and put the focus back on the joy of eating. Whether it’s the crunch of the chicken or the silkiness of the pasta, these dishes are guaranteed to steal the show and keep your guests talking long after the board is cleared. Happy hosting!
Frequently Asked Questions
Q: How do I keep the food warm on a large board?
A: The best way to keep food warm is to use warmed serving platters or small cast-iron skillets nested within the board. You can also stagger the arrival of different dishes so that something hot is always being refreshed.
Q: Can I prep these dishes in advance?
A: Absolutely! Most of the slow-cooked items like the stew, roast, and chili actually taste better the next day. The fried and sautéed items should be made just before serving for the best texture.
Q: What is the best board to use for hosting?
A: Look for a large, food-safe wooden or marble slab. If you don’t have one, you can line your dining table with parchment paper and build the ‘board’ directly on the table for a rustic, viral-friendly look!