
Macrame and Marigolds: The Ultimate Guide to Boho Garden Decor
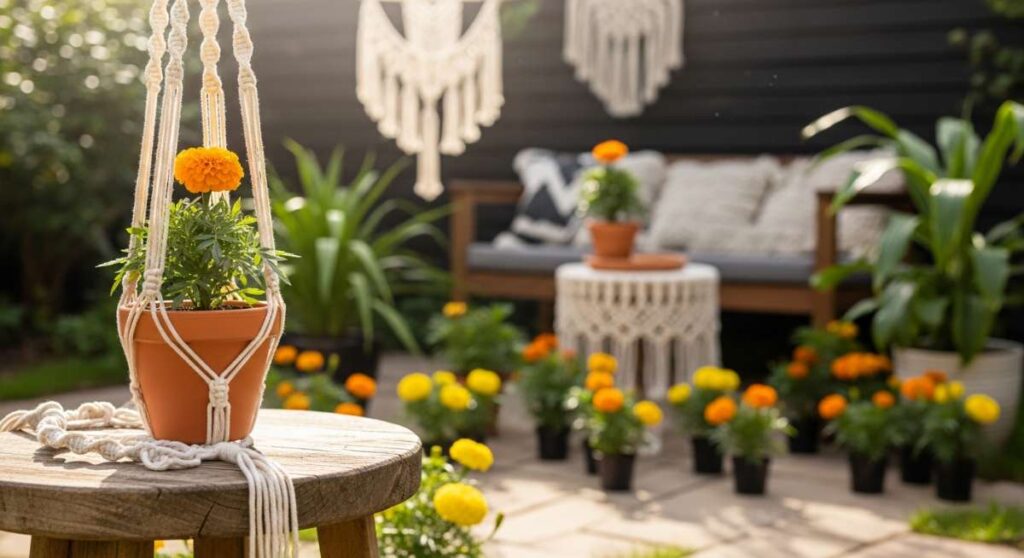
There is a specific magic that happens when the golden hour sun filters through a hand-knotted macrame hanger, casting intricate shadows across a bed of vibrant, sun-drenched marigolds. It’s that intersection of raw, organic nature and the soulful touch of the human hand that defines the boho garden aesthetic. To me, the garden isn’t just a place to grow plants; it’s an extension of the living room, a sanctuary where the air smells of damp earth and blooming jasmine, and every corner tells a story of creative slow living.
As we transition into the warmer months, I find myself drawn more to the outdoors, craving a space that feels both wild and curated. Whether you have a sprawling backyard or a tiny balcony, infusing your outdoor space with bohemian charm is about layering textures, embracing imperfection, and inviting nature to play along. It’s about creating a haven where you can kick off your shoes, feel the clover between your toes, and let the stresses of the modern world melt away into the rustle of the leaves.
In this guide, I’m sharing my favorite DIYs and design secrets to help you transform your patch of earth into a whimsical retreat. From bird sanctuaries that sing with life to cozy spa nooks that rival a high-end resort, these projects are designed to be tactile, beautiful, and deeply personal. Grab your gardening gloves and a glass of iced herbal tea—it’s time to weave some magic into your garden.
How to Create a Serene Sanctuary for Backyard Birds

Why we love this
There is nothing quite as meditative as the soft flutter of wings and the rhythmic chirping of songbirds visiting your garden at dawn. This sanctuary isn’t just a decorative feature; it’s a living, breathing ecosystem that brings a sense of dynamic peace to your backyard. Imagine sitting on your porch, the aroma of damp mulch in the air, watching a cardinal dip into a stone basin while the morning light catches the iridescent shimmer of its feathers—it’s a sensory experience that grounds you in the present moment.
Essential Elements:
- A shallow, textured stone or ceramic birdbath
- Native wildflower seeds (sunflowers, coneflowers, and black-eyed Susans)
- Wooden nesting boxes with organic hemp rope accents
- A variety of high-quality birdseed (black oil sunflower seeds are a favorite)
- A solar-powered fountain insert for moving water
How to make it
- Select a site that offers a balance of visibility and safety, ideally near a shrub or tree where birds can quickly retreat from predators. Ensure the ground is level to prevent the birdbath from tipping.
- Install your birdbath and add a solar fountain. The sound of moving water is a literal magnet for birds; adjust the nozzle so the spray is gentle and doesn’t splash out of the basin, maintaining a water depth of no more than two inches.
- Mount your nesting boxes approximately 6 to 10 feet off the ground, facing East or North to avoid the scorching afternoon sun. Use a drill with a 1/8-inch bit to create drainage holes in the bottom if they aren’t already present.
- Prepare the soil for your bird-friendly border by tilling the top 4 inches and removing weeds. Sow your native seeds generously, then lightly rake them into the earth; timing is crucial here—aim for the last frost of spring to ensure optimal germination temperatures.
- Hang your feeders using macrame cords for that boho touch, ensuring they are at least five feet away from windows to prevent bird collisions. Fill them to the brim and check daily, especially during peak migration seasons.
How to Design Vibrant Garden Borders for Instant Curb Appeal

Why we love this
Vibrant garden borders act as the colorful frame to your outdoor home, providing a lush, multi-layered visual feast that changes with the seasons. We love the way deep orange marigolds pop against the silvery foliage of dusty miller, creating a tapestry of textures that feels both intentional and wild. The scent is intoxicating—a mix of spicy floral notes and the crisp, green aroma of healthy foliage that greets you every time you walk up your path.
Essential Elements:
- A mix of perennial and annual flowering plants (Marigolds, Salvia, Lavender)
- Natural cedar mulch or pine bark
- Decorative stone edging or reclaimed bricks
- Organic compost for soil enrichment
- Drip irrigation tubing or a high-quality soaker hose
How to make it
- Outline your border using a garden hose to create soft, organic curves rather than rigid straight lines; this mimics the flow of nature and enhances the boho vibe. Use a sharp spade to cut a clean edge along the marked line.
- Amend the soil by spreading a 3-inch layer of organic compost over the area. Use a garden fork to incorporate it into the existing soil to a depth of about 8 inches, which provides the nutrient-dense foundation your vibrant blooms crave.
- Arrange your plants in the bed before digging. Place taller varieties like Salvia in the back and shorter, bushy marigolds in the front. Visual cue: Leave enough space between plants (check the tag for “mature width”) so they have room to breathe and grow without overcrowding.
- Dig holes twice as wide as the root ball and just as deep. Gently tease the roots of each plant before placing it in the ground. Backfill with soil and press down firmly to remove air pockets.
- Apply a 2-inch layer of cedar mulch around the plants, being careful not to let the mulch touch the stems directly, which can cause rot. This layer keeps the soil cool and moist, especially during the peak heat of July.
How to Build Custom Garden Containers for Your Favorite Herbs

Why we love this
There is a profound tactile joy in brushing your hand against a rosemary bush or crushing a mint leaf between your fingers while you garden. Custom containers allow you to bring these culinary delights to eye level, using raw wood and earthy textures to complement the greenery. The fragrance is a heady cocktail of woodsy pine and sweet citrus, making your herb garden a focal point of both flavor and fragrance.
Essential Elements:
- Untreated cedar planks (1×6 or 1×8)
- Outdoor-rated wood glue and galvanized screws
- Fine-grit sandpaper
- Organic potting mix specifically for edibles
- A variety of herbs (Basil, Rosemary, Thyme, Mint)
How to make it
- Measure and cut your cedar planks into four equal sides and a bottom piece. For a standard herb box, 12-inch sides work beautifully. Ensure your cuts are precise using a miter saw for a professional, snug fit.
- Apply a thin bead of outdoor wood glue to the joints before securing them with galvanized screws. Pre-drill your holes to prevent the cedar from splitting—this is a critical step for maintaining the structural integrity of the wood.
- Sand the exterior of the box with 120-grit sandpaper until the surface is smooth to the touch, highlighting the natural grain of the cedar. Avoid using chemical stains; instead, let the wood weather naturally to a beautiful silver-grey over time.
- Drill five 1/2-inch drainage holes in the bottom piece. This is non-negotiable, as herbs like rosemary and thyme hate “wet feet” and require excellent drainage to thrive.
- Fill the box with organic potting mix, leaving about an inch of space at the top. Plant your herbs, focusing on grouping those with similar water needs together. Give them a deep initial watering until water runs freely from the drainage holes.
How to Create a Magical Outdoor Realm for Childlike Wonder

Why we love this
We believe every garden needs a corner where logic takes a backseat to imagination—a place where fairy lights twinkle like low-hanging stars and hidden paths lead to secret clearings. This magical realm captures the whimsical essence of boho style, utilizing soft textures like moss and glowing lanterns to create an enchanting atmosphere. It’s a space that feels cool and shrouded in mystery, smelling of damp fern and sweet jasmine.
Essential Elements:
- Weatherproof fairy lights (warm white)
- Hanging Moroccan-style lanterns
- Natural stepping stones or wood rounds
- Fast-growing climbing vines like Clematis or Honeysuckle
- A willow or bamboo teepee frame
How to make it
- Identify a secluded corner of the garden, preferably under a canopy of trees. Clear the ground of debris and lay down wood rounds to create a winding, “secret” path that disappears into the foliage.
- Erect a willow teepee frame at the end of the path. Secure the tops with twine, leaving an opening for an entrance. Plant climbing vines at the base of each pole; as they grow, they will create a living, breathing green walls.
- Drape your fairy lights through the branches of nearby trees and over the teepee. Use a timer to ensure they click on at dusk—the visual cue for when the “magic” begins.
- Hang lanterns at varying heights from tree limbs using sturdy S-hooks. Opt for battery-operated LED candles inside to avoid fire hazards while maintaining that flickering, warm glow.
- Add a ground layer of soft moss or clover inside the teepee. This provides a velvety, cool texture for sitting and daydreaming, making the space feel like a hidden portal to another world.
How to Personalize a Play Kitchen with Organic Textures

Why we love this
A mud kitchen is the ultimate boho play accessory, blending the ruggedness of the outdoors with the domestic charm of a home. We love the tactile contrast of smooth river stones, gritty sand, and the soft petals used for “soups” and “stews.” Personalizing it with organic textures like woven baskets and wooden utensils turns a simple play structure into a piece of garden art that encourages messy, beautiful, sensory-rich play.
Essential Elements:
- A wooden play kitchen frame (repurposed or DIY)
- Woven seagrass baskets for storage
- Stainless steel bowls and wooden spoons
- A collection of sensory materials (sand, pinecones, pebbles)
- Non-toxic outdoor sealant
How to make it
- Start by prepping your wooden frame. If it’s raw wood, apply two coats of a non-toxic, water-based outdoor sealant. This protects the wood from moisture and spills while ensuring it remains safe for little hands. Allow at least 24 hours for the sealant to cure fully.
- Install a “sink” by cutting a hole in the countertop that fits a stainless steel mixing bowl. The bowl should sit flush with the wood; if it wobbles, use a bead of silicone caulk around the rim to secure it and prevent water from seeping into the wood joints.
- Mount small pegs or hooks on the backsplash to hang wooden spoons and whisks. This keeps the kitchen organized and adds a charming, rustic visual element.
- Tuck woven seagrass baskets onto the lower shelves. These are perfect for holding “ingredients” like dried lavender, smooth stones, and pinecones, adding an organic, fibrous texture to the setup.
- Create a dedicated “prep station” next to the kitchen with a large bucket of clean sand and a small watering can. The goal is to encourage the mixing of textures, so provide plenty of containers for pouring and measuring.
How to Design a Cozy Spa Nook for Ultimate Relaxation

Why we love this
Imagine the steam rising from warm water while the cool evening air brushes against your skin—the spa nook is the pinnacle of outdoor luxury. This project is all about the feeling of total surrender, using soft linens, candlelight, and the gentle sound of bubbling water to create a private sanctuary. It’s a sensory retreat that smells of eucalyptus and cedar, offering a space to decompress under the open sky.
Essential Elements:
- A stock tank tub or cedar soaking tub
- Outdoor-rated privacy curtains (linen or canvas)
- A wooden side table or bench
- Scented outdoor candles and essential oil diffusers
- Plush, quick-dry towels and a macrame rug
How to make it
- Level the ground where your tub will sit using a layer of compacted pea gravel or a sturdy wooden deck. The base must be perfectly flat to support the weight of the water, which can reach several hundred pounds when full.
- If using a stock tank, scrub the interior with a mixture of vinegar and water to remove any factory residue. For a boho look, you can wrap the exterior in bamboo fencing or leave the galvanized metal exposed for a modern-rustic vibe.
- Install a curtain rod or a simple wire line between two posts or trees. Hang linen curtains that can be drawn shut for total privacy; the fabric should be heavy enough to drape beautifully but light enough to catch the breeze.
- Position a wooden bench nearby to hold your towels and a tray for candles. Use “spa” scents like eucalyptus or lemongrass in your candles to enhance the relaxation through aromatherapy.
- Place a macrame or jute rug at the base of the tub. This provides a soft, textured place for your feet as you step out of the water, preventing slips and adding a layer of warmth to the hard ground.
How to Repurpose Rustic Pallets for Outdoor Sensory Learning

Why we love this
Rustic pallets are a boho gardener’s best friend—they are versatile, eco-friendly, and full of character. We love transforming them into vertical sensory boards that engage all five senses. From the rough texture of the weathered wood to the bright colors of painted elements, a pallet project brings a functional, educational, and visually interesting component to the garden that feels perfectly unpolished.
Essential Elements:
- Two heat-treated (HT marked) wooden pallets
- Assorted textures (brushes, sponges, bells, textured tiles)
- Outdoor acrylic paints in earthy tones
- Sandpaper and heavy-duty staples
- A drill and various hardware (latches, knobs, chains)
How to make it
- Source pallets marked with “HT” (heat treated) rather than chemically treated. Inspect for any protruding nails and remove them. Sand the entire surface thoroughly with 80-grit sandpaper to remove splinters while maintaining the rustic texture.
- Design your sensory layout on paper first. Dedicate different slats of the pallet to different senses: a “sound” section with bells and chimes, a “touch” section with various brushes and fabrics, and a “visual” section with mirrors or bright colors.
- Secure your sensory items using a drill and heavy-duty staples. For moving parts like latches or knobs, ensure they are screwed in tightly so they don’t become loose with frequent use.
- Add a pop of color by painting select slats in terracotta, sage, and ochre. Use a dry-brush technique to allow the wood grain to show through, keeping the look earthy and boho rather than flat and plastic.
- Mount the pallet vertically against a fence or wall using sturdy brackets. Ensure it is at the correct height for the intended users (usually waist-high for children) and check that it is completely stable before use.
How to Build a Simple Cooling Station for Sunny Days

Why we love this
During the peak of summer, a cooling station is a literal breath of fresh air. We love the way a fine mist feels on the skin, accompanied by the clinking of ice in a glass and the shade of a wide-brimmed umbrella. It’s about creating a functional oasis that looks as good as it feels, blending practical cooling elements with aesthetic boho touches like woven fans and patterned cushions.
Essential Elements:
- A low-pressure outdoor misting kit
- A large beverage dispenser with a fruit-infusion core
- A shaded seating area (umbrella or pergola)
- Woven hand fans and cotton throws
- Galvanized bucket for ice and drinks
How to make it
- Attach your misting kit to the perimeter of your patio cover or umbrella using the provided clips. Ensure the nozzles are spaced about 2 feet apart for even coverage. Test the system to ensure the mist is fine enough to cool the air without soaking the furniture.
- Set up a dedicated beverage table in the shade. Fill your dispenser with ice, water, and fresh mint or cucumber slices. The visual cue of floating herbs makes the station feel instantly more refreshing and high-end.
- Place a large galvanized bucket filled with ice nearby for bottled drinks. Top the ice with a sprinkle of rock salt to keep the temperature even lower for longer periods.
- Stack woven hand fans in a shallow basket on the table. These provide a tactile, non-electric way for guests to stay cool and serve as a beautiful decorative element when not in use.
- Ensure the seating area is equipped with light, breathable cotton throws. While it seems counterintuitive, a light layer can protect skin from direct sun and provide comfort as the mist cools the surrounding air.
How to Compose a Textural Landscape for Year Round Interest

Why we love this
A truly boho garden doesn’t disappear when the flowers fade; it relies on a textural landscape that remains captivating all year. We love the architectural silhouette of ornamental grasses against a winter sky and the rugged beauty of stone paths covered in frost. It’s a sensory experience of form and shadow, where the rustle of dried seed pods provides a hauntingly beautiful soundtrack to the colder months.
Essential Elements:
- Ornamental grasses (Pennisetum, Miscanthus)
- Evergreen shrubs with varied leaf shapes (Boxwood, Pieris)
- Hardscaping elements like boulders and river rock
- Deciduous trees with interesting bark (Paperbark Maple, River Birch)
- Mulch in contrasting colors
How to make it
- Map out your “winter interest” plants first. These should be the backbone of your garden. Place evergreens in a staggered pattern to provide structure and color when everything else goes dormant.
- Incorporate ornamental grasses in clusters of three or five. Do not cut them back in the fall; leave the dried plumes and stalks to provide movement and texture throughout the winter. The visual cue for pruning is early spring, just as new green shoots appear at the base.
- Layer your hardscaping. Use large boulders as focal points and create paths using a mix of jagged slate and smooth river rocks. This contrast in stone texture adds a professional, curated feel to the wildness of the plants.
- Plant a tree with exfoliating bark near a window or path. The peeling, paper-like texture of a River Birch is a tactile delight and adds a layer of visual complexity to the landscape.
- Use different types of mulch or ground cover to define sections. A dark bark mulch will make the silvery leaves of lavender or the golden hues of dried grasses stand out more sharply, creating a high-contrast, visually stimulating environment.
How to Add Privacy to Your Outdoor Soak for Total Peace
[IMAGE_10]
Why we love this
True relaxation requires the feeling of being completely tucked away from the world. We love the way a privacy screen made of natural materials—like bamboo, tall grasses, or macrame—creates a soft barrier that breathes. It doesn’t feel like a wall; it feels like a cocoon. The sound of wind filtering through a bamboo screen is incredibly soothing, providing a rhythmic rustle that masks neighborhood noise.
Essential Elements:
- Tall potted plants (Bamboo, Horsetail, or tall grasses)
- Large-scale macrame wall hangings or screens
- Trellises with fast-growing climbers like Jasmine or Ivy
- Outdoor-rated tension rods or wooden frames
- Soft, amber-toned lighting
How to make it
- Assess the sightlines from neighbors’ windows or the street. Focus your privacy efforts on these specific angles to avoid making the space feel claustrophobic.
- Use tall, narrow planters to house non-invasive bamboo or Horsetail Reed. These plants grow quickly and provide a dense, vertical green screen that takes up very little floor space. Visual cue: Ensure the planters are heavy enough to not blow over in high winds.
- Construct a simple wooden frame and hang a large-scale macrame piece from it. The open weave of the macrame provides a visual barrier while still allowing light and air to pass through, maintaining that airy, bohemian vibe.
- Install trellises on the most exposed sides of your soak area. Plant Evergreen Jasmine; not only will it provide year-round privacy, but its white flowers will fill your spa nook with an incredible, sweet fragrance during the spring and summer.
- Finalize the mood with low-level, amber lighting. Avoid bright overhead lights, which can make you feel exposed. Use path lights and candles at floor level to create a soft glow that keeps the focus inward on your private sanctuary.
Conclusion
Transforming your garden into a boho-inspired sanctuary is a journey of layers, textures, and soul. It’s about more than just aesthetics; it’s about creating a space that nourishes your spirit and connects you to the natural world. Whether you’re hanging macrame feeders for the birds or soaking in a stock tank tub under the stars, I hope these projects inspire you to embrace the wild, whimsical beauty of outdoor living. Your garden is a canvas—go ahead and paint it with your own unique magic.