
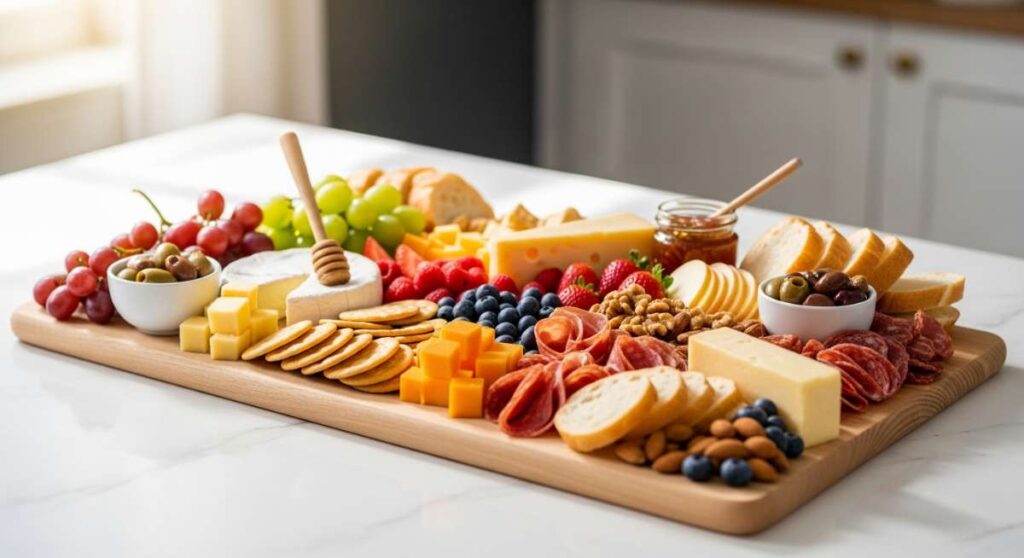
Why This Simple Food Board Is the Ultimate Crowd-Pleaser
There is something inherently magical about a shared meal that isn’t confined to a single plate. Picture this: a golden afternoon light streaming through the window, your favorite playlist humming in the background, and a table filled with friends laughing as they reach for different bites from a massive, beautifully arranged board. It’s the ultimate way to eat because it removes the formality of a sit-down dinner and replaces it with a tactile, sensory adventure where everyone finds exactly what they crave.
I discovered the power of the ‘everything board’ during a weekend when I couldn’t decide on a single menu. Instead of choosing one dish, I prepared smaller portions of our family favorites and laid them out with plenty of garnishes. The result? Total silence as everyone dug in, followed by hours of conversation. It turns out that when you offer a variety of textures and flavors—from crispy wings to molten lava cake—you create a dining experience that feels like a warm hug. It’s not just food; it’s a memory in the making.
How to make garlic chicken?

Why we love this
There is nothing quite like the intoxicating aroma of fresh garlic sizzling in a hot pan to make a house feel like a home. This garlic chicken is the centerpiece of our board because it offers a perfect balance of savory richness and a satisfying, golden-brown crust. Every bite is succulent, infused with the piquant bite of garlic that has been softened by butter, creating a silky sauce that clings to the tender meat. It’s a nostalgic, comforting flavor that appeals to both kids and adults alike, making it an absolute staple for any gathering.
Ingredients
- 1 lb boneless skinless chicken thighs, cut into bite-sized pieces
- 6 cloves of garlic, minced
- 2 tablespoons unsalted butter
- 1 tablespoon olive oil
- Salt and cracked black pepper to taste
- Fresh parsley for garnish
- A squeeze of lemon juice
How to make it
- Begin by patting the chicken pieces completely dry with paper towels; this is the secret to achieving a deep golden sear rather than steaming the meat. Season generously with salt and pepper.
- Heat a large skillet over medium-high heat and add the olive oil. Once the oil is shimmering and wisps of smoke appear, add the chicken in a single layer, ensuring you don’t crowd the pan.
- Let the chicken sear undisturbed for 4-5 minutes until a brown crust forms, then flip and cook for another 3 minutes.
- Reduce the heat to medium-low and add the butter and minced garlic. Stir constantly for about 1-2 minutes, spooning the melting garlic butter over the chicken as it foams up.
- Once the garlic is fragrant and light golden (be careful not to burn it!), remove from heat, squeeze fresh lemon over the top, and garnish with chopped parsley.
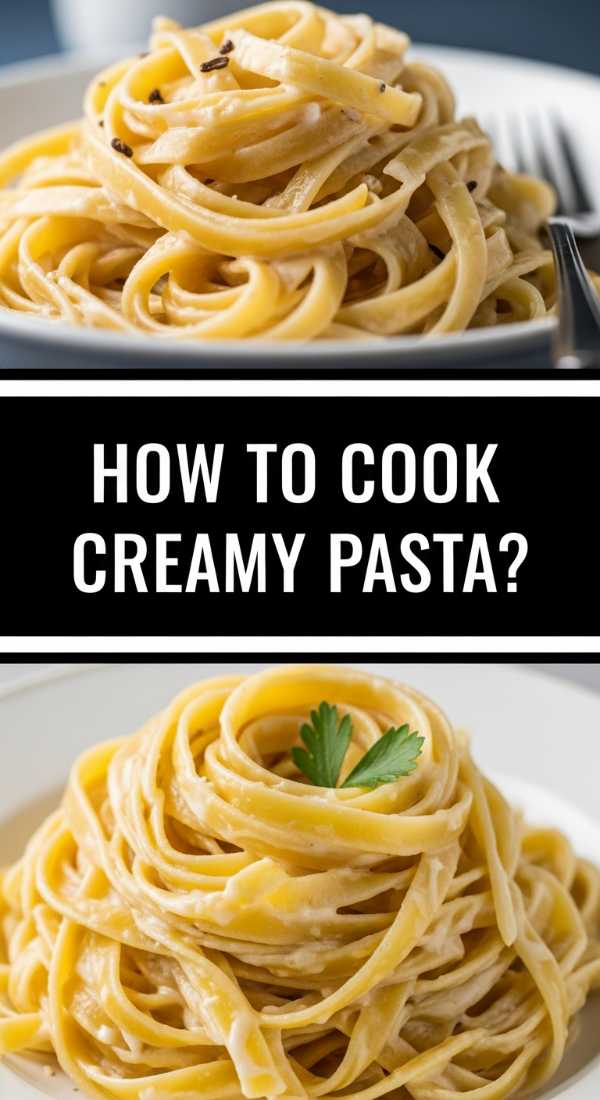
How to cook creamy pasta?
Why we love this
A creamy pasta dish provides the essential ‘velvet’ texture that every good food board needs to anchor the sharper flavors. This recipe focuses on a luxurious, satin-like sauce that coats every strand of pasta without being overly heavy or cloying. The steam rising from the bowl carries the scent of aged parmesan and a hint of nutmeg, promising a mouthfeel that is incredibly smooth and deeply satisfying. It acts as the perfect canvas for the other proteins on the board, offering a mild, buttery counterpoint to the spicier elements.
Ingredients
- 8 oz fettuccine or linguine
- 1 cup heavy cream
- 1/2 cup freshly grated Parmesan cheese
- 2 tablespoons butter
- 2 cloves garlic, smashed
- Pinch of nutmeg, salt, and white pepper
- Reserved pasta water
How to make it
- Boil a large pot of heavily salted water—it should taste like the sea—and cook your pasta until it is just shy of al dente, usually 1-2 minutes less than the package instructions.
- While the pasta cooks, melt butter in a wide saucepan over medium heat and sauté the smashed garlic cloves just until they are golden to infuse the fat, then remove the cloves.
- Pour in the heavy cream and bring to a gentle simmer, letting it reduce slightly for about 3 minutes until it begins to thicken.
- Whisk in the Parmesan cheese slowly, stirring in a figure-eight motion to ensure the cheese melts evenly into the cream without clumping.
- Transfer the pasta directly from the water into the sauce, adding a half-cup of starchy pasta water. Toss vigorously over medium heat for 2 minutes; the water will emulsify with the fats to create a glossy, clingy sauce.
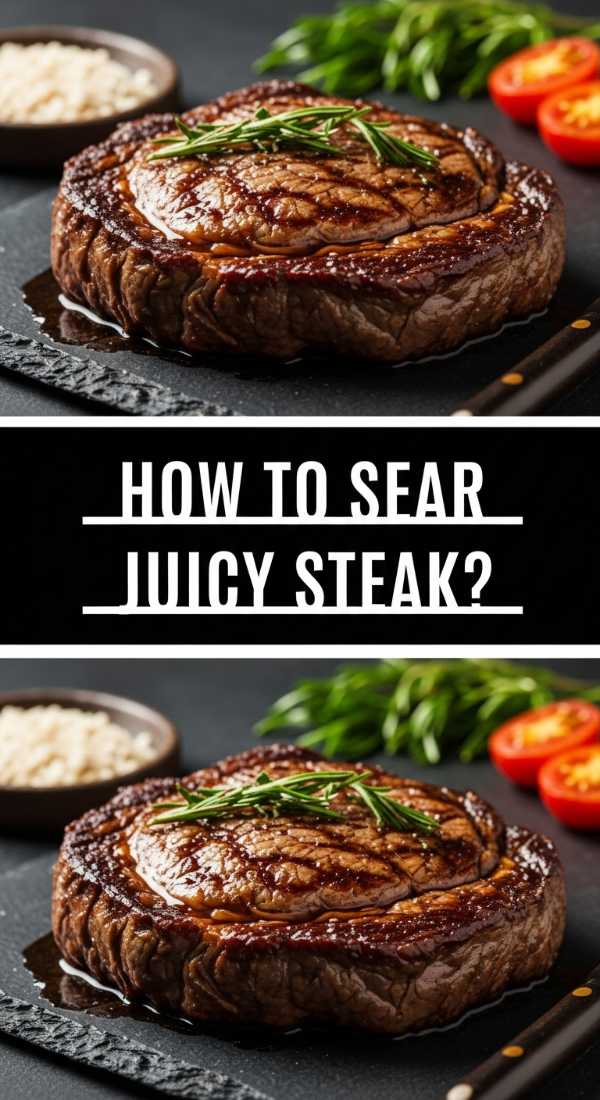
How to sear juicy steak?
Why we love this
A perfectly seared steak brings an element of luxury and a robust, umami-packed punch to your food board. We love the contrast between the dark, salty, caramelized crust and the tender, ruby-red center that melts like butter on the tongue. The sensory experience of hearing the meat hit a white-hot cast iron skillet is unmatched, and the deep, roasted scent of rendered beef fat instantly signals a celebration. Sliced into thin strips, it becomes the ultimate finger food that feels elevated yet approachable.
Ingredients
- 1 lb Ribeye or New York Strip steak (at least 1.5 inches thick)
- 2 tablespoons high-smoke point oil (like grapeseed or avocado oil)
- 3 tablespoons butter
- 3 sprigs of fresh rosemary or thyme
- 3 garlic cloves, crushed
- Flaky sea salt and coarse black pepper
How to make it
- Remove the steak from the refrigerator 45 minutes before cooking to bring it to room temperature; this ensures even cooking throughout the center.
- Pat the steak extremely dry on all sides and season very aggressively with salt and pepper. The salt helps create the crust.
- Heat a cast-iron skillet over high heat until it is screaming hot and the oil is just starting to smoke. Place the steak in the pan, pressing down slightly to ensure total contact.
- Sear for 3 minutes per side without moving it to develop a thick crust. For medium-rare, aim for an internal temperature of 130°F (54°C).
- In the final 2 minutes of cooking, drop in the butter, garlic, and herbs. Tilt the pan and use a large spoon to continuously baste the steak with the hot, flavored butter.
- Remove from the pan and let it rest on a cutting board for at least 10 minutes before slicing against the grain to keep the juices locked in.
How to bake lava cake?

Why we love this
No food board is complete without a dramatic dessert, and the lava cake is the undisputed queen of theater. There is a sheer, childlike joy in breaking the outer shell of a warm cake with a spoon and watching the molten chocolate center pour out like liquid silk. The aroma is intensely cocoa-rich, filling the room with a sweetness that isn’t overwhelming but rather deep and sophisticated. The contrast of the warm, gooey center against a cool dusting of powdered sugar makes every bite a decadent, multisensory experience.
Ingredients
- 4 oz high-quality semi-sweet chocolate
- 1/2 cup unsalted butter
- 2 large eggs plus 2 egg yolks
- 1/4 cup granulated sugar
- 2 tablespoons all-purpose flour
- 1 teaspoon vanilla extract
- Pinch of salt
How to make it
- Preheat your oven to 425°F (218°C). Generously grease two 6-ounce ramekins with butter and dust them with cocoa powder, tapping out the excess so the cakes release easily.
- Melt the chocolate and butter together in a microwave-safe bowl in 30-second intervals, stirring until completely smooth and glossy.
- In a separate bowl, beat the eggs, yolks, sugar, salt, and vanilla with a whisk or electric mixer for about 2 minutes until the mixture is thick, pale, and foamy.
- Gently fold the melted chocolate into the egg mixture using a spatula, then sift the flour over the top and fold again until just combined—do not overmix, or the cake will be tough.
- Divide the batter between ramekins and bake for 12-14 minutes. The sides should be firm and set, but the center should still have a slight jiggle. Let cool for 1 minute, then invert onto the board and serve immediately.
How to make fluffy pancakes?

Why we love this
Pancakes add a whimsical, “breakfast-for-dinner” vibe to a crowd-pleaser board, offering a soft and airy texture that acts as a sponge for syrups or fruit compotes. We love the sight of a stack of golden discs, each one pockmarked with tiny bubbles that signify a light-as-air interior. The smell of vanilla and malted flour cooking on a griddle is enough to bring anyone to the table. These aren’t just pancakes; they are clouds of sweetness that provide a gentle, comforting break from the savory meats and cheeses.
Ingredients
- 1 1/2 cups all-purpose flour
- 3 1/2 teaspoons baking powder
- 1 teaspoon salt
- 1 tablespoon white sugar
- 1 1/4 cups milk
- 1 egg
- 3 tablespoons melted butter
- 1 teaspoon vanilla extract
How to make it
- In a large bowl, whisk together the flour, baking powder, salt, and sugar. In a separate jug, whisk the milk, egg, melted butter, and vanilla.
- Make a well in the center of the dry ingredients and pour in the liquid. Stir with a whisk only until combined; lumps are your friend here! Over-mixing develops gluten, which makes pancakes rubbery instead of fluffy.
- Heat a non-stick griddle or skillet over medium heat and lightly coat with butter. Use a 1/4 cup measure to pour batter onto the hot surface.
- Wait for bubbles to form on the surface and the edges to look matte and set (usually about 2-3 minutes). This is your visual cue to flip.
- Flip carefully and cook for another 1-2 minutes until golden brown on the bottom. Keep them warm in a low oven until you are ready to assemble the board.
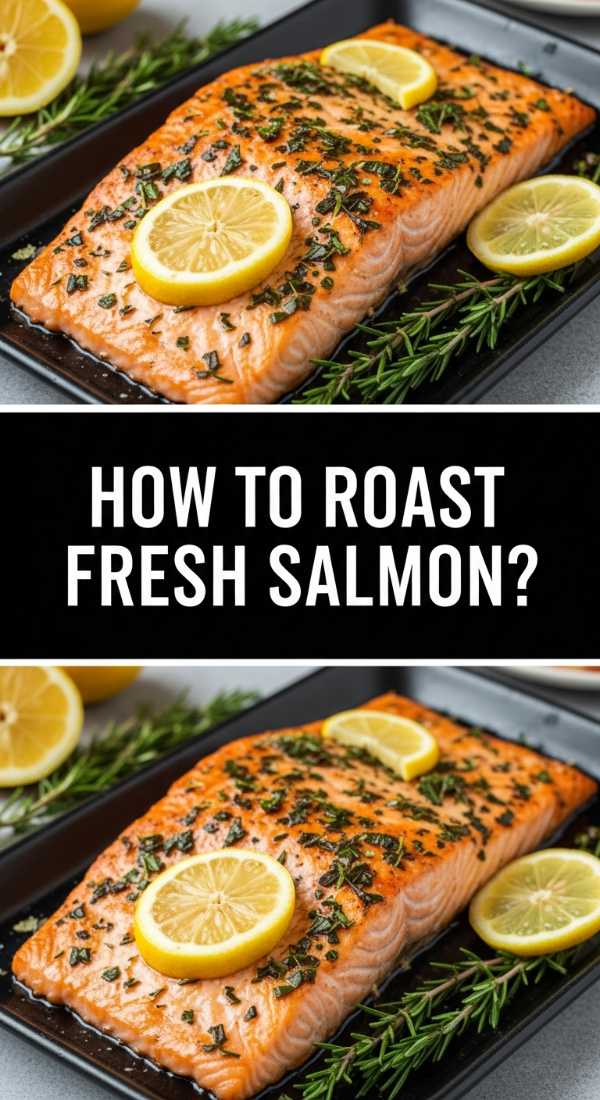
How to roast fresh salmon?
Why we love this
Roasted salmon brings a shot of vibrant color and a healthy, flaky elegance to the spread. We love the way the fish turns a beautiful opaque pink, with the surface glistening from a glaze of honey or citrus. The texture is the real winner here—buttery and moist, it practically melts in your mouth without any of the heaviness of fried foods. It’s a sophisticated addition that feels light and fresh, especially when paired with a zesty herb garnish that cuts through the natural richness of the omega-3 fats.
Ingredients
- 1 lb salmon fillet (center cut)
- 2 tablespoons olive oil
- 1 tablespoon honey
- 1 teaspoon Dijon mustard
- 1 lemon, thinly sliced
- Fresh dill and parsley
- Kosher salt and black pepper
How to make it
- Preheat your oven to 400°F (200°C) and line a baking sheet with parchment paper to prevent sticking and make cleanup a breeze.
- Pat the salmon fillet dry with a paper towel. Place it on the sheet and season the flesh side with salt and pepper.
- Whisk the olive oil, honey, and Dijon mustard in a small bowl until emulsified, then brush this glaze generously over the top of the salmon.
- Top the salmon with the lemon slices and a few sprigs of dill. Roast in the center of the oven for 12-15 minutes, depending on the thickness of the fillet.
- To check for doneness, press the top of the fish with a fork; if the flesh flakes easily along the white lines (the fat deposits), it is ready. The internal temperature should be around 145°F (63°C) for a perfect medium.
How to fry crispy wings?

Why we love this
Wings are the ultimate finger food, providing a crunch that is audible and a flavor that is infinitely customizable. We love that satisfying ‘crack’ of the skin, followed by the juicy, steam-releasing meat inside. There is something primal and fun about eating wings together, and when they are tossed in a sticky, sweet, or spicy sauce, they become the most talked-about item on the board. They add a rustic, pub-style energy to the meal that encourages everyone to roll up their sleeves and dive in.
Ingredients
- 2 lbs chicken wings (flats and drums separated)
- 1 tablespoon baking powder (the secret to crunch!)
- 1 teaspoon salt
- 1/2 cup your favorite buffalo or BBQ sauce
- 2 tablespoons melted butter
- Optional: sesame seeds or chives for garnish
How to make it
- The absolute most important step: dry your wings. Leave them uncovered in the fridge for an hour if possible, or pat them thoroughly with paper towels.
- Toss the dry wings in a bowl with the baking powder and salt. The baking powder raises the pH level of the skin, allowing it to crisp up like deep-fried skin even if you are baking or air-frying.
- If using an air fryer, cook at 400°F (200°C) for 20 minutes, shaking the basket halfway through. If using an oven, bake on a wire rack at 425°F (218°C) for 45 minutes until deep golden.
- While the wings are hot and fresh, whisk the melted butter into your sauce of choice; the fat makes the sauce glossy and helps it adhere to the skin.
- Toss the wings in the sauce until fully coated and serve immediately while the skin is at its peak crispness.
How to make cheesy potatoes?

Why we love this
If comfort had a flavor, it would be these cheesy potatoes. We love the way the sharp cheddar melts into the crevices of crispy roasted potatoes, creating little pockets of gooey bliss. The contrast between the salty, crunchy exterior of the potato and the soft, fluffy interior—all bound together by molten cheese—is simply irresistible. It’s the kind of dish that disappears in seconds because it taps into that universal craving for starch and dairy, providing a warm, golden anchor for the entire board.
Ingredients
- 1.5 lbs Yukon Gold potatoes, cubed small
- 3 tablespoons olive oil
- 1 teaspoon garlic powder
- 1/2 teaspoon smoked paprika
- 1.5 cups shredded sharp cheddar cheese
- 1/4 cup sliced green onions
- Salt and pepper
How to make it
- Preheat your oven to 425°F (218°C). Cubing the potatoes into small, 1/2-inch pieces ensures they cook quickly and have more surface area for crisping.
- Toss the potato cubes in a bowl with olive oil, salt, pepper, garlic powder, and smoked paprika until every piece is vibrantly coated.
- Spread the potatoes in a single layer on a preheated baking sheet (a hot sheet starts the searing process immediately). Roast for 25-30 minutes, flipping once, until they are golden brown and fork-tender.
- Group the potatoes closer together on the tray and sprinkle the shredded cheese generously over the top. Return to the oven for 2-3 minutes until the cheese is bubbling and just starting to brown.
- Slide the whole mass onto your board and top with fresh green onions for a pop of color and bite.
How to grill tasty sliders?

Why we love this
Sliders are the perfect miniature heroes of any food board. We love that they pack all the punch of a full-sized burger into a cute, manageable two-bite package. The sight of little toasted brioche buns with melted cheese cascading down the sides is pure food styling gold. They are easy to grab, customizable, and they bring a smoky, charred flavor that balances the more delicate items like salmon or pasta. It’s the quintessential party food that feels hearty and celebratory.
Ingredients
- 1 lb ground beef (80/20 mix for juiciness)
- 12 mini brioche slider buns
- 6 slices of American or cheddar cheese, halved
- Pickle chips
- Slider sauce (mayo, ketchup, mustard mix)
- 1 tablespoon butter, melted
How to make it
- Form the ground beef into small, 2-ounce patties. Make them slightly larger than the buns, as they will shrink during cooking. Press a small indent into the center with your thumb to keep them flat.
- Heat a grill or cast-iron griddle to high heat. Season the patties generously with salt and pepper right before they hit the heat.
- Grill for 2-3 minutes on the first side until a deep crust forms. Flip, and immediately top each patty with a half-slice of cheese. Cover the grill for 1 minute to ensure the cheese is perfectly draped over the meat.
- While the meat rests, brush the insides of the slider buns with melted butter and toast them on the grill for 30 seconds until golden.
- Assemble by spreading sauce on the bottom bun, adding the patty, a pickle chip, and the top bun. Use a toothpick to secure them if you’re piling them high on the board!
How to cook spicy shrimp?
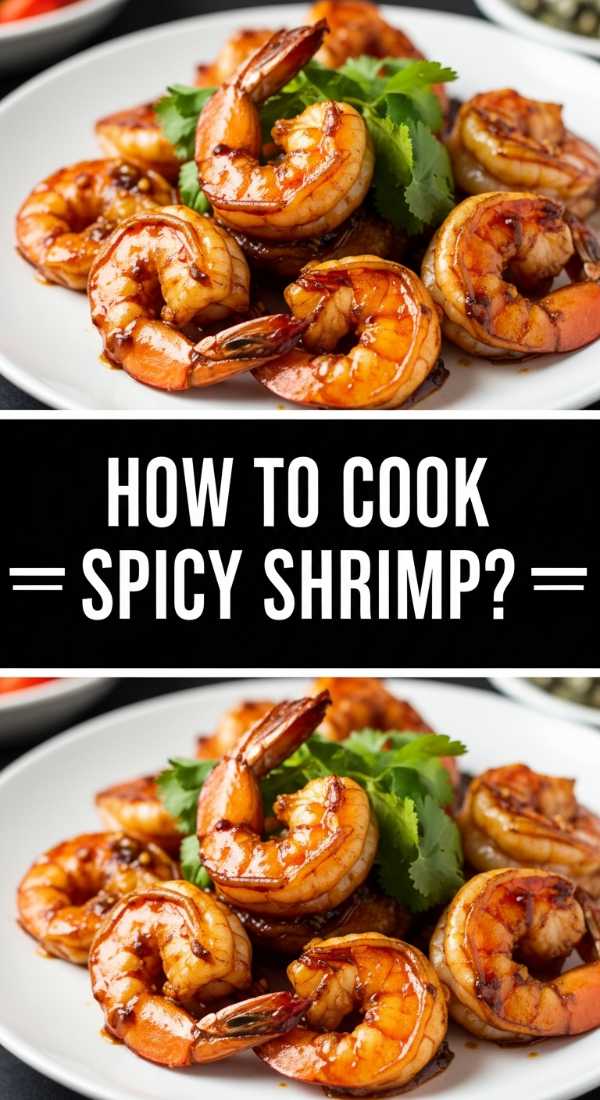
Why we love this
Spicy shrimp bring a sophisticated heat and a snap of texture that wakes up the palate. We love the vibrant orange-red hue they take on when tossed in chili flakes and paprika, making them look like little jewels on the board. Because they cook in mere minutes, they retain a succulent, springy texture that is a joy to eat. The spice isn’t just hot; it’s flavorful, with a back-note of citrus and garlic that makes you keep reaching for “just one more.”
Ingredients
- 1 lb large shrimp, peeled and deveined
- 2 tablespoons olive oil
- 1 teaspoon red chili flakes
- 1 teaspoon smoked paprika
- 2 cloves garlic, grated
- Zest and juice of 1 lime
- Fresh cilantro for garnish
How to make it
- In a bowl, toss the shrimp with olive oil, chili flakes, paprika, and grated garlic. Let them marinate for 10 minutes—don’t go longer, or the garlic and spice will overpower the delicate seafood.
- Heat a heavy skillet over high heat until it’s very hot. You want a quick sear to prevent the shrimp from becoming rubbery.
- Add the shrimp in a single layer. Cook for exactly 2 minutes on one side until the edges turn pink and opaque.
- Flip the shrimp and cook for only 1 more minute. Add the lime juice to the pan at the very end; it will sizzle and deglaze the pan, creating a light, spicy sauce.
- Remove immediately from the heat, garnish with lime zest and fresh cilantro, and serve. The total cooking time should be under 4 minutes for maximum juiciness.
Conclusion: Why the Food Board Wins Every Time
At the end of the day, a food board is more than just a collection of recipes; it’s an invitation to relax. By combining these ten diverse dishes—from the crunch of the wings to the molten center of the lava cake—you create a landscape of flavors that ensures no guest leaves hungry and every guest leaves happy. It’s the ultimate crowd-pleaser because it celebrates variety, conversation, and the simple joy of sharing a meal. So, grab your largest platter, start cooking, and watch the magic happen!