
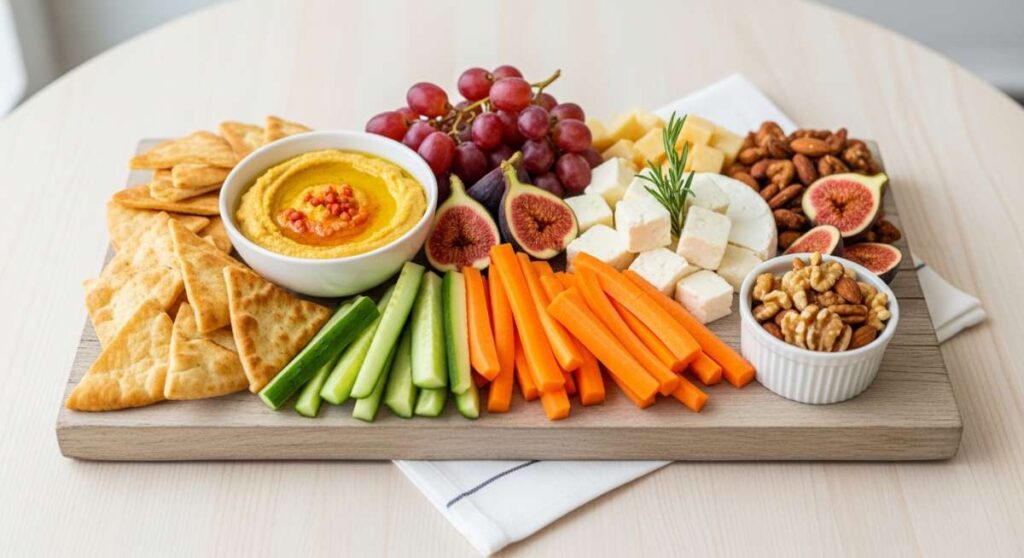
This Simple Food Board is Taking Over the Internet (and Why You Need It)
There is something almost magical about the way we gather around a table these days. Gone are the days of stiff, formal three-course meals where everyone sits in a quiet, structured row; instead, we are seeing a beautiful shift toward communal, vibrant, and effortlessly ‘messy’ food boards that celebrate the season’s best offerings. I first noticed this trend popping up on my feed a few months ago, and honestly, it has completely changed the way I host. It’s less about perfection and more about the colors, the textures, and the shared experience of reaching for a little bit of everything.
The secret to why this simple food board is taking over the internet isn’t just the aesthetics—though, let’s be real, it looks stunning in photos. It’s the accessibility. It invites your guests to graze, to customize their plates, and to linger over conversations while picking at grilled corn or juicy berries. It’s a sensory explosion that feels expensive but is actually rooted in simple, whole ingredients prepared with a little bit of love. Today, I’m sharing the ten cornerstone recipes that make my ultimate board the talk of every weekend gathering.
How to make berry salad?

Why we love this
This berry salad is like a burst of pure sunshine in a bowl, offering a complex symphony of sweetness and acidity that cleanses the palate between heavier bites. We love the way the deep purples of the blackberries bleed into the vibrant reds of the strawberries, creating a natural syrup that coats every piece of fruit. There is a cooling sensation from the fresh mint and a subtle floral note from a drizzle of honey that makes this feel far more sophisticated than a standard fruit bowl. It’s the crunch of the tiny seeds against the soft, yielding flesh of a perfectly ripe raspberry that keeps you coming back for more.
Ingredients
- 2 cups fresh strawberries, hulled and quartered
- 1 cup fresh blueberries
- 1 cup fresh raspberries
- 1 cup fresh blackberries
- 2 tablespoons high-quality honey or agave nectar
- 1 tablespoon fresh lime juice
- 1/4 cup fresh mint leaves, chiffonade
- A pinch of flaky sea salt
How to make it
- Begin by carefully washing all your berries in cold water and patting them completely dry with a soft paper towel; moisture is the enemy of a crisp salad.
- In a small glass bowl, whisk together the honey, fresh lime juice, and a tiny pinch of sea salt until the mixture is completely emulsified and smooth.
- Place the strawberries and blueberries in a large mixing bowl, but keep the raspberries and blackberries aside for now as they are much more delicate and prone to crushing.
- Drizzle half of the dressing over the strawberries and blueberries, tossing gently with a silicone spatula to ensure even coating without bruising the fruit.
- Add the remaining berries and the mint ribbons, then very gently fold them in using a lifting motion rather than a stirring motion to maintain the integrity of the fruit.
- Let the salad sit at room temperature for about 10 minutes before serving; this allows the natural juices to macerate and mingle with the lime and honey for a glossy, flavorful finish.
How to grill sweet corn?
Why we love this
Grilling sweet corn transforms a simple vegetable into a smoky, caramelized masterpiece that feels like the ultimate tribute to summer. There is something deeply satisfying about the charred, golden kernels that pop under your teeth, releasing a rush of sugary milk balanced by the bitterness of the grill marks. When slathered in butter and a dusting of salt, the aroma is nostalgic and intoxicating, filling the air with the scent of a backyard cookout. It’s a tactile, rustic experience that encourages you to get your hands a little messy, which is exactly what a great food board is all about.
Ingredients
- 6 ears of fresh sweet corn, husks removed
- 4 tablespoons unsalted butter, softened
- 1 teaspoon smoked paprika
- 1/2 teaspoon garlic powder
- Fresh cilantro for garnish
- Lime wedges for serving
- Fine sea salt and cracked black pepper
How to make it
- Preheat your grill to medium-high heat (about 400°F) and ensure the grates are clean and lightly oiled to prevent sticking.
- While the grill heats, prepare a ‘compound butter’ by mixing the softened butter with smoked paprika, garlic powder, salt, and pepper in a small bowl until creamy.
- Place the shucked corn directly onto the hot grill grates, positioning them perpendicular to the bars to get those iconic horizontal char marks.
- Close the lid and grill for about 10-12 minutes, using long-handled tongs to rotate the ears every 2-3 minutes; look for the kernels to turn a deep golden yellow with patches of blackened char.
- Once the corn is tender and evenly charred, remove it from the heat and immediately brush generously with the prepared spiced butter while the corn is still piping hot.
- Finish with a squeeze of fresh lime and a sprinkle of chopped cilantro, serving immediately to capture that perfect contrast of hot corn and melting butter.
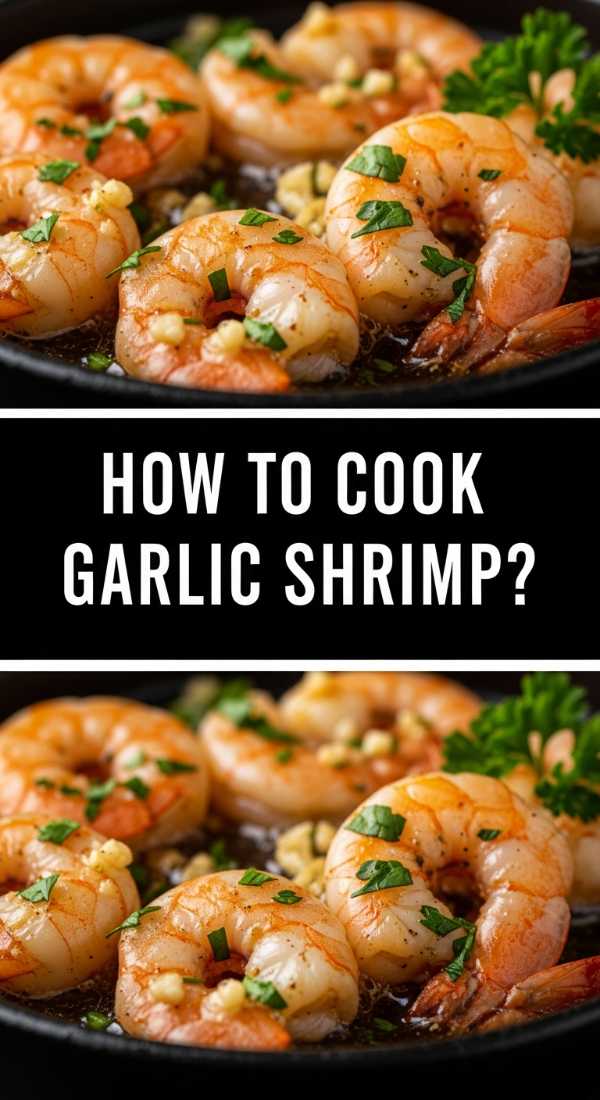
How to cook garlic shrimp?
Why we love this
Garlic shrimp is the savory powerhouse of the board, offering a rich, umami-packed bite that pairs beautifully with lighter elements. The aroma of minced garlic sizzling in olive oil is arguably one of the best scents in the culinary world, promising a dish that is both bold and comforting. We love the snap of the shrimp’s exterior which gives way to a tender, buttery center, all doused in a sauce that begs to be soaked up by a piece of crusty bread. It provides that essential protein element that turns a simple board into a satisfying, well-rounded meal.
Ingredients
- 1 pound jumbo shrimp, peeled and deveined (tails on for presentation)
- 6 cloves garlic, minced finely
- 3 tablespoons extra virgin olive oil
- 1/2 teaspoon red pepper flakes
- 1/4 cup dry white wine (like Pinot Grigio)
- 2 tablespoons fresh parsley, chopped
- Juice of half a lemon
- Salt and pepper to taste
How to make it
- Pat the shrimp dry with paper towels to ensure they sear properly rather than steaming; season them lightly with salt and pepper on both sides.
- Heat the olive oil in a large heavy-bottomed skillet over medium-high heat until the oil shimmers but isn’t smoking.
- Add the shrimp in a single layer, making sure not to overcrowd the pan (work in batches if necessary); sear for about 1-2 minutes until the edges turn pink and slightly opaque.
- Flip the shrimp over and immediately add the minced garlic and red pepper flakes; sauté for only 30-45 seconds until the garlic is fragrant and golden but not brown.
- Pour in the white wine to deglaze the pan, scraping up any browned bits from the bottom, and let it simmer for 1 minute until the liquid reduces by half.
- Remove from heat, stir in the lemon juice and fresh parsley, and toss until the shrimp are perfectly coated in the glossy garlic butter sauce.
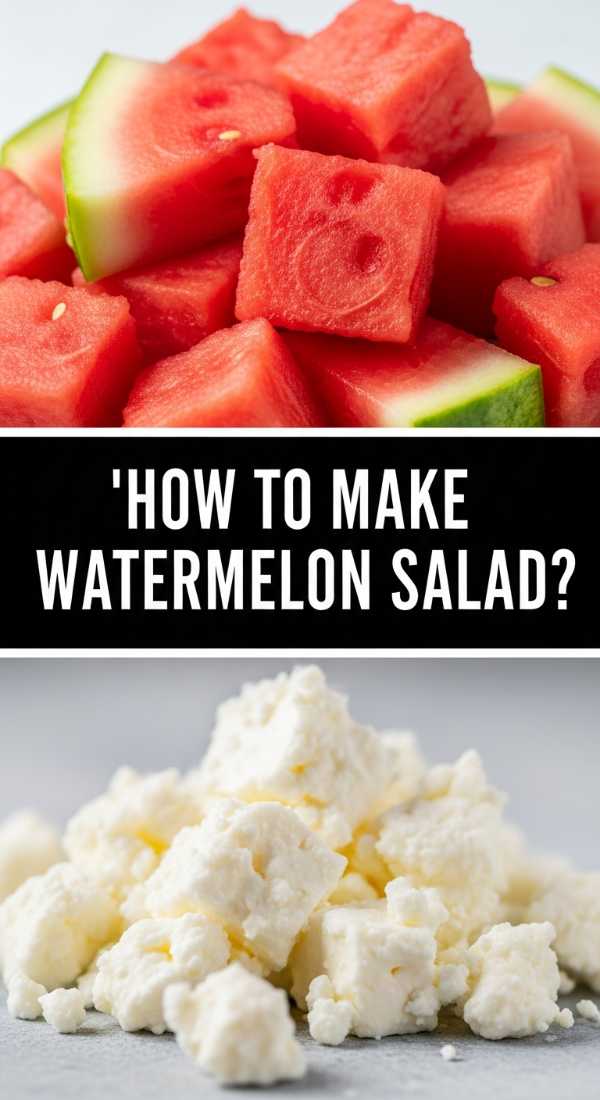
How to make watermelon salad?

Why we love this
This watermelon salad is the definition of refreshing, acting as a cool breeze on a hot afternoon. The contrast between the icy, sweet crunch of the watermelon and the creamy, salty tang of crumbled feta cheese is a culinary revelation that never gets old. We love the visual appeal of the bright pink cubes against the dark green mint and the purple shards of red onion, making it a centerpiece-worthy dish. It’s light, hydrating, and possesses a sophisticated balance of flavors that appeals to both kids and adults alike.
Ingredients
- 6 cups seedless watermelon, cut into 1-inch cubes
- 1/2 cup feta cheese, crumbled
- 1/2 small red onion, very thinly sliced
- 1/2 cup fresh mint leaves
- 2 tablespoons balsamic glaze
- 2 tablespoons extra virgin olive oil
- Flaky sea salt
How to make it
- Start by chilling your watermelon in the refrigerator for at least two hours before cutting; a cold watermelon holds its shape better and tastes significantly more refreshing.
- Cut the watermelon into uniform 1-inch cubes and place them in a shallow serving bowl rather than a deep one to prevent the bottom layers from getting crushed.
- Soak the thinly sliced red onions in a bowl of ice water for 10 minutes; this removes the harsh ‘bite’ and keeps them incredibly crisp.
- Drain the onions and pat them dry, then scatter them over the watermelon along with the crumbled feta cheese.
- Tear the mint leaves by hand rather than chopping them with a knife to prevent bruising and to release the aromatic oils more effectively.
- Just before serving, drizzle the olive oil and balsamic glaze over the top and finish with a generous sprinkle of flaky sea salt to make the watermelon’s sweetness pop.
How to grill chicken skewers?
Why we love this
Chicken skewers bring a sense of fun and portability to the board, making them the perfect ‘grab and go’ protein for guests. We love the way a good marinade penetrates the meat, ensuring every bite is juicy and infused with herbs, while the high heat of the grill creates those irresistible crispy edges. There is a rustic charm to food on a stick, and when paired with a creamy dipping sauce, they become the most sought-after item on the spread. The smokiness from the fire enhances the savory notes of the chicken, making it feel like a true outdoor feast.
Ingredients
- 1.5 lbs chicken thighs, cut into 1.5-inch pieces
- 1/4 cup olive oil
- 3 tablespoons lemon juice
- 2 teaspoons dried oregano
- 3 cloves garlic, mashed into a paste
- 1 teaspoon salt
- 1/2 teaspoon black pepper
- Wooden or metal skewers
How to make it
- In a large zip-top bag or glass bowl, combine the olive oil, lemon juice, oregano, garlic paste, salt, and pepper to create a bright, acidic marinade.
- Add the chicken pieces to the marinade, ensuring every piece is well-coated, and refrigerate for at least 30 minutes (but no longer than 4 hours to avoid the lemon juice ‘cooking’ the meat).
- If using wooden skewers, soak them in water for at least 30 minutes prior to grilling to prevent them from catching fire on the grates.
- Thread the chicken pieces onto the skewers, leaving a small amount of space between each piece to ensure the heat can circulate and cook the meat evenly on all sides.
- Preheat your grill to medium-high heat and oil the grates; grill the skewers for about 4-5 minutes per side.
- Use an instant-read thermometer to ensure the chicken has reached an internal temperature of 165°F; the meat should be firm to the touch and the juices should run clear before removing from the heat.
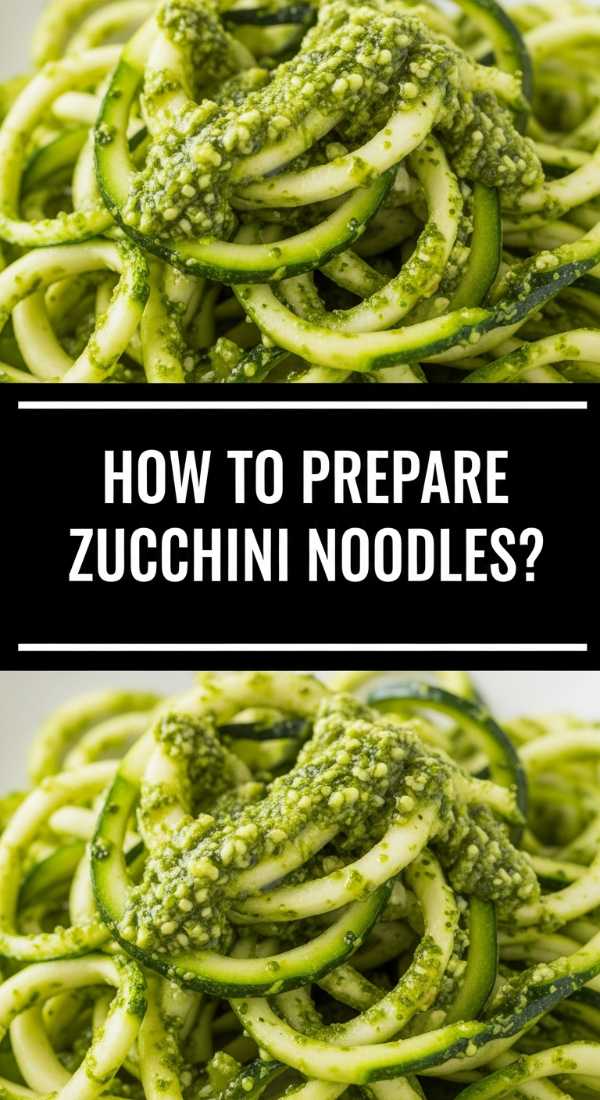
How to prepare zucchini noodles?

Why we love this
Zucchini noodles, or ‘zoodles’, offer a light and garden-fresh alternative to traditional pasta that keeps the board feeling vibrant rather than heavy. We love the mild, slightly nutty flavor of the zucchini which acts as a blank canvas for vibrant pestos or simple lemon-garlic dressings. The texture is key here—when prepared correctly, they have a delightful ‘al dente’ snap that is incredibly satisfying to eat. They bring a gorgeous tangle of bright green to your presentation, reminding everyone of the abundance of the season while keeping the meal inclusive for those looking for lighter options.
Ingredients
- 3 large zucchini, firm and unblemished
- 1 tablespoon olive oil
- 2 cloves garlic, sliced thin
- 1/4 teaspoon red pepper flakes
- 1/2 lemon, zested and juiced
- 2 tablespoons grated Parmesan cheese
- Salt to taste
How to make it
- Use a spiralizer to create long, noodle-like strands from the zucchini; if you don’t have one, a julienne peeler or a sharp knife to cut thin strips works just as well.
- Place the raw zucchini noodles in a colander and sprinkle lightly with salt; let them sit for 10 minutes to draw out excess moisture, then gently pat them dry with a clean kitchen towel.
- Heat the olive oil in a large skillet over medium heat and add the sliced garlic and red pepper flakes, cooking for about 1 minute until the garlic is just beginning to turn golden.
- Turn the heat up to medium-high and add the zucchini noodles to the pan; sauté quickly for only 2-3 minutes, tossing constantly with tongs.
- Do not overcook; you want the noodles to be warm and slightly softened but still retain a firm bite—overcooking will result in a watery, mushy mess.
- Remove from the heat immediately, toss with the lemon juice, zest, and Parmesan, and serve straight away to maintain the ideal texture.
How to bake peach cobbler?

Why we love this
Ending the meal with a warm peach cobbler is like receiving a big, sweet hug from the kitchen. We love the way the peaches soften into a jammy, golden filling that bubbles up around the edges of a buttery, biscuit-like topping. The aroma of cinnamon and baked fruit wafting through the house is enough to bring anyone to the table in a heartbeat. It’s a rustic, unpretentious dessert that celebrates the fuzzy-skinned beauty of a ripe peach, especially when served warm with a melting scoop of vanilla bean ice cream that creates a creamy sauce over the fruit.
Ingredients
- 6-8 large peaches, peeled and sliced
- 1/2 cup granulated sugar (for peaches)
- 1 teaspoon ground cinnamon
- 1 cup all-purpose flour
- 1 cup sugar (for batter)
- 1 tablespoon baking powder
- 1/4 teaspoon salt
- 3/4 cup whole milk
- 1/2 cup unsalted butter, melted
How to make it
- Preheat your oven to 375°F (190°C) and grease a 9×13 inch baking dish; meanwhile, toss the sliced peaches with 1/2 cup sugar and cinnamon in a bowl.
- In a separate medium bowl, whisk together the flour, 1 cup of sugar, baking powder, and salt until well combined.
- Stir in the milk and melted butter into the dry ingredients, mixing only until just combined—a few lumps in the batter are perfectly fine and help create a better texture.
- Pour the batter into the prepared baking dish, spreading it into an even layer with a spatula.
- Spoon the peaches and any accumulated juices over the top of the batter; do not stir them in, as the batter will naturally rise up around the fruit as it bakes.
- Bake for 40-45 minutes until the top is a deep golden brown and the peach juices are bubbling thick; let it cool for at least 15 minutes to allow the filling to set before serving.
How to make pasta salad?
Why we love this
This pasta salad is the ultimate versatile sidekick, providing a chewy, satisfying texture and a zesty punch that rounds out the board. We love the way the rotini spirals capture the vinaigrette in every nook and cranny, ensuring that no bite is bland. It’s a celebration of Mediterranean flavors—briny olives, sharp red onions, and sweet tomatoes—that only gets better as it sits and the flavors have time to marry. It’s hearty enough to be filling but bright enough to feel light, making it a staple for any outdoor gathering or festive board.
Ingredients
- 1 lb rotini or fusilli pasta
- 1 cup cherry tomatoes, halved
- 1/2 cup English cucumber, diced
- 1/3 cup Kalamata olives, sliced
- 1/4 cup red onion, finely diced
- 1/2 cup Italian dressing (homemade or high-quality store-bought)
- 1/2 cup mini mozzarella pearls
- Fresh basil for garnish
How to make it
- Cook the pasta in a large pot of heavily salted boiling water until it is slightly past ‘al dente’; for cold pasta salads, a slightly softer noodle holds the dressing better once chilled.
- Drain the pasta and immediately rinse it under cold running water to stop the cooking process and wash away excess starch, which prevents the noodles from sticking together.
- In a large mixing bowl, combine the cooled pasta with the tomatoes, cucumber, olives, red onion, and mozzarella pearls.
- Pour about two-thirds of the Italian dressing over the mixture and toss thoroughly to coat every ingredient.
- Cover and refrigerate the salad for at least one hour; this is a critical step as the pasta will absorb the dressing, intensifying the flavor throughout the dish.
- Just before serving on your board, toss with the remaining dressing to refresh the gloss and garnish with freshly torn basil leaves for a pop of herbal aroma.
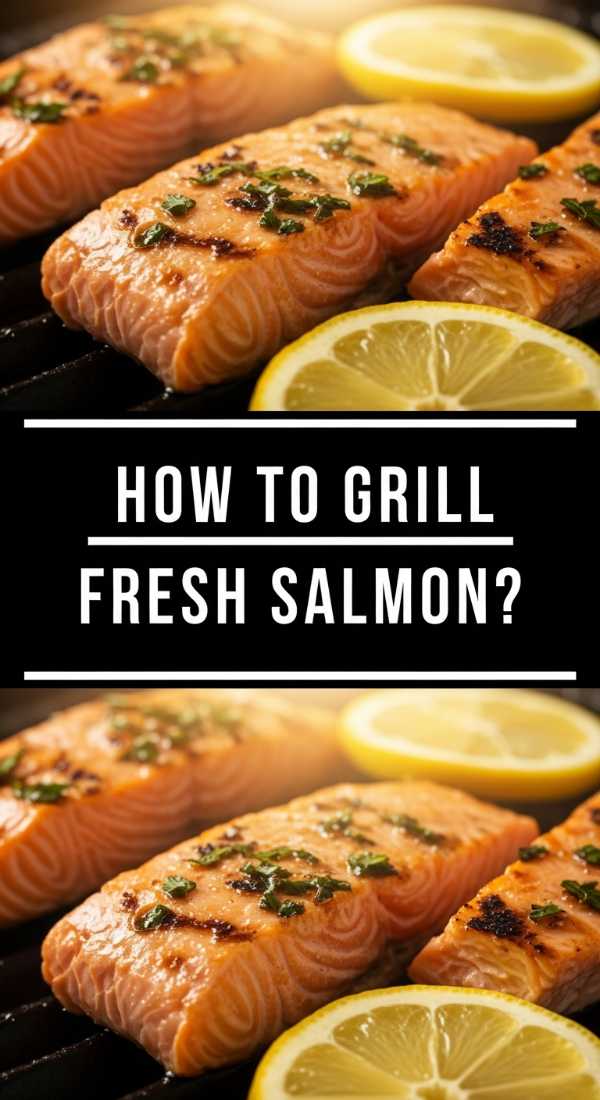
How to grill fresh salmon?
Why we love this
Grilled salmon brings an air of elegance and a boost of healthy omega-3s to your food board, offering a rich, buttery flavor that is hard to beat. We love the contrast between the crispy, salt-kissed skin and the tender, flaky pink flesh that practically melts in your mouth. The high heat of the grill imparts a subtle woodsy char that complements the natural fats of the fish beautifully. When topped with a slice of charred lemon or a dollop of herb butter, it becomes a sophisticated centerpiece that feels both indulgent and incredibly nourishing.
Ingredients
- 4 salmon fillets (about 6 oz each), skin-on
- 2 tablespoons olive oil
- 1 teaspoon sea salt
- 1/2 teaspoon cracked black pepper
- 1 teaspoon dried dill or lemon pepper seasoning
- Lemon slices for grilling
How to make it
- Remove the salmon from the refrigerator about 20 minutes before grilling to bring it to room temperature, which ensures even cooking throughout the fillet.
- Pat the skin side of the salmon very dry with paper towels; this is the secret to achieving that coveted ‘shatter-crisp’ skin texture.
- Brush both sides of the fillets with olive oil and season generously with salt, pepper, and your choice of dried herbs.
- Preheat the grill to medium-high heat and thoroughly oil the grates; place the salmon fillets skin-side down first and do not move them for at least 4-5 minutes.
- Once the skin is crispy and releases easily from the grill, flip the fillets carefully using a wide fish spatula and grill for another 3-4 minutes.
- Aim for an internal temperature of 135°F for medium-rare; the salmon should be opaque on the outside but still slightly translucent and moist in the very center.
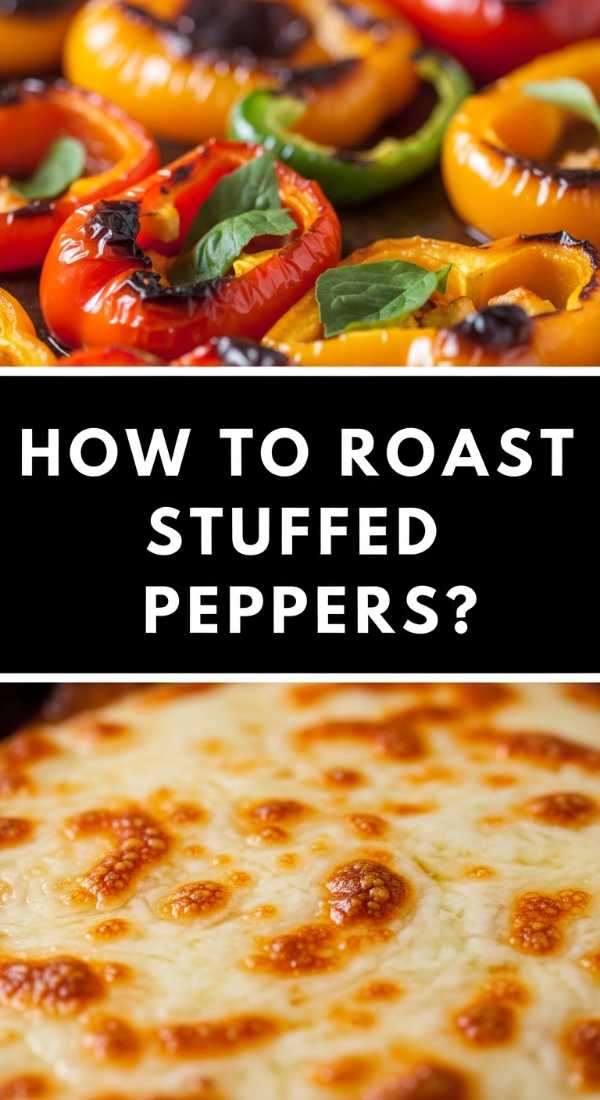
How to roast stuffed peppers?
[IMAGE_10]
Why we love this
Roasting stuffed peppers turns a simple bell pepper into a sweet, tender vessel for a savory explosion of filling. We love the way the oven’s heat concentrates the sugars in the pepper walls until they are soft and slightly charred, creating a perfect package for seasoned rice, meat, or beans. The melted cheese on top adds a gooey, golden crust that makes every bite feel like a treasure hunt. They are visually stunning with their jewel-toned colors and provide a complete, balanced bite that is as wholesome as it is delicious.
Ingredients
- 4 large bell peppers (any color), tops removed and deseeded
- 1 lb ground turkey or beef
- 2 cups cooked rice
- 1 cup marinara sauce
- 1 teaspoon Italian seasoning
- 1/2 teaspoon garlic powder
- 1.5 cups shredded mozzarella cheese
- Salt and pepper
How to make it
- Preheat your oven to 375°F (190°C) and place the empty peppers in a baking dish with a splash of water at the bottom; cover with foil and pre-bake for 10 minutes to soften them.
- While the peppers pre-bake, brown the ground meat in a skillet over medium heat, draining any excess fat once cooked through.
- Stir the cooked rice, marinara sauce, Italian seasoning, garlic powder, and half of the cheese into the meat until everything is well-incorporated and heated through.
- Remove the peppers from the oven, discard the water from the dish, and stuff each pepper to the brim with the meat and rice mixture, pressing down slightly to pack it in.
- Top each pepper with the remaining shredded mozzarella cheese and return to the oven, uncovered this time.
- Bake for another 20-25 minutes until the peppers are tender when pierced with a fork and the cheese on top is bubbly and speckled with golden-brown spots.
The Art of the Grazing Board
Building a food board like this is about more than just the individual recipes; it’s about the harmony of flavors and the joy of sharing. When you lay out these dishes—the smoky corn next to the zesty pasta salad, the succulent salmon beside the sweet peach cobbler—you’re creating a landscape of taste that invites everyone to slow down and enjoy. Don’t worry if things overlap or if the presentation isn’t ‘perfect.’ The best boards are the ones that look lived-in and loved, full of colors that remind us of how beautiful simple, fresh food can truly be. So, grab a large platter, gather your friends, and let this viral food board trend bring some magic to your next meal.
Frequently Asked Questions
How do I keep the food warm on a large board?
The best way to manage temperature is to stagger your cooking. Keep your roasted or grilled items like the chicken skewers and stuffed peppers in a low-heat oven (around 200°F) until you are ready to assemble the board. Also, using heavy ceramic or stone platters that have been slightly warmed can help retain heat for the savory items.
Can I prepare these components in advance?
Absolutely! The pasta salad actually tastes better if made a day ahead. You can chop the vegetables for the zucchini noodles, marinate the chicken, and wash the berries the night before. However, I recommend grilling the salmon and shrimp right before serving to ensure they stay juicy and tender.
What are the best substitutions for dietary restrictions?
This board is very flexible. For a vegetarian version, replace the chicken and shrimp with grilled halloumi or marinated tofu skewers. For a gluten-free board, ensure your pasta is a corn or chickpea-based variety and swap the flour in the peach cobbler for a high-quality 1-to-1 gluten-free baking blend.