
Have you ever walked into a room and felt an immediate sense of belonging, as if the walls themselves were whispering a story just for you? There’s a certain magic in the way we curate our personal sanctuaries—a delicate dance between form, function, and the soul of the home. It’s not just about filling empty space; it’s about creating a resonance that lingers long after you’ve left the room, a reflection of your journeys, your dreams, and your quietest moments of joy.
In this guide, we’re diving deep into the art of the accent. We’re moving beyond the mundane to explore how elevated wall decor and thoughtful interior design can transform even the most overlooked corners into sophisticated statements. Whether it’s the sun-drenched texture of a patio or the intimate warmth of a bedroom retreat, every choice we make adds a layer to the beautiful tapestry of our lives. Let’s explore how to bring that sophisticated spark into every corner of your world.
How to Transform a Garden Wall for Lasting Outdoor Charm
Why we love this
There is something profoundly grounding about a weathered garden wall that feels like it has shared secrets with the wind for decades. We love the tactile contrast of rough-hewn stone against the delicate, waxy leaves of climbing ivy, creating a living mural that changes with the seasons. The scent of damp earth and blooming jasmine clings to the structure, turning a simple boundary into a lush, breathable sanctuary where time seems to slow down and the hustle of the world fades into a distant hum.
Essential Elements:
- Weather-resistant stone or brick veneer
- Sturdy wall-mounted iron trellises
- Hardy climbing plants like English Ivy or Star Jasmine
- Integrated LED stone wash lights
- Copper wall-mounted planters
How to make it
- Begin by cleaning the existing wall surface thoroughly to ensure proper adhesion for any veneers or mounts; use a stiff brush and a mild detergent to remove moss or loose debris.
- Install your heavy-duty iron trellises using masonry anchors, ensuring they are spaced at least two inches away from the wall surface to allow air circulation for your climbing plants.
- Carefully apply a stone veneer or faux-stone panels starting from the bottom up, using a level at every second row to ensure a professional, straight finish that mimics natural masonry.
- Mount copper planters at varying heights to create a tiered visual effect, filling them with trailing succulents that provide a soft contrast to the vertical climbers.
- Position low-voltage LED wash lights at the base of the wall, angling them upward to highlight the textures of the stone and the silhouettes of the leaves during the evening hours.
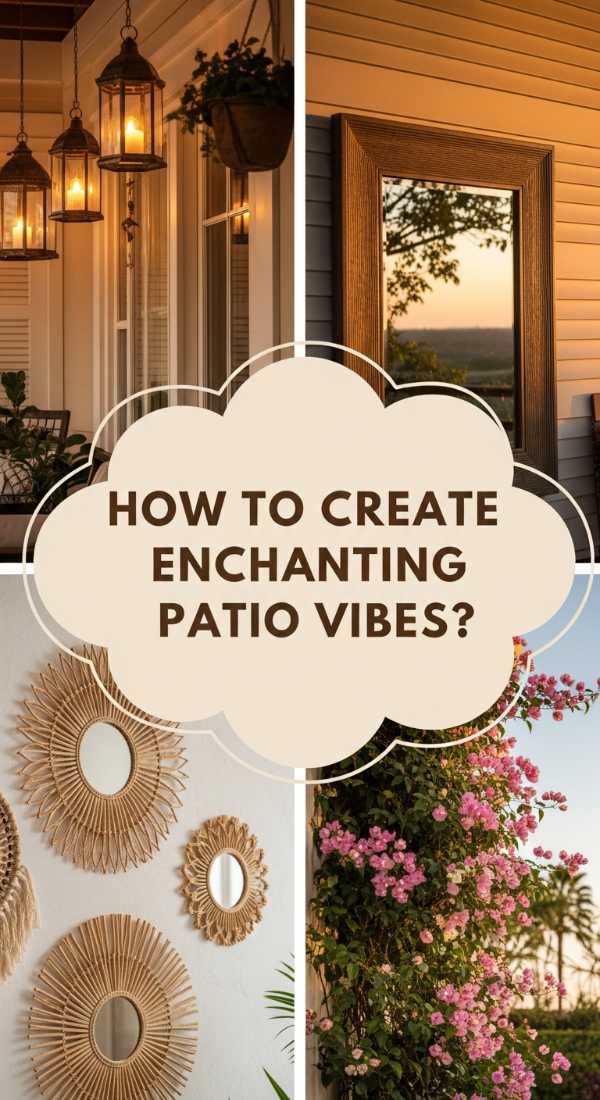
How to Create an Enchanting Patio Space for Summer Evenings

Why we love this
Imagine a warm summer breeze carrying the faint scent of citronella and charcoal as you lean back into a pile of linen cushions. This space is all about the atmosphere—the way the golden hour light filters through hanging ferns and the gentle glow of Edison bulbs creates a perimeter of safety and warmth. It’s the perfect backdrop for long conversations, the clinking of ice in glasses, and the soft, tactile comfort of an outdoor rug under bare feet, making your backyard feel like a high-end Mediterranean villa.
Essential Elements:
- Weatherproof string lights with vintage Edison bulbs
- Heavyweight outdoor linen pillows in earthy tones
- A neutral-toned jute or polypropylene outdoor rug
- Large ceramic floor lanterns with flameless candles
- Overhead wooden pergola or canvas sun sails
How to make it
- Start by defining the perimeter of your patio with a large-scale outdoor rug, ensuring it is centered under your main seating area to anchor the space visually.
- String your lights in a zigzag pattern across the ceiling or pergola, using guide wires to prevent sagging and ensuring the bulbs are at least 8 feet above the ground for safety.
- Layer your seating with oversized, UV-resistant cushions, focusing on textures like woven knits and smooth linens to provide a sensory variety that feels luxurious to the touch.
- Place large ceramic lanterns in the corners of the patio, using different heights to create depth; ensure they have timers set for dusk to create an effortless transition into the evening.
- Add a final touch of greenery by hanging moisture-loving ferns from the corners of the overhead structure, which helps to lower the temperature and adds a sense of lush enclosure.
How to Arrange a Heartfelt Family Gallery for Endless Home Comfort

Why we love this
A family gallery is more than a collection of photos; it is a visual heartbeat of the home that provides an instant sense of belonging. We love the sophisticated look of black-and-white photography paired with deep brass frames, which lends a timeless, museum-quality feel to personal memories. The sight of laughing faces and milestone moments, arranged with intention, creates a wall that feels warm and alive, inviting guests to stop, linger, and connect with the story of your life.
Essential Elements:
- Cohesive frame sets in brass, black, or natural oak
- Acid-free matting in crisp white or soft cream
- A mix of portrait and landscape orientation photos
- Precision hanging hardware and a spirit level
- Gallery-style picture lights for over-the-top illumination
How to make it
- Select your photos and convert them to a consistent color palette, such as sepia or high-contrast black-and-white, to ensure the collection looks curated rather than cluttered.
- Lay all of your framed photos out on the floor first, experimenting with spacing—keep a consistent 2-to-3-inch gap between each frame for a professional, clean aesthetic.
- Tape paper templates of each frame to the wall using painter’s tape, which allows you to visualize the final layout and adjust the height without making unnecessary holes.
- Hammer in your hanging hooks directly through the paper templates; once the hooks are secure, tear the paper away to reveal the perfect mounting points.
- Hang the frames and use a spirit level to ensure every piece is perfectly horizontal, then install a dedicated picture light above the central piece to elevate the entire display.
How to Infuse Vibrant Mexican Style for a Sun-Drenched Backyard

Why we love this
There is an undeniable energy in the bold, sun-soaked colors of Mexican-inspired design, from the deep cobalt blues to the fiery oranges of Talavera pottery. We love the way this style embraces the heat of the sun, using terracotta textures and hand-painted tiles to create a space that feels celebratory and festive. The aroma of blooming bougainvillea and the sound of a bubbling stone fountain transport you straight to a hidden courtyard in San Miguel de Allende, filled with light and life.
Essential Elements:
- Hand-painted Talavera tiles for wall accents
- Terracotta wall planters and floor urns
- Wrought iron wall art or decorative sconces
- Vibrant outdoor textiles in turquoise and ochre
- A traditional tiered stone water feature
How to make it
- Identify a focal wall and apply a small section of vibrant Talavera tiles in a diamond pattern to create a permanent colorful centerpiece that resists fading in the sun.
- Mount heavy wrought iron sconces on either side of the tile work, using rustic candle-style bulbs to provide a soft, historical glow during the evening.
- Arrange various sizes of terracotta pots against the wall, planting them with bright pink bougainvillea or structural agave to provide a mix of soft petals and sharp silhouettes.
- Drape a hand-woven Mexican serape or high-quality outdoor textile over your seating to bring the wall’s color palette down into the living area of the backyard.
- Position a stone fountain near the wall; the sound of splashing water against the hard stone creates a cooling auditory effect that perfectly complements the warm visuals.
How to Craft Rustic Tree Branch Art for Natural Interior Harmony
Why we love this
Bringing the outdoors in has a soothing effect on the soul, and rustic tree branch art offers a sculptural, organic element that softens modern lines. We love the silvered patina of weathered driftwood or the deep, chocolatey tones of walnut branches, which bring a tactile, forest-like aroma and texture to a room. It’s a way to celebrate the imperfect beauty of nature, creating a focal point that feels both artistic and deeply connected to the earth, perfect for a calm, minimalist home.
Essential Elements:
- A large, ethically sourced fallen branch or driftwood piece
- Fine-grit sandpaper and clear matte sealant
- Heavy-duty invisible wall mounts or fishing line
- Small LED fairy lights (optional for ambiance)
- Air plants or dried eucalyptus for accents
How to make it
- Select a branch with interesting twists and forks; clean it thoroughly with a damp cloth and lightly sand any rough or sharp edges to reveal the grain without losing the natural character.
- Apply two coats of a clear matte sealant to protect the wood from humidity and to ensure no dust or debris sheds onto your furniture over time.
- Identify the balance point of the branch by holding it against the wall; mark the locations where the branch naturally touches the wall surface for mounting.
- Secure the branch using heavy-duty hooks or thin, transparent fishing line anchored to ceiling joists if you want a “floating” effect that emphasizes its organic shape.
- Tuck small air plants into the natural crevices of the wood or drape a few sprigs of dried eucalyptus over the forks to add a living element and a subtle, refreshing scent.
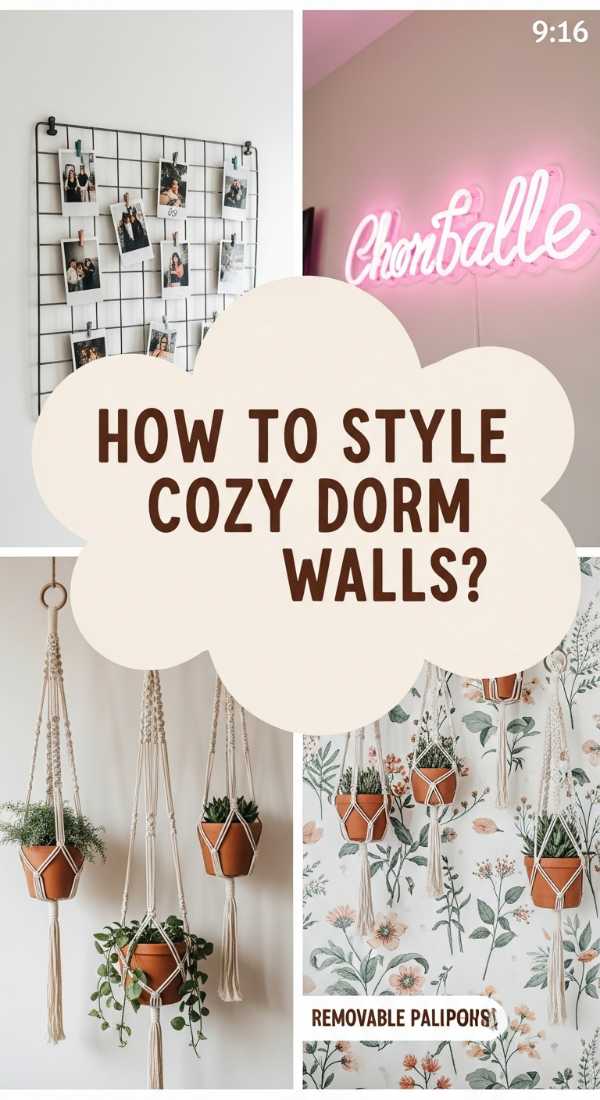
How to Style a Cozy Dorm Sanctuary for Stress-Free Studying

Why we love this
Dorm living can often feel cold and institutional, but with the right wall decor, it can become a soft, recharging sanctuary that supports both focus and rest. We love the use of removable textiles and warm, dimmable lighting that erases the harshness of fluorescent overheads. The feeling of a plush, velvet-covered wall organizer or a soft tapestry creates an acoustic buffer, making the room feel quieter, more private, and infinitely more like a home away from home.
Essential Elements:
- Large-scale fabric tapestries or textile wall hangings
- Command hooks and damage-free adhesive strips
- Clip-on desk lamps with warm-tone bulbs
- Grid-style wire wall organizers for notes and photos
- Peel-and-stick felt hex tiles for sound dampening
How to make it
- Start by covering a large portion of the cinder block wall with a textile tapestry; use Command clips at the top corners to hang it loosely for a soft, draped look that hides the industrial wall.
- Apply peel-and-stick felt tiles in a geometric pattern near your desk area; these act as both a pinboard for important deadlines and a sound-dampening barrier against hallway noise.
- Mount a wire grid organizer using adhesive hooks; this keeps your desk surface clear while putting your inspirational photos and to-do lists at eye level.
- Replace the standard white bulb in your desk lamp with a warm “sunset” toned LED to reduce eye strain during late-night study sessions and create a cozy evening vibe.
- Finish the space with a few “safe” wall plants, such as air plants in plastic geometric holders, which add life to the room without the risk of heavy pots falling or leaking.
How to Mount Edgy Skateboard Displays for Bold Urban Vibes
Why we love this
Skateboard decks are more than sports equipment; they are canvas for incredible street art and a symbol of urban movement. We love how a row of vertically mounted decks can transform a hallway into a modern art gallery, showcasing bold graphics and vibrant colors. The smooth, lacquered finish of the wood boards adds a sleek, industrial texture to the room, making it feel youthful, energetic, and full of personality while keeping the floor clutter-free.
Essential Elements:
- A collection of skateboard decks (new or vintage)
- Dedicated wall-mount skateboard hangers
- Drywall anchors and a power drill
- Spirit level for precise vertical alignment
- Accent puck lighting for a gallery effect
How to make it
- Choose a series of decks that share a common color theme or artistic style; ensure the truck holes are clear and ready for the mounting hardware.
- Measure the width of your wall and divide it by the number of decks plus one to determine the exact spacing between each board for a balanced, symmetrical look.
- Install the skateboard hangers using heavy-duty drywall anchors; ensure the hangers are perfectly vertical by using a spirit level on the side of the bracket before tightening the screws.
- Slide the decks onto the hangers, securing them with the provided nuts or clips so they sit flush against the wall without wobbling.
- Install battery-operated LED puck lights on the ceiling or high on the wall above each deck to cast a dramatic downward shadow that highlights the contours of the boards.
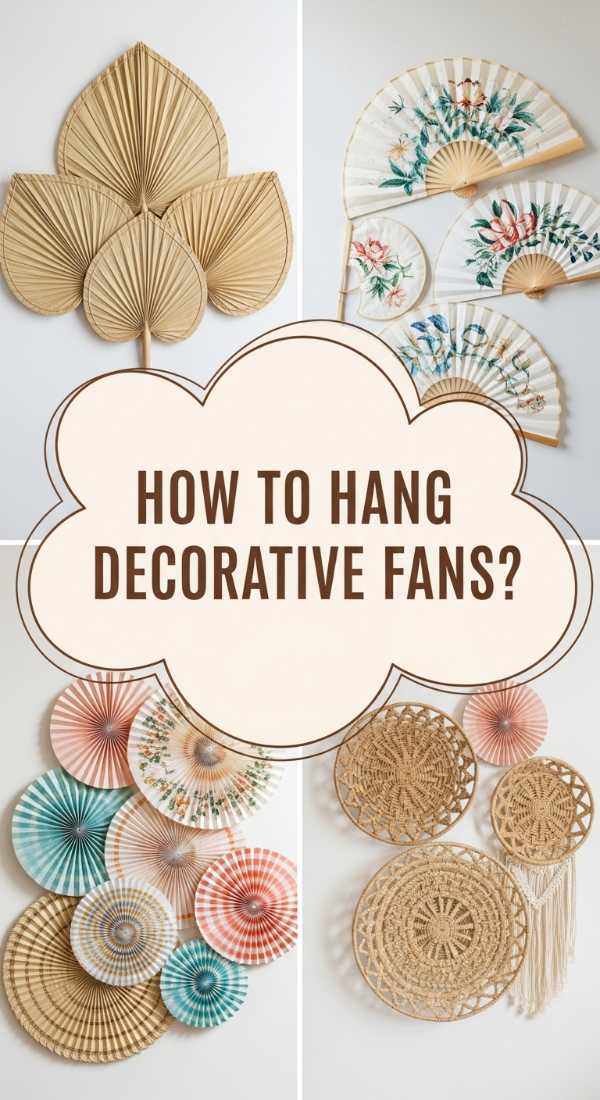
How to Hang Decorative Fans for Breezy Tropical Elegance

Why we love this
There is a timeless, airy elegance to decorative wall fans that immediately evokes the feeling of a tropical breeze and colonial-era charm. We love the intricate craftsmanship of hand-painted silk or woven bamboo, which adds a delicate, layered texture to a room. The way a large fan spans across a wall creates a sense of movement and openness, making even small rooms feel more spacious and light, filled with the imagined scent of hibiscus and sea salt.
Essential Elements:
- Oversized decorative folding fans (bamboo, silk, or paper)
- Small finishing nails or clear adhesive clips
- A pencil for marking the arc of the fan
- A handheld steamer to remove shipping wrinkles
- Matching silk tassels for additional ornamentation
How to make it
- Carefully open your decorative fan and use a handheld steamer on a low setting to gently smooth out any folds or wrinkles in the fabric or paper surface.
- Hold the fan against the wall to find the ideal height; usually, the bottom center of the fan should be about 60 inches from the floor for optimal viewing.
- Mark the top center and the two bottom outer corners of the fan’s arc with a light pencil mark to serve as your guide for placement.
- Hammer in three small finishing nails at these points, or use clear adhesive clips if you want a damage-free option; the fan should rest securely on these points.
- For an extra touch of sophistication, hang a long silk tassel from the center pivot of the fan to add vertical interest and a pop of contrasting color.
How to Design a Dreamy Bedroom Accent for the Ultimate Rest

Why we love this
The bedroom should be a sanctuary for the senses, and a well-designed accent wall can turn a simple sleeping space into a luxury hotel retreat. We love the use of soft-touch materials like velvet or oversized padded headboards that extend to the ceiling, creating an embrace of comfort. The interplay of muted, dusty rose or deep sage tones with ambient, dimmable lighting creates a cocoon-like environment where the stresses of the day melt away into the soft, plush textures of the room.
Essential Elements:
- Floor-to-ceiling upholstered wall panels
- Dimmable wall-mounted reading sconces
- A palette of muted, monochromatic colors
- Sheer linen window treatments
- Lavender-scented room spray for sensory completion
How to make it
- Select a fabric for your wall panels that feels amazing to the touch, such as a short-pile velvet or a high-quality linen blend, ensuring the color is a soothing, low-saturation tone.
- Install the panels starting from the center of the bed and working outward to the edges of the wall to ensure perfect symmetry behind the headboard.
- Mount dimmable sconces at shoulder height when sitting in bed; choose fixtures with a directional arm so you can focus light for reading without waking a partner.
- Paint the remaining walls in a slightly lighter shade of the same color as your panels to create a sophisticated, monochromatic look that expands the visual space.
- Introduce a sensory layer by misting the upholstered panels with a light lavender or sandalwood water, which will hold the scent and release it slowly throughout the night.
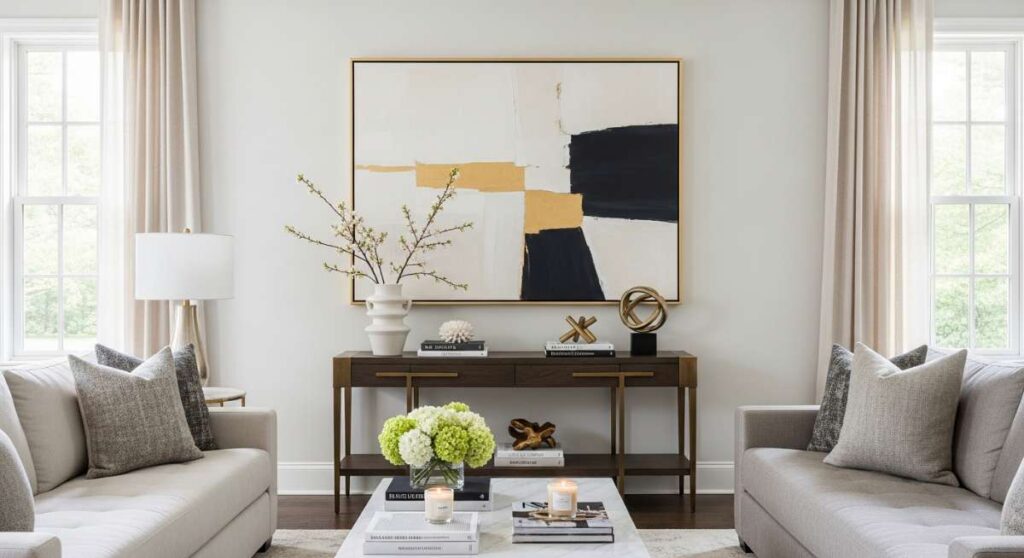
How to Curate Artistic Wall Collections for a Sophisticated Living Space
[IMAGE_10]
Why we love this
A curated wall collection is the ultimate expression of sophisticated interior design, blending different mediums and eras into one cohesive statement. We love the juxtaposition of an oil painting next to a modern charcoal sketch, all unified by a shared frame style or color story. This approach creates a rich, intellectual atmosphere that invites curiosity and tells a story of travel, art appreciation, and refined taste, making your living room feel like a private gallery.
Essential Elements:
- A mix of original art, prints, and 3D wall sculptures
- High-quality custom framing with UV-protective glass
- A consistent color thread (e.g., all gold frames or all blue accents)
- Dimmable track lighting or art spots
- Museum putty to keep frames perfectly aligned
How to make it
- Gather your pieces and identify a “hero” work—the largest or most striking piece—to serve as the anchor for the entire collection, usually placed slightly off-center for modern flair.
- Ensure all pieces are framed using UV-protective glass to prevent the colors from fading and to reduce glare from windows, which can distract from the art itself.
- Space the pieces with varied gaps—try mixing tight clusters with more open areas to create a dynamic visual rhythm that guides the eye across the wall.
- Install dimmable track lighting on the ceiling, angling the individual spots to hit each piece of art at a 30-degree angle to avoid harsh shadows or reflections.
- Apply a small dot of museum putty to the bottom corners of each frame; this prevents the art from shifting when doors close or people walk by, keeping the collection pristine.
Conclusion: Curating Your Personal Masterpiece
Designing a home is a journey, not a destination. By focusing on these sophisticated accents, you’re doing more than just decorating—you’re curating an experience for yourself and everyone who enters your home. Whether it’s through the natural charm of a garden wall or the bold statement of an urban skateboard display, the key is to choose elements that resonate with your spirit. Take your time, trust your eye, and remember that the most beautiful homes are the ones that tell the story of the people who live within them. Happy styling!