
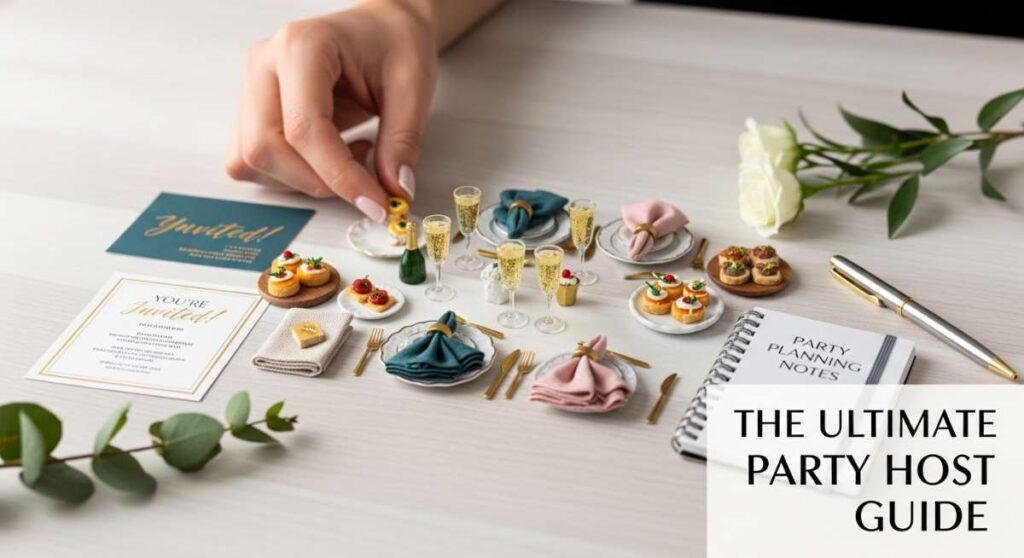
The Host with the Most: Your Ultimate Guide to Unforgettable Gatherings
Hello, my beautiful loves. There is something truly sacred about opening your doors and your heart to the people you cherish most. To me, hosting isn’t just about the food or the decor; it’s about creating a soft place to land, a sanctuary where laughter flows like wine and every guest feels like the guest of honor. It’s that cloud-soft embrace of a home filled with warmth and the hum of happy voices.
I’ve spent so many afternoons dreaming up ways to make our gatherings feel just a little more magical, without the stress that often comes with it. Whether you’re planning a sun-drenched brunch or a spooky twilight soirée, I’ve gathered my favorite little secrets to help you shine. Let’s dive into these beautiful ways to celebrate togetherness, shall we?
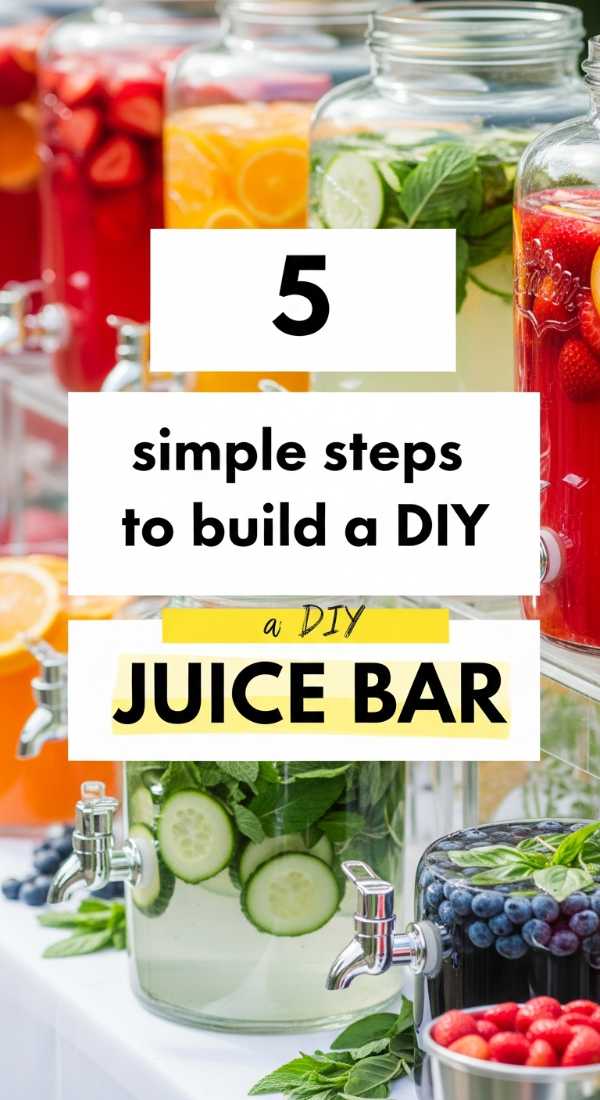
The Sunshine Sipper: 5-Step DIY Juice Bar
Why to love this recipe:
There is nothing quite like the vibrant colors of fresh fruit to wake up a morning gathering. This DIY juice bar is my favorite way to let guests customize their refreshment while keeping the vibe light, airy, and oh-so-aesthetic. It turns a simple drink into a beautiful, interactive experience that looks like a dream on your countertop.
Essential Ingredients:
- Freshly squeezed orange, grapefruit, and pineapple juices
- Sparkling mineral water or Prosecco
- Fresh berries, mint sprigs, and citrus slices for garnish
- Glass carafes and gold-rimmed glassware
- Ice bucket with floral-infused ice cubes
How to Prepare:
- Select a sunlit corner or side table and drape it with a linen runner.
- Pour your juices into clear glass carafes and label them with handwritten tags.
- Arrange small bowls of fresh garnishes and a container of sprigs.
- Set out the glassware and a chilled bucket of your floral ice.
- Let guests mix their perfect ratio of juice, bubbles, and beauty.
Budget Range
- Glass Carafes ($12 – $20)
- Linen Table Runner ($15 – $25)
- Fresh Seasonal Fruit ($10 – $15)
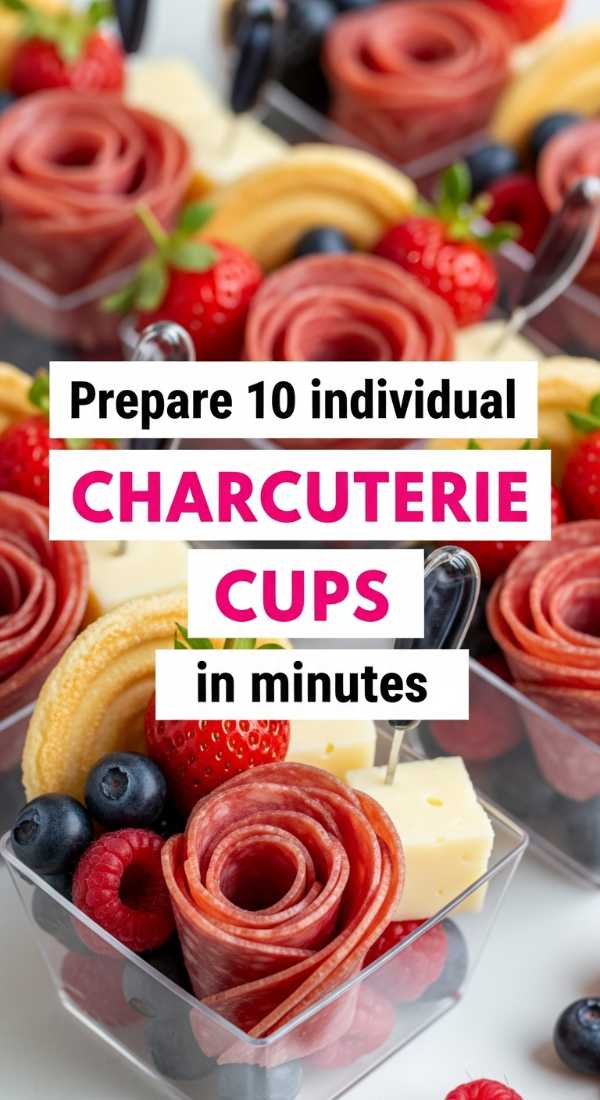
Chic & Convenient: 10 Individual Charcuterie Cups
Why to love this recipe:
Loves, we’ve all been there—trying to hover around a grazing board while holding a drink. These charcuterie cups are the ultimate solution! They are perfectly portioned, incredibly photogenic, and allow your guests to mingle freely without sacrificing a single bite of that salty-sweet goodness. They feel so intentional and thoughtful.
Essential Ingredients:
- 10 Kraft paper cups or clear bamboo cups
- Variety of hard and soft cheeses (Brie, Sharp Cheddar)
- Cured meats (Salami rosettes, Prosciutto)
- Grapes, dried apricots, and rosemary sprigs
- Breadsticks and artisan crackers
How to Prepare:
- Place a tall breadstick and cracker at the back of each cup for height.
- Fold salami into small fans or rosettes and skewer them with a cube of cheese.
- Add a small cluster of grapes to hang over the edge.
- Tuck in additional cheese slices and dried fruit to fill the middle.
- Finish each cup with a fresh sprig of rosemary for a pop of green.
- Repeat until all 10 cups are beautifully balanced.
- Place them on a tiered stand for easy grabbing.
- Serve at room temperature.
- Prepare these no more than an hour before to keep things fresh.
- Add a tiny honey stick to each cup for a gourmet touch.
Budget Range
- Kraft Snack Cups ($8 – $12)
- Gourmet Cheese Selection ($25 – $40)
- Artisan Skewers ($5 – $10)
Retro Glam: 3 Steps to Bedazzle Your Sunglasses

Why to love this recipe:
Sometimes a party needs a little extra sparkle! Bedazzled sunglasses are the perfect favor for a poolside brunch or a vibrant bachelorette. They make every photo look like a high-fashion editorial, and the process of making them is a gentle, creative ritual that adds so much personality to your event.
Essential Ingredients:
- Cat-eye or heart-shaped plastic sunglasses
- Assorted flat-back rhinestones or pearls
- Precision craft glue (like E6000)
- Tweezers or a wax rhinestone picker
How to Prepare:
- Clean the frames with alcohol to ensure the glue sticks perfectly.
- Apply small dots of glue along the top rim or corners of the frames.
- Carefully place your gems using tweezers and let them dry completely for 24 hours.
Budget Range
- Bulk Sunglasses ($15 – $25)
- Rhinestone Kit ($10 – $15)
- Precision Glue ($5 – $8)
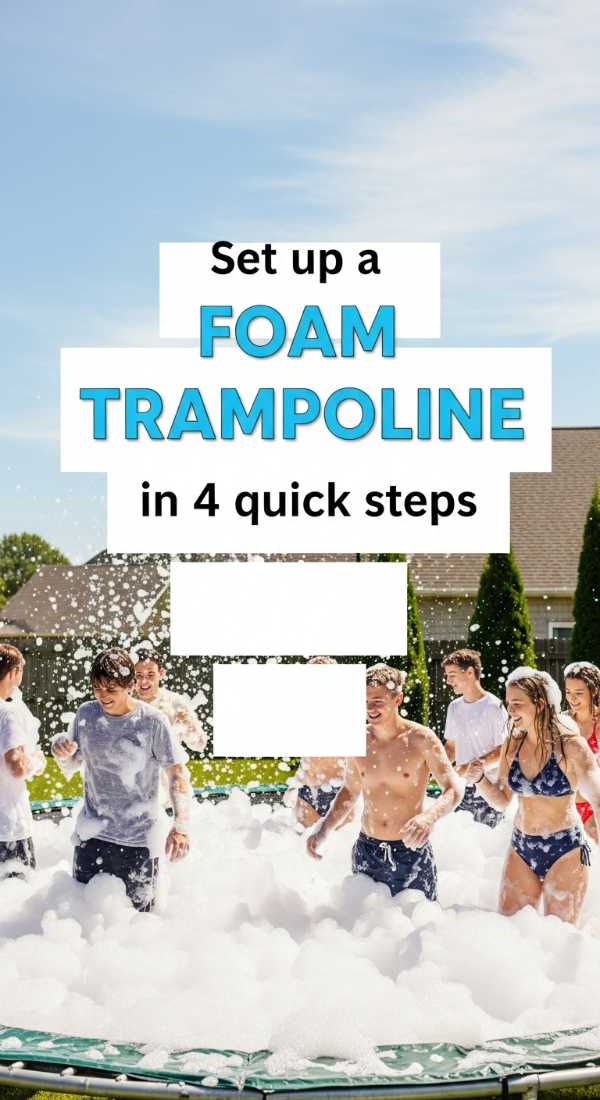
Floating Fun: Set Up a Foam Trampoline in 4 Steps
Why to love this recipe:
If you have little ones (or just the young at heart!) at your gathering, a foam trampoline is a total game-changer. It’s soft, safe, and provides hours of giggling entertainment. It transforms your backyard into a whimsical playland that feels like a floating cloud of joy.
Essential Ingredients:
- Inflatable or foam-based portable trampoline
- Electric air pump (if inflatable)
- Safety netting or soft mats for the perimeter
- Outdoor extension cord
How to Prepare:
- Clear a flat, debris-free area on your lawn.
- Unfold the trampoline and use the pump to fully inflate the base.
- Secure any safety padding or netting as per the manufacturer’s guide.
- Add a basket of towels nearby for when the jumping gets sweaty!
Budget Range
- Foam/Inflatable Trampoline ($150 – $300)
- Electric Air Pump ($20 – $35)
- Outdoor Safety Mats ($40 – $60)
Alfresco Dreams: 7 Stunning Outdoor Table Settings
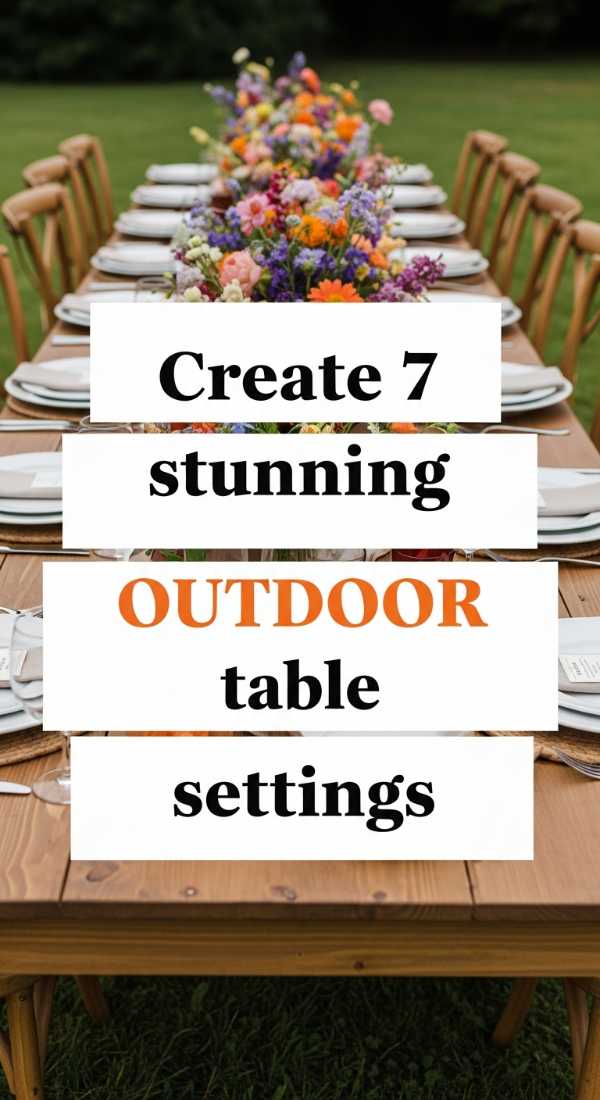
Why to love this recipe:
Dining under the stars is my love language. Creating a beautiful table setting is like writing a visual poem for your guests. These seven distinct styles range from bohemian bliss to classic garden elegance, ensuring that your meal feels like a true destination experience right in your own backyard.
Essential Ingredients:
- Selection of linen napkins and tablecloths
- Taper candles and brass holders
- Fresh eucalyptus and seasonal blooms
- Woven placemats or chargers
- Stoneware plates and gold flatware
How to Prepare:
- Start with a base layer (The Classic: white linen; The Boho: jute runner).
- Layer your plates, starting with a large charger and ending with a salad plate.
- Place a folded napkin either under the forks or cinched with a ribbon on top.
- Add the ‘Greenery Path’—run eucalyptus down the center of the table.
- Interspace five taper candles at varying heights for a romantic glow.
- Add individual bud vases with single stems for the ‘Garden Flutter’ look.
- Place a handwritten name card on each setting for that personal touch.
Budget Range
- Stoneware Dinnerware Set ($50 – $100)
- Gold Flatware ($30 – $60)
- Bulk Eucalyptus ($15 – $25)
Eerie Eats: 12 Spooky Snack Cups
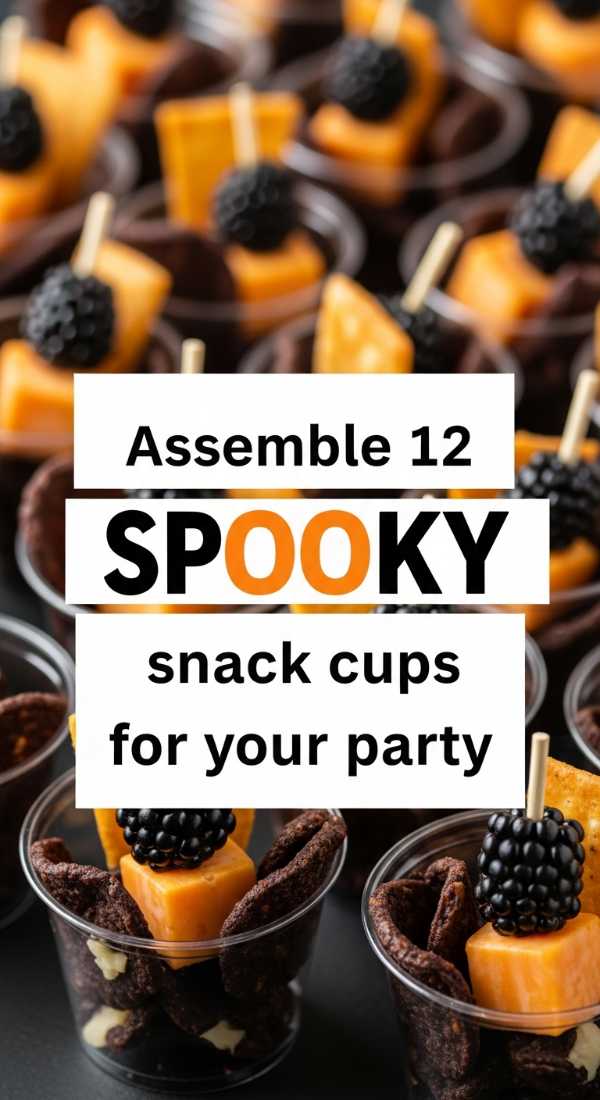
Why to love this recipe:
When the air turns crisp and the shadows grow long, it’s time for some spooky magic! These snack cups are a delightful way to serve ‘monstrous’ treats that are more sweet than scary. They are perfect for movie nights or Halloween parties, bringing a playful, gothic charm to your snack table.
Essential Ingredients:
- 12 Black or orange paper cups
- Gummy worms and chocolate ‘dirt’ (crushed Oreos)
- Pretzel ‘bones’ and candy eyes
- Green popcorn (kettle corn with food coloring)
- Mini marshmallows
How to Prepare:
- Fill the bottom of each cup with chocolate ‘dirt’.
- Layer in the green popcorn until it reaches the brim.
- Tuck in two or three gummy worms so they ‘crawl’ out.
- Place pretzel bones and candy eyes on top.
- Repeat for all 12 cups and serve on a dark tray.
- Add a dusting of powdered sugar for a ‘ghostly’ effect.
- Top with a mini chocolate bat if available.
- Use a silver marker to draw webs on the cups.
- Add a sprinkle of purple nonpareils for extra color.
- Insert a striped paper straw for a whimsical touch.
- Add a ‘toxic’ label to each cup using stickers.
- Garnish with a single candy corn on the very top.
Budget Range
- Halloween Theme Cups ($5 – $10)
- Gummy & Candy Assortment ($15 – $20)
- Oreo Bulk Pack ($4 – $6)
Magic Potions: 3 Glowing Witch’s Brew Recipes for Kids
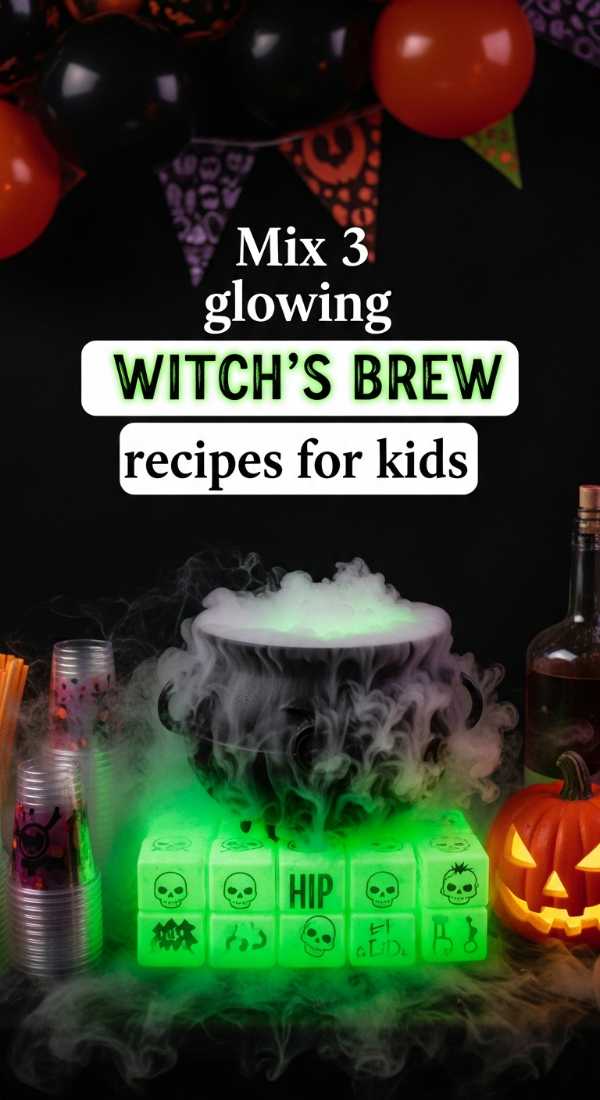
Why to love this recipe:
Watching a child’s eyes light up when their drink literally ‘glows’ is pure magic. These brews are alcohol-free, bubbling with fun, and use simple science to create a mystical effect. It’s a wonderful way to involve the little loves in the festivities with a drink that feels truly enchanted.
Essential Ingredients:
- Lemon-lime soda and sherbet (lime or raspberry)
- Edible glitter (food grade)
- Glow sticks (to place *under* clear cups)
- Dry ice (for adult handling/supervision)
How to Prepare:
- Brew 1 (The Slime): Mix lime soda with a scoop of lime sherbet for a frothy green foam.
- Brew 2 (The Potion): Stir edible purple glitter into white grape juice for a shimmering swirl.
- Brew 3 (The Sunset): Layer orange juice over lemon soda and add a drop of red syrup.
Budget Range
- Edible Luster Dust ($8 – $12)
- Assorted Sherbet ($5 – $10)
- Glow Sticks ($5 – $8)
Masquerade Magic: 5 Custom Glittered Masks

Why to love this recipe:
There is such a beautiful mystery to a masquerade. Making your own masks adds a layer of artisanal elegance to your party. These five styles allow your guests to choose a persona that fits their spirit, covered in a fine dusting of shimmer that catches the candlelight perfectly.
Essential Ingredients:
- 5 Plain papier-mâché or plastic masks
- Fine loose glitter in gold, silver, and champagne
- Mod Podge or spray adhesive
- Silk ribbons and faux feathers
How to Prepare:
- Apply a thin, even layer of adhesive to the entire surface of the mask.
- Generously coat with glitter over a tray to catch the excess.
- Once dry, shake off the extra and seal with a clear topcoat.
- Hot glue a few feathers to the corner for a dramatic flair.
- Thread silk ribbons through the sides for a soft, adjustable tie.
Budget Range
- Base Masks ($10 – $15)
- Premium Fine Glitter ($12 – $18)
- Silk Ribbon Spool ($5 – $10)
Twilight Thrills: 6 Haunted Backyard Games
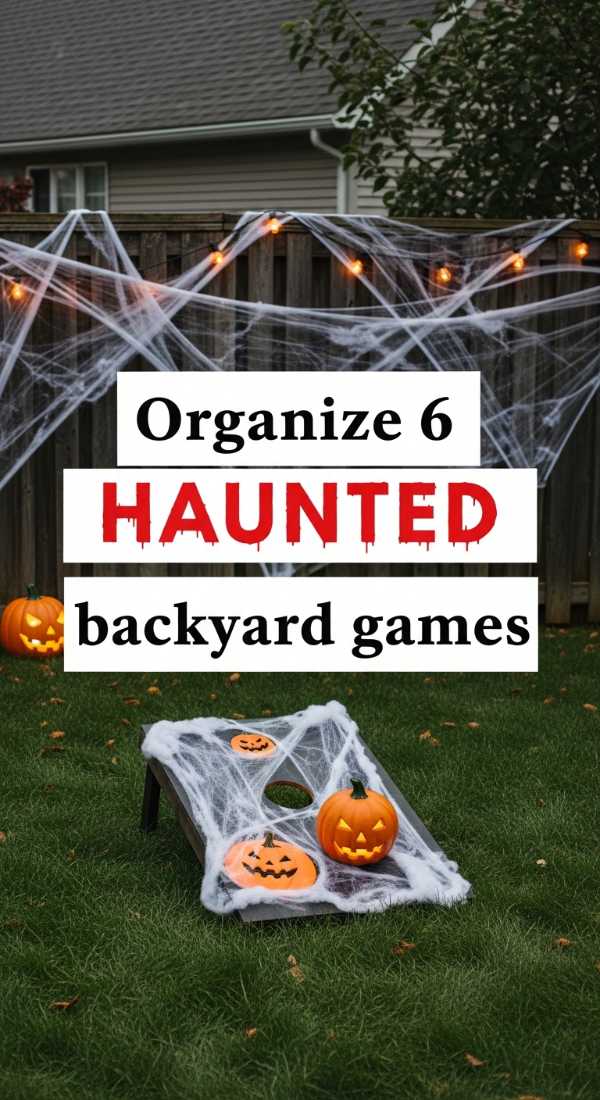
Why to love this recipe:
Games shouldn’t just be for the kids! These haunted backyard activities are designed to get everyone moving and laughing under the moon. They turn your outdoor space into a spooky carnival of delights, creating memories that will be whispered about long after the lanterns go out.
Essential Ingredients:
- Plastic pumpkins for bowling
- White sheets for ‘Ghost Sack Races’
- Ring toss set with glow-in-the-dark necklaces
- Hidden ‘treasure’ (candy or prizes) for a scavenger hunt
How to Prepare:
- Set up Pumpkin Bowling using weighted plastic gourds and a soft ball.
- Organize the Ghost Sack Race with white pillowcases or bags.
- Create Glow Ring Toss using sticks and neon necklaces.
- Hide 10 ‘Cursed Relics’ (painted stones) for a scavenger hunt.
- Mark off a ‘Zombie Tag’ zone with orange cones.
- Set up a ‘Witch’s Hat’ bean bag toss using cardboard cutouts.
Budget Range
- Plastic Pumpkin Set ($15 – $25)
- Glow Jewelry ($10 – $15)
- Bean Bag Set ($12 – $20)
Shadow & Light: 8 Spooky Lighting Effects for Your Porch

Why to love this recipe:
Lighting is the soul of any event, especially one with a spooky theme. These eight effects transform your porch from a simple entrance into a portal of mystery. It’s all about layering shadows and soft glows to create an atmosphere that is both welcoming and delightfully eerie.
Essential Ingredients:
- Purple and orange LED floodlights
- Battery-operated flickering tea lights
- String lights (Edison style or fairy lights)
- Faux cobwebs and lanterns
How to Prepare:
- Swap porch bulbs for deep purple LEDs for an instant eerie wash.
- Place flickering tea lights inside carved pumpkins along the steps.
- Drape spiderwebs over lanterns to catch the light and create shadows.
- Line the path with ‘floating’ candles hung by fishing line.
- Use an orange spotlight to silhouette a large prop against the house.
- Wrap pillars in warm orange string lights for a cozy contrast.
- Place a green ‘uplight’ behind a large potted plant for a swampy effect.
- Set a fog machine near the base of the porch to catch all the light beams.
Budget Range
- Colored Floodlight Bulbs ($12 – $20)
- Battery Tea Lights ($10 – $15)
- Low-Cost Fog Machine ($30 – $50)
Closing Thoughts from My Heart to Yours
Gathering is an art form, but more importantly, it is an act of love. I hope these ideas inspire you to open your doors and create something beautiful. Remember, it doesn’t have to be perfect to be wonderful. The most important ingredient is always the warmth you bring to the table. Go forth and be the host with the most, my loves. I can’t wait to hear about the magic you create!