
The 5-Minute Viral Food Board You Need to Try Tonight
There is something inherently magical about the way food brings us together, especially when it is laid out in a way that feels both effortless and abundant. We’ve all had those long, grueling days where the last thing we want to do is hover over a hot stove for hours, yet we still crave that sense of connection and comfort that only a home-cooked spread can provide. This viral food board isn’t just about the aesthetic—though it is stunning—it’s about reclaiming your evening and turning a simple dinner into a shared experience that nourishes the soul as much as the body.
Imagine your kitchen filled with the soft glow of candles, the sound of laughter echoing against the backsplash, and a central board overflowing with textures, colors, and aromas that make your mouth water before you even take the first bite. It is about the tactile joy of assembling a perfect taco or the meditative steam rising from a bowl of soup. Whether you are hosting your closest friends or just treating yourself after a busy week, this collection of favorites is designed to be the centerpiece of your most memorable nights.
How to whisk matcha

Why we love this
There is a quiet, meditative beauty in the process of whisking matcha that transforms a simple beverage into a ritual of mindfulness. The vibrant, emerald-green powder gives way to a creamy, frothy top that feels like a warm hug for your senses, offering an earthy, umami-rich aroma that grounds you instantly. As you take that first sip, the texture is silky and smooth, balancing a delicate bitterness with a natural sweetness that lingers on the palate, making it the perfect sophisticated addition to any brunch board or afternoon pick-me-up.
Ingredients
- 1.5 tsp high-quality ceremonial grade matcha powder
- 2 oz hot water (approximately 175°F/80°C)
- Optional: Honey or agave nectar
- Optional: 6 oz steamed milk of choice
How to make it
- Sift your matcha powder through a fine-mesh strainer into a wide, shallow bowl (a chawan) to ensure there are no clumps, which is the secret to a perfectly smooth drink.
- Pour in the hot water—ensure it is not boiling, as scalding the tea will result in a harsh, bitter flavor rather than a sweet, grassy profile.
- Using a bamboo whisk (chasen), use your wrist to whisk in a vigorous ‘W’ or ‘M’ motion rather than a circular one; this incorporates air and creates that signature micro-foam on the surface.
- Continue whisking for about 30-60 seconds until a thick, frothy layer with tiny bubbles forms on top, indicating the tea is fully emulsified.
- If desired, pour the concentrated matcha into a mug and top with frothed milk or sweetener, stirring gently to maintain the light, airy texture of the foam.
How to make caramel slice

Why we love this
The caramel slice is the ultimate indulgence, offering a structural masterpiece of contrasting textures that dance on the tongue with every bite. You have the golden, buttery crunch of the shortbread base, followed by a thick, velvety layer of gooey caramel that pulls slightly as you pull it apart, and finally, a snap of rich dark chocolate on top. The aroma of toasted sugar and vanilla wafts through the kitchen as it sets, promising a decadent treat that feels like a nostalgic trip to your favorite childhood bakery but with a sophisticated, melt-in-your-mouth finish.
Ingredients
- 1 cup all-purpose flour
- 1/2 cup desiccated coconut
- 1/2 cup brown sugar
- 125g melted butter
- 1 can (395g) sweetened condensed milk
- 2 tbsp golden syrup
- 60g extra butter (for caramel)
- 200g dark chocolate chips
- 1 tbsp coconut oil
How to make it
- Preheat your oven to 350°F (180°C) and line a square baking tin with parchment paper, leaving an overhang for easy removal later.
- Combine flour, coconut, sugar, and melted butter in a bowl, pressing the mixture firmly into the base of the tin until even; bake for 12-15 minutes until lightly golden.
- While the base bakes, combine condensed milk, golden syrup, and the extra butter in a small saucepan over medium-low heat, whisking constantly for 8-10 minutes until the mixture thickens and turns a deep amber color.
- Pour the caramel over the warm base and return to the oven for another 10 minutes to set the center, then allow it to cool completely at room temperature.
- Melt the chocolate chips and coconut oil together in the microwave in 30-second bursts, stirring until glossy, then pour over the cooled caramel and refrigerate until the chocolate is firm before slicing with a hot knife.
How to bake apple pie

Why we love this
Nothing says “home” quite like the scent of an apple pie baking in the oven—a heady mix of warm cinnamon, spicy nutmeg, and the tart sweetness of softened fruit. The crust is a work of art in itself, shattering into a thousand buttery flakes the moment your fork hits it, providing the perfect vessel for the jammy, tender apples inside. It is a dessert that feels like a warm blanket on a cold night, bringing a sense of rustic elegance to your table that makes everyone want to linger just a little bit longer over their plate.
Ingredients
- 2 1/2 cups all-purpose flour
- 1 cup cold unsalted butter, cubed
- 6-7 large Granny Smith apples, peeled and sliced
- 3/4 cup granulated sugar
- 2 tsp ground cinnamon
- 1 tbsp lemon juice
- 1 egg (for egg wash)
How to make it
- Pulse flour and cold butter in a food processor until it resembles coarse crumbs, then add ice water tablespoon by tablespoon until a dough forms; chill for at least one hour.
- Toss your sliced apples with sugar, cinnamon, and lemon juice in a large bowl, letting them macerate for 20 minutes to release their natural juices.
- Roll out half the dough on a floured surface and fit it into a pie dish, then fill with the apple mixture, piling them high in the center as they will shrink during baking.
- Roll out the second half of the dough, place it over the top (or cut into strips for a lattice), crimp the edges tightly to seal, and cut small slits in the top for steam to escape.
- Brush with a beaten egg wash for a golden sheen and bake at 400°F (200°C) for 45-50 minutes, or until the crust is deeply browned and the filling is bubbling through the vents.
How to make street tacos

Why we love this
Street tacos are the heartbeat of the food board, offering an explosion of vibrant flavors and contrasting temperatures that make every bite a new adventure. The smokiness of charred meat meets the cool, crisp bite of white onion and the zesty punch of fresh cilantro, all brought together by a generous squeeze of lime that cuts through the richness. Holding a warm corn tortilla in your hand, feeling the slight char and smelling the toasted maize, creates an interactive dining experience that is messy, joyful, and completely irresistible.
Ingredients
- 1 lb flank steak or chicken thighs, thinly sliced
- Small corn tortillas
- 1/2 white onion, finely diced
- 1 bunch fresh cilantro, chopped
- 2 limes, cut into wedges
- 2 tbsp oil with a high smoke point
- Taco seasoning (cumin, chili powder, garlic powder, salt)
How to make it
- Season your meat generously with the spice blend and let it sit for at least 15 minutes to allow the flavors to penetrate the fibers.
- Heat a heavy cast-iron skillet over high heat until it is wisps of smoke appear; add oil and sear the meat in small batches to ensure it browns deeply rather than steaming.
- While the meat rests, toast the corn tortillas directly over a gas flame or in a dry pan for 30 seconds per side until they are soft and have slight charred spots.
- Double up the tortillas (street style) and fill them with a generous portion of the seared meat, then top immediately with the raw onion and cilantro.
- Serve with lime wedges on the side, instructing guests to squeeze the juice over the tacos right before eating to brighten the savory flavors of the meat.
How to bake fudgy brownies

Why we love this
There is a profound difference between a standard brownie and a truly fudgy one; the latter is a dense, chocolatey masterpiece with a texture that borders on truffle-like. When done right, the top develops a delicate, paper-thin crinkle that shatters like ice, revealing a dark, gooey center that melts against the roof of your mouth. The aroma of high-quality cocoa and melted butter filling the house is enough to draw anyone to the kitchen, making these the ultimate crowd-pleaser for any gathering where comfort is the priority.
Ingredients
- 1 cup melted unsalted butter
- 2 cups granulated sugar
- 3 large eggs
- 1 tsp vanilla extract
- 3/4 cup Dutch-process cocoa powder
- 1/2 cup all-purpose flour
- 1/2 tsp salt
- 1 cup chocolate chunks
How to make it
- Whisk the melted butter and sugar together vigorously for about 2 minutes; the aeration of the sugar in the fat is what creates that coveted shiny, crackly top.
- Add the eggs one at a time, beating well after each addition, then stir in the vanilla extract until the batter looks glossy and smooth.
- Sift in the cocoa powder, flour, and salt, then fold the dry ingredients gently into the wet mixture using a spatula just until no white streaks remain—do not overmix or they will become cakey.
- Fold in the chocolate chunks and pour the batter into a greased 8×8 inch baking pan lined with parchment paper.
- Bake at 325°F (165°C) for 30-35 minutes; the key is to pull them out when a toothpick inserted comes out with a few moist crumbs attached, as they will continue to firm up as they cool.
How to cook chicken soup

Why we love this
Chicken soup is more than just a dish; it is a liquid embrace that carries the essence of slow-cooked love and healing. The golden broth, shimmering with tiny droplets of fat, carries the deep, savory notes of mirepoix and herbs, while the tender morsels of chicken fall apart at the touch of a spoon. It is the ultimate sensory experience of warmth—from the steam fogging up your glasses to the way it warms your chest with every spoonful, making it a mandatory component of a cozy, nourishing food board.
Ingredients
- 1 whole chicken (or 2 lbs bone-in thighs)
- 3 carrots, sliced
- 3 stalks celery, sliced
- 1 large onion, chopped
- 4 cloves garlic, smashed
- 2 sprigs fresh thyme and rosemary
- 8 cups water or low-sodium stock
How to make it
- In a large Dutch oven, sear the chicken skin-side down in a bit of oil until golden brown to develop a base layer of flavor (the Maillard reaction).
- Remove the chicken and sauté the onion, carrots, and celery in the remaining fat until they soften and the onions become translucent.
- Return the chicken to the pot, add the garlic and herbs, and cover with water or stock; bring to a boil, then immediately reduce to a very low simmer.
- Simmer uncovered for 60-90 minutes, skimming any foam from the surface to keep the broth clear and pure in flavor.
- Remove the chicken, shred the meat from the bones, and return the meat to the pot, seasoning generously with salt and black pepper to taste before serving hot.
How to flip fluffy pancakes
Why we love this
A stack of perfectly fluffy pancakes is a sight to behold, standing tall and proud with a golden-brown lattice pattern on the surface. When you cut into them, the interior is light and airy, almost cloud-like, ready to soak up every drop of maple syrup like a delicious sponge. The gentle sizzle of batter hitting a buttered griddle and the sweet, vanilla-scented steam that rises as they cook create an atmosphere of weekend indulgence that turns any morning into a celebration of the simple life.
Ingredients
- 1 1/2 cups all-purpose flour
- 3 1/2 tsp baking powder
- 1 tbsp sugar
- 1 1/4 cups milk
- 1 egg
- 3 tbsp melted butter
- 1/2 tsp salt
How to make it
- Whisk the dry ingredients together in a large bowl, ensuring the baking powder is evenly distributed to prevent uneven rising.
- Make a well in the center and pour in the milk, egg, and melted butter; whisk until just combined, leaving small lumps in the batter to keep the texture tender.
- Heat a non-stick griddle over medium heat and lightly coat with butter; use a 1/4 cup measure to pour the batter onto the hot surface.
- Wait for bubbles to form on the surface and the edges to look dry and matte—this is the visual cue that it is time to flip.
- Slide a thin spatula underneath and flip with a quick flick of the wrist, cooking for another 1-2 minutes until both sides are golden and the center is fully set.
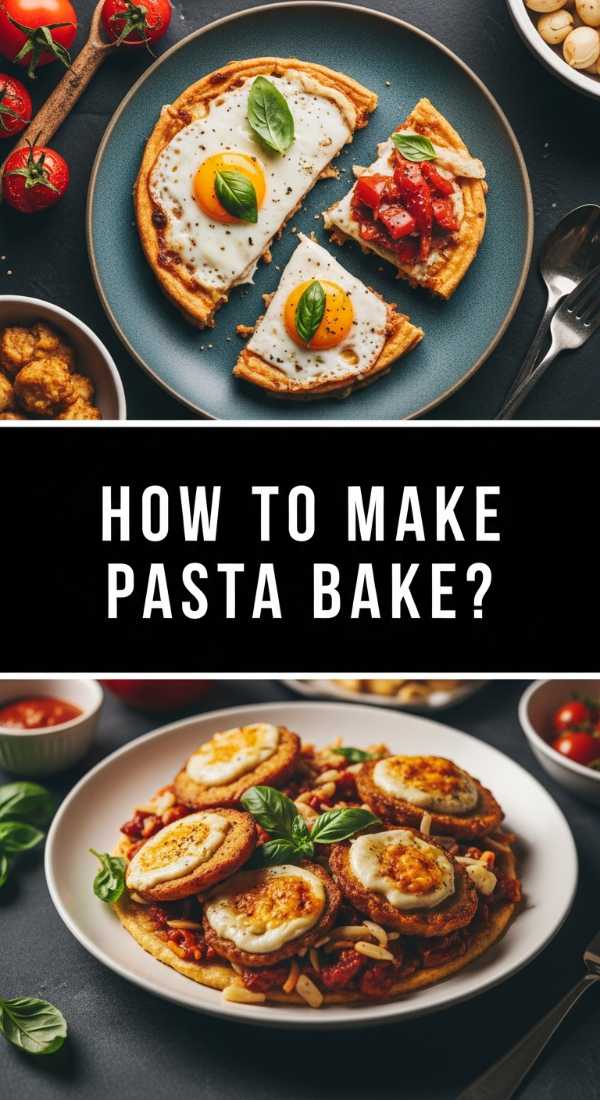
How to make pasta bake

Why we love this
The pasta bake is the king of comfort, a bubbly, cheesy masterpiece that brings a sense of rustic abundance to the center of the table. There is nothing quite like the sight of golden, caramelized cheese stretching from the dish as you serve a scoop, or the way the sauce has thickened and intensified in the heat of the oven. It smells of toasted garlic and bubbling tomato, offering a variety of textures from the soft, sauce-soaked noodles to the crunchy, browned edges that everyone fights over at the end of the meal.
Ingredients
- 1 lb rigatoni or penne pasta
- 24 oz marinara sauce
- 15 oz ricotta cheese
- 2 cups shredded mozzarella
- 1/2 cup grated parmesan
- 1 tsp dried oregano
- Fresh basil for garnish
How to make it
- Boil your pasta in heavily salted water for 2 minutes less than the package instructions; it should be ‘al dente’ as it will finish cooking in the sauce.
- Drain the pasta and toss it with the marinara sauce, dried oregano, and half of the mozzarella cheese in a large bowl.
- Spread half of the pasta mixture into a 9×13 inch baking dish, then dollop small spoonfuls of ricotta cheese evenly across the layer.
- Top with the remaining pasta, then sprinkle the remaining mozzarella and the parmesan cheese generously over the top to create a thick crust.
- Bake at 375°F (190°C) for 20-25 minutes until the cheese is bubbling and has developed golden-brown spots; let it rest for 5 minutes before serving to let the sauce set.
How to steam juicy dumplings

Why we love this
Dumplings are little parcels of joy, hiding a treasure trove of savory, juicy filling inside a delicate, translucent dough. When you lift the lid of a bamboo steamer, a cloud of fragrant steam erupts, carrying notes of ginger, sesame, and soy. The texture is a beautiful balance between the soft, chewy wrapper and the tender, flavorful interior that releases a burst of hot broth with every bite. They are the ultimate finger food for a board, encouraging everyone to dip, share, and enjoy the delicate craftsmanship of each piece.
Ingredients
- 1 pack pre-made dumpling wrappers (or frozen dumplings)
- 1 lb ground pork or finely chopped mushrooms
- 2 cups shredded cabbage
- 2 tbsp soy sauce
- 1 tbsp grated ginger
- 1 tsp sesame oil
- Cabbage leaves or parchment paper (for lining)
How to make it
- Mix your filling ingredients (pork/mushrooms, cabbage, ginger, soy, sesame) until thoroughly combined and slightly tacky.
- Place a teaspoon of filling in the center of a wrapper, moisten the edges with water, and fold into a crescent, pleating the edges tightly to seal in the juices.
- Line your steamer basket with cabbage leaves or perforated parchment paper to prevent the delicate dough from sticking to the wood or metal.
- Bring an inch of water to a boil in a wok or pan that fits your steamer; place the steamer over the water, ensuring the water does not touch the bottom of the dumplings.
- Steam on high heat for 8-10 minutes (longer if frozen) until the wrappers are translucent and the filling is firm and piping hot.
How to make potato gnocchi
[IMAGE_10]
Why we love this
Gnocchi are often described as “little pillows,” and for good reason—when made correctly, they are incredibly light, airy, and melt-in-your-mouth tender. The subtle, earthy flavor of the potato is the perfect canvas for a variety of sauces, from a simple brown butter and sage to a robust tomato ragu. There is something deeply satisfying about the process of rolling the dough and seeing the little ridges form, promising a dish that feels artisanal and sophisticated yet deeply rooted in traditional Italian comfort.
Ingredients
- 2 lbs russet potatoes
- 1 1/2 to 2 cups all-purpose flour
- 1 large egg, lightly beaten
- 1 tsp salt
- Optional: Nutmeg for seasoning
How to make it
- Boil the potatoes whole with their skins on until fork-tender; peel them while still hot and pass them through a potato ricer to ensure a light, lump-free texture.
- Spread the riced potatoes on a clean surface and let the steam escape for a few minutes; this moisture removal is critical for a non-gummy dough.
- Sprinkle 1 cup of flour over the potatoes, add the egg and salt, and gently knead the mixture together, adding more flour only until a soft, slightly sticky dough forms.
- Cut the dough into sections, roll each into a long rope about 1/2 inch thick, and cut into 1-inch pieces; optionally, roll them over a gnocchi board or the back of a fork for ridges.
- Drop the gnocchi into a large pot of boiling salted water; they are finished the second they float to the surface (usually 2-3 minutes). Remove immediately with a slotted spoon.
The Ultimate Gathering Awaits
Creating a viral food board is less about following a strict set of rules and more about embracing the joy of variety and the beauty of sharing. When you bring these diverse dishes together—from the delicate steam of dumplings to the rich crunch of a caramel slice—you aren’t just serving dinner; you’re creating a landscape of flavors that invites conversation and connection. So, clear off your table, gather your favorite people, and let the food do the talking tonight.
Frequently Asked Questions
How do I keep all the food warm on one board? The best way is to use heat-retaining dishes like small cast iron pans for the tacos and pasta, and to time your “fast” items (like pancakes and gnocchi) to come out last. You can also keep the board on a warming mat if you have one!
Can I make any of these items ahead of time? Absolutely! The caramel slice and brownies are actually better when made a day ahead as it gives them time to set. The soup can also be made in advance and reheated just before serving.
What is the best way to arrange the board for photos? Start with your largest bowls or plates (like the soup and pasta) as anchors, then fill in the gaps with the smaller items like tacos and dumplings. Use the brownies and apple pie slices to fill any remaining corners for a lush, abundant look.