
Viral Food Boards: How to Recreate the Internet’s Favorite Snack
There is something inherently magical about a beautifully arranged food board that brings people together like nothing else. It’s more than just a snack; it’s a centerpiece for conversation, a canvas for creativity, and a testament to the joy of shared meals. I remember the first time I set out a simple butter board for my friends—the way eyes lit up and the immediate sense of warmth that filled the room as everyone gathered around with warm bread in hand. It transformed a regular Tuesday into a memory we still talk about today.
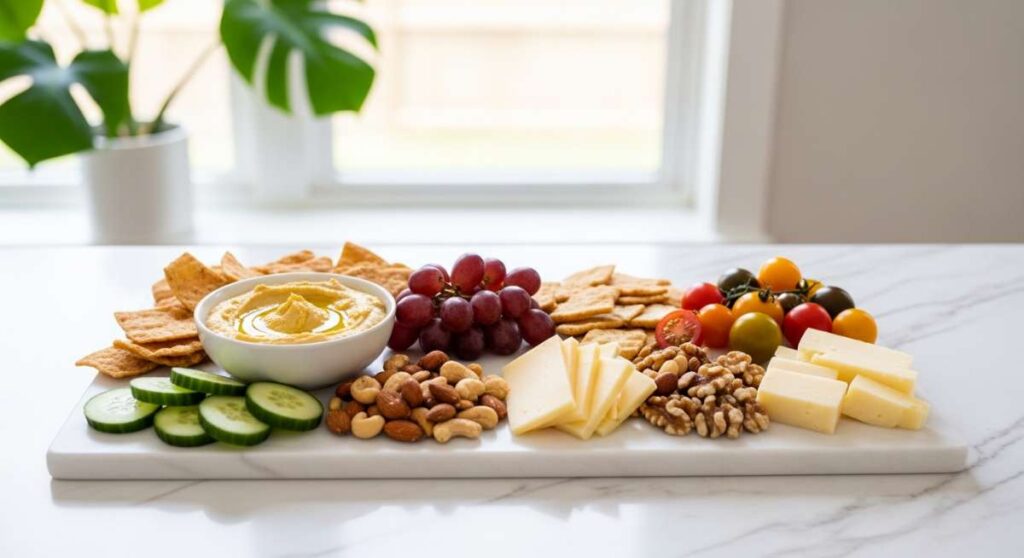
In the digital age, these ‘food boards’ have taken over our feeds, and for good reason. They are the ultimate expression of ‘low effort, high impact’ hosting. Whether you are leaning into the vibrant colors of a spring brunch or the rustic charm of a sourdough discard cracker spread, the goal is always the same: to create a tactile, sensory experience that feels both indulgent and accessible. Today, I’m pulling back the curtain on the internet’s favorite snack trends so you can bring that viral magic into your own kitchen.
How to cook the best summer pasta recipes

Why we love this
Summer pasta is the culinary equivalent of a warm breeze through an open window. We love it because it relies on the peak-season sweetness of cherry tomatoes, the peppery bite of fresh basil, and the golden richness of high-quality olive oil. There is a specific sensory delight in watching a simple sauce emulsify into a glossy coating that clings to every noodle, filling your kitchen with the intoxicating aroma of roasted garlic and Mediterranean herbs. It’s light enough for a humid evening but satisfying enough to feel like a true celebration of the season’s bounty.
Ingredients
- 1 lb Spaghetti or Bucatini
- 2 pints Cherry tomatoes
- 4 cloves Garlic, thinly sliced
- 1/2 cup Extra virgin olive oil
- 1 bunch Fresh basil
- 1/2 tsp Red pepper flakes
- Freshly grated Parmesan cheese
- Sea salt and black pepper
How to make it
- Begin by bringing a large pot of heavily salted water to a rolling boil; the water should taste like the sea to properly season the pasta from the inside out.
- While the water heats, place a large skillet over medium-low heat and add the olive oil and sliced garlic. Sauté slowly for 3-5 minutes until the garlic is translucent and fragrant, but be careful not to let it brown, as burnt garlic turns bitter.
- Add the whole cherry tomatoes and red pepper flakes to the oil. Increase the heat to medium and cook, stirring occasionally, until the tomatoes begin to burst and release their juices, creating a natural, chunky sauce. Use the back of a wooden spoon to gently press down on any stubborn tomatoes.
- Drop your pasta into the boiling water and cook for 1-2 minutes less than the package directions specify for ‘al dente.’ This allows the pasta to finish cooking in the sauce.
- Before draining, reserve at least one cup of the starchy pasta water. This is the secret to a professional sauce.
- Transfer the pasta directly into the skillet with the tomatoes. Add a splash of the reserved pasta water and toss vigorously over medium heat. The starch will help the oil and tomato juice emulsify into a creamy, cohesive sauce.
- Remove from heat, fold in a generous handful of torn basil leaves and Parmesan, and serve immediately with an extra drizzle of oil.
How to make the best cookout side dishes

Why we love this
A cookout is only as good as its side dishes, and a vibrant corn salad or a loaded potato board is the heart of the party. We love these dishes because they provide the necessary crunch, acidity, and creaminess to balance out charred meats and smoky flavors. Imagine the snap of grilled corn against a tangy lime dressing, or the cooling sensation of a herb-packed slaw on a hot afternoon. These sides are designed to be served family-style, encouraging guests to scoop, share, and come back for seconds of that perfect, zesty bite.
Ingredients
- 4 ears of Corn, husked
- 1 Red bell pepper, diced
- 1/2 Red onion, finely minced
- 1/4 cup Fresh cilantro, chopped
- 1 Jalapeño, seeded and minced
- 1/2 cup Feta cheese, crumbled
- 3 tbsp Fresh lime juice
- 2 tbsp Mayonnaise or Greek yogurt
- 1/2 tsp Smoked paprika
How to make it
- Preheat your grill to medium-high heat. Place the husked corn directly on the grates and grill for 8-10 minutes, turning occasionally, until the kernels are charred and tender.
- Remove the corn from the grill and let it cool slightly. Standing the cob upright in a large bowl, use a sharp knife to carefully shear the kernels off the cob.
- In the same bowl, combine the charred corn with the diced bell pepper, red onion, jalapeño, and cilantro. The colors should be bright and festive.
- In a small separate jar or bowl, whisk together the lime juice, mayonnaise, smoked paprika, salt, and pepper until smooth. This creates a creamy yet acidic dressing that mimics Mexican Street Corn.
- Pour the dressing over the vegetables and toss thoroughly to ensure every kernel is coated.
- Fold in the crumbled feta cheese gently so it doesn’t break down too much; you want those salty pockets of texture.
- Refrigerate for at least 30 minutes before serving to let the flavors meld together, and garnish with an extra dusting of paprika for a pop of color.
How to bake easy summer desserts
Why we love this
Summer desserts should feel effortless and fruit-forward, focusing on the natural sugars of berries and stone fruits rather than heavy chocolates. We love a simple galette or fruit crumble because of the rustic, imperfect beauty—the way the fruit juices bubble over the golden crust, creating a sticky, caramelized edge that is pure bliss. The aroma of baking peaches or strawberries mingled with a hint of vanilla is the quintessential scent of a summer evening, promising a sweet, cooling finish to a day spent in the sun.
Ingredients
- 2 cups Fresh berries (blueberries, raspberries, or sliced strawberries)
- 1 store-bought Pie crust (or homemade)
- 1/4 cup Granulated sugar
- 1 tbsp Cornstarch
- 1 tsp Lemon zest
- 1 Egg (for egg wash)
- Turbinado sugar for dusting
- Vanilla bean ice cream for serving
How to make it
- Preheat your oven to 400°F (200°C) and line a large baking sheet with parchment paper to prevent the fruit juices from sticking.
- In a medium bowl, toss your fresh berries with the granulated sugar, cornstarch, and lemon zest. The cornstarch is vital here; it thickens the juices as they bake, preventing a soggy crust.
- Unroll your pie dough onto the prepared baking sheet. It doesn’t need to be a perfect circle—cracks and jagged edges add to the rustic charm of a galette.
- Mound the fruit mixture into the center of the dough, leaving a 2-inch border around the edges.
- Gently fold the edges of the dough over the fruit, pleating it as you go. The center should remain open, showing off the vibrant colors of the berries.
- Whisk the egg with a teaspoon of water and brush it over the crust. Sprinkle the turbinado sugar generously over the egg wash; this creates a professional, crunchy, sparkling finish.
- Bake for 25-30 minutes until the crust is a deep golden brown and the fruit is bubbling vigorously. Let it cool for at least 15 minutes to allow the filling to set before slicing.
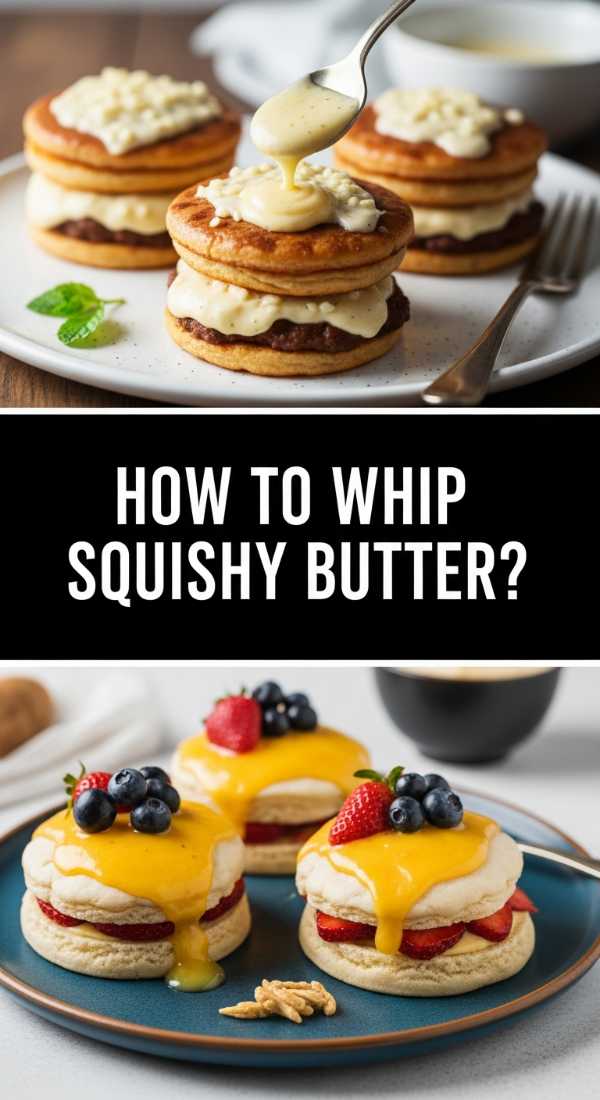
How to whip perfect squishy butter

Why we love this
The butter board trend took the internet by storm because it turned a humble condiment into an interactive work of art. We love squishy, whipped butter for its ethereal, cloud-like texture that melts the moment it hits warm bread. It is a sensory playground—cool but pliable, salty yet creamy, and decorated with textures like crunchy sea salt, floral honey, and fresh herbs. It’s the ultimate appetizer for those who believe that bread and butter is the finest meal on earth, offering a decadent, communal experience that feels incredibly fancy despite its simplicity.
Ingredients
- 2 sticks High-quality unsalted butter (room temperature)
- 1/2 tsp Flaky sea salt
- 1 tbsp Honey or maple syrup
- Fresh herbs (thyme, rosemary, or edible flowers)
- Zest of one lemon
- Optional: Chili flakes or crushed nuts
How to make it
- Ensure your butter is truly at room temperature. It should yield easily when pressed with a finger but not be greasy or melting. This is the most critical step for achieving the ‘squishy’ texture.
- Place the softened butter in the bowl of a stand mixer fitted with the whisk attachment, or use a hand mixer.
- Start on a low speed to break up the butter, then increase to high. Whip for 3-5 minutes. You are looking for the butter to lighten in color (it should turn almost white) and double in volume as air is incorporated.
- Once the butter is fluffy, use an offset spatula to spread it across a clean wooden board or marble slab. Use swooping motions to create ‘peaks’ and ‘valleys’—these little pockets will hold your toppings.
- Drizzle the honey or maple syrup over the butter, ensuring it pools in the swoops you created.
- Sprinkle the flaky sea salt, lemon zest, and fresh herbs evenly across the board. The goal is to make every bite a balanced mix of sweet, salty, and aromatic.
- Serve immediately with warm, crusty baguette slices or toasted sourdough.
How to use your sourdough discard

Why we love this
Sourdough discard is the unsung hero of the kitchen, offering a complex, tangy depth of flavor that fresh flour simply can’t match. We love using it because it satisfies the soul to minimize waste while creating something deeply delicious. Whether it’s turned into crispy crackers or airy pancakes, the fermented notes provide a sophisticated edge to everyday snacks. There’s a certain satisfaction in the crackle of a discard cracker or the lacy edges of a savory crepe, making the sourdough journey feel rewarding every single day.
Ingredients
- 1 cup Sourdough discard (unfed)
- 1 cup All-purpose flour
- 1/4 cup Olive oil
- 1 tsp Sea salt
- 2 tbsp Dried herbs (herbes de Provence or rosemary)
- Extra sea salt for topping
How to make it
- In a medium bowl, mix together the sourdough discard, flour, olive oil, salt, and herbs until a cohesive dough forms. It should feel similar to playdough—not too sticky, but not dry and crumbly.
- Wrap the dough in plastic wrap and let it rest in the refrigerator for at least 30 minutes. This relaxes the gluten, making it much easier to roll out thinly without it snapping back.
- Preheat your oven to 350°F (175°C). Divide the dough into two pieces.
- On a piece of parchment paper, roll the dough out as thin as humanly possible—ideally about 1/16th of an inch. The thinner the dough, the crispier the cracker.
- Lightly brush the surface with a tiny bit of olive oil and sprinkle with extra flaky sea salt.
- Use a pizza cutter or a sharp knife to score the dough into squares or rectangles, but don’t worry about separating them yet.
- Bake for 15-20 minutes, or until the edges are golden brown and the centers feel firm. Rotate the pan halfway through to ensure even browning. Let them cool completely on the pan to reach maximum crunch before breaking them along the score lines.
How to host a spring brunch

Why we love this
A spring brunch is a celebration of renewal and light, characterized by pastel palettes and fresh, vibrant flavors. We love this style of hosting because it’s inherently relaxed; it bridges the gap between breakfast and lunch, allowing for a leisurely morning of sipping mimosas and grazing on savory tarts. The air is usually filled with the scent of fresh-cut tulips and brewing coffee, creating an atmosphere of soft elegance. It’s the perfect excuse to use your prettiest linens and serve dishes that feel as light and airy as the season itself.
Ingredients
- 1 batch Savory Quiche or Frittata
- Assorted pastries (croissants, danishes)
- Fresh fruit platter (melon, berries, citrus)
- Smoked salmon and cream cheese
- Prosecco and orange juice for mimosas
- Arugula salad with lemon vinaigrette
How to make it
- Start by planning a menu that features at least one ‘make-ahead’ main dish, like a quiche. This allows you to spend time with your guests rather than being stuck at the stove.
- Prepare your quiche by blind-baking the crust at 375°F for 10 minutes, then filling with a custard of eggs, heavy cream, sautéed leeks, and gruyère cheese. Bake until just set with a slight jiggle in the center.
- Set the scene 30 minutes before guests arrive. Use a light-colored tablecloth and arrange a variety of heights on your table—use cake stands for pastries and flat boards for cheeses.
- Create a ‘DIY Mimosa Bar’ by setting out chilled bottles of Prosecco in an ice bucket alongside carafes of fresh orange, grapefruit, and cranberry juices. Provide bowls of fresh berries for garnishing.
- Assemble a fresh arugula salad at the last minute. Toss the greens with a simple whisked dressing of 3 parts olive oil to 1 part lemon juice, salt, and pepper. The acidity cuts through the richness of the pastries and eggs.
- Arrange the food in a ‘flow’ that makes sense: plates and silverware at one end, savory mains in the middle, and sweets/drinks at the far end to prevent traffic jams.
How to decorate beautiful spring cookies

Why we love this
Decorating spring cookies is a meditative, artistic process that results in edible works of art. We love it because it allows for total creative expression through soft hues, floral patterns, and delicate details. There is a profound sense of satisfaction in seeing a plain sugar cookie transformed by a smooth layer of royal icing and a few piped petals. The snap of the icing combined with the buttery, melt-in-your-mouth texture of the cookie creates a nostalgic treat that feels special enough for a gift or a centerpiece at any spring gathering.
Ingredients
- 1 batch Sugar cookie dough (chilled)
- 4 cups Powdered sugar
- 3 tbsp Meringue powder
- 1/2 cup Warm water
- Gel food coloring (pastel shades)
- Pipe bags and small round tips
How to make it
- Roll out your chilled sugar cookie dough to a consistent 1/4-inch thickness. Use spring-themed cutters like flowers, bunnies, or eggs. Bake and let them cool completely; decorating a warm cookie will result in a melted mess.
- Make the royal icing by whisking powdered sugar, meringue powder, and water on low speed until combined, then on high for 5 minutes until stiff peaks form.
- Divide the icing into bowls and tint with gel food coloring. To achieve ‘flood’ consistency (the smooth base), add water 1/2 teaspoon at a time until the icing reaches the consistency of honey.
- Transfer a thicker version of the icing (piping consistency) to a bag. Outline the edge of each cookie to create a ‘dam.’
- Wait 5 minutes, then use the flood consistency icing to fill in the center. Use a toothpick or scribe tool to pop bubbles and push the icing into the corners.
- Let the base layer dry for at least 4 hours (or overnight) before adding details. This prevents the colors from bleeding into each other.
- Use your thicker icing to pipe delicate dots, lines, or flower petals on top of the dried base. For a ‘watercolor’ look, paint diluted food coloring onto the dry icing with a clean food-safe brush.
How to bake extra fluffy cupcakes

Why we love this
The perfect cupcake is a masterpiece of chemistry and technique, yielding a crumb that is so light it almost dissolves on the tongue. We love extra fluffy cupcakes because they provide the ideal canvas for rich buttercreams and fillings without feeling heavy or dry. The gentle aroma of vanilla and butter wafting from the oven is a domestic comfort like no other. Achieving that ‘bakery-style’ lift and soft texture is a triumph of home baking that makes every birthday or celebration feel just a little bit more professional and indulgent.
Ingredients
- 1 1/2 cups Cake flour (sifted)
- 1 cup Granulated sugar
- 1 1/2 tsp Baking powder
- 1/2 tsp Salt
- 1/2 cup Unsalted butter (softened)
- 1 large Egg + 1 Egg white
- 1/2 cup Whole milk
- 2 tsp Vanilla extract
How to make it
- Preheat your oven to 350°F (175°C) and line a cupcake tin. Use cake flour instead of all-purpose; it has a lower protein content, which is the secret to a tender, fluffy crumb.
- In a stand mixer, cream the butter and sugar for at least 5 full minutes. Do not skip this; you are creating a mechanical leavening by beating air into the fat, which is essential for the lift.
- Whisk the whole egg and egg white together with the vanilla. Add this to the butter mixture slowly, beating well after each addition to maintain the emulsion.
- Sift your dry ingredients (flour, baking powder, salt) twice. Sifting aerates the flour and removes clumps.
- Alternate adding the dry ingredients and the milk to the batter, starting and ending with the dry. Mix on the lowest speed only until just combined—overmixing develops gluten and will make the cupcakes tough instead of fluffy.
- Fill the cupcake liners only 2/3 full. This gives them room to rise without spilling over the edges and collapsing.
- Bake for 18-22 minutes. Test with a toothpick; it should come out clean or with a few moist crumbs. Let them cool in the pan for 5 minutes before transferring to a wire rack.
How to serve refreshing summer soups
Why we love this
Summer soups, particularly chilled ones like Gazpacho or Salmorejo, are the ultimate refreshers when the temperature climbs. We love them because they capture the raw, unadulterated flavor of peak-season produce without the need for a hot stove. There is a cooling, clean sensation in every spoonful, balanced by the bite of vinegar and the richness of emulsified olive oil. They are vibrant, colorful, and visually stunning when served in glass bowls, offering a sophisticated and healthy alternative to heavier summer appetizers.
Ingredients
- 2 lbs Ripe Roma tomatoes
- 1 Cucumber, peeled and chopped
- 1 Green bell pepper
- 1 clove Garlic
- 2 tbsp Sherry vinegar
- 1/2 cup Extra virgin olive oil
- 1 tsp Salt
- Croutons and microgreens for garnish
How to make it
- Roughly chop your tomatoes, cucumber, pepper, and garlic. Since this is a blended soup, the shapes don’t have to be perfect, but removing the seeds from the pepper is essential for a smooth texture.
- Place all the vegetables in a high-speed blender. Add the sherry vinegar and salt.
- Blend on high until the mixture is completely liquefied.
- With the blender running on low, slowly stream in the olive oil. This creates an emulsion, changing the color from deep red to a beautiful creamy orange and giving the soup a silky mouthfeel.
- Pass the soup through a fine-mesh sieve or chinois into a large pitcher. This removes any remaining bits of skin or seeds, resulting in a professional, velvet-smooth consistency.
- Chill the soup in the refrigerator for at least 4 hours, or ideally overnight. Chilled soup must be very cold to be truly refreshing.
- Serve in chilled bowls or glasses, topped with a drizzle of oil, crunchy croutons, and a sprinkle of microgreens for a fresh, herbal finish.
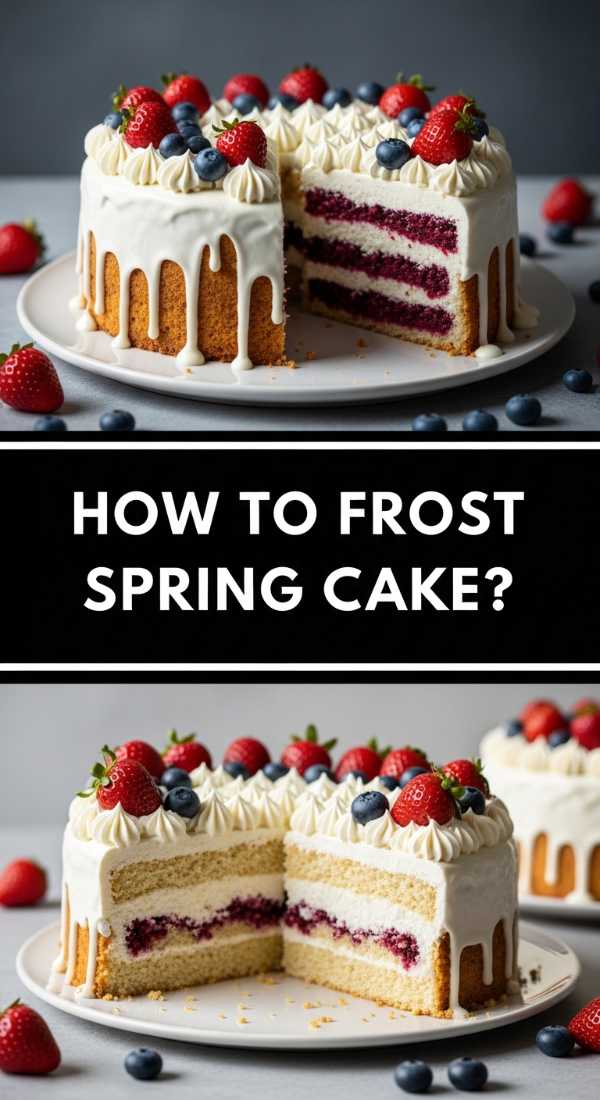
How to frost a spring cake
[IMAGE_10]
Why we love this
Frosting a spring cake is where baking meets floriculture. We love this process because it’s the final flourish that turns a simple sponge into a breathtaking centerpiece. Using light, whipped frostings and decorating with fresh blossoms or botanical piping creates a look that is both elegant and whimsical. The smooth, cool touch of Swiss meringue buttercream and the delicate placement of petals evoke the feeling of a garden in bloom, making any occasion feel like a high-end garden party.
Ingredients
- 2 layers of Vanilla or Lemon Sponge cake (cooled)
- 1.5 cups Egg whites
- 2 cups Granulated sugar
- 3 cups Unsalted butter (cubed, slightly cool)
- 1 tbsp Vanilla bean paste
- Fresh edible flowers (pansies, chamomile, or lavender)
How to make it
- Prepare your Swiss meringue buttercream by whisking egg whites and sugar over a double boiler until the sugar is dissolved and the mixture reaches 160°F.
- Transfer to a stand mixer and whisk on high until stiff, glossy peaks form and the bowl feels cool to the touch (about 10-15 minutes).
- Switch to the paddle attachment and add the butter one cube at a time on medium speed. If it looks curdled, just keep beating; it will come together into a silky smooth frosting. Add the vanilla bean paste.
- Place your first cake layer on a turntable. Apply a generous scoop of frosting and spread it evenly with an offset spatula. Place the second layer on top, bottom-side up for a perfectly flat surface.
- Apply a very thin ‘crumb coat’ of frosting over the entire cake to trap any loose crumbs. Chill the cake for 20 minutes until firm.
- Apply the final thick layer of frosting. Use a bench scraper held at a 45-degree angle against the side of the cake while spinning the turntable to achieve perfectly smooth, sharp edges.
- Gently press fresh, washed, and dried edible flowers into the sides of the cake in a ‘cascading’ pattern, or use a small round tip to pipe delicate vines and leaves.
Conclusion
Mastering the art of the viral food board and these seasonal favorites is all about embracing the process and the premium ingredients that make them shine. Whether you are whipping up a batch of fluffy cupcakes for a friend or laying out a decadent butter board for a party, remember that the most important ingredient is the love you put into the presentation. These trends may come and go on the internet, but the joy of sharing a beautiful, home-cooked meal is a timeless tradition that will always be in style. Happy hosting!