
Easy Hosting Hacks: How to Build the Ultimate Simple Food Board
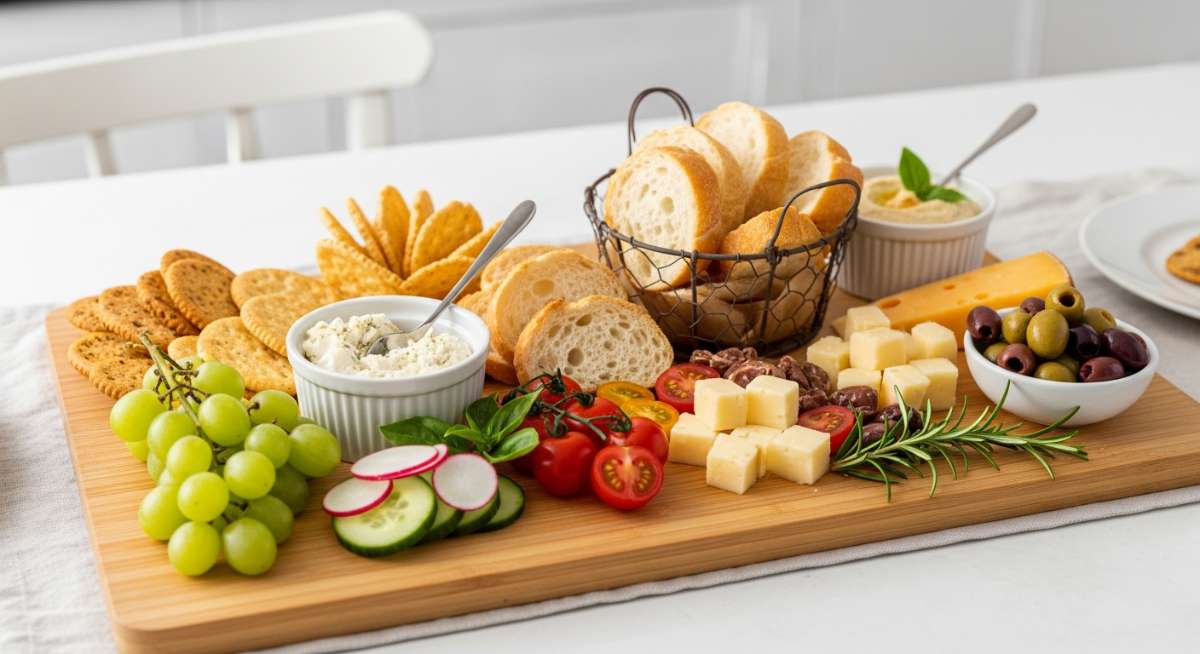
There is nothing quite like the feeling of opening your front door to the laughter of friends and the soft glow of a home that feels truly lived-in. We have all been there—the frantic rush to clean, the stress of a complicated menu, and that nagging feeling that we should have started prepping days ago. But hosting shouldn’t feel like a chore; it should feel like a gift. The secret to a stress-free evening lies in the art of the ‘Simple Food Board,’ a viral trend that turns snacking into a centerpiece, allowing you to actually sit down and enjoy the conversation rather than being stuck in the kitchen.
A great food board is more than just a snack; it is a visual story of your home. It reflects the care you’ve put into your space, from the freshly painted deck where you gather to the serene office where you plan your next big project. By combining easy, high-quality ingredients with a beautifully curated environment, you create an atmosphere that feels effortless and high-end. Today, I’m sharing not just how to build the perfect board, but how to ensure every corner of your home—from the garden to the sanctuary of your bedroom—is ready for those magical hosting moments.
How to Refresh Your Deck with Trendy Paint Colors for a Modern Look

Why we love this
Stepping out onto a freshly painted deck feels like adding an entire new room to your house, filled with the scent of cedar and the warmth of the afternoon sun. The right modern hue, like a deep charcoal or a soft greige, provides a sophisticated backdrop for your outdoor food board, making the vibrant colors of fresh berries and cheeses pop against the sleek, satin finish. It transforms a weathered wooden space into a high-end retreat where the air feels crisper and every sunset looks a little bit more cinematic.
Essential Elements:
- High-quality exterior deck paint or solid stain
- Power washer or stiff scrubbing brush
- Sanding block (60-80 grit)
- Painter’s tape and drop cloths
- Long-handled paint roller and angled brushes
How to make it
- Begin by clearing the deck entirely and using a power washer to remove years of built-up dirt, mildew, and old, flaking finish; ensure the wood is completely dry, which usually takes about 48 hours of clear weather.
- Lightly sand any rough patches or splinters to create a smooth surface that will allow the paint to bond effectively, then sweep away all dust with a microfiber cloth.
- Apply painter’s tape to the siding of your house and any railing hardware you want to protect, ensuring crisp, professional lines.
- Start by using an angled brush to ‘cut in’ the paint between floorboards and around the edges where a roller cannot reach, focusing on even coverage without pooling.
- Use a long-handled roller to apply the first thin coat of paint to the main floorboards, working in the direction of the wood grain and maintaining a wet edge to avoid lap marks.
- Allow the first coat to dry for the time recommended on the can (usually 4-6 hours) before applying a second coat for full color depth and maximum weather protection.
How to Build Stylish Fencing on a Budget for Instant Curb Appeal

Why we love this
A beautiful fence does more than mark a boundary; it creates a private sanctuary where your family can feel truly tucked away from the world. We love the way horizontal slats catch the light, creating rhythmic shadows across the lawn while providing a chic, modern aesthetic that looks far more expensive than it actually is. The smell of fresh pine and the sight of a clean, structured perimeter instantly elevate the mood of your entire property, making every outdoor gathering feel intimate and exclusive.
Essential Elements:
- Pressure-treated fence posts (4×4)
- Cedar or pine pickets
- Fast-setting concrete mix
- Galvanized wood screws
- Post hole digger and level
How to make it
- Mark your fence line using string and stakes, ensuring you are following local property lines and utility markings before you begin any digging.
- Dig post holes every 6 to 8 feet, ensuring they are at least 2 feet deep or below the frost line to prevent the fence from leaning over time.
- Set the 4×4 posts into the holes, using a level to ensure they are perfectly vertical, then pour in the fast-setting concrete and add water according to the package instructions.
- Once the concrete has cured for 24 hours, install your support rails horizontally between the posts, securing them with heavy-duty galvanized screws.
- Attach your pickets to the rails; for a modern look, install them horizontally with a small 1/2-inch gap between each board to allow for airflow and a high-end ‘slat’ appearance.
- Finish the wood with a clear weather sealant or a trendy semi-transparent stain to highlight the natural grain while protecting the structure from the elements.
How to Use Lush Green Room Dividers for a Natural Living Space

Why we love this
Bringing nature indoors with a living room divider creates a breathing, vibrating energy that static furniture simply cannot match. The gentle rustle of leaves in the breeze from a nearby window and the earthy, humid aroma of healthy soil turn a standard open-concept room into a series of cozy, secret nooks. It’s a sensory delight that cleans the air and softens the hard lines of a home, making your hosting space feel like a lush, botanical getaway where guests can truly relax.
Essential Elements:
- Open-backed shelving unit or hanging macrame array
- Assorted indoor plants (Pothos, Snake Plants, Monstera)
- Decorative pots with drainage trays
- High-quality indoor potting mix
- Moisture meter
How to make it
- Select an open-backed shelving unit that allows light to pass through from both sides, ensuring it is sturdy enough to hold the weight of multiple ceramic pots.
- Choose a variety of plants with different heights and textures; use trailing plants like Pothos on the top shelves to create a ‘waterfall’ effect of greenery.
- Pot each plant in a container that complements your room’s decor, ensuring every pot has a drainage hole and a saucer to protect the shelving from water damage.
- Arrange the plants on the shelves, staggering the heights and leaf shapes to create a natural, organic look rather than a rigid line.
- Position the divider near a source of indirect sunlight, as most indoor plants thrive in bright, filtered light which will keep the leaves vibrant and lush.
- Establish a consistent watering schedule using a moisture meter to ensure you are not overwatering, and wipe the leaves with a damp cloth weekly to keep them shiny and dust-free.
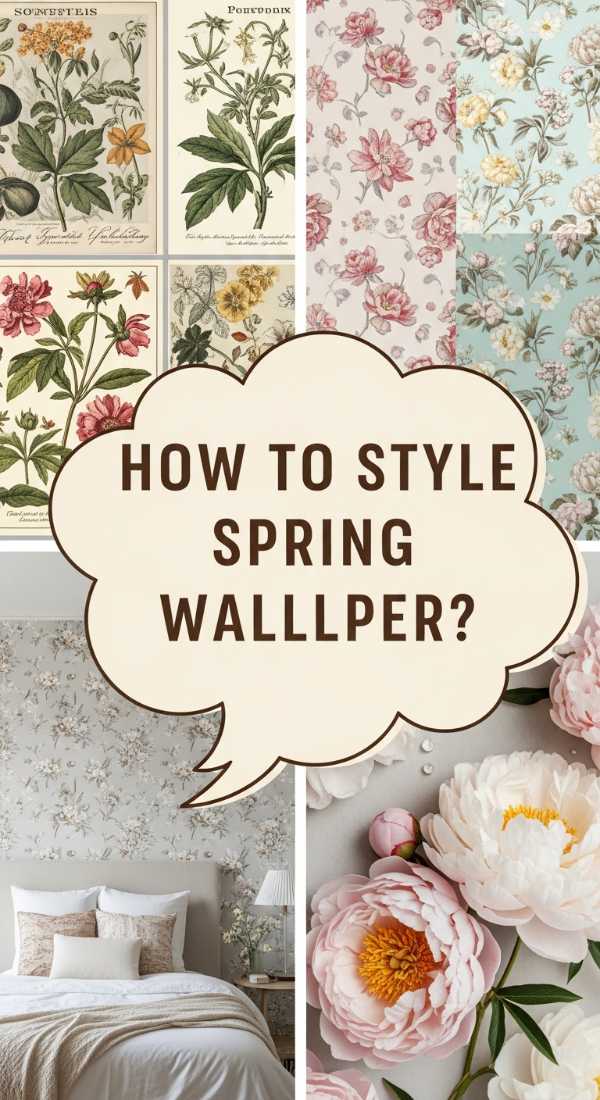
How to Style Floral Wallpaper for a Fresh Spring Aesthetic
Why we love this
Floral wallpaper is like a permanent bouquet for your walls, offering a tactile richness that paint alone can’t provide. We adore the way a bold, oversized botanical print can transform a small powder room or an accent wall into a conversation piece that feels both vintage and incredibly current. The smooth, matte texture of the paper and the intricate details of the petals create a backdrop of timeless elegance, making your home feel like it’s in a constant state of springtime bloom.
Essential Elements:
- Peel-and-stick or pre-pasted floral wallpaper
- Wallpaper smoother or squeegee
- Precision craft knife and extra blades
- Tape measure and level
- Sponge and bucket of water
How to make it
- Clean the wall surface thoroughly with a damp sponge to remove dust and oils, then let it dry completely to ensure the adhesive bonds perfectly.
- Measure the height of the wall and cut your first panel of wallpaper, adding an extra 2 inches at the top and bottom for trimming.
- Use a level to draw a straight vertical line on the wall; this is your ‘plumb line’ and is the most critical step to ensure your pattern doesn’t end up crooked.
- Peel back the top few inches of the backing and align the edge of the paper with your plumb line, pressing it firmly to the wall.
- Slowly pull the backing away while using a smoother tool to push air bubbles out from the center toward the edges, moving in a downward and outward motion.
- Line up the pattern of the second panel perfectly with the first, overlapping or butting the edges as per the manufacturer’s instructions, and trim the excess at the ceiling and baseboard with a sharp craft knife.
How to Create Artistic Spring Chalkboard Displays for Seasonal Decor

Why we love this
There is something so nostalgic and charming about the scratch of chalk against a dark board, allowing you to change your home’s ‘mood’ as often as the weather. A spring chalkboard display, featuring hand-drawn tulips or a whimsical menu for your food board, adds a personalized, artisan touch to your kitchen or entryway. It’s a tactile, low-tech way to express creativity, filling the room with a sense of playful hospitality and a hint of that sweet, dusty chalk aroma that reminds us of fresh starts.
Essential Elements:
- Large framed chalkboard or chalkboard paint
- High-quality dustless chalk or liquid chalk markers
- Microfiber cloth and water
- Stencils (optional)
- Q-tips for fine detailing
How to make it
- If using a new chalkboard, ‘season’ it by rubbing the side of a piece of chalk over the entire surface and then wiping it off; this prevents ‘ghosting’ where your first drawing stays permanently visible.
- Sketch your design lightly with a regular piece of chalk first, planning out the placement of your spring-themed words and floral borders.
- Use liquid chalk markers for the final design to achieve vibrant, saturated colors and crisp lines that won’t smudge if someone accidentally brushes against them.
- Layer your colors by letting the first layer dry completely before adding highlights or shadows, which gives the art a professional, three-dimensional look.
- Use a damp Q-tip to clean up any small mistakes or to sharpen the edges of your lettering for a clean, graphic appearance.
- Finish the display by framing it with a few sprigs of real eucalyptus or dried lavender attached to the corner of the frame for an extra sensory layer.
How to Design a Serene Blue Layout for a Calming Home Office

Why we love this
A serene blue office is the ultimate antidote to a busy workday, evoking the stillness of a deep lake or the vastness of a clear morning sky. We love how cool tones lower the heart rate and sharpen focus, creating a professional sanctuary that feels both airy and grounded. The sight of soft blue walls paired with natural wood furniture creates a crisp, clean aesthetic that makes the time spent at your desk feel like a moment of peace rather than a chore.
Essential Elements:
- Paint in a ‘serene blue’ shade (dusty navy or soft sky)
- Natural wood or white desk furniture
- Task lighting with warm-toned bulbs
- Blue-toned textiles (rugs, curtains, or pillows)
- Minimalist wall art
How to make it
- Choose a blue paint with a grey or green undertone to prevent the room from feeling too ‘nursery-like’; test swatches on different walls to see how the color changes in morning versus evening light.
- Paint the walls using a high-quality eggshell finish, which provides a soft glow without reflecting too much glare from computer screens.
- Incorporate natural textures like a light oak desk or a jute rug to balance the coolness of the blue walls with much-needed warmth and organic appeal.
- Layer in different shades of blue through your accessories—a navy chair cushion or light blue ceramic pen holders—to create depth and visual interest.
- Optimize your lighting by placing a task lamp on the desk and using sheer white curtains to maximize the entry of soft, natural daylight.
- Keep the layout minimalist by using hidden cable management systems, ensuring the physical space remains as calm and uncluttered as the color palette suggests.
How to Master a Dreamy Pink Layout for a Feminine Sanctuary

Why we love this
There is a specific kind of magic in a pink sanctuary—it’s like living inside a sunset or the softest petal of a peony. This isn’t about bright ‘bubblegum’ tones; it’s about sophisticated blushes and dusty roses that create a warm, candle-lit glow even in the middle of the day. The feeling of sinking into velvet pink textures with the scent of rosewater in the air creates an environment of pure indulgence and self-care, making it the perfect place to unwind after hosting a big event.
Essential Elements:
- Blush or terracotta-pink bedding or upholstery
- Gold or brass accent pieces
- Faux fur or chunky knit throws
- Soft, indirect mood lighting (fairy lights or salt lamps)
- Floral arrangements or dried pampas grass
How to make it
- Select a base shade of muted pink for the largest surfaces, such as a duvet cover or an area rug, to set a sophisticated rather than childish tone.
- Incorporate metallic accents like gold picture frames or brass lamps, as the warm yellow of the metal perfectly complements the pink tones and adds a touch of luxury.
- Layer textures to create ‘coziness’; mix a silk pillowcase with a chunky knit wool throw and a velvet accent chair to provide a variety of tactile experiences.
- Use ‘warm’ white light bulbs (2700K) in all lamps to enhance the pink hues of the room, making the walls appear to glow with a soft, flattering light.
- Add a natural element like dried pampas grass in a ceramic vase to introduce a neutral, earthy texture that grounds the feminine color scheme.
- Scent the space with a vanilla or rose-scented candle to complete the sensory experience of a calming, dreamy retreat.
How to Curate a Cute Campsite Setup for the Perfect Outdoor Escape

Why we love this
A curated campsite brings the comforts of a boutique hotel to the raw beauty of the wilderness, creating an experience that is both rugged and refined. We love the smell of campfire smoke mingling with fresh pine, and the sight of a bell tent glowing like a paper lantern against the night sky. It’s about more than just sleeping outside; it’s about creating a magical, temporary home where you can serve your food board under the stars, wrapped in a wool blanket while the owls hoot in the distance.
Essential Elements:
- Aesthetic canvas bell tent or teepee
- Outdoor-safe rugs and floor cushions
- Battery-powered fairy lights or lanterns
- Folding wooden camp table
- Portable fire pit and cozy wool blankets
How to make it
- Choose a flat, well-drained area of ground and clear away any sharp rocks or branches before laying down a heavy-duty groundsheet to protect your tent.
- Pitch your canvas tent, ensuring the guy lines are taut and the entrance is facing the best view—whether that’s a lake, a forest, or just a beautiful sunset.
- Cover the tent floor with several layered rugs to provide insulation from the cold ground and to create a soft, inviting interior space.
- Set up a ‘hosting station’ using a low folding table, where you can arrange your food board and drinks without them being on the ground.
- String battery-operated fairy lights along the interior ceiling of the tent and place lanterns around the perimeter of the campsite for a warm, safe glow.
- Arrange a circle of comfortable camp chairs around a portable fire pit, keeping plenty of blankets nearby to ensure the conversation continues long after the sun goes down.
How to Plan a DIY Flower Bed for a Flourishing Garden Vista

Why we love this
Watching a flower bed you planted yourself come to life is one of the most rewarding parts of homeownership. The feel of rich, cool soil between your fingers and the vibrant sight of petals unfolding in the morning dew create a sense of deep connection to your home. A flourishing garden vista provides a stunning, living wallpaper for your outdoor hosting areas, filling the air with the sweet perfume of jasmine or lavender and inviting butterflies to join your afternoon tea.
Essential Elements:
- Garden spade and metal rake
- High-quality organic compost and mulch
- A mix of perennial and annual flowers
- Landscape edging (stone, metal, or wood)
- Soaker hose or watering can
How to make it
- Outline the shape of your flower bed using a garden hose to create natural, flowing curves that look more organic than rigid straight lines.
- Remove the grass and weeds from the area using a sharp spade, then turn the soil to a depth of about 12 inches to loosen it for new roots.
- Mix in a generous amount of organic compost to provide the nutrients your flowers will need to bloom vibrantly throughout the season.
- Arrange your plants while they are still in their nursery pots, placing taller varieties in the back and shorter ones in the front to ensure everything is visible.
- Dig holes twice as wide as the root balls, place the plants inside, and firm the soil around them gently before watering them thoroughly to settle the roots.
- Apply a 2-inch layer of mulch over the entire bed to retain moisture, suppress weeds, and give the garden a finished, professional look.
How to Craft a DIY Planter Light Post for a Bright Welcoming Entrance

Why we love this
There is nothing more welcoming than a glowing light at the end of a driveway or flanking a front door, especially when it’s nestled among trailing flowers. We love this DIY because it combines functional security lighting with the soft beauty of a container garden. The sight of a classic lantern illuminating the velvet leaves of a silver falls plant creates an instant ‘wow’ factor for guests as they arrive, signaling that the home inside is just as thoughtful and bright.
Essential Elements:
- Large, heavy ceramic or wooden planter
- 4×4 pressure-treated wooden post (approx. 6ft)
- Solar-powered or hardwired outdoor lantern
- Fast-setting concrete
- Assorted potting soil and ‘spiller’ plants (like Creeping Jenny)
How to make it
- Place your wooden post in the center of the empty planter, using a level to ensure it is perfectly upright while you have someone help you hold it.
- Mix the fast-setting concrete in a bucket and pour it into the planter around the post, filling it about halfway up the pot to provide a heavy, stable base.
- Once the concrete is fully set (usually 30-60 minutes), drill a hole through the center of a post cap and mount your solar lantern to the top of the post.
- Fill the remaining space in the planter with high-quality potting soil, ensuring there is enough room for the roots of your chosen plants.
- Plant a variety of ‘thriller, filler, and spiller’ flowers; use a tall grass in the center, colorful petunias as filler, and ivy to spill over the edges of the pot.
- Position the planter in a spot that receives at least 6 hours of sunlight daily so the solar lantern can charge fully and provide a bright, welcoming glow all night long.
Wrapping Up Your Lifestyle Refresh
Hosting the perfect gathering is about the harmony between the food you serve and the environment you create. By mastering the ‘Simple Food Board’ and surrounding it with a home that is thoughtfully designed—from the serene blue of your office to the glowing light posts at your entrance—you create an experience that guests will never forget. Remember, lifestyle is a journey of small improvements that add up to a beautiful, welcoming whole. Happy hosting!
Frequently Asked Questions
Find answers to common questions about hosting and home DIY projects below.