
How to Master the Simple Food Board Trend Without Breaking the Bank
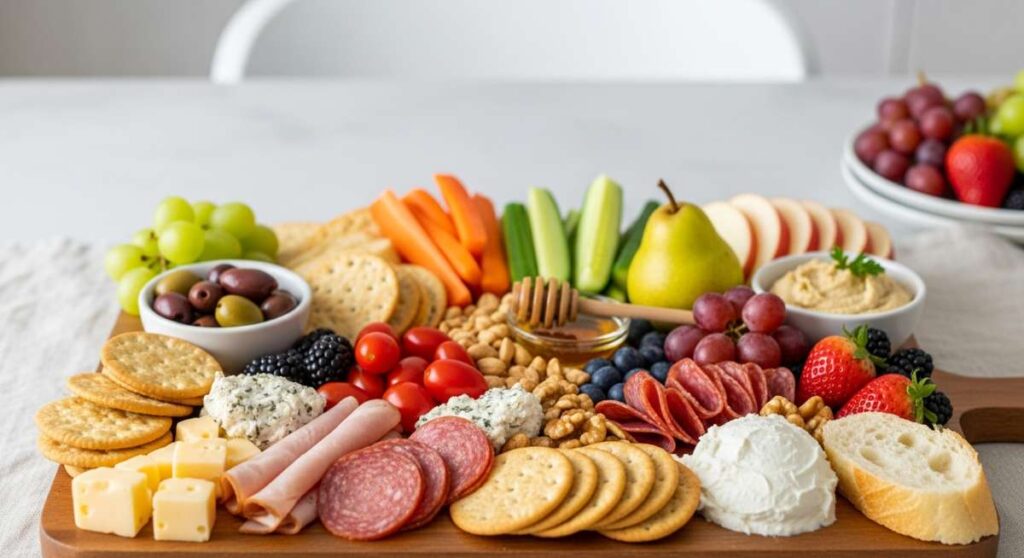
There is something inherently magical about a shared table, but lately, the pressure to create a Pinterest-perfect spread has turned many of us away from hosting. We see those massive, hundred-dollar grazing tables and think, “Not in this economy!” But I’m here to tell you that the viral food board trend isn’t actually about the price tag; it’s about the art of the assembly and the joy of picking at something beautiful with your favorite people. It’s about the tactile experience of a crisp cracker hitting a soft cheese or the burst of a vine-ripened tomato against a piece of grilled bread.
I remember the first time I tried to put one together for a casual Friday night. I was so worried about things being ‘fancy’ enough that I almost forgot the most important part: the flavor. Once I let go of the need for expensive imported meats and focused on fresh, seasonal ingredients used in creative ways, the magic happened. These boards aren’t just meals; they are conversations waiting to happen. Whether you are hosting a backyard bash or just want a cozy Sunday brunch, mastering these simple, budget-friendly iterations will make you the hero of the season.
7 Best Summer Pasta Recipes You’ll Love

Why we love this
Nothing says summer like the aroma of fresh basil and toasted garlic wafting through a sun-drenched kitchen. These pasta boards are all about the contrast between the warmth of the noodles and the bright, acidic pop of raw cherry tomatoes and lemon zest. Imagine a silky strands of linguine coated in a light, buttery sheen, textured with the crunch of toasted pine nuts and the creaminess of a hand-torn burrata melting right into the center of the board. It feels indulgent yet light enough to enjoy even on the hottest July afternoon, capturing the essence of the Mediterranean in every bite.
Ingredients
- 1 lb Linguine or Tagliatelle
- 2 cups Cherry tomatoes, halved
- 4 cloves Garlic, thinly sliced
- 1 bunch Fresh basil
- 1/2 cup Extra virgin olive oil
- 1 ball Burrata cheese
- 1/2 cup Grated Parmesan
- Red pepper flakes and sea salt
How to make it
- Bring a large pot of heavily salted water to a rolling boil. Use about 2 tablespoons of salt per gallon; it should taste like the sea. This is your only chance to season the pasta itself.
- While the water heats, add half of your olive oil to a cold pan with the sliced garlic. Turn the heat to medium-low. This technique allows the garlic to infuse the oil slowly without burning, which results in a mellow, sweet flavor rather than a bitter one. Watch for the garlic to turn a pale golden blonde.
- Add the halved cherry tomatoes and a pinch of red pepper flakes to the oil. Increase the heat to medium and sauté for about 5 minutes, or until the tomatoes just begin to burst their skins and release their juices.
- Cook the pasta until it is two minutes shy of ‘al dente’. Reserve 1 cup of starchy pasta water before draining. This water is the secret ingredient for a silky, cohesive sauce.
- Transfer the pasta directly into the tomato pan. Pour in half of the reserved pasta water and the remaining olive oil. Toss vigorously over medium-high heat. The starch in the water will emulsify with the oil to create a glossy sauce that clings to every strand.
- Spread the pasta across a large wooden board or platter. Top with hand-torn basil leaves, the burrata ball (break it open so the cream spills out), and a generous dusting of Parmesan. Serve immediately while the cheese is still cool against the warm pasta.
10 Best Cookout Side Dishes To Make

Why we love this
The side dish board is often the secret star of the cookout, offering a kaleidoscope of colors and textures that provide a much-needed break from heavy grilled meats. We love the way charred corn kernels crunch against the softness of a lime-crema dressing, and the way a vinegary cucumber salad cleanses the palate between bites. There is a rustic charm to seeing grilled vegetables, potato salads, and fruit skewers all nestled together, smelling of woodsmoke and fresh herbs. It creates a visual feast that signals the start of summer celebrations, inviting everyone to dig in and try a little bit of everything.
Ingredients
- 4 ears of Corn, husked
- 1 lb Fingerling potatoes
- 2 large Cucumbers, sliced
- 1 Red onion, pickled
- 1/4 cup Fresh dill
- 1/2 cup Greek yogurt
- 2 tbsp Lime juice
- Smoked paprika and black pepper
How to make it
- Begin by boiling the fingerling potatoes in salted water until fork-tender, about 12-15 minutes. Drain and let them cool slightly, then halve them lengthwise.
- Preheat your grill to high heat. Lightly oil the corn and the cut sides of the potatoes. Place them on the grates. Look for deep char marks on the corn—rotate every 2 minutes until blackened in spots all over. For the potatoes, grill them cut-side down until they develop a crispy, dark brown crust.
- While the vegetables grill, whisk together the Greek yogurt, lime juice, and a pinch of smoked paprika to create a tangy dressing. Thin it with a teaspoon of water if needed until it reaches a drizzling consistency.
- Slice the cucumbers thinly and toss them with the pickled red onions and fresh dill. This provides the acidic, crisp component of the board.
- Assemble the board by arranging the charred corn (either on the cob or sliced off), the crispy potatoes, and the cucumber salad in distinct sections.
- Drizzle the yogurt dressing over the potatoes and corn. Garnish the entire board with extra sprigs of dill and a final sprinkle of sea salt for a professional, layered look.
5 Best Fresh Summer Desserts Ever

Why we love this
Summer desserts should feel like a breeze—effortless, cooling, and bursting with the natural sweetness of peak-season fruit. This dessert board replaces heavy cakes with the velvety smoothness of whipped mascarpone and the vibrant, ruby-red juices of macerated strawberries. The smell is intoxicating, a mix of floral vanilla bean and the earthy scent of fresh mint leaves. There’s something deeply satisfying about dipping a crisp, buttery shortbread cookie into a cloud of cream and following it with a cold, juicy slice of stone fruit that drips down your fingers.
Ingredients
- 1 pint Strawberries, hulled and sliced
- 2 cups Peaches or Nectarines, sliced
- 8 oz Mascarpone cheese
- 1 cup Heavy whipping cream
- 1/4 cup Powdered sugar
- 1 tsp Vanilla bean paste
- 1 pack Shortbread cookies or Graham crackers
- Fresh mint for garnish
How to make it
- Start by macerating the strawberries. Place the sliced berries in a bowl with a tablespoon of sugar. Let them sit for at least 20 minutes; the sugar draws out the natural juices, creating a syrupy glaze that intensifies the berry flavor.
- In a cold mixing bowl, combine the mascarpone, heavy cream, powdered sugar, and vanilla bean paste. Using a hand mixer or whisk, beat the mixture on medium-high speed.
- Watch for “stiff peaks.” This means when you lift the whisk, the cream stands straight up without drooping. Be careful not to over-mix, or the mascarpone can become grainy. The texture should be like thick, spreadable clouds.
- Slice your peaches or nectarines just before serving to prevent browning. If you want an extra touch of flavor, toss them in a little lemon juice and honey.
- To assemble, place a large bowl of the whipped mascarpone in the center of your board. Surround it with piles of the macerated strawberries and sliced peaches.
- Tuck the shortbread cookies into the gaps and garnish the entire board with fresh mint leaves. The green against the red and orange makes the colors pop beautifully.
8 Easy Sourdough Discard Recipes Today

Why we love this
The sourdough discard board is a triumph of sustainability and flavor, turning what many throw away into golden, tangy treasures. We adore the complex, fermented aroma that fills the house as discard crackers and flatbreads bake to a perfect crisp. There is a specific “snap” to a homemade sourdough cracker that you just can’t get from a store-bought box, and when paired with a sharp cheddar or a smooth hummus, the tanginess of the dough shines through. It’s a rustic, soulful way to share the fruits of your baking labor with friends.
Ingredients
- 1 cup Sourdough discard (unfed)
- 1 cup All-purpose flour
- 1/4 cup Unsalted butter, melted
- 1 tbsp Dried herbs (rosemary or thyme)
- 1 tsp Sea salt
- Optional: Everything bagel seasoning
How to make it
- Preheat your oven to 325°F (165°C). In a medium bowl, mix the sourdough discard, melted butter, and dried herbs until a smooth paste forms.
- Add the flour and salt, stirring until a stiff dough forms. If the discard is very liquid, you may need an extra tablespoon of flour. The dough should be tacky but not sticking to your fingers.
- Place a large sheet of parchment paper on your counter. Place the dough in the center and top with another sheet of parchment. Roll the dough out as thin as possible—ideally 1/16th of an inch. The thinner the dough, the crispier the crackers.
- Remove the top layer of parchment. If using bagel seasoning, sprinkle it on now and lightly roll over it once more to press the seeds into the dough.
- Use a pizza cutter or a sharp knife to score the dough into squares or rectangles. Do not worry about separating them; they will snap apart after baking.
- Bake for 20-25 minutes. Look for a deep golden brown color around the edges and a pale gold in the center. If the centers are still soft, bake for another 5 minutes. They must be completely dry to achieve that signature snap. Let them cool completely before placing them on your board.
10 Best Spring Brunch Ideas Now

Why we love this
A spring brunch board feels like a celebration of renewal, filled with the soft greens of asparagus and the bright yellows of perfectly soft-boiled eggs. We love the interactive nature of a brunch board where guests can build their own open-faced sandwiches on toasted brioche. The scent of smoked salmon mingled with fresh dill and capers is classic and sophisticated, while the addition of crisp radishes adds a peppery bite that wakes up the taste buds. It’s the ultimate slow-morning luxury, meant to be enjoyed with a steaming cup of coffee and plenty of laughter.
Ingredients
- 6 large Eggs (room temperature)
- 1 bunch Thin asparagus
- 4 slices Smoked salmon
- 1 loaf Brioche bread, sliced and toasted
- 1/2 cup Cream cheese
- 1 bunch Radishes, thinly sliced
- Capers and fresh dill
How to make it
- Prepare the “jammy” eggs. Bring a pot of water to a boil, then gently lower the eggs in. Boil for exactly 6 and a half minutes. Immediately transfer the eggs to an ice bath for 5 minutes. This stops the cooking process and ensures the yolk remains thick and custardy while the white is fully set.
- Snap the woody ends off the asparagus. Blanch them in the boiling water for 2 minutes until bright green, then shock them in the ice bath along with the eggs. This preserves the vibrant color and crisp texture.
- Toast your brioche slices until they are golden and fragrant. Slice them into soldiers (strips) for easier dipping.
- Spread a thin layer of cream cheese on a portion of the board. Arrange the smoked salmon in “ribbons” by folding the slices loosely over themselves.
- Peel and halve the jammy eggs, exposing the bright orange yolks. Place them next to the asparagus and salmon.
- Scatter the sliced radishes, capers, and dill over the top. Add a small bowl of flakey sea salt and cracked pepper so guests can season their eggs to taste.
7 Best Spring Cookies Decorated Beautifully

Why we love this
This board is a visual masterpiece, celebrating the delicate artistry of spring blooms through the medium of sugar and butter. We love the satisfying crunch of a shortbread cookie that gives way to a soft, melt-in-your-mouth interior. Using edible flowers or lemon-infused glazes creates a sensory experience that feels like walking through a garden in full bloom. The faint scent of citrus and vanilla is light and airy, and the pastel colors of the decorations make it almost too pretty to eat—almost.
Ingredients
- 1 batch Sugar cookie dough (chilled)
- 2 cups Powdered sugar
- 2 tbsp Lemon juice
- 1 tbsp Milk
- Edible dried flowers (pansies or lavender)
- Gel food coloring (pastel shades)
How to make it
- Roll out your chilled cookie dough to 1/4 inch thickness on a floured surface. Use flower-shaped cutters to create consistent forms. Chill the cut-out shapes for 10 minutes in the freezer before baking; this prevents the edges from spreading and keeps the shapes sharp.
- Bake at 350°F (175°C) for 8-10 minutes, just until the edges are a very pale gold. Let them cool completely on a wire rack before decorating.
- Whisk together the powdered sugar, lemon juice, and milk to create a smooth flood icing. The consistency should be like honey—it should disappear back into itself after 5-10 seconds when drizzled from a spoon.
- Divide the icing and add tiny drops of gel coloring to achieve soft pinks, yellows, and purples. Dip the top of each cookie into the icing, letting the excess drip off.
- While the icing is still wet, carefully place a dried edible flower or a sprinkle of lavender buds in the center. The icing will act as glue as it hardens.
- Let the cookies dry for at least 4 hours until the icing is completely firm. Arrange them on a board with small bowls of lemon curd or additional fresh berries for a stunning tea-time display.
5 Best Cold Summer Soups Fast

Why we love this
When the heat is relentless, a cold soup board is the ultimate refreshing savior. We love the vibrant, electric green of a chilled cucumber and honeydew gazpacho, or the deep, earthy red of a traditional tomato-based version. The texture is incredibly smooth and cooling, with the added crunch of garnishes like toasted pepitas or finely diced bell peppers. It’s a sophisticated and unexpected way to present a meal, turning the concept of a “soup course” into a fun, communal dipping and sipping experience that feels light as air.
Ingredients
- 3 large English cucumbers, peeled
- 1 small Honeydew melon, cubed
- 1 Jalapeño, deseeded
- 1/4 cup Fresh mint leaves
- 2 tbsp Rice vinegar
- 1/4 cup Olive oil
- Yogurt for drizzling
- Croutons for crunch
How to make it
- In a high-powered blender, combine the cucumbers, honeydew melon, jalapeño, and mint. The honeydew provides a subtle sweetness that balances the cool cucumber perfectly.
- Blend on high until the mixture is completely liquid and ultra-smooth. This may take 1-2 minutes depending on your blender.
- While the blender is on low, slowly stream in the rice vinegar and olive oil. This emulsifies the soup, giving it a creamy mouthfeel without the need for heavy dairy.
- Season with a pinch of salt and taste. The flavors will mute slightly once chilled, so ensure it tastes well-seasoned at room temperature.
- Pour the soup into a large glass pitcher or several small individual bowls and refrigerate for at least 2 hours. Serving it ice-cold is essential for the best experience.
- To serve on a board, place the bowls of chilled soup in the center. Surround them with “toppings” like crispy croutons, extra mint leaves, and a small carafe of yogurt. Drizzle the yogurt into the soup at the table and top with croutons for texture.
10 Best Outdoor Grilling Recipes Quick

Why we love this
The grilling board is the king of summer entertaining, bringing the smoky, charred goodness of the fire directly to the center of the party. We love the rustic appearance of sliced steak or skewers of shrimp laid out alongside grilled lemons and blistered peppers. The aroma is primal and enticing—charred fat, woodsmoke, and caramelizing sugars. Each bite offers a different level of sear, from the juicy, tender interior to the salty, blackened crust that only a high-heat grill can produce. It’s communal dining at its most energetic and satisfying.
Ingredients
- 1 lb Flank steak or Skirt steak
- 1 lb Large shrimp, peeled and deveined
- 2 Bell peppers, sliced into thick strips
- 1 Lemon, halved
- 2 tbsp Chimichurri sauce
- 1 tbsp Smoked paprika
- 3 cloves Garlic, minced
- Olive oil and coarse salt
How to make it
- Marinate the steak in olive oil, garlic, and coarse salt for at least 30 minutes. For the shrimp, toss them in olive oil and smoked paprika. Keeping the flavor profiles distinct allows for more variety on the board.
- Preheat your grill to high. You want the grates to be screaming hot to ensure a good sear without overcooking the inside.
- Place the steak on the hottest part of the grill. For a medium-rare flank steak, grill for 4-5 minutes per side. Do not move it until it naturally releases from the grates; this ensures a perfect crust.
- Grill the shrimp and peppers at the same time. Shrimp cook quickly—usually 2 minutes per side until they are opaque and slightly charred. Place the lemon halves cut-side down on the grill for 3 minutes until caramelized.
- Crucial step: Let the steak rest for at least 10 minutes on a cutting board before slicing. This allows the juices to redistribute so they don’t run all over your presentation board.
- Slice the steak against the grain into thin strips. Arrange the steak, shrimp, and peppers on the board. Squeeze the grilled lemon over everything and serve with a side of chimichurri for dipping.
5 Best Floral Spring Cakes Ever

Why we love this
A floral cake board turns dessert into an ethereal experience, focusing on light, airy sponges and delicate botanical flavors. We love the pairing of a lemon-thyme sponge with a honey-lavender buttercream; it’s a profile that feels sophisticated and deeply connected to the season. The texture of a well-made spring cake should be moist and tender, almost like a sweet cloud that dissolves on the tongue. Adorning the board with fresh flowers and honeycomb makes it feel like a centerpiece at a royal garden party, offering a refined sweetness that isn’t overwhelming.
Ingredients
- 1 loaf Lemon sponge cake (sliced)
- 1 cup Buttercream frosting
- 1 tsp Dried culinary lavender
- 2 tbsp Honey
- Fresh edible flowers (Violas or Marigolds)
- Lemon curd for dipping
How to make it
- Bake or source a high-quality lemon sponge cake. If baking, ensure you use fresh lemon zest in the batter to provide a bright, natural citrus punch. Once cooled, slice the cake into neat, 1-inch thick triangles or rectangles.
- Infuse your buttercream. Finely grind the dried lavender and fold it into the buttercream along with the honey. Let it sit for 30 minutes so the floral notes permeate the frosting.
- Place the sliced cake pieces around the perimeter of your board.
- Add a decorative bowl of the lavender-honey buttercream to the center. Use a spoon to create an aesthetic swirl on top.
- Fill small ramekins with lemon curd and place them between the cake slices. This provides a tart contrast to the sweet frosting.
- Decorate the entire board by tucking fresh edible flowers between the cake slices. This is purely for aesthetics but makes the board look incredibly professional and expensive.
7 Best Squishy Butter Recipes Simple

Why we love this
The viral butter board is the ultimate evolution of the bread basket, turning simple fat and salt into a creamy, spreadable canvas of flavor. We love the tactile joy of swooping a piece of warm, crusty sourdough through a wave of softened, high-quality butter topped with crunchy sea salt and honey. The texture is smooth and luxurious, and the flavor combinations are endless—from savory garlic and herbs to sweet cinnamon and brown sugar. It’s a decadent, indulgent trend that feels like the ultimate treat for butter lovers, encouraging everyone to double-dip and enjoy the richness.
Ingredients
- 2 sticks High-quality unsalted butter (softened to room temperature)
- 1 tbsp Flakey sea salt (Maldon is best)
- 2 tbsp Local honey
- 1 tsp Lemon zest
- Fresh thyme or rosemary
- 1 loaf Crusty baguette or sourdough
How to make it
- The most important step is the temperature of the butter. It must be “squishy”—meaning soft enough to spread with a spoon but not melted. Leave it out on the counter for at least 4 hours. Do not microwave it, as this ruins the emulsion.
- Using the back of a spoon or a small offset spatula, create decorative “swipes” of butter across a clean wooden board. You want hills and valleys to catch the toppings.
- Drizzle the honey in a zig-zag pattern over the butter. The honey will pool in the valleys you created.
- Sprinkle the flakey sea salt generously over the top. The crunch of the salt against the soft butter is the highlight of the dish.
- Finely chop your fresh herbs and scatter them over the board along with the fresh lemon zest. The zest cuts through the richness of the fat and brightens the whole experience.
- Slice your bread and toast it slightly so it’s warm. Place the bread directly on the board or in a basket nearby. Guests should use the bread to “swipe” the butter directly off the wood.
Conclusion: Your Board, Your Rules
Mastering the viral food board trend isn’t about following a strict set of instructions; it’s about embracing the season and the people you’re sharing it with. Whether you’re making a simple squishy butter board for a movie night or an elaborate grilled steak spread for a backyard party, the goal is the same: beautiful food made accessible. Don’t be afraid to experiment with what’s in your pantry or what’s on sale at the farmer’s market. The best boards are the ones that feel lived-in, loved, and thoroughly enjoyed. Now, go grab a board and start creating!