

There’s something truly magical about the way our homes and shared spaces evolve with the seasons. Lately, my TikTok feed has been an endless scroll of inspiration, from the soft pastels of spring to the sun-drenched vibes of upcoming summer. It’s more than just decorating; it’s about creating a feeling—that cozy, ‘main character’ energy that makes every day feel like a curated celebration. I’ve spent the last few weeks testing out the viral trends that everyone is obsessing over, and let me tell you, these hacks are game-changers for anyone looking to add a little sparkle to their life.
Whether you’re a teacher looking to transform a classroom door into a portal of wonder, or a graduate trying to summarize four years of memories on a tiny square of fabric, there is a DIY here for you. We are diving deep into the tactile joy of crafting, the buttery aroma of fresh-baked holiday treats, and the refreshing breeze of a perfectly styled porch. Grab your glue gun, preheat your oven, and let’s get into the ten DIY home hacks that are taking over the internet right now.
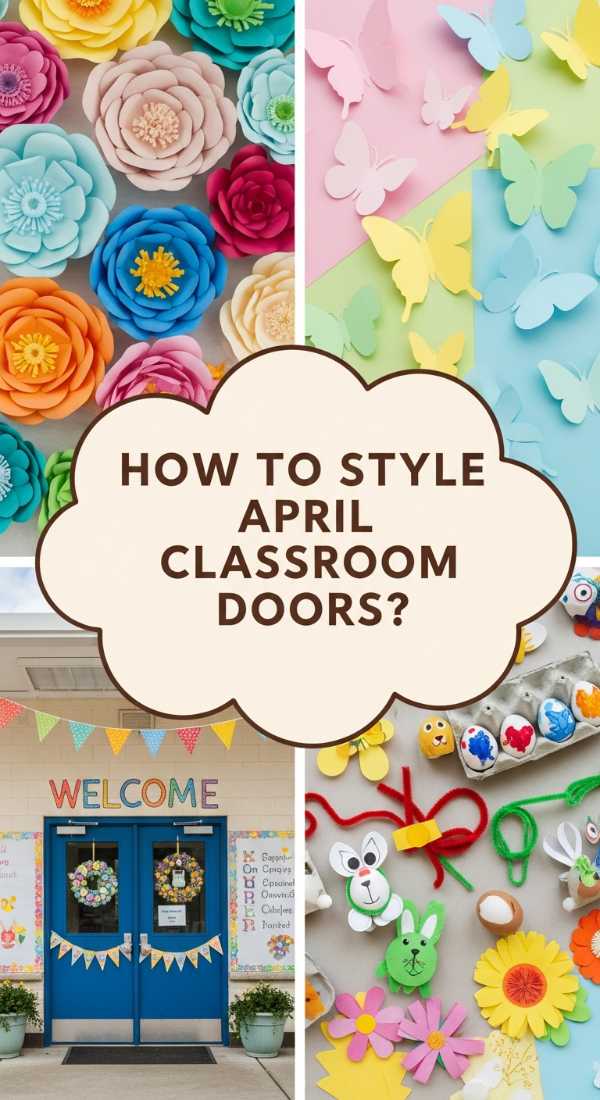
How to Design Magical April Door Decorations for Classroom Inspiration
Why we love this
Walking into a classroom should feel like stepping into a storybook, and these magical April door designs do exactly that. The texture of layered cardstock combined with the soft, ethereal shimmer of iridescent cellophane creates a visual feast that captures the essence of spring showers. There is a specific, nostalgic aroma of paper and craft glue that fills the hallway, evoking a sense of creativity and new beginnings. This project transforms a flat surface into a multidimensional landscape of blooming paper flowers and fluttering butterflies that seem to dance in the light.
Essential Elements:
- Iridescent or clear cellophane
- Heavyweight cardstock in pastel shades
- Hot glue gun and glue sticks
- Large butcher paper for the background
- Decorative border trim
- Scissors or a precision cutting machine
How to make it
- Begin by measuring your door carefully, ensuring you leave space for the handle and hinges to move freely without snagging the decor.
- Cover the entire door in a soft blue or light green butcher paper to act as your sky or meadow canvas; use painter’s tape on the edges to prevent damage to the door finish.
- Create ‘3D Raindrops’ by cutting teardrop shapes out of the iridescent cellophane; crinkle them slightly between your palms to give them texture before glueing them in a cascading pattern from the top.
- For the floral base, fold cardstock in half and cut petal shapes to create 3D blooms; use a pencil to curl the edges of the paper outward for a realistic, wind-swept look.
- Layer your elements from back to front: start with clouds at the top, followed by the raindrops, and finish with the large, vibrant flowers at the bottom, using foam mounting tape to make them pop off the surface.
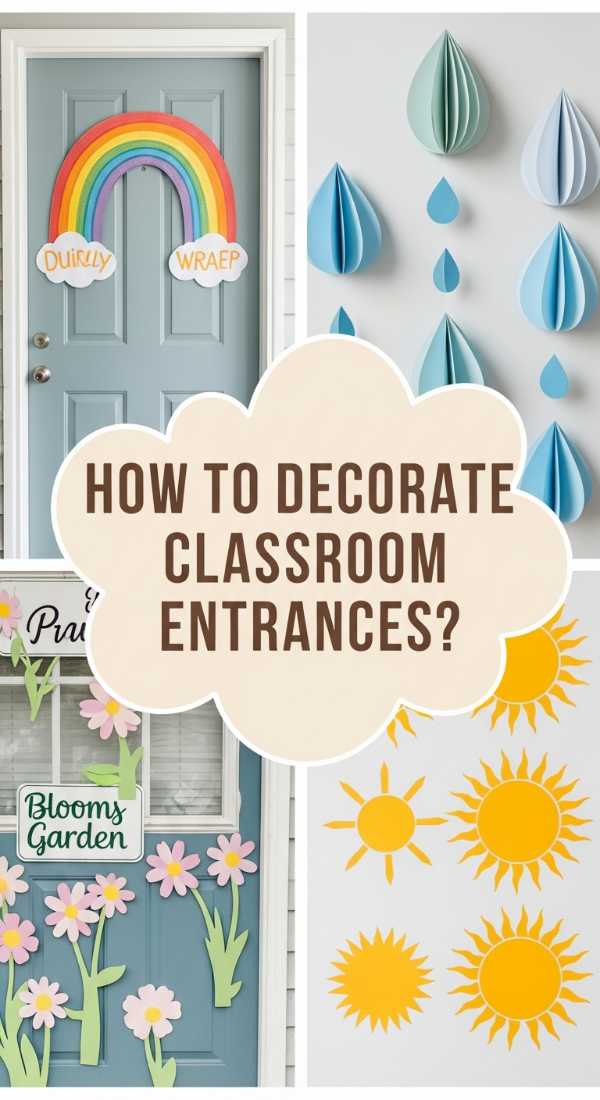
How to Create Whimsical April Door Displays for Student Joy
Why we love this
This hack is all about the ‘wow’ factor that brings an immediate smile to every student’s face as they walk down the hall. We love the tactile contrast between fluffy white cotton batting ‘clouds’ and the smooth, vibrant ribbons representing a rainbow of possibilities. The display feels alive, almost as if a spring breeze is moving through the corridor, carrying the faint, clean scent of fresh laundry and markers. It turns a mundane school day into a whimsical adventure, fostering a sense of belonging and joy through shared aesthetic beauty.
Essential Elements:
- Satin ribbons in every color of the rainbow
- Large rolls of cotton batting or polyester fiberfill
- Bright yellow felt for a sun accent
- Photos of students or personalized name tags
- Double-sided heavy-duty mounting tape
How to make it
- Define your focal point by cutting a large, smiling sun from the yellow felt and mounting it in the upper corner of the door using high-tack adhesive.
- Measure and cut lengths of satin ribbon that span from the sun to the opposite bottom corner; ensure you heat-seal the ends of the ribbon with a lighter to prevent fraying over time.
- Apply the ribbons in a fanned-out ‘ray’ pattern, securing them tightly at the sun and letting them flow freely or pinning them at the base for a structured look.
- Take your cotton batting and pull it apart slightly to create ‘wispy’ cloud textures; hot glue these over the starting point of the ribbons to hide the staples or tape.
- Finish the display by tucking student name tags into the ‘clouds’ or along the ribbon rays, ensuring each element is secured firmly enough to withstand the high-traffic environment of a school hallway.
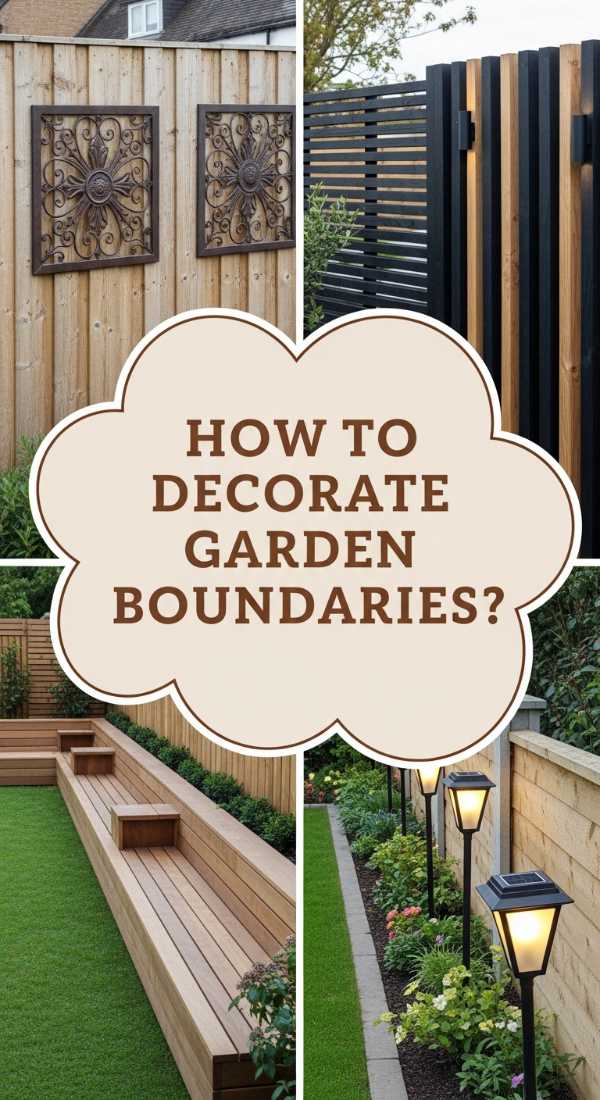
How to Style Rustic Wooden Fence Decorating for Garden Elegance

Why we love this
There is nothing quite like the earthy, grounding scent of weathered cedar and damp moss to make a backyard feel like a private sanctuary. This rustic fence styling adds layers of visual interest to your perimeter, turning a functional barrier into a gallery of garden elegance. We love the way the rough texture of the wood contrasts with the delicate, trailing vines of jasmine or ivy, creating a sensory experience that is both rugged and refined. It’s the perfect backdrop for a quiet morning coffee, where the air feels cool and the surroundings look effortlessly timeless.
Essential Elements:
- Reclaimed wooden crates or pallets
- Terracotta pots in varying sizes
- S-hooks and heavy-duty outdoor screws
- Weather-resistant fairy lights
- Trailing plants like Creeping Jenny or Ivy
How to make it
- Clean your fence surface thoroughly with a stiff brush to remove cobwebs and loose debris, ensuring a clean slate for your decorative elements.
- Arrange your reclaimed crates on the ground first to find a balanced, staggered layout before drilling them directly into the fence posts for maximum support.
- Install heavy-duty screws into the crates or the fence rails, then hang your terracotta pots using wire hangers or S-hooks, ensuring they are tilted slightly forward for drainage.
- Weave weather-resistant fairy lights through the slats of the crates, hiding the battery pack in a waterproof container or behind a pot to keep the aesthetic clean.
- Fill the pots with a high-quality potting mix and your trailing plants; water them immediately and watch as the foliage begins to soften the hard lines of the wood over the coming weeks.
How to Implement Chic Wooden Fence Accents for Backyard Privacy
Why we love this
Privacy doesn’t have to look like a fortress; it can look like a high-end outdoor lounge with the right chic accents. This approach uses horizontal wooden slats and dark, moody stains to create a sophisticated, modern vibe that feels incredibly high-end. The smooth finish of the stained wood feels luxurious to the touch, and the subtle scent of outdoor wood sealant brings a professional ‘just finished’ atmosphere to your patio. It’s about creating a secluded nook where you can escape the world, surrounded by clean lines and the soft glow of well-placed lighting.
Essential Elements:
- Horizontal cedar slats or pressure-treated boards
- Dark wood stain (Ebony or Walnut)
- Outdoor-rated black metal hardware
- Solar-powered post cap lights
- Tall, slender planters for vertical greenery
How to make it
- Apply two coats of a dark, weather-sealing stain to your wooden slats, allowing at least 24 hours of drying time between coats to achieve a deep, even pigment.
- Mount the slats horizontally across your existing fence posts, using a spacer block (about 1/2 inch) between each board to ensure perfectly uniform gaps for airflow and style.
- Secure the boards with black deck screws to create a modern, industrial-chic contrast against the dark wood.
- Place your solar post cap lights on every other fence post; these provide a soft, ambient glow that illuminates the grain of the wood at night without the need for complex wiring.
- Position tall planters filled with bamboo or ornamental grasses in front of the new accents to add a layer of soft texture and enhance the feeling of a private, upscale retreat.
How to Bake Aesthetic Easter Cookies Decorated for Spring Celebrations

Why we love this
These cookies are more than just a dessert; they are edible pieces of art that capture the very soul of spring. The aroma of Madagascar vanilla bean and citrus zest wafting from the oven is enough to make anyone feel festive, while the snap of a perfectly tempered royal icing offers a satisfying crunch followed by a soft, buttery crumb. We love the satiny finish of the pastel flood work and the intricate, tiny details of gold leaf that make each cookie look like a treasure found in a high-end bakery. It’s a sensory delight that makes the holiday table feel complete.
Essential Elements:
- Chilled shortbread or sugar cookie dough
- Royal icing (stiff and flood consistencies)
- Gel food coloring (Soft Pink, Mint, Lavender)
- Edible gold leaf or metallic dust
- Fine-tipped piping bags and scribes
How to make it
- Roll out your chilled dough to a consistent 1/4-inch thickness; use egg and bunny-shaped cutters and chill the cut-outs for 15 minutes before baking to ensure they hold their sharp edges.
- Bake at 350°F (175°C) for 8-10 minutes, or until the edges are barely golden; the cookies should look matte on top but remain soft enough to melt in your mouth.
- Outline your designs with stiff-consistency icing using a #2 tip, then immediately ‘flood’ the center with a thinner icing to create a smooth, pool-like surface.
- Use a scribe tool (or a toothpick) to pop any tiny air bubbles and to pull the icing into corners for a professional, seamless finish.
- Once the icing has dried completely (at least 6-8 hours), apply small flecks of edible gold leaf using a clean, dry paintbrush to add a touch of luxury and sparkle.
How to Master Pastel Easter Cookie Designs for Sweet Holiday Moments

Why we love this
There is a soft, dreamlike quality to masterfully executed pastel cookies that makes them the star of any Easter brunch. The texture of the matte icing against a dusting of sparkling sanding sugar creates a beautiful play of light, while the subtle flavor of almond extract provides a sophisticated twist on the classic sugar cookie. We love the meditative process of piping delicate dots and swirls, seeing the palette of mint greens and pale yellows come together in a cohesive, joyful collection. They are almost too pretty to eat, but the rich, buttery flavor ensures they won’t stay on the plate for long.
Essential Elements:
- Almond-flavored sugar cookie base
- Pastel-toned royal icing in squeeze bottles
- White sanding sugar or nonpareils
- Bunny and chick-shaped cookie cutters
- Small offset spatula
How to make it
- Prepare your cookies and let them cool entirely on a wire rack; any residual heat will cause the icing to melt and run off the edges.
- Divide your royal icing into several bowls and tint them with gel colors; use a ’15-second consistency’ (where a line drawn in the icing disappears in 15 seconds) for easy one-step decorating.
- Squeeze a generous amount of icing onto the center of the cookie and use the offset spatula to spread it toward the edges, leaving a tiny margin of cookie showing.
- While the icing is still wet, sprinkle white sanding sugar over the top to create a ‘fuzzy’ texture for bunnies or a shimmering effect for eggs.
- Allow the cookies to set in a cool, dry place for 12 hours before stacking or packaging to ensure the delicate pastel designs remain crisp and un-smudged.
How to Craft Personal Cap Decoration Graduation High School Style for Lasting Memories

Why we love this
Graduation is a whirlwind of emotions, and personalizing your cap is the ultimate way to ground those memories in something tangible. We love the tactile mix of smooth glitter cardstock and the delicate, papery feel of silk flowers that wrap around the mortarboard. There’s a specific, triumphant feeling in seeing your own name or a meaningful quote sparkling in the sun during the ceremony. It smells like hairspray and fresh flowers, and it feels like a heavy weight being lifted as you finally cross that stage, wearing a piece of art that tells your unique story.
Essential Elements:
- Graduation cap (mortarboard)
- Glitter cardstock or patterned scrapbook paper
- Silk flowers and faux greenery
- Strong adhesive (E6000 or hot glue)
- Stick-on pearls or rhinestones
How to make it
- Create a template by tracing your cap onto the back of your glitter cardstock; cut it out and remember to cut a small hole in the very center for the tassel button to peek through.
- Apply a thin, even layer of adhesive to the cardstock and press it firmly onto the cap, smoothing out any air bubbles from the center outward to ensure a flat surface.
- Deconstruct your silk flowers by removing the plastic stems, then arrange the flat flower heads in a ‘C’ shape around one corner of the cap for an asymmetrical, modern look.
- Use a pair of tweezers to place small rhinestones or pearls in the centers of the flowers or to spell out your graduation year; this level of detail makes the cap look professionally custom-made.
- Allow the glue to cure for a full 24 hours before the ceremony to ensure that no decorations fall off during the traditional cap toss.
How to Personalize Graduation Cap Art for Senior Year Success

Why we love this
This hack is for the senior who wants to turn their cap into a high-impact statement piece that can be seen from the back row of the bleachers. We love the bold use of paint markers and vinyl lettering that creates a clean, graphic look that stands out in photos. The texture is smooth and professional, and the process of hand-lettering your favorite mantra provides a moment of reflection on the hard work of the past four years. It’s about celebrating success with a design that is as loud and proud as your achievements, capturing the vibrant energy of youth and the excitement of what’s next.
Essential Elements:
- Matte black or colored graduation cap
- Permanent metallic paint markers (Gold, Silver, Rose Gold)
- Custom vinyl decals or stickers
- Clear sealant spray (matte finish)
- Washi tape for guiding lines
How to make it
- Plan your design on a piece of paper first to ensure your quote or artwork is centered and scaled correctly for the 9×9 inch square.
- Use washi tape to create straight horizontal lines on the cap; this helps you keep your lettering perfectly aligned as you write with the paint markers.
- Apply your custom vinyl decals slowly, using a credit card or squeegee to press out any air bubbles as you peel back the transfer tape.
- Once the ink and decals are set, use the paint markers to add small accent stars or dots around the edges to fill in any empty space and add visual depth.
- Lightly mist the entire cap with a matte clear sealant spray from about 12 inches away; this protects the ink from smudging if it happens to rain during an outdoor ceremony.
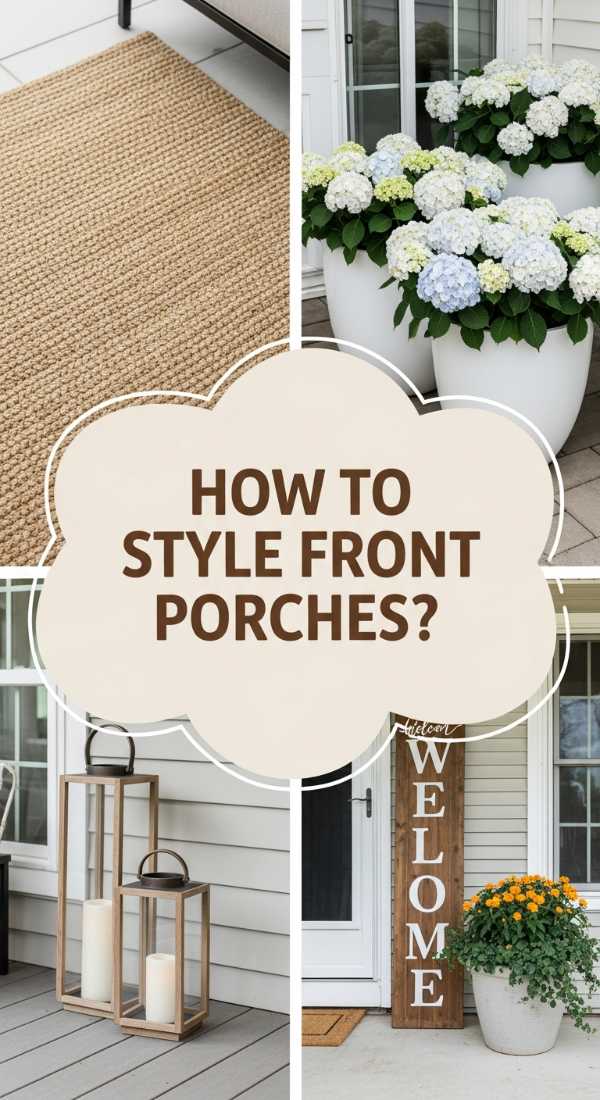
How to Arrange Refreshing Summer Porch Decor for Outdoor Relaxation

Why we love this
When the heat of summer hits, your porch should feel like a breezy oasis. We love the combination of crisp linen pillows and the natural, scratchy-but-sturdy texture of a jute rug underfoot. There is an intoxicating aroma of citronella candles and potted lavender that keeps the bugs away while making the air smell like a Mediterranean garden. It’s the feeling of a cold glass of lemonade sweating in your hand and the rhythmic creak of a swing or rocking chair that defines relaxation. This setup invites you to slow down and savor the long, golden hours of the season.
Essential Elements:
- Weather-proof outdoor pillows in navy or white
- Large jute or sisal area rug
- Ceramic side tables or garden stools
- Potted ferns or oversized palms
- Battery-operated outdoor lanterns
How to make it
- Start by clearing your porch and giving the floor a deep scrub; a clean base makes the new textures of the rug and pillows feel much more inviting.
- Layer your jute rug in the center of the seating area to ground the space; if the rug is large enough, ensure the front legs of all chairs are resting on it to create a cohesive ‘room’ feel.
- Arrange your outdoor pillows in pairs on your chairs or bench, mixing solid colors with classic summer stripes to add visual rhythm and comfort.
- Place large potted ferns in the corners of the porch to provide a lush, green frame that naturally cools the air through transpiration.
- Set your battery-operated lanterns on the garden stools or the floor; set the timers so they automatically flicker to life at dusk, providing a warm, inviting glow without the hazard of real flames.
How to Curate Sunny Porch Vignettes for Seasonal Curb Appeal
Why we love this
Curb appeal is all about the first impression, and a sunny porch vignette acts like a warm hug for your home’s exterior. We love the vibrant pop of yellow marigolds against a classic white door and the sturdy, tactile weight of a woven welcome mat that says ‘stay awhile.’ The scent of sun-warmed wood and fresh potting soil creates a welcoming atmosphere that begins before you even step inside. It’s a curated snapshot of domestic bliss, where every element—from the height of the planters to the color of the wreath—works together to tell a story of a home that is loved and lived-in.
Essential Elements:
- A set of three nesting planters (wood or metal)
- Bright seasonal flowers (Geraniums, Marigolds)
- A modern, oversized house number sign
- Boxwood or eucalyptus wreath
- Coordinating door mat and outdoor rug layer
How to make it
- Layer a small, patterned outdoor rug underneath a slightly smaller coir doormat; this ‘double mat’ look is a major TikTok trend that adds instant designer flair.
- Group your nesting planters to one side of the door, placing the tallest one in the back and the shortest in the front to create a pleasing triangular composition.
- Fill the planters with high-contrast flowers—think bright reds or yellows against deep green foliage—to ensure the colors ‘pop’ even from the street.
- Hang a simple, high-quality eucalyptus wreath on the door using a magnetic hanger or a discreet hook; the green tones bridge the gap between the house and the garden.
- Update your house numbers with a modern, vertical sign that complements the hardware on your door, ensuring it is visible and well-lit for a polished, functional finish.
The Joy of a Curated Home
Transforming your space doesn’t require a massive budget or a professional contractor; it just takes a little bit of inspiration and the willingness to get your hands a little messy. Whether you’re baking cookies or staining a fence, the real magic lies in the process of making something your own. These TikTok-inspired hacks are more than just trends—they are opportunities to infuse your personality into your surroundings and create memories that last long after the season changes. So, pick one project this weekend and see how a few small changes can completely shift the energy of your home.