

In the whirlwind of our modern lives, we often find ourselves searching for a sense of grounding. We crave a sanctuary that doesn’t just house our belongings, but actually breathes with us, reflecting our deepest desires for peace and beauty. This is the heart of slow living: the intentional act of curating your surroundings to foster a slower, more meaningful rhythm of life. It’s about finding magic in the mundane, from the way light hits a velvet room divider to the sound of rain flowing through a perfectly designed garden path.
Creating a dream space isn’t about following every trend on your feed; it’s about the sensory experience of your home. Imagine walking through your front door and being greeted by the earthy scent of cedar and the visual warmth of layered flower pots, or stepping into a backyard that feels like a permanent tropical escape. It’s about the textures we touch, the colors that soothe our eyes, and the pride we feel when a DIY project comes to life. Let’s explore how to transform your home into a curated masterpiece of comfort and style.
How to Design a Tropical Island Theme for the Ultimate Home Vacation

Why we love this
There is something profoundly soul-soothing about the island aesthetic, where the boundary between the indoors and the lush outdoors simply melts away. We love this because it brings the intoxicating aroma of jasmine and hibiscus right to your doorstep, paired with the tactile luxury of natural rattan and weathered teak. When you step into a room designed with this theme, you can almost feel the phantom warmth of a tropical sun and the rhythmic sway of palm fronds, turning every afternoon tea into a mini-getaway that rejuvenates your spirit and calms the mind.
Essential Elements:
- Natural fiber rugs (sisal or jute)
- Large-leaf indoor plants like Monstera or Birds of Paradise
- Rattan or bamboo furniture pieces
- Sheer linen curtains for airy light filtration
- A color palette of sand, turquoise, and deep jungle green
How to make it
- Start by clearing the space to create an airy, open layout that mimics the flow of an ocean breeze. Remove heavy drapes and replace them with light-filtering sheer fabrics.
- Introduce oversized botanical elements. Position a large Monstera Deliciosa in a corner with bright, indirect light; ensure the pot has drainage to prevent root rot.
- Layer your textures. Place a thick jute rug as your base, then add a smaller, softer cotton rug on top to provide a cushioned feel underfoot.
- Incorporate natural wood accents. Use teak oil to treat any wooden furniture, giving it that rich, sun-kissed glow characteristic of island resorts.
- Finish with sensory details. Use a diffuser with coconut or lime essential oils and curate a playlist of soft, acoustic island melodies to complete the immersive vacation atmosphere.
How to Style Aesthetic Drainage Ideas for a Perfect Garden Flow

Why we love this
Functional garden elements often get overlooked, but there is a hidden elegance in managing the flow of nature. We love aesthetic drainage because it transforms a potential mud-patch into a stunning water feature that delights the senses during a downpour. The sight of water dancing over smooth, variegated river stones and the gentle, melodic bubbling sound it produces creates a tranquil atmosphere. It’s the perfect marriage of practical engineering and high-end landscape design, ensuring your garden remains both dry and visually captivating regardless of the weather.
Essential Elements:
- Smooth river rocks and pebbles in various sizes
- Permeable landscape fabric
- Trench shovel or spade
- Hardy moisture-loving plants like Sedges or Iris
- Perforated drainage pipe (optional for high volume)
How to make it
- Identify the natural low points in your yard where water tends to pool. Map out a winding path that looks natural rather than a straight, industrial line.
- Excavate a trench approximately 12 inches deep and 18 inches wide along your mapped path. Slope the trench gradually downward toward a safe exit point, like a rain garden or street drain.
- Line the entire trench with a heavy-duty, permeable landscape fabric to prevent soil from clogging your stones while allowing water to seep through.
- Fill the center of the trench with larger, jagged rocks to create a stable base. Over these, layer smooth river stones, varying the colors and sizes to mimic a natural dry creek bed.
- Place larger boulders along the edges of the “stream” to act as anchors, and tuck water-loving plants into the gaps to soften the look and absorb excess moisture.
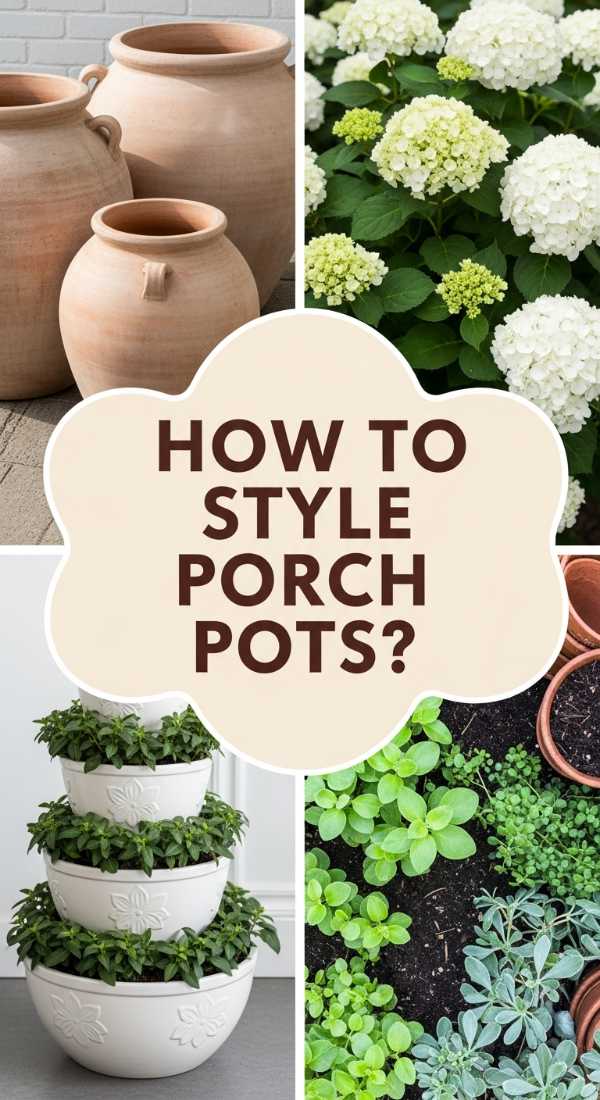
How to Curate Front Porch Flower Pots for an Instant Curb Appeal Boost
Why we love this
Your front porch is the “handshake” of your home, and nothing says welcome like a vibrant, well-curated collection of flower pots. We love this approach because it allows for seasonal expression and instant gratification in home styling. The fragrance of fresh blooms like petunias or geraniums mixed with the damp, rich smell of potting soil creates an inviting atmosphere. Visually, the pops of color against your home’s exterior provide a sophisticated polish that makes even a simple entryway feel like a grand invitation to slow down and enjoy the view.
Essential Elements:
- Varying sizes of weather-resistant planters
- High-quality potting mix with perlite
- A mix of “Thriller, Filler, and Spiller” plants
- Slow-release fertilizer
- Hand trowel and watering can
How to make it
- Select three pots of different heights but within the same color family (e.g., shades of terracotta or navy) to create a cohesive yet dynamic visual cluster.
- Fill each pot three-quarters full with high-quality potting mix. Mix in a handful of slow-release fertilizer granules to ensure your plants have nutrients for the entire season.
- Choose your “Thriller”: a tall, focal plant like a Canna Lily or a Spike Dracaena. Place this in the center or back of the pot.
- Surround the thriller with “Fillers”: mounding plants like Marigolds or Lantana that add volume and density. Pack them closely for a lush, professional look.
- Finish with “Spillers”: trailing plants like Sweet Potato Vine or Creeping Jenny that cascade over the edges, softening the hard lines of the container. Water thoroughly until liquid runs out of the bottom.
How to Use a Blue Room Divider for an Elegant Studio Partition

Why we love this
In a multi-functional studio, a room divider isn’t just a wall—it’s a statement of style and boundaries. We love using a deep, blue divider because it acts as a calming anchor in a busy space, offering a cool, sophisticated backdrop that feels both modern and timeless. The rich, velvety texture of a navy screen or the sleek lines of a sapphire folding panel can transform a chaotic open floor plan into a series of intentional, cozy zones. It provides a sense of privacy and order, making your sleep or work area feel like a secluded retreat from the rest of the world.
Essential Elements:
- A folding or standing room divider in a shades of Blue
- Measuring tape
- Anti-scratch furniture pads
- Accent lighting (like a floor lamp or LED strip)
- Level (to ensure stability)
How to make it
- Measure the width of the area you wish to partition. Ensure there is enough clearance for foot traffic on at least one side of the divider.
- Select a blue shade that complements your existing decor; navy works well for traditional spaces, while a bright teal or powder blue suits modern or boho vibes.
- Place anti-scratch pads on the feet of the divider to protect your flooring. Position the divider in a “Z” or “L” shape rather than a flat line to increase its structural stability.
- Adjust the angles of the panels using a level to ensure the unit doesn’t lean. The folds should be even and intentional to create a clean silhouette.
- Enhance the partition by placing a warm-toned floor lamp behind it. The light will catch the blue hue, creating a soft, ambient glow that defines the new “room” without closing it off completely.
How to Create a DIY Grill Station for Affordable Outdoor Entertaining

Why we love this
The DIY grill station is the ultimate tribute to the joy of outdoor cooking and communal gatherings. We love this project because it elevates the standard backyard barbecue into a professional-feeling culinary experience without the massive price tag. There is a primal, satisfying sensory joy in the smell of wood smoke, the sizzle of meat on a hot grate, and the tactile feel of a sturdy prep counter. It turns the act of cooking into a performance and a social event, creating a dedicated hub where friends can gather, drinks in hand, while the chef works their magic in a beautiful, organized setting.
Essential Elements:
- Pressure-treated lumber or cedar for the frame
- Concrete pavers or stone tiles for the countertop
- Standard charcoal or gas grill
- Outdoor-rated wood screws and brackets
- Hooks for grilling utensils
How to make it
- Measure your grill’s dimensions. Design a wooden frame that allows for at least 6 inches of clearance around the heat source for safety. Use cedar for natural rot resistance.
- Construct the base frame using 4×4 posts for legs and 2x4s for the horizontal supports. Use a drill and heavy-duty outdoor screws to secure all joints tightly.
- Install a lower shelf using wood slats. This provides airflow and a place to store charcoal bags or propane tanks off the ground.
- For the countertop, lay down a sheet of cement board over the wooden frame. Adhere stone tiles or large concrete pavers on top using outdoor construction adhesive to create a heat-resistant prep surface.
- Sand all wooden surfaces to a smooth finish and apply a weather-resistant stain. Add stainless steel hooks to the sides for your tongs and spatulas, and ensure the entire station is level before the first use.
How to Mix Concrete Colors for a Sophisticated Outdoor Aesthetic

Why we love this
Concrete is often thought of as cold and industrial, but when you master the art of color mixing, it becomes a warm, artisanal material. We love this technique because it allows you to customize your outdoor space with earthy terracottas, moody charcoals, or sandy beiges that mimic natural stone. The process is incredibly tactile—there’s a meditative quality to folding pigments into the cool, heavy slurry. Once cured, the matte, velvety finish of colored concrete feels high-end and intentional, providing a sophisticated foundation for patios, planters, or custom stepping stones.
Essential Elements:
- High-strength concrete mix
- Liquid or powder concrete pigment
- Large mixing tub or wheelbarrow
- Measured mixing bucket for water
- Stirring paddle or drill mixer attachment
How to make it
- Determine your desired color intensity. Always perform a small “test puck” first, as concrete dries significantly lighter than it looks when wet.
- Pour the required amount of water into your mixing tub. If using liquid pigment, shake the bottle thoroughly and mix it directly into the water before adding the dry concrete. This ensures the most even color distribution.
- Gradually add the dry concrete mix into the colored water. Use a heavy-duty drill mixer to incorporate the materials until you reach a consistency similar to peanut butter.
- If using powder pigment, add it slowly during the mixing process. Continue stirring for at least 5 minutes to ensure there are no “streaks” of concentrated color left in the batch.
- Pour the mixture into your forms. Tap the sides of the forms with a rubber mallet to release air bubbles, which can cause unsightly voids. Allow the concrete to cure in a shaded area for at least 48 hours for the full color to develop.
How to Style Patriotic Wreaths for a Proud Seasonal Front Door

Why we love this
Seasonal decor is a wonderful way to mark the passing of time, and a patriotic wreath brings a sense of pride and classic Americana to your home. We love this because it combines bold primary colors with rustic textures like burlap and grapevine. The visual contrast of crisp red and white stripes against a deep navy field, accented by the scent of dried eucalyptus or cedar, creates a striking focal point. It’s a celebratory gesture that feels both festive and dignified, offering a warm welcome to guests during summer holidays while showcasing your personal style and heritage.
Essential Elements:
- Grapevine or straw wreath base
- Red, white, and blue wired ribbons
- Wooden stars or metallic accents
- Artificial berries or seasonal greenery
- Floral wire and hot glue gun
How to make it
- Start with a sturdy grapevine base. This provides a rustic texture that balances the bright colors of patriotic ribbons.
- Create a multi-layered bow using the red and white striped ribbon and a solid blue ribbon. Use wired ribbon so you can “fluff” the loops into a full, three-dimensional shape. Secure it to the top or side with floral wire.
- Incorporate greenery. Tuck sprigs of boxwood or eucalyptus into the grapevine, securing them with small dabs of hot glue. This adds a lush, living look to the arrangement.
- Add your symbolic elements. Distribute wooden stars evenly around the wreath, or cluster them near the bow for a concentrated burst of “stars and stripes.”
- Check for balance by hanging the wreath on a temporary hook. Adjust the elements so the weight is distributed evenly and the colors pop against the color of your front door.
How to Recreate an Island Theme Interior for a Constant Summer Feel

Why we love this
Why wait for a vacation when you can live inside one? We love the island interior theme because it prioritizes comfort, light, and a connection to the natural world. Imagine the feeling of cool linen against your skin, the visual serenity of a sun-drenched room, and the organic textures of sea-grass and driftwood. It’s a design style that rejects clutter and embraces the “slow” in slow living, encouraging you to kick off your shoes, breathe deeply, and enjoy a space that feels perpetually rinsed by the sea and warmed by the sun.
Essential Elements:
- Whitewashed or light oak flooring
- Slipcovered furniture in white or cream linen
- Woven wall hangings or baskets
- Framed botanical prints
- Natural light maximization (mirrors and light colors)
How to make it
- Switch out heavy upholstery for breathable fabrics. Use white cotton or linen slipcovers on sofas to create a bright, clean base that feels relaxed and unpretentious.
- Focus on the walls. Apply a fresh coat of warm white paint (look for undertones of sand rather than blue) to bounce light around the room.
- Incorporate “found” objects from nature. Arrange a collection of large seashells on a coffee table or lean a piece of sculptural driftwood against a corner to serve as organic art.
- Maximize your natural light. Place large mirrors opposite windows to double the visual space and reflect the sky into your home.
- Layer in natural fibers. Add a sea-grass rug and several woven baskets to store blankets. These textures provide the tactile warmth essential to the island vibe.
How to Integrate Hidden Drainage Ideas for a Professional Landscape Look

Why we love this
The mark of a truly professional landscape is functionality that remains invisible. We love hidden drainage because it solves the problem of water runoff without interrupting the visual flow of a pristine lawn or garden bed. There is a quiet satisfaction in knowing that beneath a beautiful patch of turf or a decorative gravel path lies a sophisticated system protecting your home’s foundation. It allows the beauty of your plants and hardscaping to take center stage, providing peace of mind during heavy storms without any industrial eyesores like plastic pipes or open concrete culverts.
Essential Elements:
- French drain pipe (perforated)
- Drainage fabric (sock or sheet)
- Clean 3/4 inch crushed stone
- Pop-up emitter for the exit point
- Turf or sod for covering
How to make it
- Dig a trench that is roughly 18 inches deep and 12 inches wide. Ensure the trench has a 1% slope (1 inch of drop for every 8 feet of length) away from your home.
- Line the trench with non-woven drainage fabric. Lay the perforated pipe in the center, with the holes facing downward to allow water to enter from the bottom as the water table rises.
- Fill the space around and over the pipe with clean, crushed stone. Do not use gravel with “fines” (dust), as this will clog the system over time.
- Wrap the fabric over the top of the stones, creating a “burrito” effect that keeps soil out of the drainage channel.
- Cover the system with 2-3 inches of topsoil and replace the sod. Use a pop-up emitter at the end of the line; it remains flush with the grass until water pressure forces it open, keeping the entire system completely hidden from view.
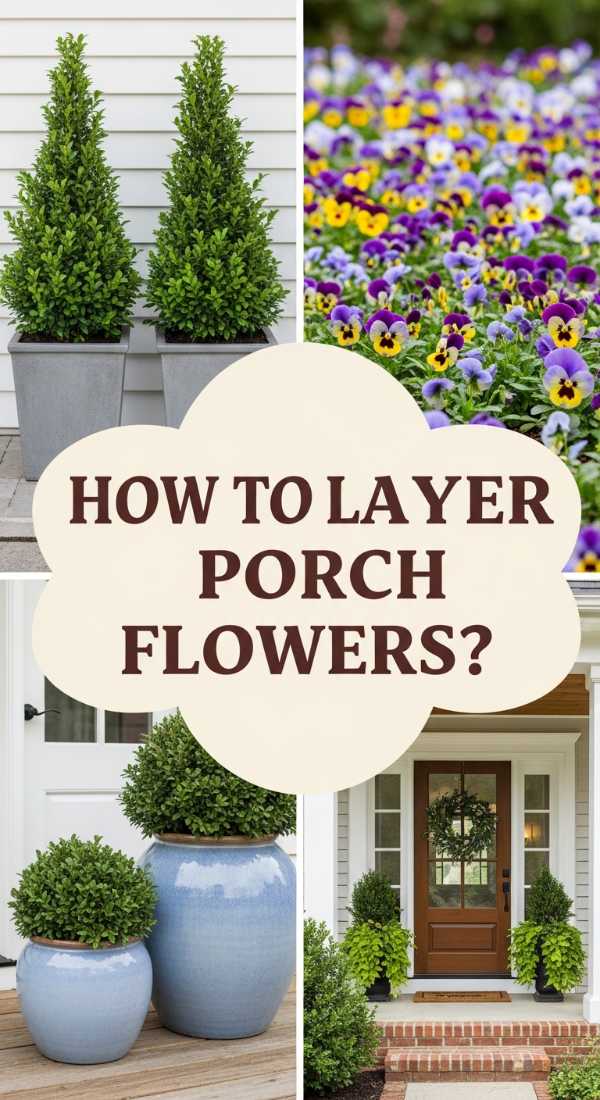
How to Layer Front Porch Flower Pots for a Luxuriously Welcoming Entry
Why we love this
Layering flower pots is the secret weapon of high-end designers to create depth and abundance. We love this because it adds a three-dimensional quality to your porch, making it feel like a lush, curated garden rather than just a few scattered plants. The sensory richness of various leaf shapes—from the feathery fronds of a fern to the broad, waxy leaves of a hosta—creates a visual feast. When you walk through a layered entry, the vertical height and clustered colors envelop you, providing a sense of privacy and luxury that makes arriving home the best part of your day.
Essential Elements:
- A collection of 5-7 pots in varying heights and shapes
- Plant stands or wooden crates for added elevation
- Coordinated plant palette (e.g., all greens and whites)
- Mulch or moss to cover the soil
- Consistent watering schedule or drip system
How to make it
- Choose a “hero” pot—the largest and most ornate of the group—and place it at the back of your arrangement, nearest to the door or wall.
- Use plant stands or inverted smaller pots to elevate mid-sized containers. This creates a “stadium seating” effect, ensuring every plant is visible and gets adequate sunlight.
- Group your plants in odd numbers (3, 5, or 7). This is more pleasing to the eye and looks less formal/rigid than even pairs.
- Vary the textures. Place a fine-textured plant, like Asparagus Fern, next to a bold-textured one, like a Caladium, to create visual interest through contrast.
- Bridge the gap between the pots and the porch floor by placing the smallest pots at the very front, angled slightly toward the path. Cover the soil in all pots with matching green moss or black mulch to create a unified, professional finish.
Embracing the Slow Home
Curating your dream space is a journey, not a destination. Whether you are mixing custom concrete colors or carefully layering petunias on your porch, each step is an invitation to be present and find joy in your surroundings. By focusing on sensory details and intentional design, you transform your home from a place where you simply exist into a sanctuary where you truly thrive. Remember, the art of slow living is found in the details—the way the light hits, the scent of the garden, and the comfort of a space that is uniquely yours. Happy decorating!