
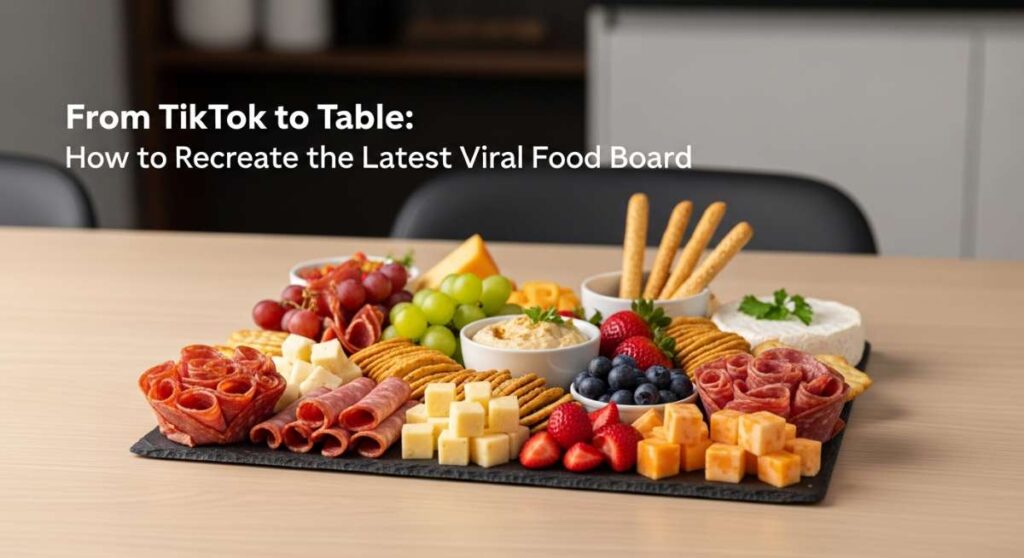
From TikTok to Table: How to Recreate the Latest Viral Food Board
Have you ever found yourself falling down a midnight TikTok rabbit hole, mesmerized by the rhythmic slicing of artisan bread and the artistic drizzle of honey over a mountain of creamy burrata? You aren’t alone. There is something profoundly soothing about the ‘Food Board’ aesthetic—a trend that has moved from our screens into our hearts, turning simple outdoor gatherings into curated experiences that feel like a scene from a Nancy Meyers film.
Bringing these viral moments to life is about more than just food; it is about the ritual of preparation and the joy of sharing. Whether you are setting up on a sun-drenched hill or your own backyard, creating a viral-worthy food board is about capturing a feeling of abundance and effortless beauty. Let’s dive into the secrets of making your next picnic not just a meal, but a memory.
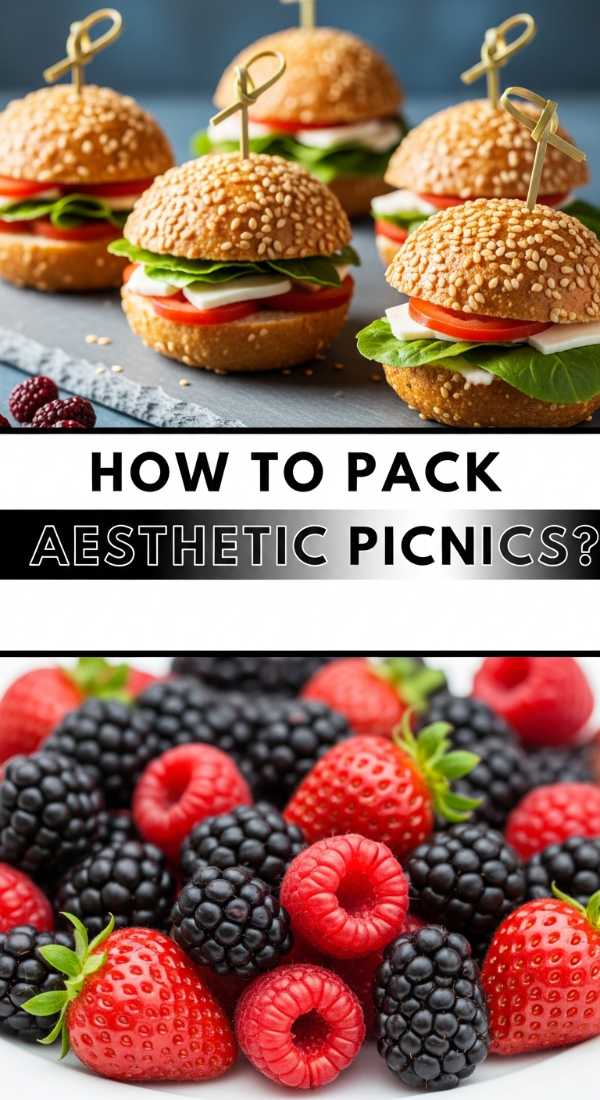
How to pack aesthetic picnics?
Why we love this
There is a specific kind of magic that happens when you replace plastic wrap with linen and Tupperware with wicker. We love the aesthetic picnic because it appeals to every sense: the tactile softness of a Turkish cotton throw, the visual feast of color-coordinated fruits, and the gentle clink of real glassware in the breeze. It transforms a mundane lunch into an elevated escape, making even a local park feel like the rolling hills of Tuscany or a coastal dreamscape.
Ingredients
- Linen or cotton oversized blanket
- Wicker picnic basket with leather straps
- Wooden charcuterie boards
- Linen napkins in neutral tones
- Fresh wildflowers and a small twine tie
- Glass carafes for infused water
- Ceramic plates
How to make it
- Begin by selecting a color palette that complements your surroundings; for a forest setting, go with sage and cream, or for a beach, choose sandy beiges and sky blues.
- Layer your textiles starting with a waterproof base layer to protect from damp grass, then top with your aesthetic linen throw, smoothing out wrinkles to create a flat canvas for your food.
- Arrange your wooden boards off-center to create a dynamic, asymmetrical look, which is more pleasing to the eye and provides better ‘flat lay’ photo opportunities.
- Decant all store-bought items into ceramic bowls or onto wooden boards to remove ‘commercial’ visual noise, ensuring that every element looks handmade and curated.
- Add the finishing touch by scattering loose grapes or sprigs of rosemary around the edges of the boards and tucking a small bundle of wildflowers into the corner of the basket.
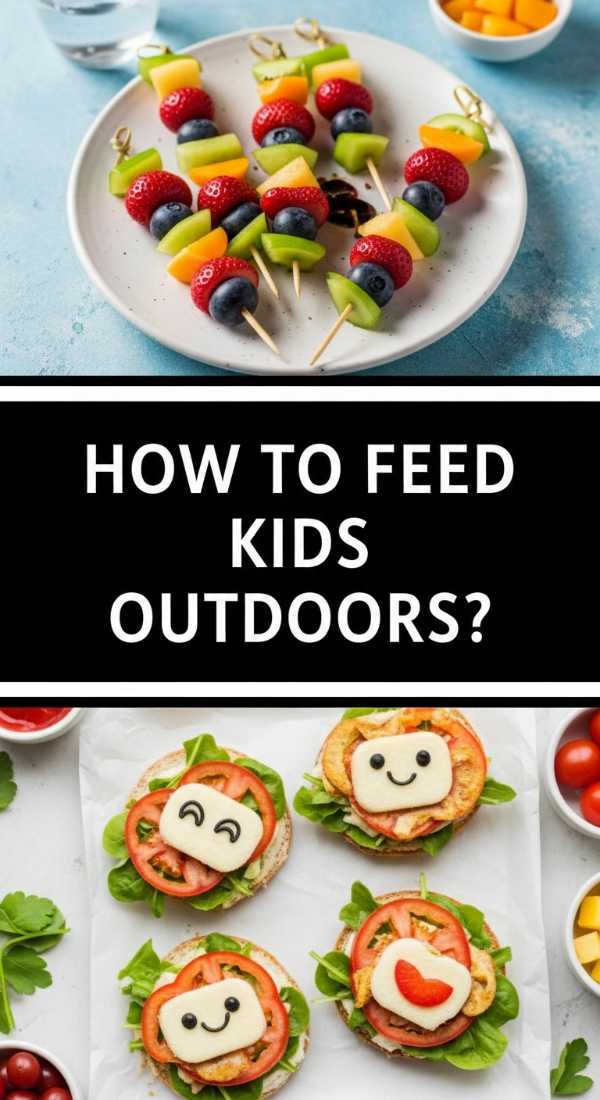
How to feed kids outdoors?
Why we love this
Feeding children outdoors turns a high-stress mealtime into an adventurous exploration where ‘messy’ is part of the fun. We love this approach because it leans into the tactile nature of finger foods, allowing kids to pick and choose from vibrant colors and interesting shapes. The fresh air often encourages even the pickiest eaters to try a new berry or a slice of star-shaped cucumber while they are distracted by the sights and sounds of nature.
Ingredients
- Bento-style divided containers
- Silicone cupcake liners
- Cookie cutters (stars, hearts, animals)
- Reusable bamboo skewers (blunt tips)
- Miniature pita pockets
- Yogurt dipping sauce
- Pre-cut fruit and veggie shapes
How to make it
- Start by prepping your vegetables; use star or flower-shaped cookie cutters on cucumbers, melons, and cheese slices to make the healthy options visually irresistible to small hands.
- Utilize silicone cupcake liners inside larger containers to create colorful barriers between different foods, preventing ‘flavor bleed’ which often causes kids to reject snacks.
- Assemble ‘deconstructed’ sandwiches by placing mini pita pockets in one section and various fillings like turkey rolls or hummus in others, allowing the child to build their own bite.
- For protein, roll thin slices of ham or turkey into tight cylinders and secure them with a small piece of chive or just place them snugly in a row to keep them from unravelling.
- Finish the preparation by including a ‘dip station’ with mild ranch or Greek yogurt sweetened with honey, as the action of dipping provides a sensory engagement that keeps kids seated and eating longer.
How to plan date picnics?

Why we love this
A date picnic is the ultimate romantic gesture because it shows time and intention; it is the physical manifestation of ‘I want to spend quiet time with you.’ We love the intimacy of sharing a small board, where your hands occasionally brush against each other as you reach for the same piece of prosciutto or a chocolate-dipped strawberry. As the sun sets and the golden hour light hits your picnic spread, the world seems to shrink down to just the two of you and a bottle of chilled rosé.
Ingredients
- Triple-cream brie or camembert
- Prosciutto di Parma
- Dark chocolate truffles
- Candied walnuts
- Sparkling cider or chilled wine
- Small portable Bluetooth speaker
- Cozy throw blanket for two
How to make it
- Select a location that offers both privacy and a view, preferably arriving 45 minutes before ‘Golden Hour’ to ensure the most flattering light for your date and your photos.
- Prepare a ‘charcuterie for two’ by placing a wheel of brie in the center of a small board and making a small ‘X’ cut on top, then warming it slightly before packing so it remains gooey.
- Fan out the prosciutto in delicate ribbons rather than flat slices, creating height and texture that looks professional and is easier to pick up with fingers.
- Pack a ‘mood kit’ including a curated playlist of low-fi beats or soft jazz to create an auditory bubble that blocks out surrounding park noise.
- Always include a small ‘sweet finish’ like artisan chocolates tucked into a corner of the board, providing a decadent conclusion to the savory meal without needing extra plates.
How to make simple snacks?

Why we love this
Sometimes the most viral moments come from the simplest ingredients treated with respect and style. We love simple snacks because they don’t require hours in the kitchen, yet they provide that satisfying crunch and salty-sweet balance that makes outdoor lounging so addictive. There is a primal joy in cracking open a perfectly salted pistachio or biting into a crisp apple slice that has been paired with a sharp cheddar, proving that you don’t need a culinary degree to create a masterpiece.
Ingredients
- High-quality sea salt crackers
- Sharp white cheddar block
- Fuji or Honeycrisp apples
- Roasted salted pistachios
- Dried apricots
- Local honey
How to make it
- Slice your sharp cheddar into uniform triangles—consistency is key to making simple ingredients look high-end and intentional.
- Core and slice the apples into thin wedges, then immediately toss them in a bowl with a squeeze of lemon juice to prevent browning and keep them crisp for hours.
- Create ‘flavor clusters’ on your board by grouping the nuts in a small pile and placing the dried apricots directly next to the cheese to encourage specific pairing combinations.
- Drizzle a small amount of honey into a tiny glass jar rather than pouring it over the food, allowing guests to control the sweetness and preventing the crackers from becoming soggy.
- Arrange the crackers in a tight, overlapping shingle pattern along the edge of the board to create a frame for the other ingredients, ensuring they stay organized during transport.
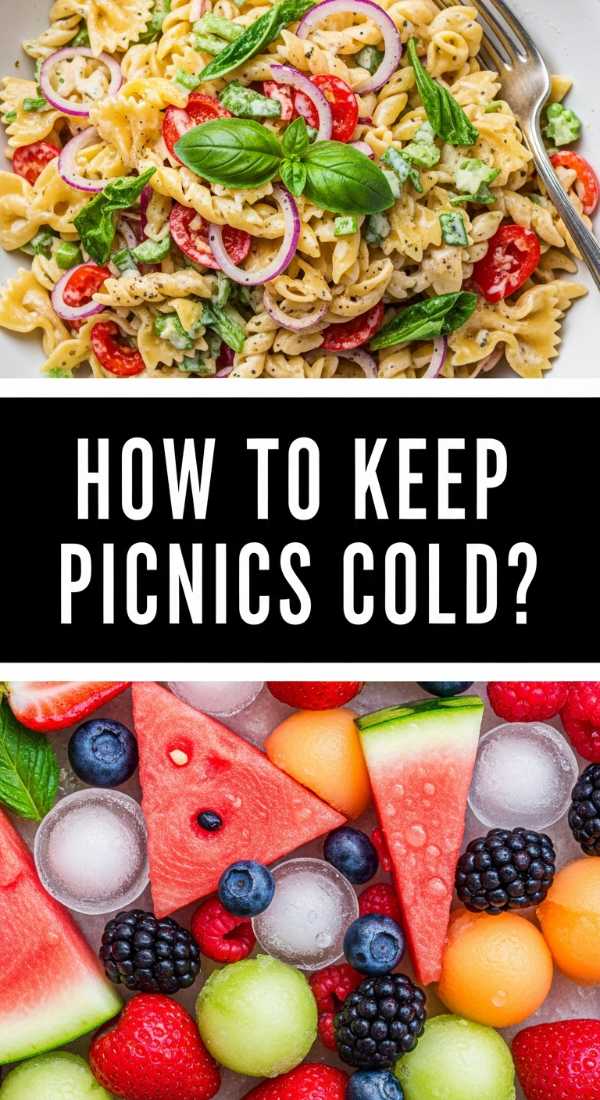
How to keep picnics cold?
Why we love this
There is nothing quite as disappointing as a warm salad or a sweaty piece of cheese on a hot day. We love the ‘cold prep’ technique because it ensures that every bite remains refreshing, crisp, and safe to eat, even when the sun is beating down. Mastering the art of the ‘chill’ means you can linger longer over your board, confident that your sparkling water will still have that icy bite and your dips will maintain their perfect, thick consistency.
Ingredients
- Insulated cooler bag with a hard liner
- Reusable gel ice packs
- Frozen water bottles
- Frozen grapes
- Refreezable ‘fake’ ice cubes (plastic-coated)
How to make it
- Pre-chill your cooler bag in the freezer or fridge for at least two hours before packing to ensure the insulation is already working against the external heat.
- Place large, heavy gel packs at the very bottom of the bag, as cold air naturally sinks and will keep the entire contents chilled from the base up.
- Use frozen water bottles as ‘dual-purpose’ ice packs; they will keep your food cold during the journey and provide ice-cold drinking water as they slowly melt.
- Layer your most perishable items, like dairy and meats, directly on top of the ice packs, while placing produce and breads near the top where it is slightly less cold.
- Add a handful of frozen grapes to your wine glasses or water tumblers; they act as edible ice cubes that chill the liquid without diluting it as they thaw.
How to prep healthy picnics?
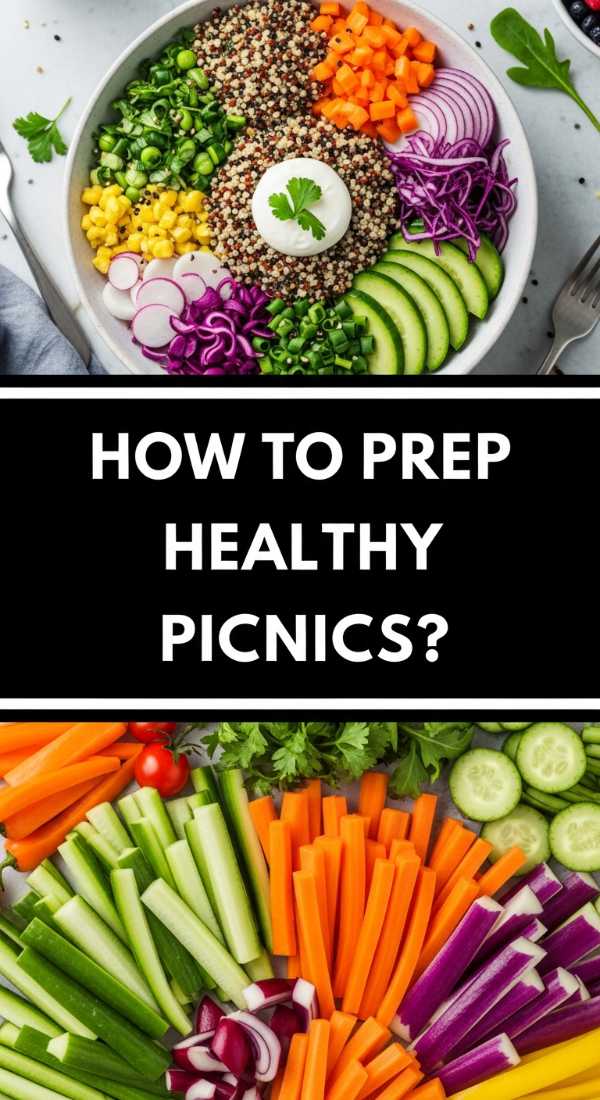
Why we love this
A healthy picnic leaves you feeling energized and vibrant rather than weighed down by heavy fats and sugars. We love this approach because it celebrates the natural crunch of raw vegetables and the bright, zesty notes of citrus and herbs. It is a celebration of the garden, where the vibrant purples of radishes and the deep greens of snap peas create a natural mosaic that looks as good as it feels to eat.
Ingredients
- Multi-colored heirloom carrots
- Snap peas and sliced radishes
- Roasted red pepper hummus
- Quinoa salad with parsley and lemon
- Sliced turkey breast or chickpeas
- Watermelon wedges with lime zests
How to make it
- Blanch your hardier vegetables like green beans or broccoli for exactly 60 seconds in boiling water then plunge them into ice, which locks in a bright green color and a perfect ‘snap’ texture.
- Pack your grain salads in wide-mouthed jars, placing the dressing at the very bottom, followed by the grains, and then the fresh herbs on top to keep them from wilting.
- Slice your watermelon into thick wedges and sprinkle with a mixture of lime zest and a tiny pinch of chili flakes to elevate the natural sweetness with a sophisticated kick.
- Choose lean proteins like grilled chicken strips or seasoned chickpeas and store them in airtight containers to maintain their moisture without making other items soggy.
- Instead of heavy chips, offer air-popped popcorn seasoned with nutritional yeast and smoked paprika for a high-volume, low-calorie crunch that satisfies the ‘snack’ craving.
How to pack beach snacks?

Why we love this
The beach presents a unique challenge—the dreaded sand crunch—but a well-packed beach board is the height of summer luxury. We love beach snacks because they lean into saltiness and hydration, echoing the environment around you. There is a deep satisfaction in sitting on your towel, the salt spray on your skin, and opening a container of perfectly chilled, sand-free mango or salty pretzels that balance the heat of the sun.
Ingredients
- Individual airtight containers (lock-lid)
- Pre-cut tropical fruits (mango, pineapple)
- Salted pretzels or pita chips
- Beef jerky or plant-based jerky
- Insulated tumblers with lids
- Wet wipes and a small hand towel
How to make it
- Prioritize individual portioning; instead of one large board, give everyone their own small, lidded container to minimize the amount of time food is exposed to blowing sand.
- Avoid ‘sticky’ foods like open honey or wet dips unless they are in deep, narrow jars that are easy to dip into without exposing a wide surface area to the elements.
- Pack a ‘rinse station’ consisting of a separate bottle of tap water and a small towel to clean your hands thoroughly before touching any food items.
- Use insulated tumblers for everything, including fruit salads, as the vacuum seal keeps the heat out and ensures the fruit stays icy and refreshing even in direct sunlight.
- Choose ‘sand-proof’ snacks like whole grapes, cherries, or individually wrapped cheese sticks that can be peeled back and eaten without direct finger-to-food contact.
How to style picnic jars?
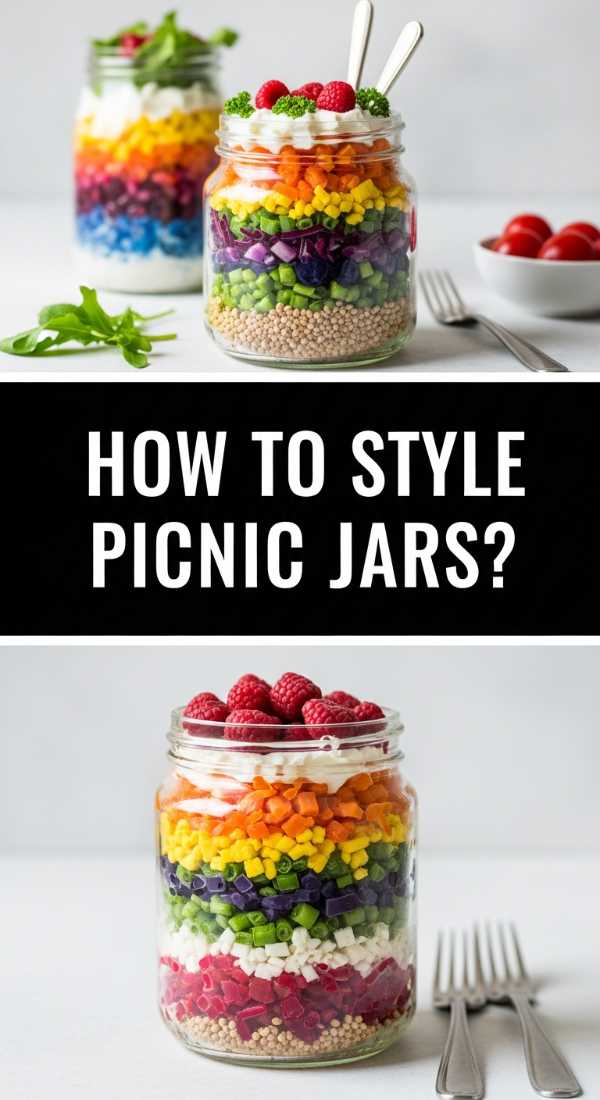
Why we love this
Picnic jars are the darling of social media for a reason: they are gorgeous, portable, and perfectly portioned. We love the ‘vertical aesthetic’ of a jar, where you can see every layer of a salad or dessert through the glass like a culinary terrarium. They eliminate the need for messy serving spoons and plates, making them the ultimate ‘grab and go’ luxury for a stylish afternoon outdoors.
Ingredients
- Wide-mouth Mason jars (16 oz)
- Vinaigrette or creamy dressing
- Heavy veggies (cucumber, chickpeas)
- Leafy greens (spinach, arugula)
- Toasted seeds or nuts
- Edible flowers (optional)
How to make it
- The ‘Wet-to-Dry’ Rule: Always pour 2 tablespoons of dressing into the bottom of the jar first; this ensures your greens stay crisp and never touch the liquid until you shake it.
- Layer your ‘barrier’ ingredients next—these are items like chickpeas, cucumbers, or carrots that actually benefit from marinating in the dressing at the bottom.
- Add your delicate items like tomatoes, cheese, or fruit in the middle layer, keeping them separate from both the dressing and the heavy grains.
- Pack your greens tightly at the very top, leaving about half an inch of headspace to allow the ingredients to move when you are ready to shake and serve.
- Place a small circle of parchment paper over the top of the greens before screwing on the lid to prevent any condensation from making the leaves soggy during transport.
How to serve picnic dips?
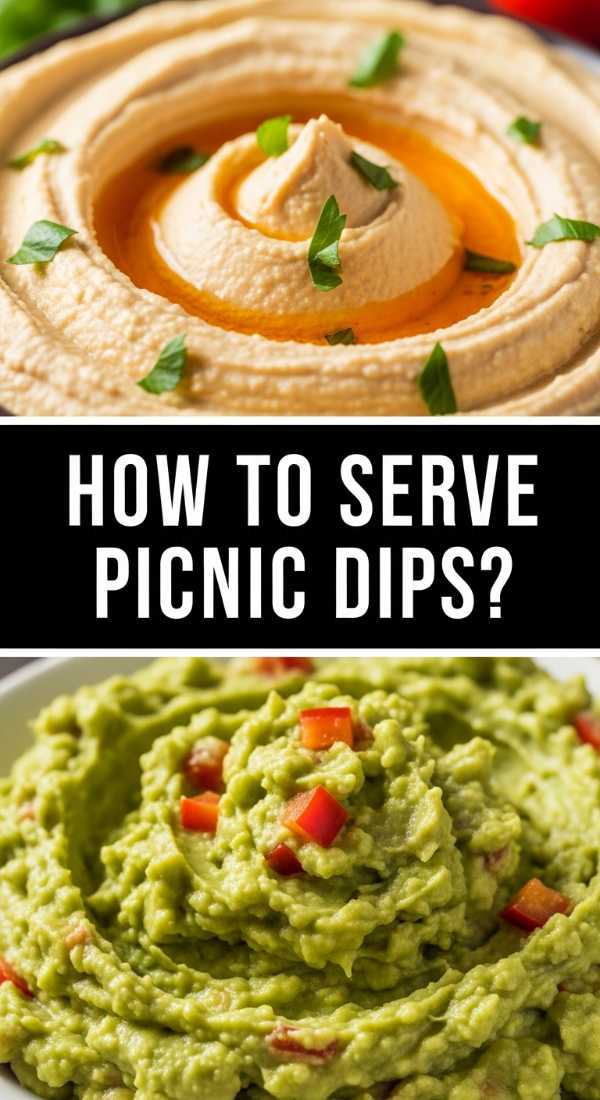
Why we love this
Dips are the social glue of any food board; they are the centerpieces that everyone gathers around. We love them because they offer a variety of textures, from the velvet smoothness of whipped feta to the chunky, rustic feel of a fresh salsa. A well-presented dip, garnished with colorful oils and fresh herbs, acts as a visual anchor for your entire picnic spread, inviting everyone to dig in and share.
Ingredients
- Whipped feta or Greek yogurt base
- Extra virgin olive oil
- Za’atar or smoked paprika
- Fresh mint and parsley
- Toasted pine nuts
- Pomegranate arils
How to make it
- Transfer your dip into a shallow, wide ceramic bowl rather than a deep one; this provides more surface area for beautiful garnishes and makes it easier to scoop.
- Use the back of a spoon to create deep ‘swirls’ or a well in the center of the dip, which will act as a reservoir for your oil and toppings.
- Drizzle high-quality olive oil into the swirls and then sprinkle your dry spices (like Za’atar) directly onto the oil to help the flavors bloom and stick.
- Garnish with a ‘pop’ of color using fresh herbs and pomegranate arils; the contrast of the green and red against a white dip looks stunning and artisanal.
- Keep the dip chilled until the absolute last second, as dairy-based dips can lose their structure and become runny if left in the sun for more than 20 minutes.
How to organize picnic baskets?
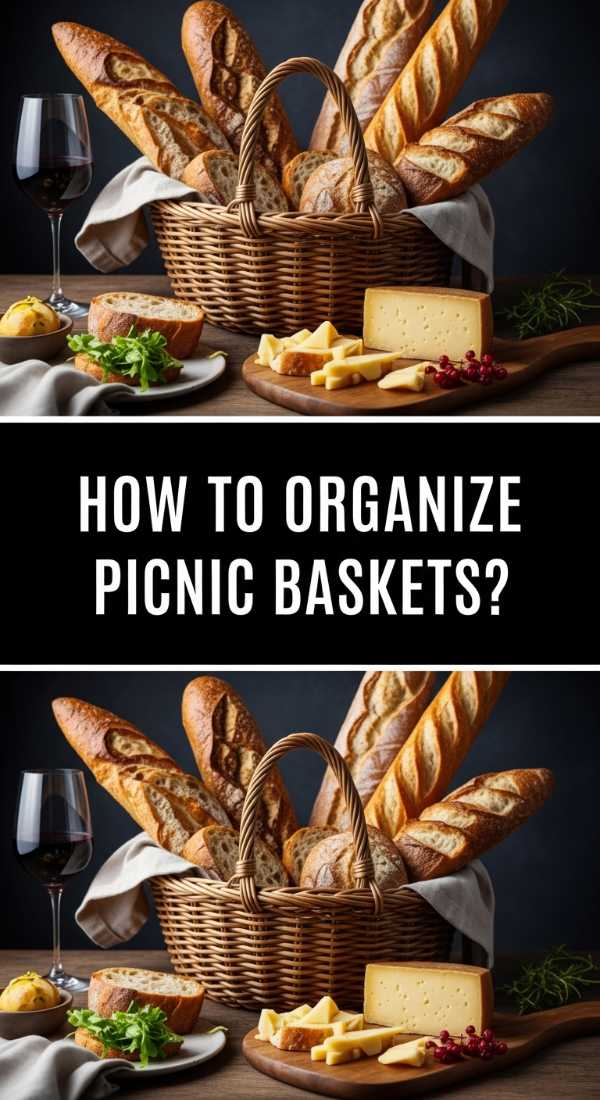
Why we love this
There is a hidden art to packing a basket that feels like a puzzle coming together. We love a well-organized basket because it protects your hard work—preventing the ‘squashed bread’ syndrome and ensuring that nothing leaks. An organized basket means that when you reach your destination, you aren’t digging through a chaotic mess, but rather unveiling a beautiful, orderly feast that is ready to be enjoyed immediately.
Ingredients
- Rigid-sided picnic basket
- Lightweight cutting board (as a flat base)
- Tea towels for padding
- Small bungee cords or ribbons
- Lightweight nesting containers
How to make it
- Start by placing a flat, rigid item like a cutting board or a large book at the very bottom of the basket to create a stable, level floor for your glass jars and containers.
- Pack the heaviest, densest items (like bottles of water or glass jars) in the center, directly over the handle’s balance point, to make the basket easier to carry without tipping.
- Use clean tea towels to fill in the ‘dead space’ between containers; this prevents items from sliding around and clinking during the walk, while also providing extra napkins for later.
- Place fragile items like bags of chips, soft breads, or berry containers at the very top, ensuring nothing is resting on them that could cause bruising or crushing.
- Double-bag any items that contain liquid in silicone reusable bags as a fail-safe against leaks, ensuring that your beautiful wicker basket stays clean and dry for your next outing.
Conclusion
Recreating the viral food board trend is about more than just the food on the plate; it is a celebration of the ‘slow living’ movement. By taking the time to layer your jars, garnish your dips, and choose the right linens, you are turning a simple meal into an act of self-care and connection. So, grab your basket, head to the nearest patch of green, and let the sunshine be your filter. Your TikTok-worthy table is waiting!