
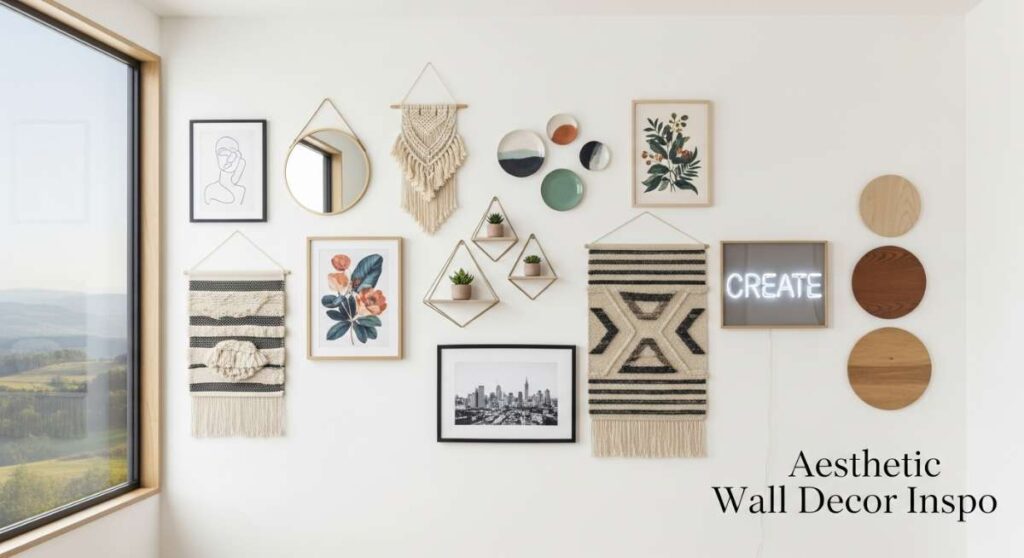
Have you ever walked into a room and felt an instant shift in your mood? Maybe it was the way the light caught a specific texture on the wall, or how a collection of memories seemed to wrap around you like a warm hug. Our homes are more than just four walls and a roof; they are the canvases of our lives, and the way we decorate those walls tells a story that words often fail to capture. In today’s fast-paced world, creating a sanctuary that feels uniquely ‘you’ is the ultimate form of self-care.
Transforming your space doesn’t always require a massive renovation or a professional designer’s eye. Sometimes, it’s about the small, intentional choices—a weathered branch found on a morning walk, a collection of vintage trays, or a bold splash of cultural heritage. Whether you’re looking to turn a cold patio into a Mediterranean escape or make your grand staircase feel like a personal gallery, these aesthetic trends are designed to breathe new life into your environment instantly. Let’s dive into ten ways you can elevate your home and create a space that truly resonates with your soul.
How to Style Outdoor Wall Decor for a Serene Garden Retreat
Why we love this
There is something profoundly soul-soothing about a garden retreat that feels like a hidden sanctuary. When you style outdoor wall decor correctly, the atmosphere shifts from a simple backyard to an evocative, sensory-rich escape. You can almost smell the damp earth and blooming jasmine as the sun glints off weather-worn mirrors that reflect the surrounding greenery. The texture of rough-hewn wood against cool stone provides a grounding tactile experience, making the air feel cooler and the silence deeper. It’s about creating a visual rhythm that mimics the heartbeat of nature itself.
Essential Elements:
- Weather-resistant oversized mirrors
- Wrought iron trellises
- Cedar wood panels or slatted screens
- Floating wall planters with trailing ivy
- Outdoor-rated battery candles or soft fairy lights
- Antique garden tools for a rustic touch
How to make it
- Begin by assessing the structural integrity of your outdoor wall; if it is masonry, you will need a hammer drill and masonry bits to ensure a secure hold for heavier items.
- Clean the wall surface thoroughly with a stiff brush to remove moss or debris, creating a clean palette for your design.
- Install your central focal point, such as a large arched mirror, which will create the illusion of a portal leading into another garden, instantly doubling the visual depth of your space.
- Flank the mirror with vertical cedar slats, ensuring they are spaced exactly two inches apart for a modern, architectural look that allows air to flow through.
- Mount wrought iron trellises onto the slats using galvanized screws to prevent rusting, and carefully weave climbing vines like Clematis or Star Jasmine through the lattice.
- Finish by hanging small, solar-powered lanterns at varying heights to provide a warm, amber glow that mimics the flicker of a fireplace when the sun goes down.
How to Transform Patio Walls for Ultimate Backyard Relaxation
Why we love this
Transforming a patio wall is the secret to achieving that high-end resort feeling right in your own backyard. Imagine leaning back into a plush outdoor sofa, the air filled with the faint, sweet aroma of lavender planted in wall-mounted boxes, while your eyes rest on a beautifully textured vertical garden. The sound of a small wall-mounted water feature provides a rhythmic, liquid soundtrack that drowns out the neighborhood noise, creating a cocoon of tranquility. This design approach focuses on softness and organic movement, turning hard concrete into a living, breathing tapestry of comfort.
Essential Elements:
- Vertical felt pocket planters
- Wall-mounted waterfall or fountain
- Dimmable LED strip lighting for the perimeter
- Outdoor canvas art with UV protection
- Teak wood shelving units
- Potted ferns and hostas
How to make it
- Start by mapping out a lighting plan; run waterproof LED strips along the base or top of the wall to provide a soft wash of light that highlights the wall’s texture without being harsh.
- Install a heavy-duty wall-mounted water feature as your primary auditory element, ensuring the pump is primed and the basin is leveled to prevent splashing.
- Secure a series of felt pocket planters in a grid pattern; use high-quality potting soil mixed with perlite to ensure proper drainage for your wall-bound plants.
- Select a variety of foliage with different shades of green—from lime hostas to dark forest ferns—to create a lush, ombre effect that draws the eye upward.
- Add a piece of UV-resistant outdoor canvas art that features abstract shapes or calming landscapes to break up the greenery and add a sophisticated, indoor-outdoor vibe.
- Check all connections and mounting points weekly for the first month to ensure the weight of the water and wet soil is properly supported by your anchors.
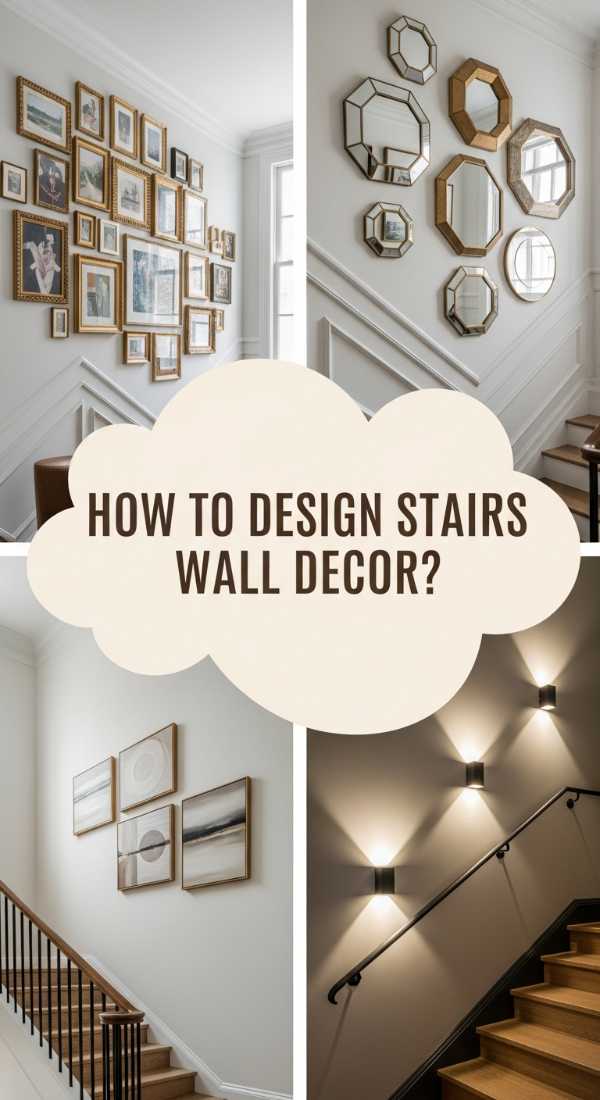
How to Design Stairs Wall Decor for a Grand Entrance
Why we love this
The staircase is the spine of the home, and decorating this vertical transition transforms a functional path into a grand, cinematic journey. Walking up a well-designed stairwell feels like moving through a private museum where every step reveals a new detail—the subtle glint of gold leaf on a frame, the smooth glass of a shadow box, or the rich texture of a hand-painted mural. It evokes a sense of prestige and history, making the climb feel effortless as your attention is captured by a curated story. It’s about movement, rhythm, and the emotional resonance of a grand entrance.
Essential Elements:
- Uniform or eclectic picture frames
- Stair-step template paper for layout
- Laser level for precise alignment
- Matte boards in neutral tones
- Architectural moldings or wainscoting
- Spotlight or directional picture lights
How to make it
- Measure the angle of your staircase by placing a long level against the treads; this angle must be mirrored in your layout to ensure the gallery wall flows naturally with the architecture.
- Apply decorative picture frame molding or wainscoting to the lower third of the wall to provide a solid, traditional foundation for your art display.
- Trace all your frames onto kraft paper and tape them to the wall using painter’s tape; this allows you to experiment with spacing without committing to a single nail hole.
- Maintain a consistent gap—usually 2 to 3 inches—between each frame to create a cohesive look, even if the frames themselves are of different sizes or styles.
- Use a laser level to ensure that the bottom edge of each frame follows the diagonal line of the stairs perfectly, preventing a cluttered or haphazard appearance.
- Install dedicated picture lights above the most significant pieces of art to create a high-end, gallery-like atmosphere that guides guests upward with light.
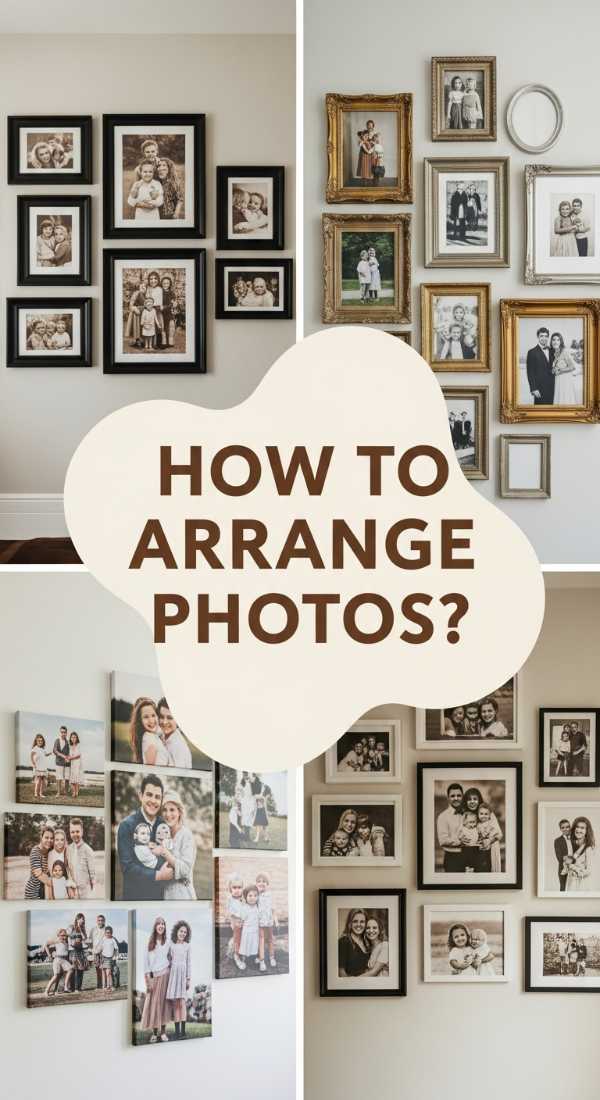
How to Arrange Family Photos for a Nostalgic Home Feel
Why we love this
There is nothing quite as heart-warming as a wall dedicated to the faces and moments that define your life. This trend goes beyond simple framing; it’s about creating a nostalgic sanctuary where the air feels heavy with love and history. You can almost feel the texture of the old black-and-white prints and smell the dusty sweetness of old albums. It creates a space where time seems to slow down, allowing you to pause and reconnect with your roots every time you pass by. It’s a visual hug that provides comfort and a deep sense of belonging for everyone who enters.
Essential Elements:
- Black and white photo prints
- Mixed metallic and wooden frames
- Shadow boxes for memorabilia (baby shoes, wedding invites)
- Handwritten captions or quotes
- Wall-mounted digital frame for rotating memories
- Acid-free mounting tape
How to make it
- Select a variety of photos that span different eras but convert them all to black and white or sepia tones to create a unified, timeless aesthetic.
- Choose a mix of frame materials—brushed gold, reclaimed wood, and sleek black—to give the wall an evolved, “collected over time” feeling rather than a store-bought look.
- Incorporate 3D elements by using shadow boxes to hold physical mementos, such as a dried flower from a special bouquet or a vintage key, to add depth to the flat photos.
- Lay your arrangement out on the floor first, starting with the largest “anchor” photo in the center and radiating smaller photos outward in a loosely organized cluster.
- Use archival-quality, acid-free mats to protect your precious originals from yellowing or damage over the years, ensuring they stay crisp for the next generation.
- Periodically swap out one or two photos to keep the energy of the wall fresh and to reflect new milestones as your family continues to grow.
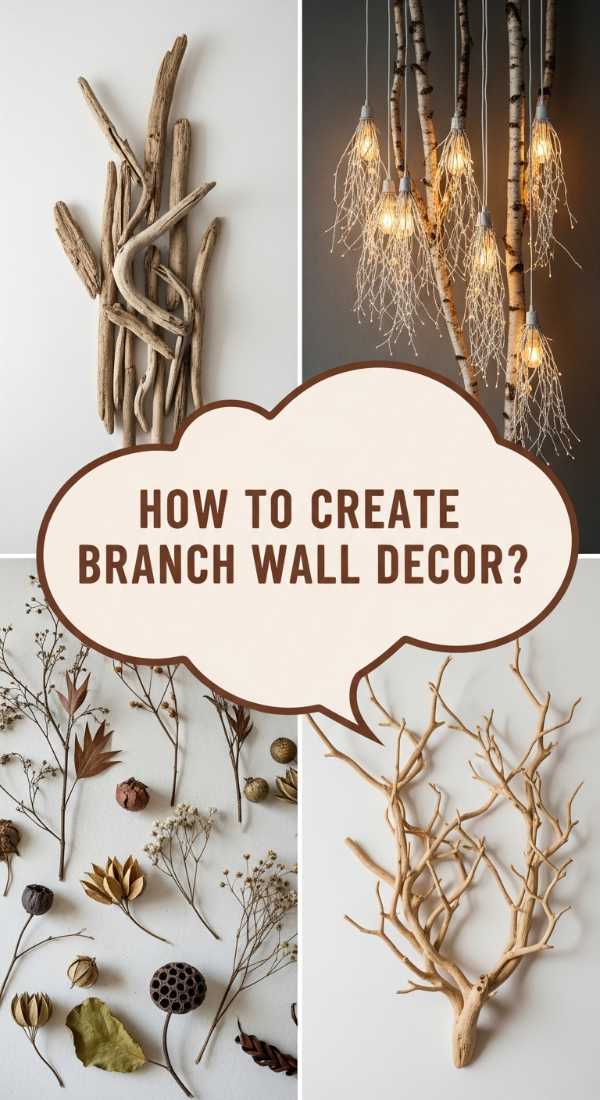
How to Create Tree Branch Wall Decor for Organic Interior Vibes

Why we love this
Bringing the outdoors in with tree branch decor creates a grounding, organic atmosphere that is both ethereal and raw. There is a primal beauty in the silhouette of a sprawling branch against a clean, modern wall—it bridges the gap between structured living and the wild unknown. You can almost feel the rough, cool bark and the scent of crisp autumn air when you enter the room. This style adds a sculptural element that feels light and airy, casting beautiful, spindly shadows that change throughout the day as the sun moves across the sky.
Essential Elements:
- Large, fallen hardwood branch (Birch, Manzanita, or Driftwood)
- Sandpaper (fine and medium grit)
- Clear matte polyurethane sealant
- Invisible fishing line or heavy-duty wire
- Wall anchors and eye hooks
- Fairy lights or air plants for adornment
How to make it
- Forage for a branch with an interesting shape, ensuring it is dry and free of pests; birch and manzanita are favorites for their beautiful bark and structural density.
- Sand away any sharp edges or loose bark flakes using medium grit sandpaper, then finish with a fine grit to give the branch a smooth, tactile quality.
- Apply two thin coats of clear matte sealant to preserve the wood and prevent it from drying out or shedding over time, allowing at least four hours of drying time between coats.
- Locate the studs in your wall using a stud finder to ensure the weight of the branch is fully supported; screw eye hooks directly into the studs for maximum security.
- Suspended the branch using high-tensile fishing line for a “floating” effect, or use leather straps for a more industrial, rustic look.
- Drape delicate air plants (Tillandsia) or micro-LED fairy lights over the limbs to add a touch of life and magic to the natural wooden sculpture.
How to Feature Mexican Wall Decor for a Bold Cultural Aesthetic
Why we love this
Mexican wall decor is a celebration of life, color, and masterful craftsmanship. It fills a room with a vibrant, pulsating energy that feels like a fiesta for the senses. The cool, glazed touch of Talavera tiles and the intricate, punched details of tin mirrors evoke a sense of sun-drenched courtyards and rich history. The aroma of spicy peppers and citrus almost seems to linger in the air when surrounded by such bold, warm pigments. It’s an aesthetic that refuses to be ignored, offering a joyful, courageous statement that honors traditional artistry while making a modern home feel alive.
Essential Elements:
- Hand-painted Talavera plates
- Hoja de Lata (punched tin) mirrors
- Woven Otomi textiles
- Terracotta sun plaques
- Vibrant papel picado banners (for a festive look)
- Iron-work wall sconces
How to make it
- Choose a focal point wall and paint it a warm, earthy neutral like terracotta or a deep sand color to make the colorful decor pieces pop.
- Arrange a cluster of hand-painted Talavera plates in a circular pattern, using specialized wire plate hangers that grip the edges without obscuring the art.
- Center a large punched-tin mirror on the wall; the reflective surface will catch the light and scatter it through the intricate geometric patterns, creating a shimmering effect.
- Frame a piece of Otomi embroidery—known for its bright animal and floral motifs—in a simple wooden frame to add a soft, tactile element to the harder tile and tin pieces.
- Install wrought iron sconces on either side of the display, using amber-toned bulbs to mimic the warm, golden light of a Mexican sunset.
- Layer your pieces so they overlap slightly in some areas, creating a sense of abundance and richness that is characteristic of Mexican interior design.
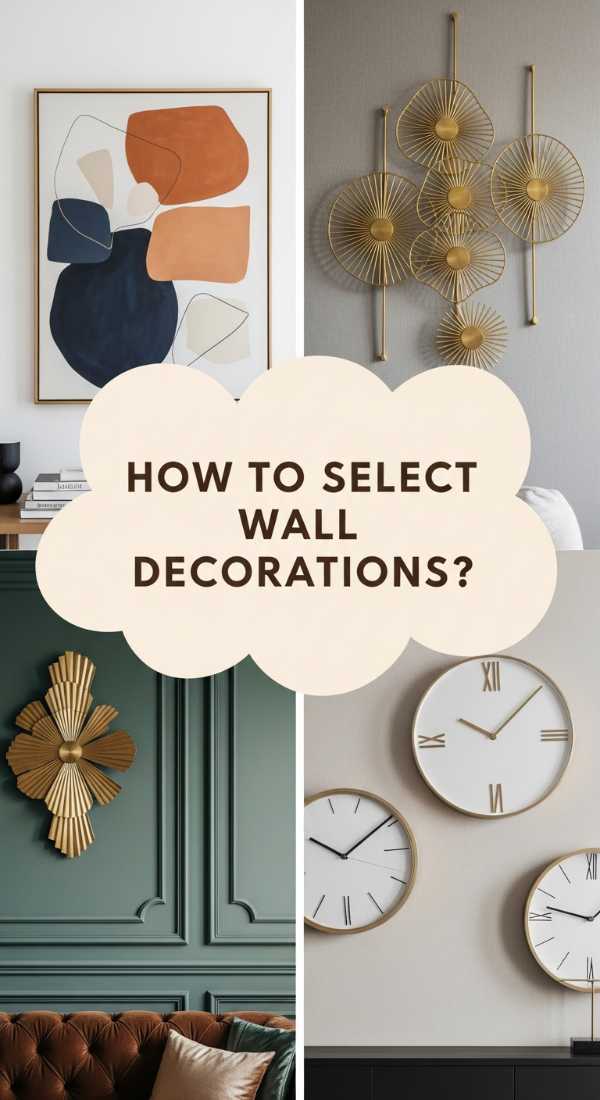
How to Select Elegant Wall Decorations for a Polished Living Room
Why we love this
An elegant living room is defined by restraint, quality, and a sense of effortless sophistication. When wall decor is selected with an eye for polish, the entire room feels more expansive and serene. Think of the smooth, cool surface of a marble-inlay wall piece or the understated luxury of a oversized, framed silk textile. This aesthetic creates a high-end atmosphere where every detail feels intentional and expensive, even if it was curated on a budget. It’s a visual deep breath that allows the mind to rest in a space of symmetry and refined beauty.
Essential Elements:
- Large-scale abstract art in muted tones
- Gold or silver leaf accents
- Beveled edge mirrors
- Wall-mounted picture molding
- Architectural plaster reliefs
- Symmetrical sconce lighting
How to make it
- Implement architectural interest by installing picture-frame molding (boiserie) on your main walls; use a miter saw for perfect 45-degree angles and paint the molding the same color as the wall for a subtle, high-end look.
- Select one massive piece of art rather than many small ones; an oversized canvas creates a singular focal point that feels much more expensive and curated.
- Ensure the center of your artwork is exactly 57 to 60 inches from the floor, which is the standard eye-level used in professional galleries and museums.
- Incorporate reflective materials like beveled mirrors or metallic leaf to bounce light around the room, making it feel brighter and more luxurious.
- Use balanced, symmetrical arrangements; for every sconce or art piece on the left, ensure there is a corresponding element on the right to create visual harmony.
- Hide all cords and mounting hardware behind the art or within the walls to maintain the “polished” illusion and keep the focus entirely on the aesthetic.
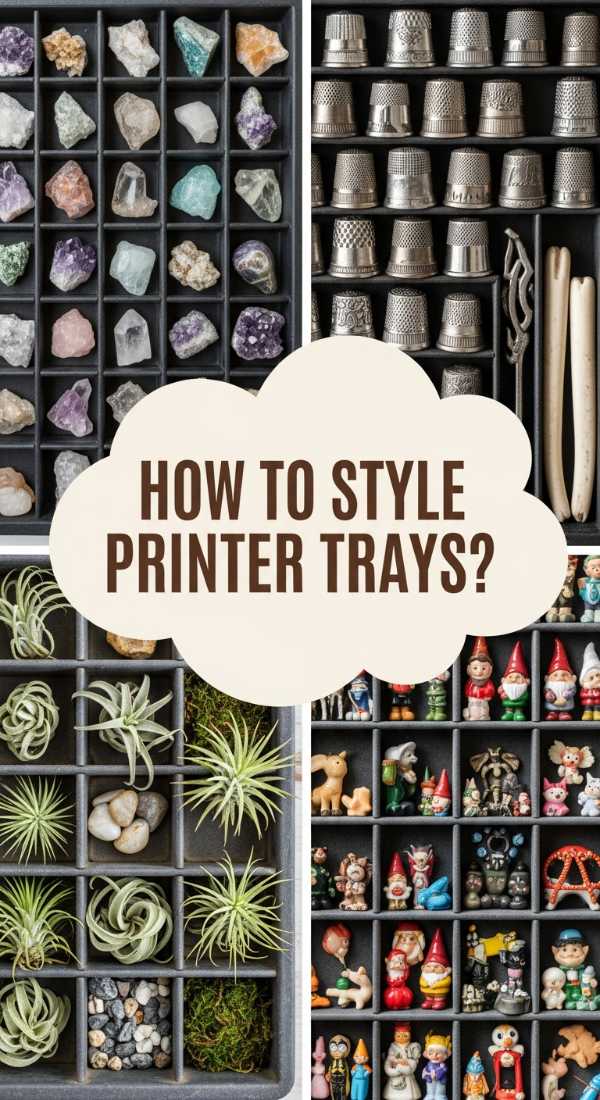
How to Style Printer Tray Wall Decor for a Charming Antique Display
Why we love this
There is a whimsical, storybook charm to a printer’s tray filled with tiny treasures. Each small compartment is a world unto itself, holding a collection of curiosities that invite the viewer to lean in and explore. You can almost feel the history of the old lead type that once sat in these wooden slots and smell the sweet, papery scent of a vintage bookstore. It’s a tactile, nostalgic experience that turns a wall into a conversation piece, celebrating the beauty of the small, the forgotten, and the meticulously curated.
Essential Elements:
- Vintage wooden letterpress/printer tray
- Miniature collectibles (thimbles, stones, tiny vases)
- Dried botanical clippings
- Vintage postage stamps or old coins
- Clear museum gel for securing items
- Micro-spotlight for illumination
How to make it
- Clean your vintage tray using a soft brush and a light wood conditioner to restore the luster of the timber without removing its historic patina.
- Mount the tray horizontally using heavy-duty D-rings on the back, ensuring it is perfectly level so your miniatures don’t slide.
- Categorize your miniatures by color, texture, or theme (e.g., all natural elements like shells and acorns in one section, and metallic objects like keys in another).
- Use a tiny dot of clear museum gel on the bottom of each item before placing it in a compartment; this keeps them secure if the wall is bumped or during cleaning.
- Leave a few compartments empty or filled with a small piece of decorative paper to prevent the display from looking overcrowded and to give the eye a place to rest.
- Install a battery-operated micro-LED spotlight above the tray to highlight the tiny details and cast interesting shadows within the deep wooden grid.
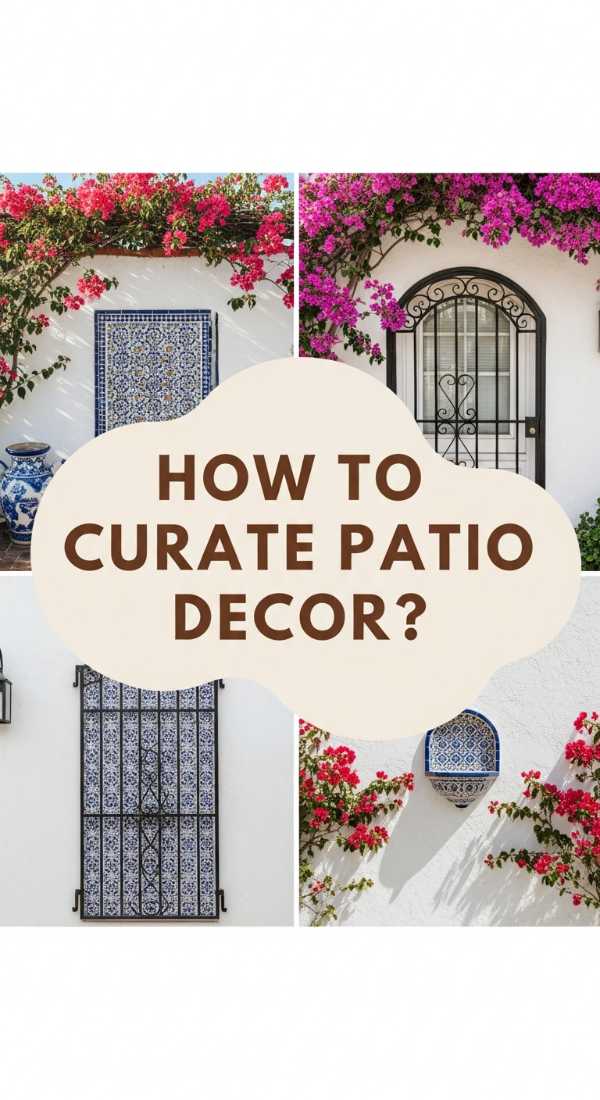
How to Curate Patio Wall Decor for a Mediterranean Feel
Why we love this
A Mediterranean-inspired patio is an invitation to slow down and savor the moment. This aesthetic is all about sun-bleached textures, weathered stone, and the vibrant contrast of blue and white. You can almost feel the warmth of the coastal sun on your skin and the smell of salt spray and citrus trees. By curating decor that feels aged and authentic, you create an outdoor space that feels like it has existed for centuries. It is an evocative, romantic style that turns a simple outdoor wall into a portal to the Greek Isles or the Italian coast.
Essential Elements:
- Terracotta wall pockets and planters
- Wrought iron scrolls or gates
- Ceramic plates with cobalt blue patterns
- Whitewashed wooden shutters
- Climbing bougainvillea or jasmine
- Stone-look wall plaques
How to make it
- Apply a lime-wash or a textured “plaster” paint to your patio wall to give it that iconic, soft Mediterranean finish that reflects the sun beautifully.
- Mount a pair of weathered, whitewashed wooden shutters on either side of a central window or mirror to mimic the architecture of a coastal villa.
- Install terracotta wall pockets at various heights and plant them with red geraniums or trailing herbs like rosemary for an authentic burst of color and fragrance.
- Hang a collection of hand-painted ceramic plates in shades of Mediterranean blue, arranging them in a fluid, asymmetrical wave across the wall.
- Integrate a piece of decorative wrought iron—perhaps an old gate or a scroll—to add weight and a sense of historic permanence to the space.
- Ensure you have a nearby trellis for climbing plants; as the bougainvillea grows against the wall, it will naturally integrate the decor into the living landscape.
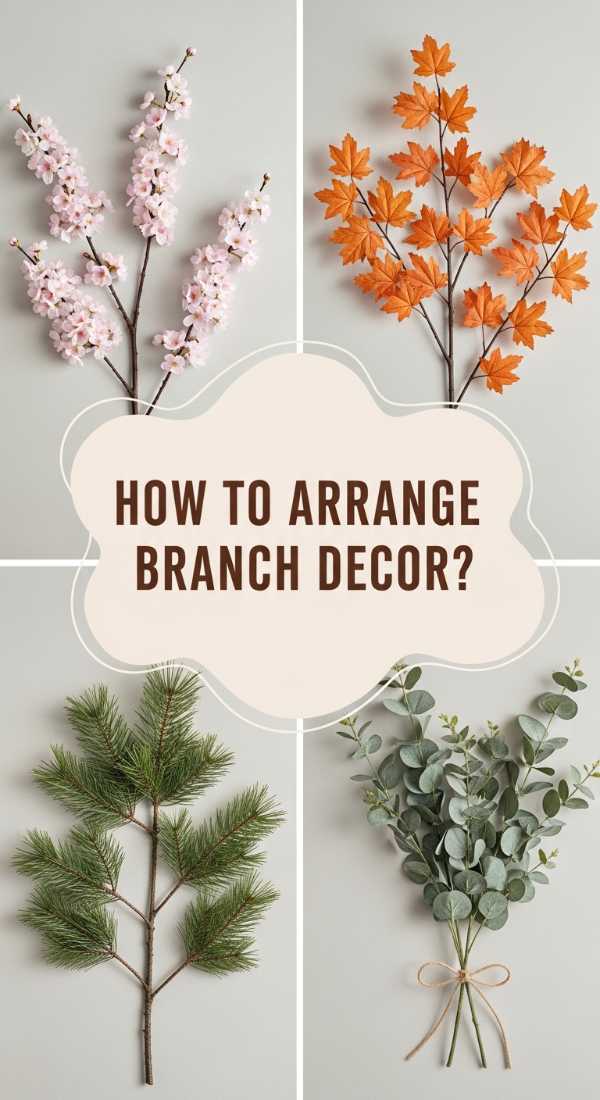
How to Arrange Tree Branch Decor for a Seasonal Home Refresh
[IMAGE_10]
Why we love this
Seasonal tree branch decor is the ultimate way to stay in sync with the rhythm of the natural world. It allows your home to evolve as the seasons shift, bringing a sense of freshness and anticipation into your living space. From the delicate, budding blossoms of spring to the stark, architectural pine branches of winter, this trend is a sensory delight. You can smell the pine needles, feel the soft velvet of pussy willow, and see the changing colors of the year reflected right on your walls. it is a dynamic, living art form that keeps your home feeling vibrant and new.
Essential Elements:
- Removable wall clips or magnetic hooks
- Seasonal branches (Cherry blossoms, Autumn maple, Pine, Eucalyptus)
- Ribbon or twine for hanging
- Lightweight ornaments or glass vials
- Pruning shears
- Floral preservative spray
How to make it
- Select branches that reflect the current season: use flowering dogwood or cherry blossoms for spring, eucalyptus for summer, dried maple for autumn, and evergreen boughs for winter.
- Prune the branches to a size that complements your wall space; use a 45-degree cut at the base of the stems to help them absorb any moisture if you are using glass vials.
- Use clear, removable adhesive hooks to create a temporary support structure on the wall, allowing you to change the arrangement every few months without damage.
- Suspend small glass vials filled with water from the branches using twine if you want to keep fresh blossoms alive for several days.
- For dried or evergreen branches, lightly mist them with a floral preservative spray to prevent shedding and keep the colors vibrant throughout the season.
- Add small, seasonal accents—like tiny wooden eggs in spring or dried orange slices in winter—to further enhance the thematic storytelling of your wall.
Creating Your Personal Wall Sanctuary
Decorating your walls is about more than just filling empty space; it’s about creating an environment that nurtures your spirit. Whether you choose the bold, sun-drenched vibes of a Mexican aesthetic or the quiet, organic beauty of a tree branch sculpture, remember that your home should be a reflection of your journey. Don’t be afraid to mix styles, experiment with textures, and most importantly, surround yourself with items that bring you joy every time you see them. Happy decorating!