

There is a unique kind of magic that happens when you finally decide to turn your house into a home. It’s not just about the furniture or the paint on the walls; it’s about the way the light catches a crystal vase in the afternoon or how a soft, chunky knit throw feels when you curl up with a book after a long day. We are living in an era where our personal spaces have become our sanctuaries, our offices, and our social hubs, making the way we curate them more important than ever before. This blog post is a love letter to the little details that transform an ordinary Tuesday into an aesthetic experience worthy of a viral Pinterest board.
Lately, I’ve been feeling a pull toward intentionality—moving away from ‘fast decor’ and toward pieces and projects that tell a story. Whether you are hosting a sprawling family brunch for Easter or just trying to make your back deck feel like a five-star resort, the secret is in the layers. It’s about mixing textures like weathered wood with sleek glass, or the nostalgic scent of fresh-baked cookies with the modern look of a minimalist table setting. I’ve gathered the ten most-wanted lifestyle decor trends that influencers are obsessed with right now, and I’m showing you exactly how to bring that effortless, ‘lived-in luxury’ look into your own life.
How to Create an Outdoor Patio Decor Sanctuary for Total Evening Bliss
Why we love this
Imagine the sun dipping below the horizon, leaving behind a sky of velvet purple while you are wrapped in the warm, amber glow of flickering lanterns. This sanctuary isn’t just a patio; it is an extension of your soul, offering a tactile experience of soft outdoor rugs against bare feet and the soothing rustle of oversized linen pillows. The air carries the faint, woody aroma of a smokeless fire pit, creating an atmosphere that feels both expansive and deeply intimate. It is the ultimate retreat for decompression, where the textures of woven rattan and smooth stone ground you in the present moment of total evening bliss.
Essential Elements:
- Weather-resistant sectional sofa with deep, plush cushions
- String lights (Edison bulbs) and oversized floor lanterns
- Outdoor-grade jute or polypropylene area rug
- Smokeless fire pit or tabletop fire bowl
- Assortment of throw blankets in waffle knit or cotton fringe
- Potted palms and lavender for greenery and natural fragrance
How to make it
- Start by defining the ‘floor’ of your sanctuary with a large area rug to anchor the furniture and provide a soft texture underfoot; ensure it is centered to the architectural lines of your deck or patio.
- Arrange your seating in a conversational ‘U’ shape to encourage connection, leaving enough space for ‘flow’ while ensuring everyone has a clear view of the focal point, such as the fire pit.
- Layer your lighting by stringing heavy-duty Edison bulbs overhead in a zigzag pattern, then place lanterns of varying heights in corners to eliminate dark shadows and create a warm, three-dimensional glow.
- Introduce textiles by tossing weather-proof pillows onto the seating, mixing solid earth tones with subtle geometric patterns for visual depth and a cozy, high-end feel.
- Incorporate life by flanking the entry points with large planters; use the ‘thriller, filler, spiller’ method—a tall focal plant, a bushy mid-layer, and a trailing vine—to create professional-looking greenery.
- Finalize the ambiance by setting up your fire pit; if using wood, stack it neatly nearby as a decor element, or if using gas, ensure the glass beads are evenly distributed for a clean, consistent flame.
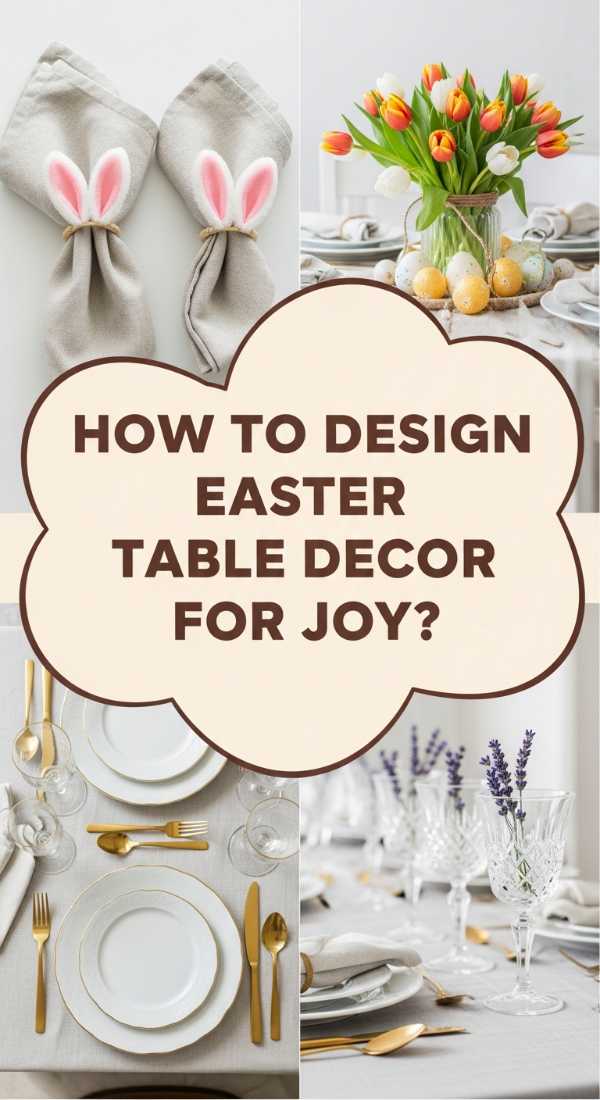
How to Style Easter Table Decor Ideas for a Memorable Family Brunch
Why we love this
There is a delicate, ethereal beauty in a perfectly set Easter table that captures the very essence of spring’s rebirth. We adore the play of light reflecting off vintage glassware and the soft, tactile crunch of a linen runner against a rustic wooden tabletop. The scent of fresh-cut tulips and eucalyptus fills the room, mingling with the sweet aroma of freshly brewed coffee and citrus. It creates a visual feast of pastel hues—mint, lavender, and butter yellow—that feels sophisticated yet incredibly welcoming, making every family member feel like an honored guest at a curated garden party.
Essential Elements:
- Sheer linen table runner in a neutral or pastel shade
- Woven seagrass or rattan placemats for natural texture
- Mismatched vintage china or matte ceramic plates
- Fresh floral centerpiece (tulips, ranunculus, and baby’s breath)
- Hand-painted ceramic eggs or moss-covered bunnies
- Cloth napkins secured with velvet ribbons or twine
How to make it
- Clear your table and lay down a freshly steamed linen runner, allowing it to drape elegantly over the ends for a soft, relaxed look that isn’t too formal.
- Position your placemats at each setting, then stack your dinner plates and salad plates; choosing pieces with a slight scallop or organic edge adds a modern, handcrafted feel to the arrangement.
- Construct your centerpiece by placing a low, wide vase in the center; trim your flowers at an angle and arrange them so they are lush but low enough that guests can easily see over them during conversation.
- Add a touch of whimsy by nestling small decor items like moss-covered bunnies or speckled ceramic eggs into the floral arrangement or placing one on each napkin as a focal point.
- Fold your cloth napkins into a simple rectangle or a ‘bunny ear’ shape and tie them with a thin velvet ribbon, tucking a small sprig of dried lavender or eucalyptus into the knot for a sensory surprise.
- Finalize the table by polishing your glassware until it sparkles and placing your flatware with precision, ensuring the spacing is consistent around the entire table for a professional, influencer-worthy finish.
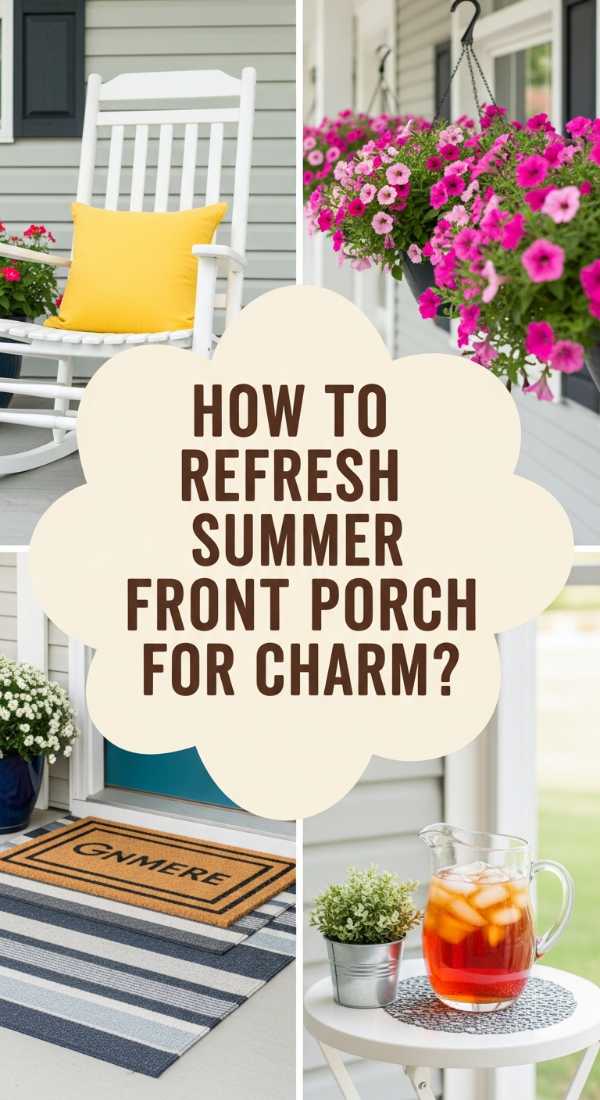
How to Refresh Summer Front Porch Decor for Endless Seasonal Charm

Why we love this
A summer front porch is more than just an entryway; it’s a public-facing hug that welcomes you home with vibrant colors and breezy textures. We love the rhythmic creak of a classic rocking chair paired with the crisp, cool feel of outdoor stripes and navy accents. The air is thick with the sweet perfume of blooming petunias and the refreshing zest of a lemon-themed wreath. It feels like a permanent vacation spot where you can sip iced tea, listen to the cicadas, and enjoy the tactile contrast of smooth ceramic garden stools and rough-hewn cedar planks.
Essential Elements:
- Classic wooden or resin rocking chairs or a porch swing
- A layered doormat look (patterned rug underneath a coir mat)
- A large, vibrant summer wreath with lemons or sunflowers
- Symmetrical oversized planters with colorful annuals
- Outdoor throw pillows in navy, white, or citrus tones
- Small side table for holding drinks and books
How to make it
- Begin by deep-cleaning the porch surface, removing cobwebs and dust to create a fresh canvas for your decorative layers.
- Create a ‘layered’ entryway by placing a large, thin outdoor rug (like a black and white stripe) and centering a heavy-duty coir doormat with a welcoming greeting on top of it.
- Arrange your seating—place two rocking chairs at an angle toward each other to suggest conversation, or hang a swing with sturdy, polished hardware for a nostalgic touch.
- Install a high-impact wreath on the front door; ensure it is hung at eye level using a magnetic or over-the-door hanger that doesn’t damage the finish.
- Style your planters by selecting ‘thriller’ plants like Dracaena for height and ‘spiller’ plants like Sweet Potato Vine to cascade over the edges, ensuring they are watered and deadheaded regularly for peak vibrance.
- Add the finishing touches with outdoor pillows that feature UV-resistant fabric and a small, sturdy side table placed within arm’s reach of the seating for maximum functionality and charm.
How to Arrange Mother’s Day Brunch Decorating Ideas for a Heartfelt Celebration
Why we love this
Mother’s Day brunch is all about softness, gratitude, and the delicate beauty of a spring morning. We love the way lace overlays soften the edges of a dining space, creating a vintage-inspired aesthetic that feels both nostalgic and fresh. The room should smell like a bouquet of peonies and warm vanilla scones, with a color palette of dusty rose, cream, and gold. It’s a sensory experience where the clinking of champagne flutes meets the visual delight of personalized place cards, making every mother figure feel truly cherished in a space designed just for her.
Essential Elements:
- Lace or embroidered tablecloth
- Tiered serving stands for pastries and finger sandwiches
- Personalized place cards with handwritten calligraphy
- Fresh peony or rose arrangements in mixed glass bottles
- Gold-toned cutlery and rimmed glassware
- A dedicated ‘Mom-osa’ bar station with fresh fruit garnishes
How to make it
- Drape your table with a high-quality lace or linen cloth, ensuring the overhang is even on all sides for a balanced, sophisticated foundation.
- Create a multi-dimensional centerpiece by grouping various heights of glass bud vases together, filling each with a single, high-quality bloom like a peony or a spray rose.
- Set each place with a gold-rimmed charger plate, followed by a dinner plate and a folded napkin; place a personalized, handwritten card on top to add a deeply emotional and curated touch.
- Set up a ‘Mom-osa’ bar on a side buffet or bar cart, arranging sparkling wine bottles in a silver ice bucket and placing fresh berries and juices in clear carafe jars for a vibrant pop of color.
- Use tiered stands to display food at different levels; place heavier items like quiches on the bottom and delicate pastries or macarons on the top to create visual interest and save table space.
- Dim the overhead lights and use natural sunlight or soft-glow lamps to keep the mood light and airy, perfectly complementing the morning celebration.
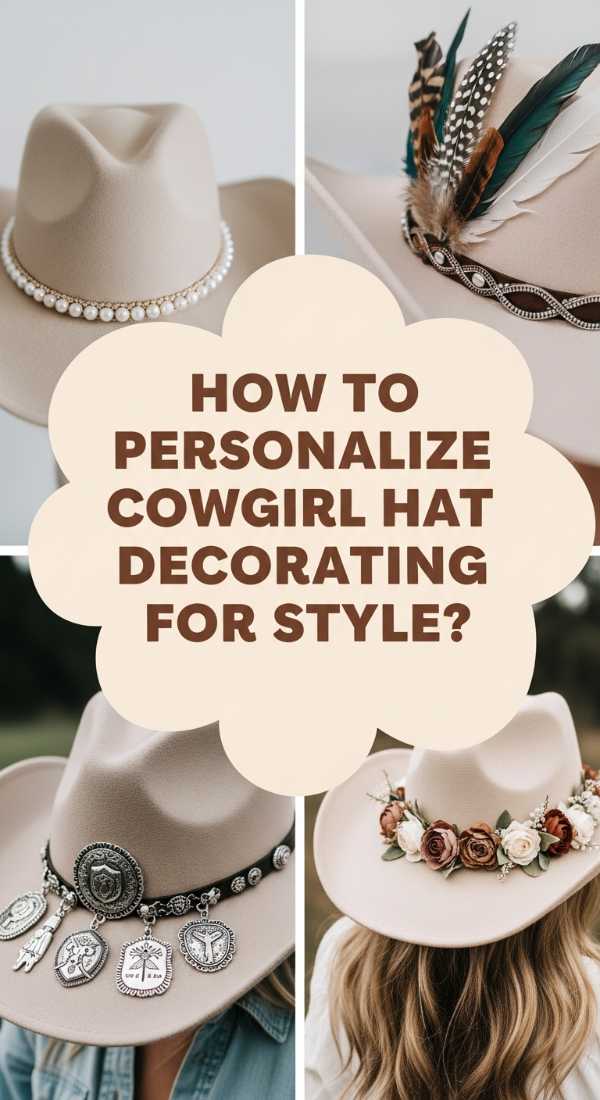
How to Master Cowgirl Hat Decorating Ideas for Your Next Aesthetic Event

Why we love this
The ‘Coastal Cowgirl’ aesthetic has taken the world by storm, and we are obsessed with the rugged-meets-refined texture of a custom-decorated hat. This project is a tactile dream, combining the stiffness of high-quality felt or straw with the softness of ostrich feathers and silk ribbons. There is a creative thrill in distressing a brim or adding a shimmering vintage brooch that tells a story. It’s a piece of wearable decor that smells of leather and desert sage, turning a simple accessory into a bold statement of personal style and adventurous spirit.
Essential Elements:
- High-quality felt or straw cowgirl hat (neutral tones like sand or cream)
- Dried florals, wheat stalks, or ostrich feathers
- Vintage brooches, turquoise pins, or silver charms
- Velvet, silk, or leather cord for hat bands
- A wood-burning tool (for felt) or sandpaper (for distressing)
- Hot glue gun and high-strength adhesive
How to make it
- Select your base hat and decide on a theme—either ‘rugged boho’ or ‘glamorous western’—to ensure all your decorative elements are cohesive.
- If you want a vintage look, lightly scuff the edges of the brim with fine-grit sandpaper or use a wood-burning tool to carefully etch small initials or designs into the felt.
- Create a custom hat band by wrapping velvet ribbon or a leather cord around the crown twice, securing it with a small, hidden knot or a dab of hot glue at the back.
- Layer your textures by tucking a large ostrich feather and a small bundle of dried flowers into the band on one side, ensuring they follow the curve of the crown for a professional silhouette.
- Attach your ‘statement piece’—such as a turquoise pin or a vintage brooch—directly onto the band to hide the glue points and provide a focal point of shine.
- Finish by spraying the decorative elements with a light mist of hairspray or floral sealant to keep the feathers and dried flowers from fraying during your event.
How to Bake Spring Cookies Decorated for the Most Sweet Seasonal Treats

Why we love this
Spring cookies are like edible pieces of art that bring a burst of joy to any kitchen counter. We love the buttery, melt-in-your-mouth texture of a shortbread base paired with the crisp, sweet snap of royal icing. The process of decorating—piping delicate petals and tiny green leaves—is incredibly meditative and rewarding. The kitchen fills with the scent of warm sugar and almond extract, while the pastel colors of the icing create a visual palette that looks like a freshly bloomed garden. It’s a sweet, sensory way to celebrate the season with every bite.
Essential Elements:
- Soft-bite sugar cookie or shortbread dough
- Royal icing in various pastel colors (consistency is key!)
- Fine-tip piping bags and couplers
- Scribe tool or toothpick for smoothing icing
- Edible gold leaf or pearl sprinkles
- Flower-shaped cookie cutters (tulips, daisies, butterflies)
How to make it
- Roll out your chilled dough to an even 1/4-inch thickness; use your spring-themed cutters to stamp out shapes and bake them just until the edges are a very pale gold, ensuring they stay soft and tender.
- Prepare your royal icing in two consistencies: ‘outline’ (like toothpaste) and ‘flood’ (like honey); tint them with gel food coloring for vibrant, non-watery spring shades.
- Pipe a thin border around the edge of the cooled cookie using the outline icing, then immediately fill the center with the flood icing, using a scribe tool to pop bubbles and push the icing into the corners.
- Allow the base layer to dry for at least 4 hours before adding ‘wet-on-dry’ details like flower petals or butterfly wing patterns using the thicker outline icing for a 3D effect.
- For a high-end look, apply tiny flakes of edible gold leaf using a dry paintbrush or add small pearl sprinkles while the icing is still slightly tacky.
- Let the cookies dry completely overnight at room temperature before stacking or gifting, ensuring the intricate designs are preserved and the icing is rock-solid.
How to Design Church Easter Decorations Sanctuary for a Beautiful Worship Experience

Why we love this
Designing for a sanctuary requires a balance of grand scale and intimate detail to foster a sense of reverence and celebration. We love the dramatic visual impact of towering white lilies against dark wood and the way white gossamer drapes catch the morning light, symbolizing purity and light. The aroma of hundreds of fresh blooms creates a heavenly atmosphere that envelops the congregation. It is a design that feels ancient and sacred, yet modern and bright, providing a peaceful backdrop for reflection and a glorious setting for communal joy.
Essential Elements:
- Abundant white Easter Lilies in various heights
- Long bolts of white sheer fabric or gossamer for draping
- Large-scale wooden cross for the central focal point
- Warm LED uplighting to highlight architectural features
- Greenery garlands (ivy or ferns) to soften stone or wood edges
- Taper candles or flameless pillars for a soft, holy glow
How to make it
- Start with the focal point: Clean and polish the central cross, then drape a long piece of white sheer fabric over the horizontal beam in a graceful ‘swoop’ to symbolize the resurrection.
- Arrange the lilies in ‘banks’ or tiers on either side of the altar; use risers hidden by greenery to create a wall of white blossoms that provides a lush, overflowing appearance.
- Integrate greenery garlands along the pulpit and communion rails, weaving them loosely to maintain an organic, natural feel that contrasts with the structured architecture.
- Position warm LED uplights behind the lily banks and at the base of the cross, angling them upward to create soft shadows and a sense of divine radiance throughout the sanctuary.
- Ensure all walkways are clear while placing smaller floral arrangements at the ends of pews or near the entrance to carry the theme from the door to the altar.
- Conduct a final ‘walk-through’ from the perspective of a congregant to ensure the sightlines are beautiful from every angle and the scent of the lilies is present but not overwhelming.
How to Personalize Graduation Cap Decoration for a Bold Future Celebration
Why we love this
Your graduation cap is the final canvas of your academic journey, and we love the way it allows students to express their unique voice amidst a sea of identical gowns. It’s a tactile project involving the sparkle of glitter, the smoothness of cardstock, and the 3D texture of silk flowers or miniature charms. There is a profound sense of pride in crafting a message that looks toward the future while honoring the hard work of the past. It’s a visual celebration that smells of fresh ink and success, making that walk across the stage feel even more personal and unforgettable.
Essential Elements:
- Graduation cap (mortarboard)
- Cardstock ‘cap topper’ (to avoid damaging the actual cap)
- Strong adhesive or double-sided craft tape
- Vinyl lettering or high-quality stickers
- 3D embellishments like silk flowers, rhinestones, or tassels
- Photos or meaningful quotes printed on high-gloss paper
How to make it
- Measure the top of your cap and cut a square piece of sturdy cardstock slightly smaller than the mortarboard; this serves as your ‘canvas’ so you can work flat and fix mistakes before committing to the cap.
- Plan your layout by placing your largest elements first—usually a central quote or a photo—ensuring the ‘hole’ for the tassel button is perfectly centered and cut out.
- Apply your background (glitter paper, a painted design, or fabric) to the cardstock using a flat, even layer of adhesive to prevent bubbling or warping.
- Secure your lettering: If using vinyl, peel slowly to ensure every letter is perfectly aligned; if hand-painting, use a fine-tip brush and steady your hand on the table.
- Build up your 3D elements, such as gluing a border of silk flowers around the edge or adding rhinestones to highlight specific words, creating a design that pops even from a distance.
- Attach the finished cardstock topper to your cap using heavy-duty double-sided tape at all four corners and around the center button, ensuring it is secure enough to withstand the celebratory ‘cap toss.’
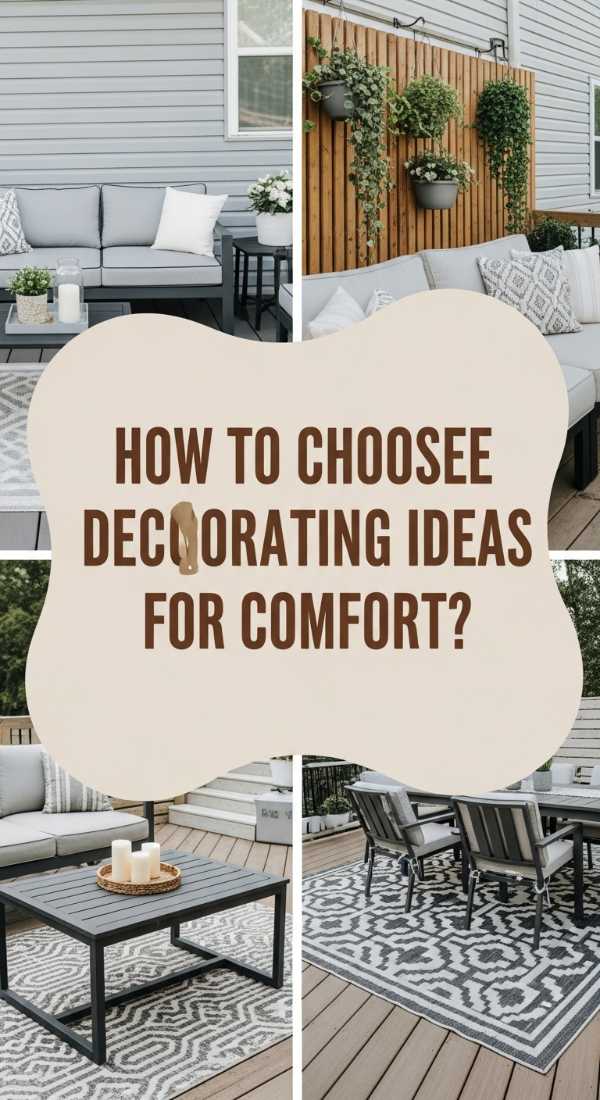
How to Implement Deck Decorating Ideas for the Ultimate Relaxation Space

Why we love this
A well-decorated deck is the bridge between the comfort of your home and the wild beauty of the outdoors. We love the grounding sensation of weather-worn wood paired with the modern, sleek lines of black metal railings and soft, neutral textiles. The atmosphere is defined by the sound of wind chimes and the sight of potted herbs swaying in the breeze, creating a space that feels both airy and enclosed. It’s the perfect place for a slow morning coffee or a quiet evening under the stars, offering a sensory blend of fresh air and curated luxury.
Essential Elements:
- Outdoor sectional or a pair of oversized Adirondack chairs
- Privacy screens (lattice, tall planters, or outdoor curtains)
- Solar-powered deck post lights or step lights
- Large outdoor rug with a botanical or geometric print
- Tiered herb garden or vertical planter wall
- All-weather coffee table or storage ottoman
How to make it
- Define your zones: Divide your deck into a ‘lounging zone’ with comfortable seating and a ‘utility zone’ for grilling or gardening to maximize the flow of the space.
- Install privacy screens or tall, narrow planters filled with bamboo or ornamental grasses along the perimeter to create an intimate ‘room’ feel and block out neighbor views.
- Roll out a high-quality outdoor rug that is large enough for all furniture legs to sit upon; this instantly softens the look of the wood and makes the area feel like a true living room.
- Add functional lighting by mounting solar-powered caps on your deck posts and tucking ‘fairy lights’ into your planters for a magical, twinkling effect that requires no electrical work.
- Incorporate a vertical herb garden near your seating area; the scent of basil, mint, and rosemary provides a natural aromatherapy experience while you relax.
- Style your furniture with UV-protected throw pillows and a lightweight acrylic tray on the coffee table to hold snacks and drinks, ensuring every piece is as durable as it is beautiful.
How to Craft Mothers Day Decorations for a Day of Pure Joy
[IMAGE_10]
Why we love this
Hand-crafted Mother’s Day decorations carry an emotional weight that store-bought items simply can’t match. We love the tactile, ‘perfectly imperfect’ look of hand-strung photo banners and the soft, paper-petal texture of oversized crepe flowers. This decor style smells of fresh ink and craft glue, bringing a sense of childhood wonder back into the home. It’s about creating a visual timeline of love—using photos, handwritten notes, and her favorite colors to build a space that celebrates her journey, filling the heart with as much joy as the room itself.
Essential Elements:
- Photo garland featuring favorite family memories
- Handmade crepe paper flowers or a paper flower wall
- Custom ‘Happy Mother’s Day’ banner in cardstock
- Vases filled with her favorite specific blooms
- Table confetti made from punched-out hearts or petals
- Personalized ‘Message Jar’ filled with reasons why she’s loved
How to make it
- Create a photo garland by selecting 10-15 meaningful photos, printing them in a consistent size (like 4×4 squares), and clipping them to a strand of twine using mini wooden clothespins.
- Craft a ‘Mother’s Day’ banner by cutting out letters from heavy cardstock; use a hole punch to thread silk ribbon through the tops and hang it prominently over a mantle or doorway.
- Make oversized crepe paper flowers by layering sheets of paper, folding them accordion-style, and fluffing the ‘petals’ out; these make a stunning backdrop for a celebratory brunch or cake table.
- Set up a ‘Reasons We Love You’ station: provide small slips of colorful paper and a beautiful glass jar, encouraging every family member to write a note and drop it inside as a heartfelt gift.
- Scatter ‘nature-inspired’ confetti—like dried rose petals or small paper hearts—across the dining table and sideboards to add a layer of festive texture.
- Finalize the room by ensuring all decorations are at eye level and well-lit, creating a cohesive, immersive environment that tells a story of appreciation and love.
The Joy of Curating Your Life
Creating a home that feels like a sanctuary doesn’t happen overnight, but through these intentional projects, you can transform every corner of your life into something extraordinary. Whether it’s the simple joy of a hand-decorated cookie or the grand gesture of a fully styled patio, these lifestyle choices reflect the beauty you find in the world. Remember, the best decor isn’t just what looks good on camera—it’s what makes you feel most at home. Happy decorating!