
Have you ever spent hours scrolling through Pinterest or flipping through glossy magazines, sighing at the perfectly curated spaces and wishing you had a celebrity budget to match? I’ve been there, clutching my lukewarm coffee and looking at my beige walls thinking, ‘Someday.’ But here’s the secret I’ve learned after years of DIY trials and errors: a magazine-worthy home isn’t about how much you spend; it’s about the soul you pour into the details. It’s about that ‘aha!’ moment when a coat of paint or a hand-built planter transforms a dull corner into your favorite sanctuary.
In this guide, we are diving deep into the viral projects that are taking the home decor world by storm. From enchanting outdoor lighting that makes your garden feel like a boutique hotel to color-themed layouts that soothe the mind, we’re covering it all. Whether you’re a seasoned pro with a power saw or a total beginner looking for a weekend refresh, these projects are designed to be approachable, affordable, and absolutely breathtaking. Let’s turn that ‘someday’ into today and start building the home you’ve always dreamed of.
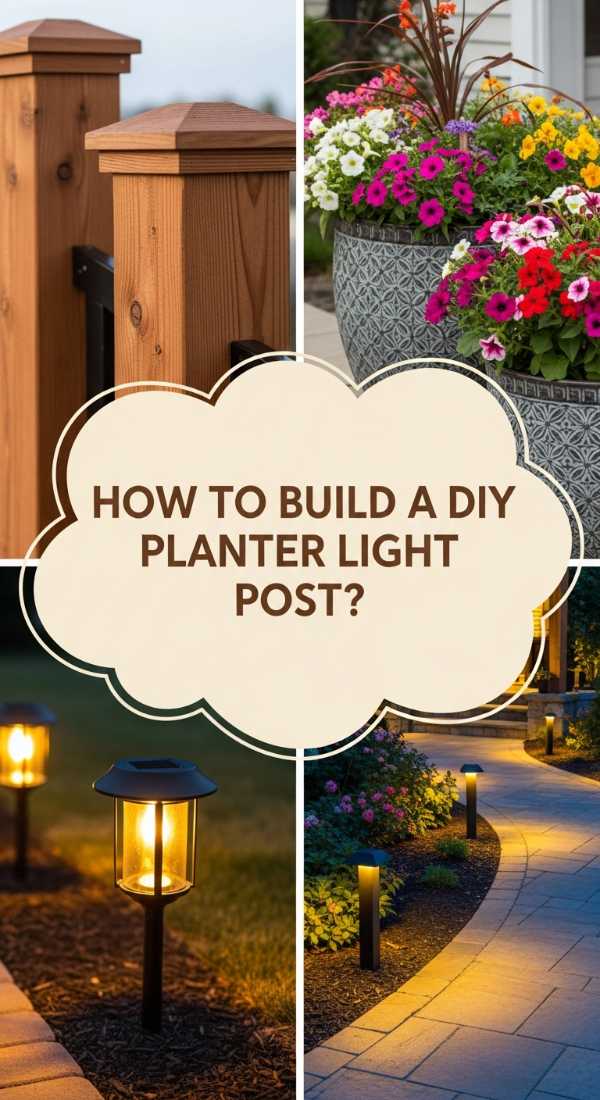
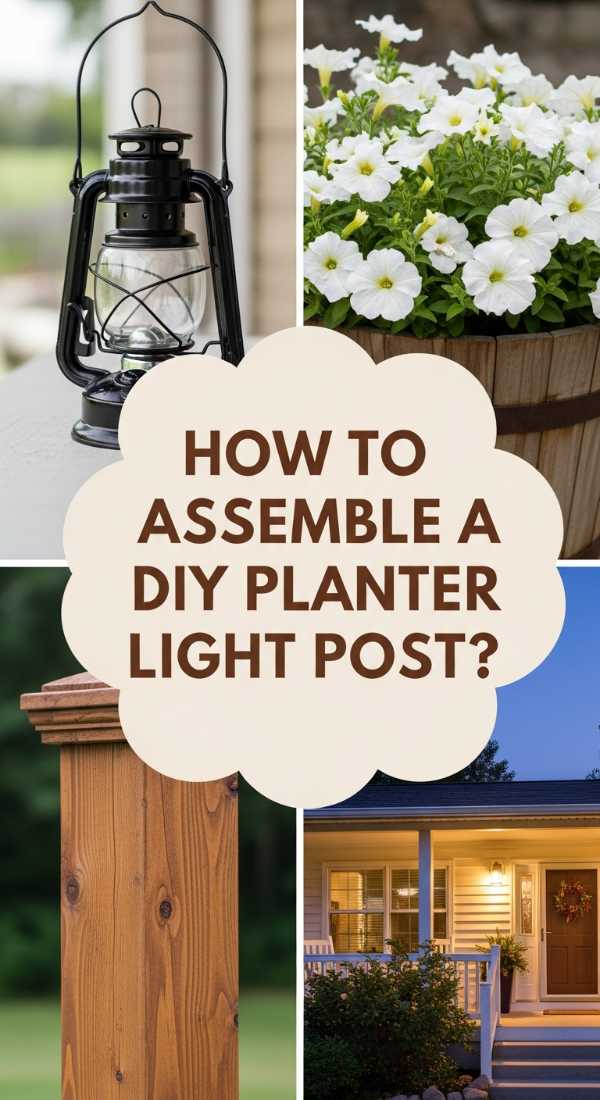
How to Build a DIY Planter Light Post for a Magical Garden Glow
Why we love this
There is something truly ethereal about the way light dances through the leaves of a well-manicured garden as the sun begins to set. This DIY planter light post isn’t just a utility; it’s a mood-setter that combines the organic beauty of lush greenery with the soft, inviting radiance of an overhead lantern. Imagine the scent of damp earth and blooming jasmine swirling around you as you lounge on your patio, the warm amber glow casting long, romantic shadows across your wooden deck. It creates an outdoor living room atmosphere that feels both safe and incredibly sophisticated, turning any backyard into a high-end retreat.
Essential Elements:
- Large heavy-duty wooden or resin planter
- 4×4 pressure-treated wooden post (8 feet tall)
- Quick-setting concrete mix
- Level
- Outdoor solar or hardwired lantern
- Decorative pea gravel or river stones
- Potting soil and seasonal flowers
- Power drill and wood screws
How to make it
- Begin by preparing your planter; if it doesn’t have drainage holes, drill several into the bottom, but ensure you leave a central area solid for the post.
- Center your 4×4 post inside the planter and use a level to ensure it is perfectly vertical. It helps to have a partner hold the post while you work.
- Mix your quick-setting concrete in a bucket according to package instructions until it reaches a thick, oatmeal-like consistency, then pour it into the bottom third of the planter around the post.
- Maintain the level position of the post for 20-30 minutes as the concrete sets; once hardened, this provides a heavy, stable base that won’t tip over in high winds.
- Once the concrete is fully cured (usually 24 hours), attach your lantern fixture to the top of the post using the manufacturer’s mounting hardware and a power drill.
- Add a layer of landscape fabric over the concrete to prevent soil from washing away, then fill the remaining space with high-quality potting soil.
- Plant trailing vines like ivy or bright petunias around the base of the post to soften the look of the wood and add a burst of life.
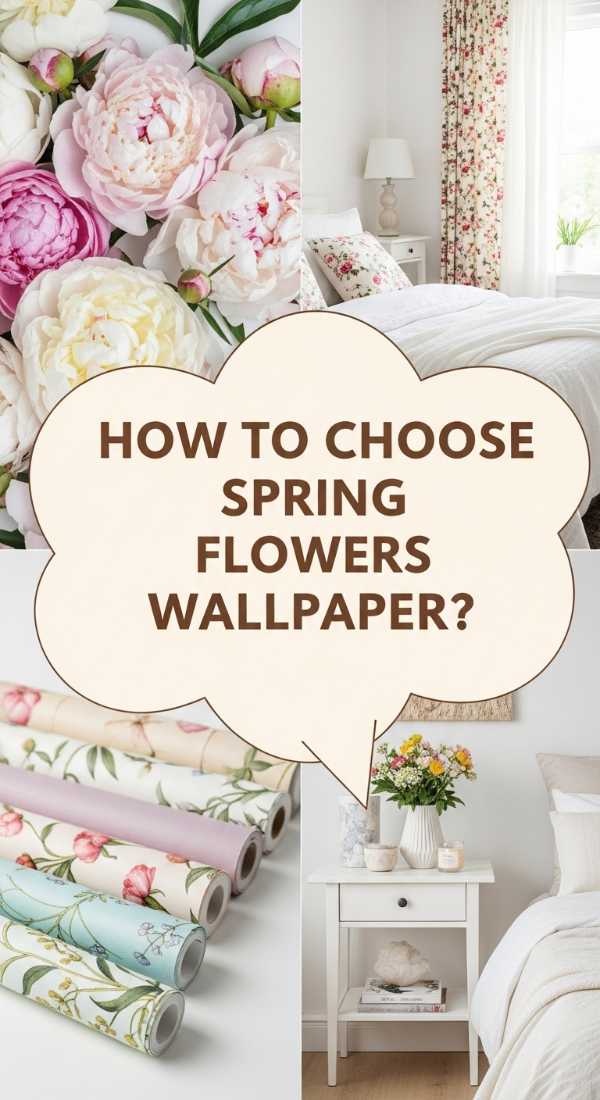
How to Choose Spring Flowers Wallpaper for a Refreshing Bedroom Sanctuary
Why we love this
Stepping into a bedroom adorned with delicate spring florals feels like a permanent invitation to a garden party where the air is always crisp and the flowers never wilt. We love this look because it breaks the monotony of flat, painted walls with intricate textures and a palette that breathes life back into a tired space. The visual impact of oversized blooms or dainty botanical prints can evoke the soft rustle of silk sheets and the gentle hum of a morning breeze. It creates a focal point that is both nostalgic and modern, offering a sense of serenity that makes waking up feel like a curated experience rather than a chore.
Essential Elements:
- High-quality peel-and-stick or traditional wallpaper
- Measuring tape
- Level and pencil
- Wallpaper smoothing tool (squeegee)
- Utility knife with fresh blades
- Wallpaper paste (if not self-adhesive)
- Step ladder
How to make it
- Start by measuring the height and width of your walls to determine exactly how many rolls you need; always buy 10-15% extra to account for pattern matching and mistakes.
- Choose a scale that fits your room: large, bold florals work best as a single accent wall, while smaller, vintage-style patterns can wrap an entire room without feeling overwhelming.
- Prep your walls by cleaning them with a damp cloth to remove dust and oils, ensuring the surface is completely dry and smooth before application.
- Use a level and a pencil to draw a faint vertical line (a plumb line) where your first panel will go; this ensures your entire pattern stays straight across the wall.
- Carefully peel back the top 6 inches of the backing and align the edge of the paper with your plumb line, pressing firmly at the top.
- Slowly work your way down, peeling the backing and using the smoothing tool in an outward motion to eliminate air bubbles and creases.
- Trim the excess at the ceiling and baseboards using a very sharp utility knife, holding a metal ruler against the corner for a perfectly crisp, professional edge.
How to Design Low Retaining Walls for a Structured Modern Landscape

Why we love this
There is a profound sense of satisfaction in a landscape that feels intentional and architectural, and low retaining walls are the secret weapon for achieving that structured look. They provide a crisp, clean border that separates wild greenery from manicured paths, offering a visual rhythm that guides the eye through the garden. We love the tactile contrast between the cold, solid stone or smooth concrete and the soft, swaying grasses or vibrant perennials that spill over the edges. It’s an upgrade that adds literal and figurative layers to your yard, giving it a high-end, professionally designed feel that lasts through every season.
Essential Elements:
- Retaining wall blocks or natural stone
- Crushed gravel (for base)
- Landscape fabric
- Level
- Rubber mallet
- Shovel and tamper
- String line and stakes
- Construction adhesive (for the top cap)
How to make it
- Identify the area and use stakes and a string line to mark the exact path of your wall, ensuring the line is level to guide your excavation.
- Dig a trench roughly 6 inches deep and twice as wide as your blocks; this foundation is critical for preventing the wall from shifting or sagging over time.
- Fill the trench with 3-4 inches of crushed gravel and use a hand tamper to pack it down until it is incredibly firm and perfectly level.
- Lay the first course of blocks, using a level on every single stone and tapping them into place with a rubber mallet; this first row must be flawless as it dictates the rest of the wall.
- Stack subsequent rows, staggering the vertical seams (like bricks) to ensure structural integrity and a professional aesthetic.
- Backfill the space behind the wall with gravel and lay landscape fabric to allow for proper drainage while preventing soil from clogging the stone gaps.
- Secure the final “cap” row of stones with a heavy-duty outdoor construction adhesive to give the wall a finished, permanent look.
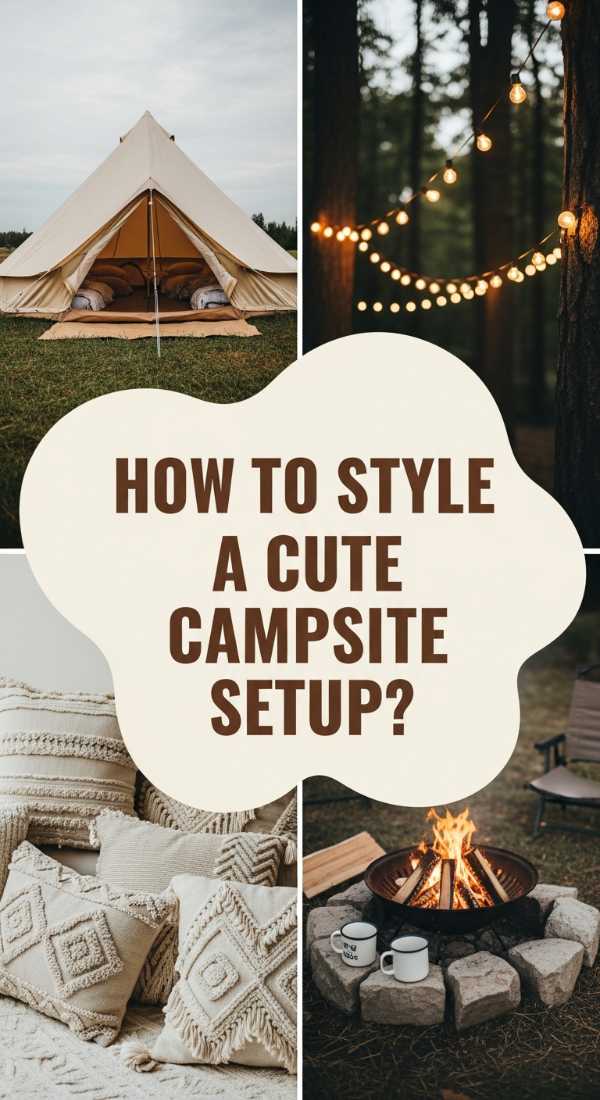
How to Style a Cute Campsite Setup for the Ultimate Glamping Experience
Why we love this
Forget the days of roughing it in a cold, dark tent; the modern glamping aesthetic is all about bringing the cozy luxuries of home into the heart of the wild. This setup is a sensory delight, combining the smell of pine needles and woodsmoke with the touch of faux-fur throws and the soft twinkle of fairy lights. It transforms a simple outdoor overnight into a magical, immersive experience that feels like a scene from a movie. We love how it encourages you to disconnect from the digital world and reconnect with nature, all while surrounded by textures and colors that make you feel pampered and safe under the stars.
Essential Elements:
- Large bell tent or stylish canvas tent
- Inflatable mattress or folding cot
- Outdoor rugs (woven or jute)
- String lights (battery or solar-powered)
- Plush throw pillows and blankets
- Portable fire pit or lantern
- Low folding table
- Fresh greenery or dried pampas grass
How to make it
- Begin by selecting a flat, debris-free site and laying down a heavy-duty groundsheet to protect your tent from moisture and sharp rocks.
- Set up your tent and prioritize height; a bell tent allows you to stand up, which immediately elevates the feeling from “camping” to “living.”
- Layer the floor with multiple outdoor rugs to create a warm, padded surface that covers the plastic tent floor and mimics a real room.
- Dress your bed with high-thread-count sheets and a heavy duvet, piling on textural pillows in earthy tones like terracotta, sage, and cream.
- Drape warm-toned LED fairy lights around the interior poles and along the entrance to create a soft, inviting glow that doesn’t attract as many bugs as harsh white lights.
- Set up a “lounge area” outside the tent with two comfortable chairs, a small table for drinks, and a portable fire pit to serve as the evening’s focal point.
- Add small touches like a Bluetooth speaker for soft acoustic music and a tray with s’mores ingredients to complete the whimsical, luxury vibe.
How to Master a Pink Layout for an Ultra Feminine Office Aesthetic
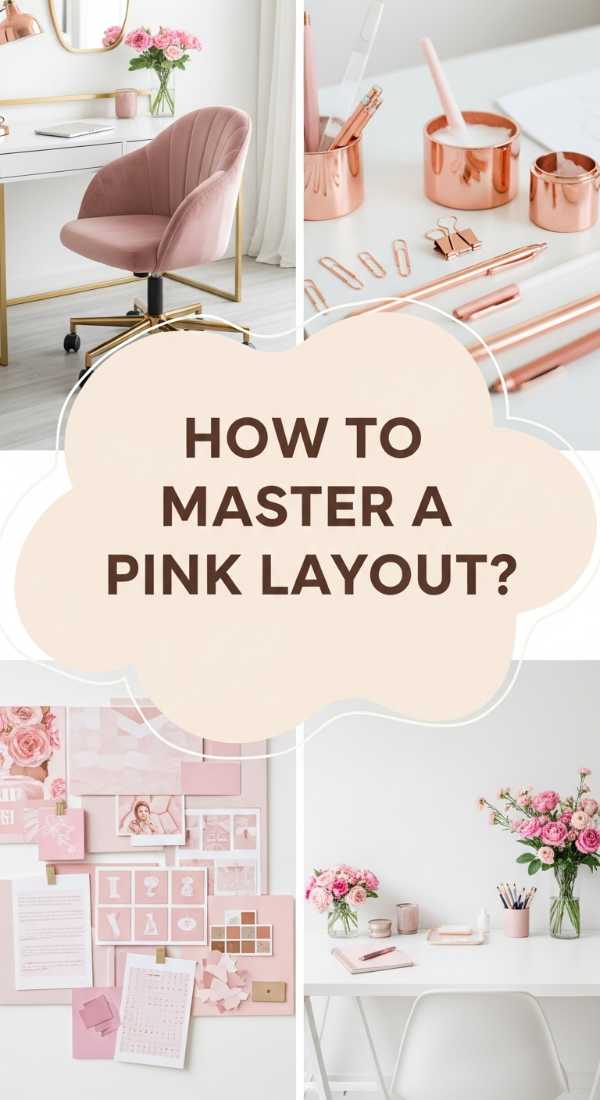
Why we love this
A pink-themed office is more than just a design choice; it’s a power move that celebrates soft strength and creative energy. We love this aesthetic because it challenges the notion that professional spaces must be cold or neutral. Instead, it uses shades of blush, rose, and magenta to create a cocoon of inspiration that feels both sophisticated and playful. Walking into a pink office feels like a fresh start every morning—it’s bright, energizing, and undeniably chic. It pairs beautifully with gold accents and white marble, creating a space that looks like a high-end fashion atelier where big ideas are born.
Essential Elements:
- Desk in white or light wood
- Ergonomic chair in blush velvet
- Pink desk accessories (stapler, pen holder, trays)
- Framed art with rose-gold or pink motifs
- Fresh peonies or pink silk flowers
- Pink area rug
- Ambient lighting with warm bulbs
How to make it
- Start with a neutral base—white walls and a light-colored desk—to allow your pink accents to pop without overwhelming the senses.
- Select your primary shade of pink; a muted “dusty rose” works well for large surfaces like a rug or chair, while “hot pink” is perfect for small, energetic pops.
- Swap out standard office hardware for gold or brass alternatives, which complement pink tones beautifully and add an expensive, metallic shine.
- Layer textures by adding a faux-fur pink throw over your chair and a smooth leather desk mat, creating a tactile experience that feels luxurious.
- Organize your bookshelf by color, incorporating pink book spines or storage boxes to maintain the visual theme throughout the vertical space.
- Incorporate a mood board or gallery wall that features prints with pink accents, tying the entire room together through a cohesive color story.
- Finish with a signature scent, like a rose or vanilla candle, to ensure the office appeals to the senses as much as the eyes.
How to Construct a DIY Duck Enclosure for a Happy Backyard Habitat

Why we love this
There is something inherently joyful about the rhythmic quacking and playful splashing of backyard ducks, and a well-designed enclosure makes their care a breeze. We love this project because it combines rustic charm with practical homesteading, creating a sanctuary that looks like a miniature cottage in your garden. The sight of clean wood, sturdy hardware cloth, and a dedicated splash pool provides a sense of wholesome accomplishment. It’s a space where nature meets nurture, offering your feathered friends a safe haven from predators while adding a delightful, farm-to-table aesthetic to your property.
Essential Elements:
- Pressure-treated lumber (2x4s and 4x4s)
- Hardware cloth (not chicken wire, for predator safety)
- Corrugated roofing panels
- Plywood for the nesting box
- Heavy-duty hinges and latches
- Pre-formed pond liner or large basin
- Straw or wood shavings for bedding
How to make it
- Design a layout that includes both a fully enclosed “house” for sleeping and a secure “run” for daytime activity, allowing at least 4-5 square feet per duck.
- Build the frame of the house using 2x4s, ensuring the floor is raised off the ground to prevent rot and keep the interior dry during rainy seasons.
- Wrap the outdoor run in 1/2-inch hardware cloth, burying the bottom edge 6 inches into the ground to deter digging predators like foxes or raccoons.
- Install a sloped corrugated roof over the house to ensure water runoff, and use wide-opening doors to make cleaning the interior bedding easy.
- Create a dedicated “wet zone” in the run by sinking a pre-formed pond liner into the ground, providing the ducks with the essential water they need for grooming.
- Incorporate a ramp with small wooden slats (cleats) to help the ducks easily enter and exit their elevated house without slipping.
- Finish the exterior with a weather-resistant stain or a cute coat of farmhouse-style paint to match your home’s aesthetic.
How to Implement Landscaping Ideas for Curb Appeal That Wows

Why we love this
Curb appeal is the ultimate first impression; it’s the visual handshake your home offers to the neighborhood. We love a well-landscaped front yard because it instantly increases the perceived value of your home while creating a welcoming path for guests. The combination of deep green lawns, crisp mulch, and a symphony of blooming shrubs creates a vibrant frame for your architecture. It’s about the sensory experience of walking up to your door—the smell of fresh cedar mulch, the sight of swaying hydrangeas, and the feeling of pride that comes from a home that looks loved and maintained from the street.
Essential Elements:
- Fresh dark mulch (black or dark brown)
- Edging material (stone, brick, or metal)
- A mix of perennials and evergreen shrubs
- Solar path lights
- High-quality grass seed or sod
- Large decorative planters for the porch
- Pruning shears
How to make it
- Start by defining your beds; use a garden hose to map out soft, flowing curves rather than rigid straight lines, which looks more natural and high-end.
- Clean out all weeds and old debris, then use a sharp spade to cut a deep “V” edge along the grass line to keep the lawn from creeping into your garden beds.
- Layer your plants by height: place taller evergreens at the back near the house, mid-sized flowering shrubs in the middle, and low-growing groundcovers at the front.
- Focus on symmetry near the entryway; placing matching planters on either side of the front door creates an instant sense of balance and formality.
- Apply a thick 3-inch layer of dark mulch across all beds; this not only suppresses weeds but provides that crisp, professional contrast that makes plant colors pop.
- Install solar-powered path lights along the walkway to ensure your landscaping looks just as stunning at 9 PM as it does at noon.
- Maintain the look by deadheading spent blooms and keeping the grass edges trimmed weekly, ensuring the “wow” factor never fades.
How to Create a Blue Layout for a Serene and Calm Living Space
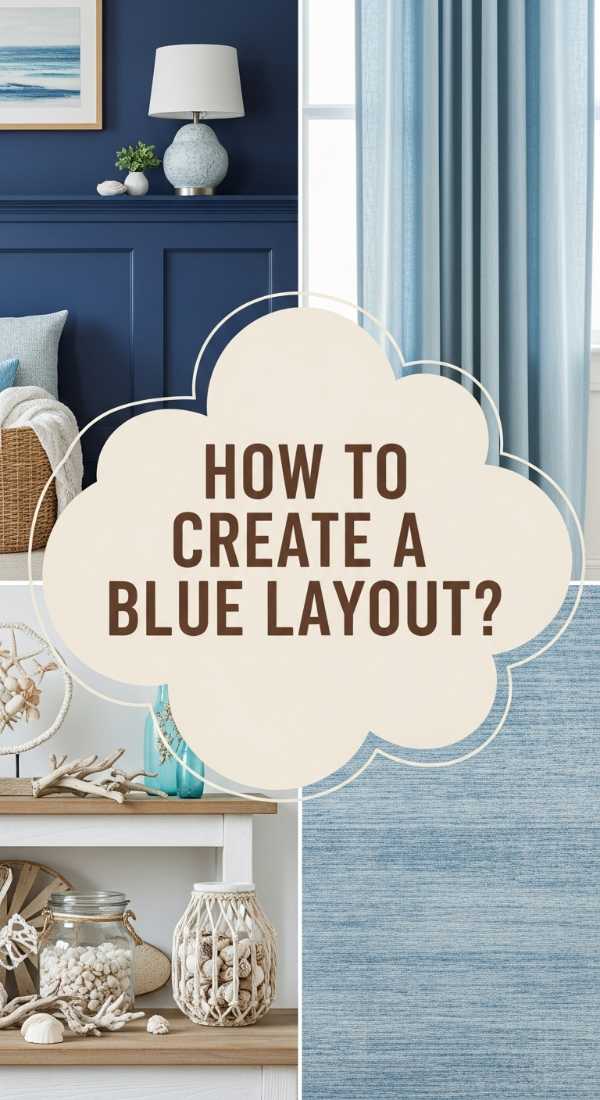
Why we love this
Blue is the color of the endless sky and the deep, rhythmic ocean; it is the ultimate hue for fostering a sense of peace and tranquility in a busy home. We love a blue-themed living space because it acts as a visual deep breath, lowering the heart rate and inviting you to sink into a state of relaxation. From the rich, velvety depth of navy to the airy lightness of seafoam, blue offers a versatility that few other colors can match. It feels clean, timeless, and effortlessly cool, providing a sophisticated backdrop for family gatherings or quiet Sunday afternoons with a book.
Essential Elements:
- Blue area rug (patterned or solid)
- Navy or slate blue throw pillows
- Textured blue blankets
- Wall art featuring coastal or abstract blue themes
- Ceramic vases in varying shades of azure
- Light gray or cream sofa (as a base)
- Metallic accents (silver or chrome)
How to make it
- Choose your “anchor” blue—this should be the dominant shade that sets the tone, such as a deep navy for a moody, cozy feel or a sky blue for a bright, airy vibe.
- Start with a large area rug that incorporates several shades of blue; this provides a roadmap for the rest of your decor items to follow.
- Layer your seating with a variety of textures: combine a smooth navy velvet pillow with a chunky, light-blue knit throw to add visual interest and depth.
- Incorporate blue through glass and ceramics; translucent blue glass vases catch the light beautifully and mimic the appearance of water.
- Paint an accent wall in a soft, dusty blue to envelop the room in color without making it feel smaller or too dark.
- Balance the cool tones of the blue with warm wood furniture or metallic silver hardware to prevent the space from feeling too “cold.”
- Ensure your lighting is warm-toned (2700K bulbs), as this softens the blue hues and makes the room feel cozy rather than clinical in the evenings.
How to Install Spring Flowers Wallpaper for a Whimsical Home Transformation
![]()
Why we love this
The transformation that occurs when you apply a whimsical floral wallpaper is nothing short of magic—it’s like watching a room bloom right before your eyes. We love this project specifically for those forgotten spaces like powder rooms, laundry rooms, or entryways where a burst of color and pattern can make a massive impact. The delicate petals and winding stems of spring flowers create a sense of movement and joy that paint simply cannot replicate. It turns a functional area into a destination, a place where you can linger and admire the artistry, making the mundane moments of daily life feel a little more enchanted.
Essential Elements:
- Prep-pasted or unpasted floral wallpaper
- Wallpaper sponge and bucket of water
- Seam roller
- Wide putty knife (for guiding cuts)
- Step stool
- Large workspace (like a clean floor or table)
- Pencil and level
How to make it
- Ensure your walls are perfectly smooth; sand down any bumps and fill any holes with spackle, as floral patterns can highlight surface imperfections.
- Apply a wallpaper primer to the wall 24 hours before you begin; this allows for easier repositioning and protects the drywall for future removal.
- If using unpasted paper, apply the paste to the wall (paste-the-wall method) or the paper (paste-the-paper method) using a paint roller for even coverage.
- Book the paper: fold the pasted sides together for 5-10 minutes to allow the glue to activate and the paper to expand slightly before hanging.
- Hang your first strip using a plumb line for perfect verticality, then align the second strip by carefully matching the pattern at eye level first.
- Use a seam roller to firmly press down the edges where two strips meet, ensuring the join is invisible and won’t peel back over time.
- Wipe away any excess paste from the surface of the paper immediately with a clean, damp sponge to prevent a cloudy residue from drying on the design.
How to Assemble a DIY Planter Light Post for Enchanting Evening Curb Appeal
Why we love this
While the backyard version of this project is about relaxation, the front-yard planter light post is all about the grand entrance. We love how this single DIY element can transform a standard driveway or walkway into an inviting, high-end estate entrance. The glow of the lantern at the end of the drive says ‘welcome home’ in the most beautiful way possible, providing both safety and style. It’s a beacon of warmth that highlights your gardening efforts and adds a layer of sophisticated lighting that makes your home stand out on the block, especially during those long winter evenings.
Essential Elements:
- Tall, decorative tapered planter
- Pressure-treated 4×4 post
- Concrete mix
- Outdoor-rated solar lantern with high lumen output
- House numbers (to mount on the post)
- Hanging basket bracket
- Seasonal trailing plants
How to make it
- Select a planter that complements your home’s architecture—black for modern, white for cottage, or natural wood for a rustic look.
- Secure the post in concrete as detailed in the previous section, but ensure the post is tall enough (at least 6-7 feet) to be visible from the street.
- Mount large, modern house numbers vertically down the side of the post; this adds a functional, custom element that helps guests find your home.
- Install a decorative wrought-iron bracket on the side of the post opposite the house numbers and hang a lush basket of flowers or ferns.
- Choose a solar lantern with a “flickering flame” or “warm Edison” bulb effect to create a more high-end, realistic lighting look without needing an electrician.
- Surround the base of the post with white marble chips or dark lava rock to create a clean, maintenance-free surface inside the planter.
- Position the entire assembly at the start of your walkway or the corner of your driveway to maximize the visual impact and provide essential path lighting.
Creating Your Dream Lifestyle
Building a home that feels like a sanctuary doesn’t happen overnight, but through these intentional DIY projects, you can create a space that truly reflects who you are. From the structural elegance of a stone wall to the soft, feminine energy of a pink-hued office, every choice you make adds a layer of story to your environment. Remember, the goal isn’t perfection—it’s personality. Don’t be afraid to get your hands dirty, try a new color, or build something from scratch. Your home is your canvas, and you have all the tools you need to make it a masterpiece.
Frequently Asked Questions
- How much do these DIY projects typically cost? Most of these projects can be completed for under $200, with many like the wallpaper accent or the planter light post costing significantly less if you shop sales or use reclaimed materials.
- Do I need professional tools to build the duck enclosure or retaining walls? Basic tools like a drill, a level, and a shovel are sufficient for most of these. For the retaining walls, a rubber mallet is essential, but you don’t need heavy machinery for low, decorative walls.
- Is peel-and-stick wallpaper really as good as traditional wallpaper? Yes! Modern peel-and-stick is high-quality, renter-friendly, and much easier for beginners to install. Just ensure your walls are clean and smooth for the best adhesion.
- Can I use regular wood for the planter posts? It is highly recommended to use pressure-treated wood or cedar, as these are naturally resistant to rot and insects, ensuring your project lasts for many years outdoors.