

From Bloom to BBQ: Essential Flavors for Your Seasonal Kitchen
Hello, my loves! Can you feel it? That gentle, honey-warm breeze filtering through the curtains and the scent of wild jasmine waking up the garden. There is something so deeply restorative about this shift from the tender buds of spring to the golden, sun-drenched afternoons of summer. It is a time for slow mornings on the porch and long, laughter-filled evenings by the grill, and I am so honored to share my kitchen heart with you today.
Food is my love language, especially during these months. It’s about the snap of a fresh pea, the juice of a sun-ripened strawberry staining our fingers, and the smoke rising from the backyard barbecue. This seasonal guide is more than just recipes; it’s an invitation to pause, breathe in the fragrance of fresh herbs, and nourish your soul with the vibrancy of the earth. Let’s step into our kitchens together and create some magic.
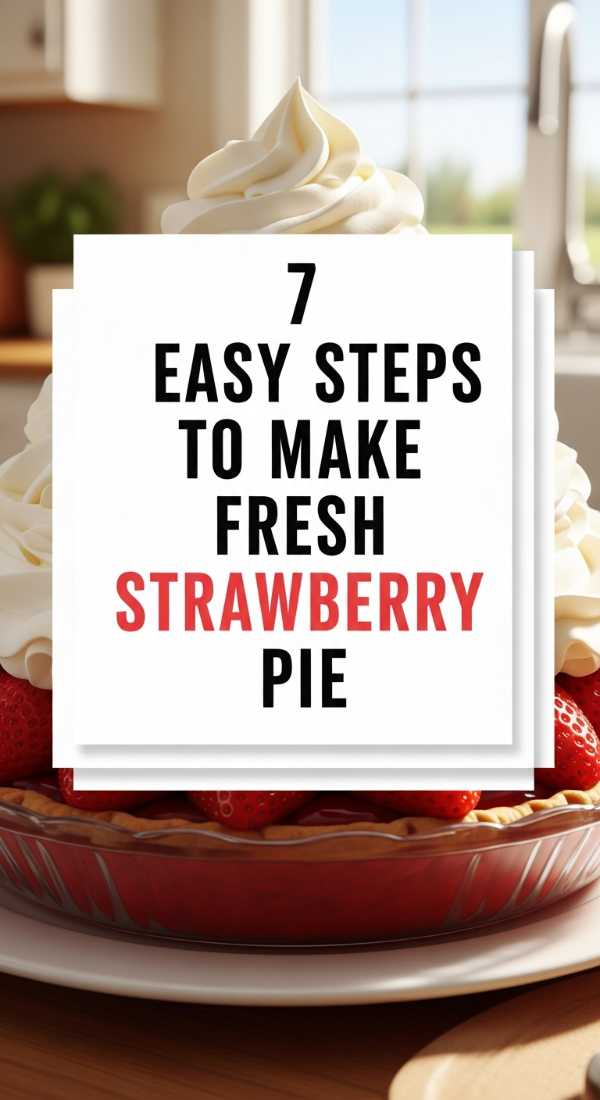
7 Easy Steps to Make Fresh Strawberry Pie
Why to love this recipe:
This pie is a slice of pure sunshine. It celebrates the ruby-red sweetness of peak-season strawberries without overcomplicating their natural beauty, encased in a buttery, flaky embrace that feels like home.
Essential Ingredients:
- 2 lbs fresh strawberries
- 1 cup granulated sugar
- 3 tbsp cornstarch
- 1 tsp vanilla extract
- Pre-made or homemade pie crust
- Whipped cream
- Lemon zest
How to Prepare:
- Pre-bake your pie crust until golden brown and let it cool completely.
- Wash, hull, and slice half of your strawberries; keep the other half whole.
- In a saucepan, mash one cup of berries with sugar and cornstarch, heating until thick and clear.
- Stir in the vanilla extract and a pinch of lemon zest for brightness.
- Arrange the whole strawberries beautifully inside the cooled crust.
- Pour the thickened strawberry glaze evenly over the fresh fruit.
- Chill in the refrigerator for at least 3 hours before serving with a dollop of cream.
Budget Range
- Store-brand frozen pie crust ($3.49)
- Organic local strawberries ($5.99)
- Generic cornstarch ($1.89)
Prepare 5 Tea Party Sandwiches in 20 Minutes

Why to love this recipe:
There is nothing quite as charming as a tea party spread. These tiny bites are light, elegant, and surprisingly easy to whip up, making any afternoon feel like a special occasion with your favorite people.
Essential Ingredients:
- White and whole wheat bread
- English cucumbers
- Smoked salmon and cream cheese
- Egg salad with dill
- Ham and honey mustard
- Chicken salad with grapes
How to Prepare:
- Cream Cheese & Cucumber: Spread herbed cream cheese on white bread and layer paper-thin cucumber slices.
- Smoked Salmon: Layer thin salmon over cream cheese with a sprinkle of fresh dill on whole wheat.
- Classic Egg Salad: Mix mashed boiled eggs with mayo and dill, spread generously.
- Honey Ham: Combine thin ham slices with a swipe of sweet honey mustard.
- Fruity Chicken Salad: Mix shredded chicken with halved grapes and light mayo.
Budget Range
- Great Value Sliced White Bread ($1.50)
- Philadelphia Cream Cheese ($4.20)
- English Cucumber ($1.25)
Make Grillos Pickle Dip in 3 Simple Steps

Why to love this recipe:
If you are a pickle lover, this dip is your new obsession. It is tangy, crunchy, and incredibly refreshing—the perfect companion for a bag of salty chips on a hot July day.
Essential Ingredients:
- 1 jar Grillos Pickles (chopped)
- 8 oz softened cream cheese
- 1/2 cup sour cream
- Fresh dill and pickle brine
How to Prepare:
- Finely dice about a cup of Grillos pickles and reserve two tablespoons of the brine.
- In a medium bowl, whip together the cream cheese, sour cream, and pickle brine until smooth.
- Fold in the diced pickles and fresh dill, then chill for 30 minutes before serving.
Budget Range
- Grillo’s Pickles ($6.99)
- Daisy Sour Cream ($2.50)
- Fresh Dill bunch ($1.99)
Follow 6 Steps for Healthy Grilling Recipes

Why to love this recipe:
Grilling doesn’t have to be heavy. These steps ensure your summer meals are light, packed with nutrients, and bursting with that smoky charred flavor we all crave when the sun goes down.
Essential Ingredients:
- Zucchini and bell peppers
- Lean protein (shrimp or tofu)
- Olive oil
- Lemon juice
- Garlic and dried oregano
- Sea salt
How to Prepare:
- Preheat your grill to a medium-high heat and clean the grates thoroughly.
- Lightly brush your vegetables and proteins with heart-healthy olive oil.
- Season simply with garlic, oregano, salt, and pepper to let the natural flavors shine.
- Place items on the grill, ensuring enough space for even air circulation.
- Grill vegetables for 3-4 minutes per side and proteins until just opaque.
- Finish with a squeeze of fresh lemon juice immediately after removing from the heat.
Budget Range
- Private Selection Olive Oil ($8.99)
- Fresh Zucchini ($0.99/lb)
- Frozen Jumbo Shrimp ($10.00)
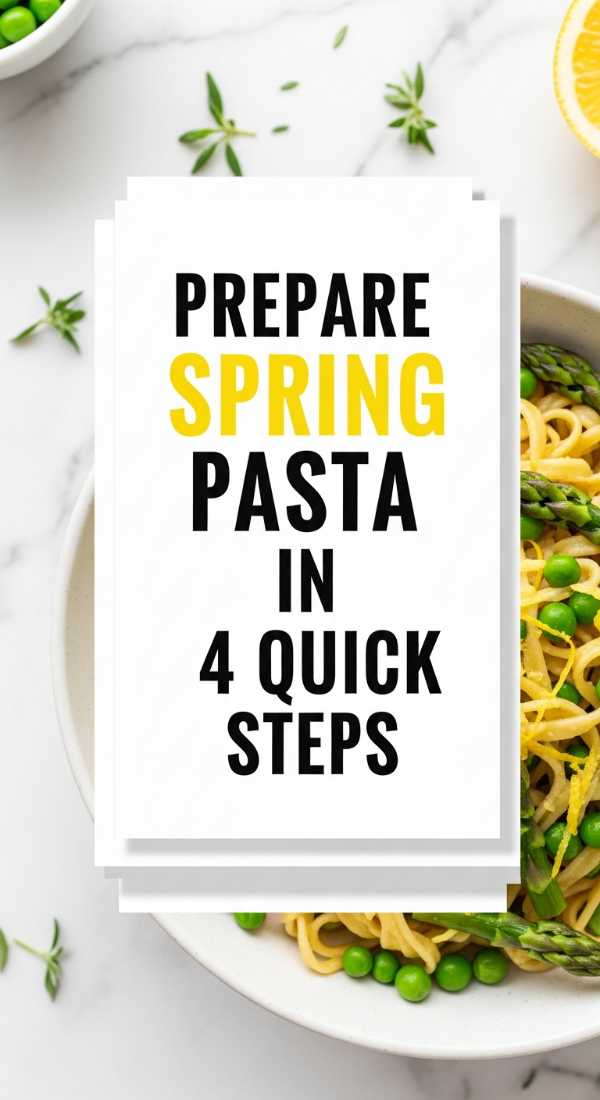
Prepare Spring Pasta in 4 Quick Steps
Why to love this recipe:
This pasta is like a garden in a bowl. It’s light, vibrant, and uses the very best of spring’s bounty—asparagus and peas—for a meal that feels fancy but takes minutes.
Essential Ingredients:
- Penne or Farfalle pasta
- Fresh asparagus spears
- Frozen sweet peas
- Parmesan cheese
- Garlic and butter
How to Prepare:
- Boil your pasta in salted water, adding the asparagus and peas during the last 3 minutes of cooking.
- Drain the pasta and veggies, reserving a small splash of the starchy cooking water.
- In the same pot, melt butter and sauté minced garlic until fragrant.
- Toss everything back together with the reserved water and a generous dusting of Parmesan.
Budget Range
- Barilla Penne Pasta ($1.75)
- Fresh Asparagus ($2.50)
- Kraft Shredded Parmesan ($4.50)
Craft a Virgin Pina Colada in 5 Minutes

Why to love this recipe:
Transport yourself to a tropical island without the hangover. This mocktail is creamy, frosty, and sweet, making it the ultimate treat for kids and adults alike during a pool day.
Essential Ingredients:
- 1 cup frozen pineapple chunks
- 1/2 cup coconut cream
- 1/2 cup pineapple juice
- 1 cup ice
- Maraschino cherries
How to Prepare:
- Add the frozen pineapple, coconut cream, and pineapple juice into a high-speed blender.
- Add the ice cubes to achieve that perfect slushy consistency.
- Blend on high until completely smooth and velvety.
- Pour into a tall glass and garnish with a cherry and a tiny umbrella.
- Sip immediately while it’s frosty!
Budget Range
- Dole Canned Pineapple Juice ($3.50)
- Goya Cream of Coconut ($2.99)
- Frozen Pineapple Chunks ($4.00)
8 Tasty Ways to Use Sourdough Discard Easy

Why to love this recipe:
Don’t let that precious starter go to waste! Sourdough discard adds a beautiful tang and moisture to everyday bakes, turning kitchen waste into culinary gold.
Essential Ingredients:
- Sourdough discard
- Flour
- Sugar
- Eggs
- Baking powder
- Butter
How to Prepare:
- Pancakes: Whisk discard into your favorite batter for a tangy breakfast.
- Crackers: Mix with butter and herbs, roll thin, and bake until crisp.
- Muffins: Fold into blueberry muffin mix for extra lift and moisture.
- Waffles: Use it for a fermented crunch that stays crispy longer.
- Chocolate Brownies: The acidity of the discard makes the chocolate taste richer.
- Pizza Crust: Add to flour and water for a quick-ferment thin crust.
- Biscuits: Use it to create flaky, layered biscuits with a deep flavor.
- Banana Bread: Swirl it in to balance the sweetness of overripe bananas.
Budget Range
- King Arthur All-Purpose Flour ($5.99)
- Store-brand Granulated Sugar ($2.50)
- Land O’Lakes Butter ($4.99)
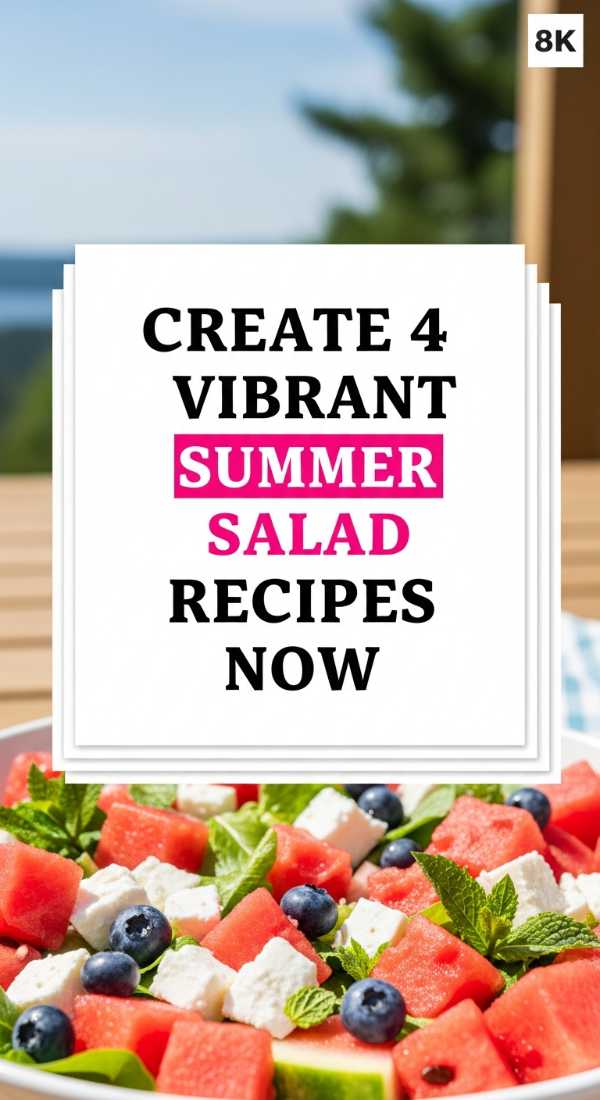
Create 4 Vibrant Summer Salad Recipes Now
Why to love this recipe:
When it is too hot to cook, these salads are your best friend. They are hydrating, colorful, and celebrate the refreshing crunch of seasonal produce.
Essential Ingredients:
- Watermelon and Feta
- Corn and Black Bean
- Classic Caprese (Tomato/Basil)
- Peach and Arugula
How to Prepare:
- Watermelon Feta: Cubed watermelon, crumbled feta, mint leaves, and lime juice.
- Summer Corn: Charred corn kernels, black beans, cilantro, and avocado lime dressing.
- Caprese: Sliced heirloom tomatoes, fresh mozzarella, basil, and balsamic glaze.
- Peach Arugula: Sliced peaches, peppery arugula, goat cheese, and balsamic vinaigrette.
Budget Range
- Whole Seedless Watermelon ($5.00)
- Fresh Mozzarella Log ($5.50)
- Canned Black Beans ($0.89)
Grill Perfect Chicken in 6 Easy Steps

Why to love this recipe:
Mastering the grill means no more dry chicken! These steps guarantee juicy, tender meat with those beautiful char marks that scream summer cookout.
Essential Ingredients:
- Chicken breasts or thighs
- Salt and pepper
- Paprika and onion powder
- High-smoke point oil
How to Prepare:
- Pound chicken breasts to an even thickness so they cook uniformly.
- Pat the meat completely dry with paper towels to ensure a good sear.
- Season liberally with salt, pepper, paprika, and onion powder.
- Oil the grill grates and heat to a steady medium-high.
- Grill for 5-7 minutes per side, only flipping once.
- Let the chicken rest for 5 minutes under foil before slicing to lock in the juices.
Budget Range
- Family Pack Chicken Breasts ($12.00)
- McCormick Smoked Paprika ($4.25)
- Vegetable Oil ($3.50)
Mix 5 Refreshing Spring Mocktail Recipes Today

Why to love this recipe:
Spring is for sipping pretty! These mocktails use floral notes and fresh herbs to create sophisticated drinks that are as beautiful to look at as they are to drink.
Essential Ingredients:
- Lavender syrup
- Sparkling water
- Fresh berries
- Cucumber and mint
- Rose water
How to Prepare:
- Lavender Lemonade: Stir lavender syrup into fresh lemonade with a sprig of thyme.
- Cucumber Mint Fizz: Muddle cucumber and mint, top with lime juice and soda water.
- Ginger Berry Smash: Muddle raspberries with ginger beer and a splash of honey.
- Rose Petal Soda: A drop of rose water in sparkling water with a lemon twist.
- Spring Garden: Muddled strawberries and basil topped with sparkling white grape juice.
Budget Range
- Perrier Sparkling Water ($6.50/pack)
- Monin Lavender Syrup ($10.00)
- Fresh Mint bunch ($1.99)
A Season of Joy and Flavor
As the days grow longer and the air turns sweet with the promise of summer, I hope these recipes find a place at your table. Whether you are hosting a grand backyard bash or simply enjoying a quiet bowl of spring pasta by the window, remember that the best ingredient is always the love you pour into it. Enjoy these flavors, cherish these moments, and let your kitchen be a place of endless bloom. I can’t wait to hear which of these becomes your new favorite!
Frequently Asked Questions
- Q: Can I make the strawberry pie a day in advance?
A: It is best served within 24 hours to keep the crust crisp, but it will stay delicious in the fridge for up to two days! - Q: What is the best way to store sourdough discard?
A: Keep it in a sealed glass jar in the refrigerator. It can last for several weeks for use in non-leavened recipes! - Q: How do I prevent my grilled chicken from sticking?
A: Make sure your grill is very hot before adding the meat, and ensure the grates are clean and well-oiled. - Q: Can I use frozen fruit for the summer salads?
A: For salads, fresh is definitely best for the texture! Save the frozen fruit for the Pina Coladas or mocktails.