
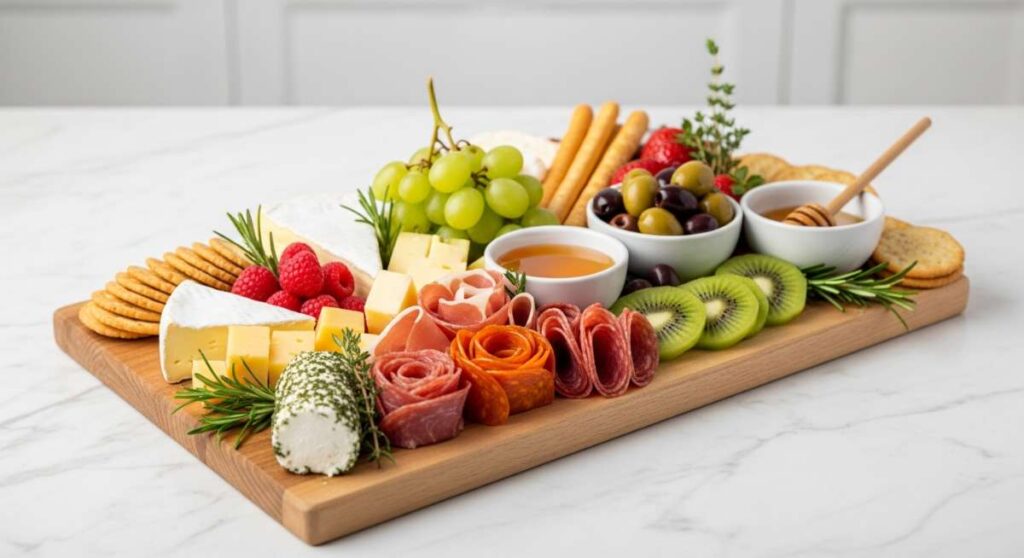
The Ultimate Guide to Making a Viral Charcuterie Board in 5 Minutes
There is something truly magical about the way a perfectly curated space or a beautifully arranged spread can instantly lift your spirits. I remember the first time I hosted a summer gathering; I was so nervous about everything being ‘perfect’ that I almost forgot to enjoy the company of my favorite people. But then I realized that the secret to that effortless, viral lifestyle aesthetic isn’t about perfection—it’s about creating moments that feel warm, intentional, and inviting.
Whether you are styling a dreamy pink flat-lay for your morning coffee or transforming your backyard into a glamping sanctuary, it’s those small, thoughtful details that turn an ordinary day into a Pinterest-worthy memory. This guide is your ultimate roadmap to elevating every corner of your life, from the way your front porch greets your guests to the serene blue hues of your home office. Let’s dive into how you can create a lifestyle that feels as good as it looks!
How to Style a Pink Layout for Dreamy Spring Vibes
Why we love this
Nothing captures the essence of a fresh start quite like a soft, blush-toned layout that feels like a warm hug for your senses. When you combine delicate textures like silk ribbons with the crisp, clean scent of fresh peonies, you create a visual symphony that radiates positivity and grace. It’s the kind of aesthetic that makes you want to slow down, sip a rose-flavored latte, and bask in the gentle morning light hitting your desk. This style isn’t just about the color; it’s about the feeling of airy romance and the quiet joy of springtime blossoms.
Essential Elements:
- Blush pink linen napkins or silk fabric scraps
- Fresh pink peonies, ranunculus, or cherry blossoms
- Rose gold or copper accents (like a vintage tray or scissors)
- A high-quality ceramic mug in a creamy white or pastel pink
- Macarons or light-colored pastries for texture
How to make it
- Begin by choosing a flat, well-lit surface near a window to capture soft, natural light, which is essential for that ‘dreamy’ glow.
- Lay down your base layer—a neutral white wood or a pale pink linen—ensuring there are natural folds in the fabric to create depth and shadow.
- Place your ‘hero’ item, such as a notebook or a cup of tea, slightly off-center to follow the rule of thirds for a more balanced composition.
- Tuck small sprigs of greenery or floral petals around the main objects, layering them so some look like they are casually falling off the frame.
- Add small metallic elements or delicate jewelry to catch the light, then use a tripod to take photos from a direct ‘top-down’ bird’s-eye view for that classic flat-lay look.
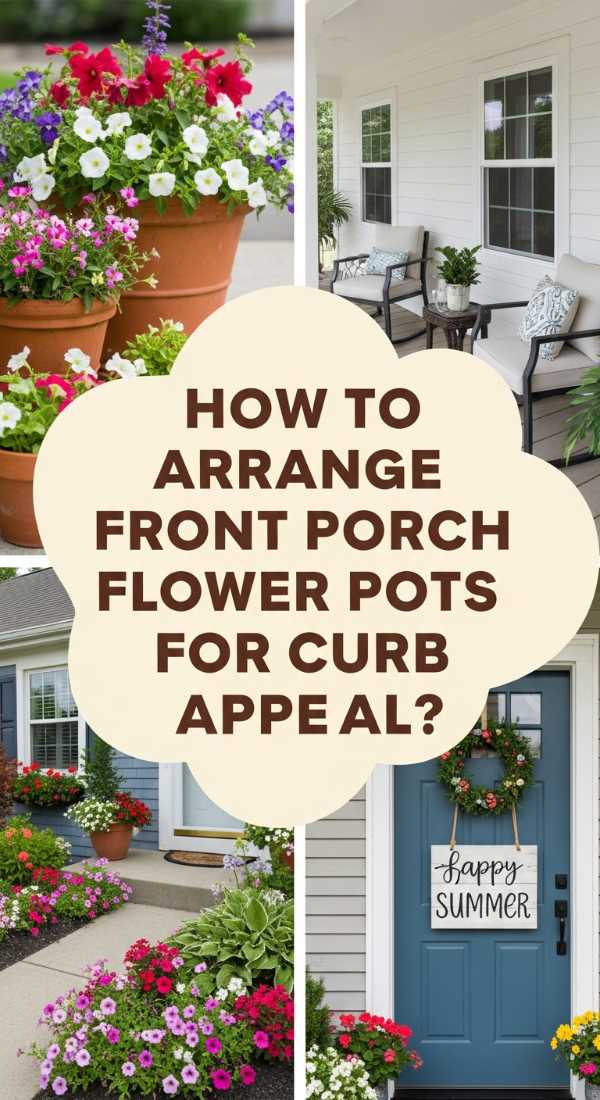
How to Arrange Front Porch Flower Pots for Instant Curb Appeal
Why we love this
Your front porch is the handshake of your home, and there is nothing more welcoming than a vibrant explosion of petals and lush greenery. The aroma of damp soil and sweet jasmine wafting through the air as you step toward the door creates an immediate sense of peace and belonging. We love this look because it uses varying heights and textures to create a lush, lived-in feel that makes even the simplest entryway feel like a grand garden estate. It’s a tactile experience of soft leaves and sturdy terracotta that signals ‘home’ the moment you pull into the driveway.
Essential Elements:
- Three varying sizes of weather-resistant pots (Large, Medium, Small)
- Thriller plants (like Dracaena or Canna Lilies)
- Filler plants (like Geraniums or Petunias)
- Spiller plants (like Sweet Potato Vine or Creeping Jenny)
- High-quality potting mix with slow-release fertilizer
How to make it
- Select a cohesive color palette for your pots—think classic stone, modern black, or traditional terracotta—and arrange them in a cluster of three near your door.
- Fill each pot two-thirds of the way with fresh potting soil, packing it down lightly to remove large air pockets while keeping it fluffy enough for drainage.
- Place your ‘Thriller’ (the tallest, most dramatic plant) in the center or back of the largest pot to provide a vertical focal point.
- Surround the thriller with ‘Fillers’ (mounding plants with lots of flowers) to add volume and color, ensuring you leave about two inches between each root ball.
- Plant your ‘Spillers’ along the very edge of the pot, angling them slightly outward so they can cascade gracefully down the sides as they grow.
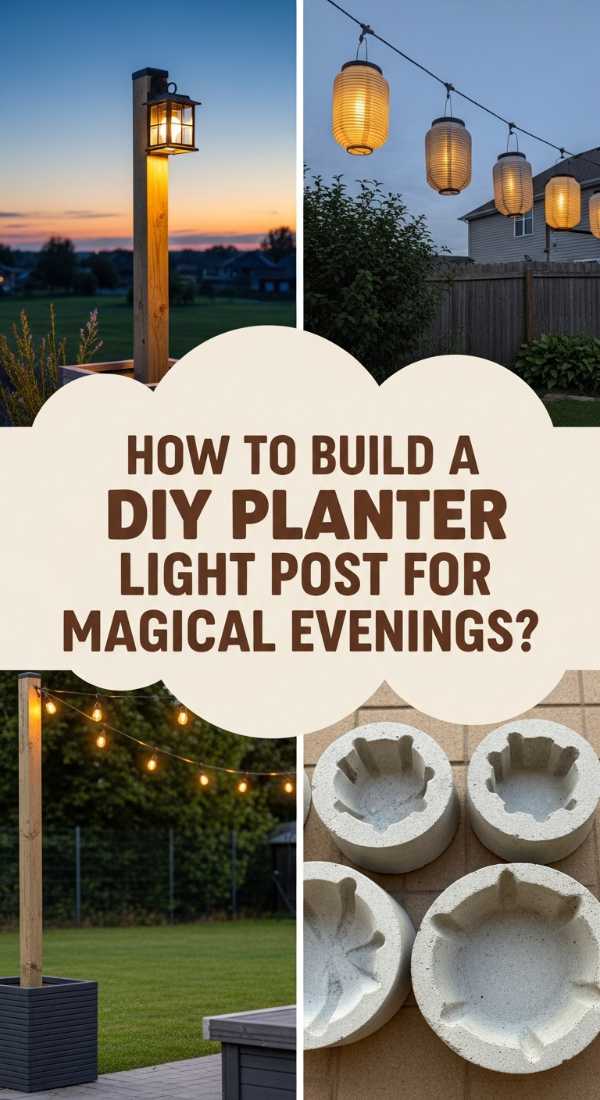
How to Build a DIY Planter Light Post for Magical Outdoor Evenings

Why we love this
As the sun sets, there is a transformative power in soft, ambient lighting that turns a dark backyard into a mystical retreat. These planter light posts provide a steady, warm glow that mimics the flicker of starlight, casting long, romantic shadows across your patio furniture. The combination of sturdy timber, blooming flowers at the base, and the delicate twinkle of Edison bulbs creates a sensory experience that is both grounding and whimsical. It’s the ultimate way to extend your summer evenings, wrapped in the scent of night-blooming jasmine and the soft hum of good conversation.
Essential Elements:
- Large heavy-duty plastic or wooden planters
- 4×4 pressure-treated wooden posts (8 feet tall)
- Fast-setting concrete mix and water
- Heavy-duty screw hooks
- Outdoor-rated Edison string lights
How to make it
- Place your wooden post exactly in the center of the empty planter, using a level to ensure it is perfectly vertical on all sides.
- Mix your fast-setting concrete in a bucket according to the package directions and pour it into the planter around the base of the post, leaving about 4 inches of space at the top.
- Hold the post steady for about 5-10 minutes (or use braces) until the concrete sets firm enough to stand on its own, then let it cure for 24 hours.
- Once cured, drill a small pilot hole near the top of the post and screw in a heavy-duty metal hook to hold your light strings.
- Fill the remaining 4 inches of the planter with potting soil and plant colorful annuals to hide the concrete and add a lush, decorative finish.
How to Design Low Maintenance Flower Bed Ideas for Busy Gardeners
Why we love this
There is a unique satisfaction in a garden that thrives on its own, offering beauty without demanding every second of your weekend. We love the effortless elegance of perennial grasses swaying in the wind, paired with the rugged, silver-toned leaves of drought-resistant shrubs. It creates a landscape that feels intentional and architectural, smelling of earthy mulch and fresh rain rather than chemicals and constant upkeep. This approach allows you to be a ‘slow gardener,’ spending more time enjoying the view from your porch swing than pulling weeds under the hot sun.
Essential Elements:
- Hardy perennials (like Lavender, Coneflower, or Sedum)
- Ornamental grasses (like Blue Fescue or Maiden Grass)
- Landscape fabric or heavy-duty cardboard for weed suppression
- Natural cedar mulch or river stones
- Soaker hoses for efficient, automated watering
How to make it
- Clear the designated area of all existing weeds and debris, then lay down a thick layer of cardboard or landscape fabric to prevent future weed growth.
- Sketch a layout that places taller, structural plants in the back and shorter, spreading varieties in the front to ensure every plant gets sunlight.
- Cut ‘X’ shapes into your fabric and dig holes twice the width of your plant containers, mixing in a little compost to give the roots a healthy start.
- Install a soaker hose system snaking between the plants, which delivers water directly to the roots and minimizes evaporation and leaf disease.
- Cover the entire area with a 3-inch layer of organic mulch, which retains moisture and gives the bed a clean, professional look while suppressing any stray seeds.
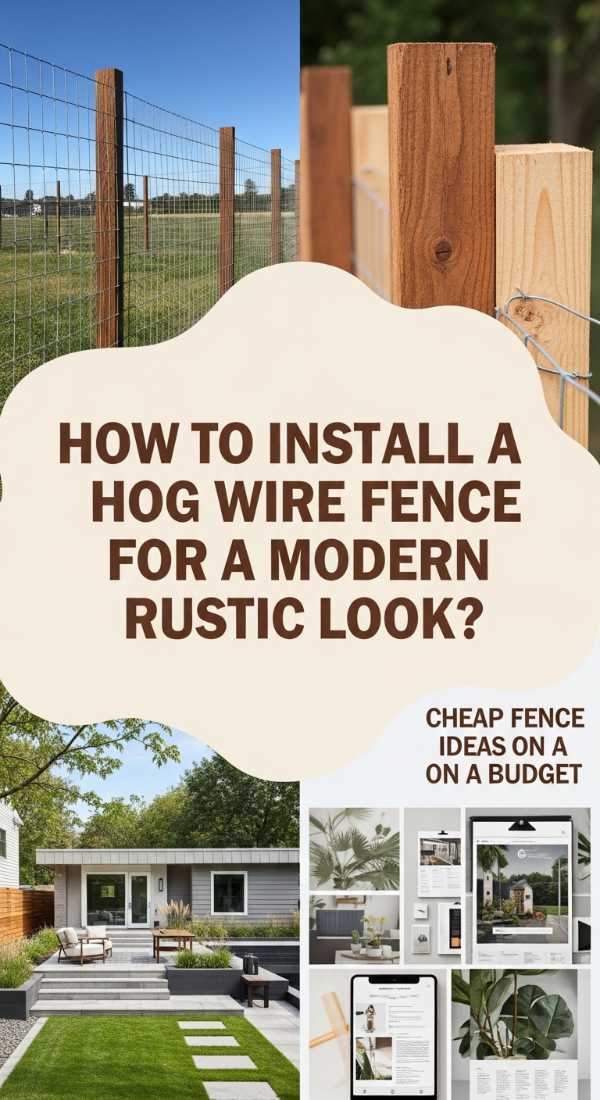
How to Install a Hog Wire Fence for a Modern Rustic Look
Why we love this
The hog wire fence is the perfect marriage between industrial strength and farmhouse charm, offering security without blocking the breathtaking views of your landscape. We love the way the silver galvanized steel glints in the sunlight, framed by the warm, honey-toned grain of cedar or redwood posts. It feels open and airy, allowing the breeze to flow through your yard while providing a sturdy boundary for pets or children. It’s a design choice that says you value both function and high-end aesthetic, creating a clean, geometric silhouette against the organic chaos of nature.
Essential Elements:
- Galvanized hog wire panels (usually 4-gauge)
- Cedar or pressure-treated 4×4 posts and 2×4 rails
- Fencing staples or U-nails
- Circular saw and wire cutters
- Level and post-hole digger
How to make it
- Measure and mark your post locations every 6 to 8 feet, then dig holes at least 2 feet deep to ensure the fence remains stable against wind and pressure.
- Set your posts in concrete, ensuring they are perfectly level and aligned in a straight line, and allow them to dry completely for at least 48 hours.
- Construct a ‘picture frame’ using 2×4 wood rails between the posts, creating a top and bottom support that will hold the wire panel in place.
- Measure the interior of your wooden frame and cut the hog wire panel to size using heavy-duty wire cutters or a grinder, wearing safety goggles for protection.
- Position the wire panel inside the frame and secure it firmly using fencing staples every 6 inches, then add a decorative top cap rail to hide the wire edges.
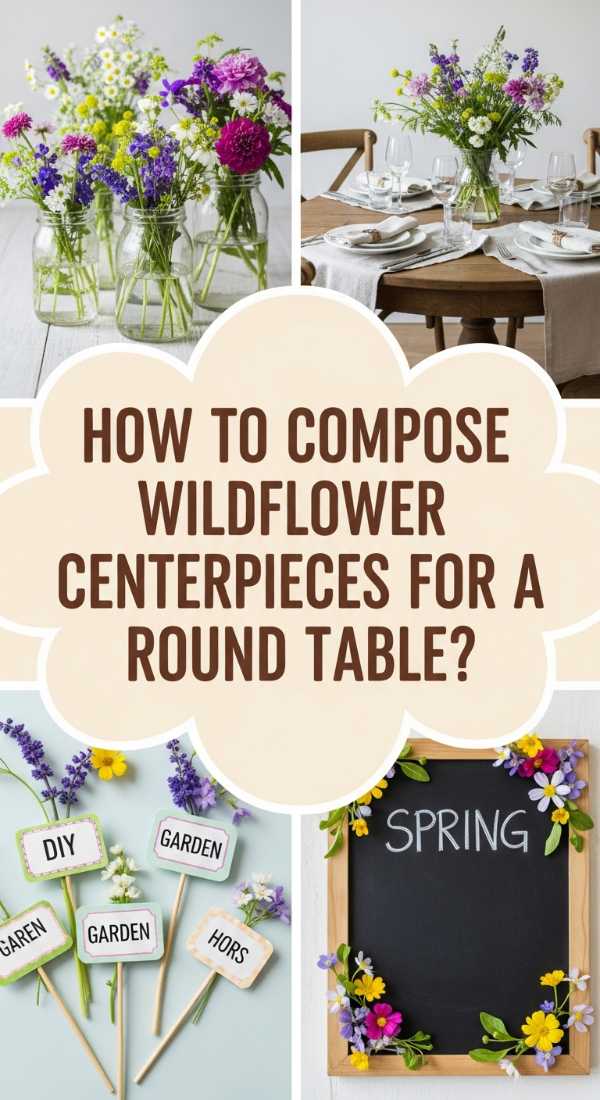
How to Compose Wildflower Centerpieces for a Whimsical Round Table

Why we love this
There is a carefree, untamed beauty in a wildflower centerpiece that feels like a summer meadow brought indoors. We love the way the different stem lengths create a sense of movement, with tiny buds dancing above larger, ruffled blooms in a chaotic yet harmonious display. The scent is often a complex mix of honey, clove, and fresh-cut grass, evoking memories of childhood adventures and sun-drenched afternoons. It turns a formal round table into a cozy, conversational space where the boundaries between the indoors and the natural world beautifully blur.
Essential Elements:
- Varying heights of glass jars or vintage milk bottles
- Local wildflowers (Queen Anne’s Lace, Zinnias, Cosmos)
- Floral shears or sharp scissors
- Clear floral tape or a ‘frog’ pin holder
- Fresh, cool water with a pinch of sugar
How to make it
- Start with a clean vessel and create a ‘grid’ across the top using thin strips of clear floral tape to help the wild, thin stems stand upright.
- Strip all leaves from the bottom half of your stems to ensure no foliage sits below the water line, which prevents bacterial growth and keeps flowers fresh.
- Place your largest, ‘focal’ flowers first at varying angles, following the circular shape of the table so the arrangement looks beautiful from every seat.
- Incorporate ‘filler’ stems like Baby’s Breath or Goldenrod to add volume and fill in any gaps between the larger blooms.
- Add ‘wispy’ elements like long grasses or vines that stick out further than the rest, giving the arrangement that signature ‘just-picked’ whimsical movement.
How to Assemble a Cute Campsite Setup for the Ultimate Glamping Experience
Why we love this
Glamping is all about taking the ruggedness of the great outdoors and infusing it with the plush comforts of a five-star boutique hotel. We love the sensory contrast of the cool night air against the warmth of a faux-fur throw and the crackle of a campfire paired with the glow of Moroccan lanterns. It’s an invitation to disconnect from the digital world and reconnect with the soul, all while surrounded by soft textures, the smell of toasted marshmallows, and the comfort of a real mattress under the stars. It’s ruggedness redefined with a touch of velvet and gold.
Essential Elements:
- A large canvas bell tent or high-quality teepee
- Inflatable air mattress with high-thread-count linens
- Battery-operated string lights and lanterns
- Outdoor rugs and floor cushions
- A portable fire pit and a stylish s’mores kit
How to make it
- Choose a flat, cleared piece of land and lay down a heavy-duty tarp before pitching your canvas tent to protect the floor from moisture and sharp rocks.
- Layer the interior with several outdoor rugs to create a soft walking surface and immediately make the tent feel like a cozy indoor room.
- Set up your bed in the center, using a real duvet and plenty of pillows rather than sleeping bags to elevate the comfort level to ‘glamping’ status.
- Drape warm-toned LED string lights along the tent poles and place lanterns near the entrance to create a safe, glowing path for the evening.
- Arrange a small ‘lounge area’ just outside the tent with folding chairs, a small side table, and a basket of blankets for the ultimate stargazing spot.
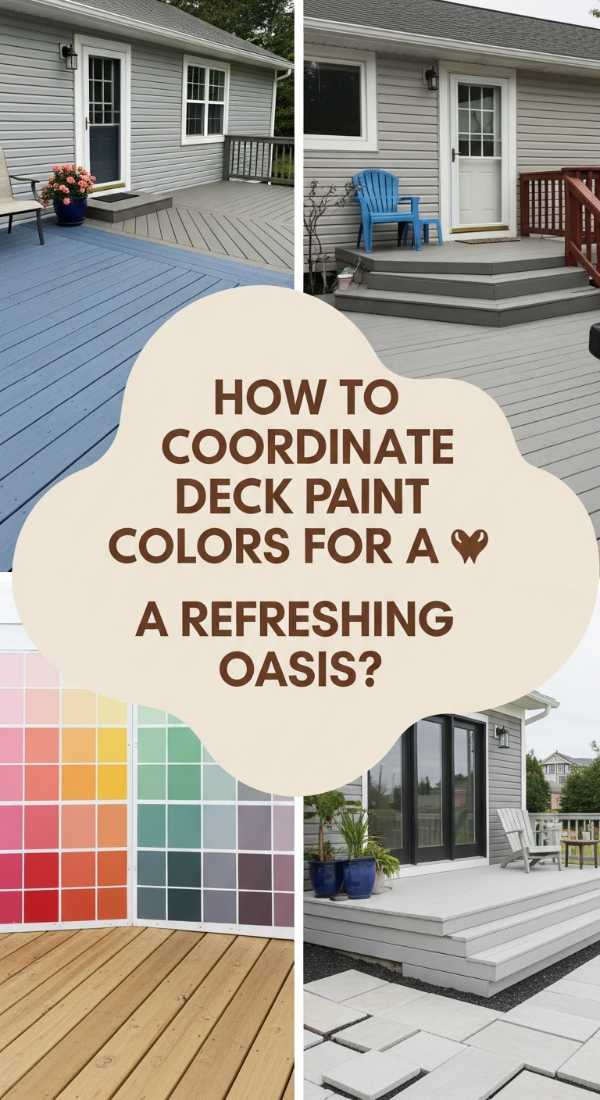
How to Coordinate Deck Paint Colors for a Refreshing Backyard Oasis

Why we love this
The right deck color can act as a stunning backdrop that makes your patio furniture and garden greenery truly pop. We love the sophisticated look of a deep charcoal or a weathered navy, which provides a cool, grounding contrast to the bright colors of summer flowers. Walking barefoot on a freshly painted, smooth surface feels like luxury, and the visual cleanliness of a uniform color palette brings a sense of modern order to the outdoor space. It’s an instant facelift for your home that makes the entire backyard feel like a seamless extension of your interior design.
Essential Elements:
- High-quality exterior deck paint or solid stain
- Deck cleaner and a stiff scrub brush
- Long-handle paint roller with a heavy nap
- Painter’s tape and high-quality brushes for edges
- Power washer (optional but recommended)
How to make it
- Deep clean the deck using a specialized deck cleaner and a power washer to remove all dirt, mold, and old, flaking paint, then let it dry for 48 hours.
- Sand down any rough spots or splinters with medium-grit sandpaper to ensure the new paint adheres properly and feels smooth underfoot.
- Use painter’s tape to protect the siding of your house and any permanent fixtures, then use a brush to ‘cut in’ the paint between the floorboards and in corners.
- Apply the first coat of paint using a roller on a long extension pole, working in the direction of the wood grain and ensuring an even, thin layer.
- Allow the first coat to dry completely (usually 4-6 hours) before applying a second coat for maximum durability and color depth, then wait 24 hours before moving furniture back.
How to Construct a DIY Outdoor Shower for Refreshing Summer Days
Why we love this
There is nothing quite as invigorating as rinsing off under the open sky, with the sun on your skin and a gentle breeze blowing through the trees. An outdoor shower is the ultimate summer luxury, smelling of coconut soap and cedar wood while offering a tactile connection to nature. We love this because it keeps the sand and dirt outside where they belong, while providing a spa-like escape in your own backyard. It’s a sensory ritual that marks the end of a long beach day or a sweaty gardening session, leaving you feeling completely refreshed and renewed.
Essential Elements:
- Cedar wood slats for a privacy screen
- Outdoor-rated shower head and plumbing kit
- Paver stones or a wooden pallet for the base
- Standard garden hose adapter (for easy setup)
- Stainless steel hooks for towels and robes
How to make it
- Select a location with good drainage and access to a water source, such as an outdoor spigot, and clear the ground to be level.
- Lay down a base of gravel followed by large paver stones or a cedar slat floor to allow water to drain away without creating a muddy mess.
- Build a simple three-sided privacy enclosure using cedar posts and horizontal slats, leaving small gaps between the slats for airflow and a modern look.
- Mount the shower hardware to a central vertical post, connecting it to your garden hose using a specialized brass adapter for a quick-install ‘cold’ shower.
- Install sturdy stainless steel hooks on the interior of the enclosure for towels and a small wooden shelf for biodegradable soap and shampoo.
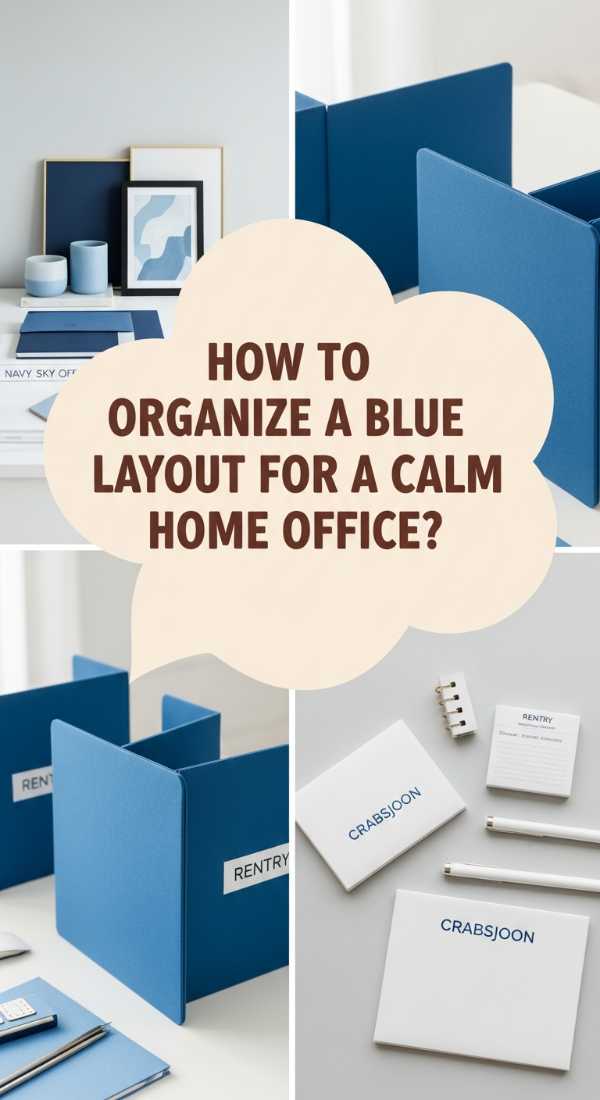
How to Organize a Blue Layout for a Calm Home Office
[IMAGE_10]
Why we love this
Blue is the ultimate color for productivity and peace, mimicking the vastness of the ocean and the clarity of a cloudless sky. When you organize your workspace around these tones, the visual noise of a busy workday seems to melt away, replaced by a sense of focused serenity. We love the combination of deep navy accessories against crisp white marble, creating a professional yet tranquil environment. It’s an aesthetic that smells of fresh linen and tastes like an iced blueberry tea, making the ‘9 to 5’ feel less like a chore and more like a creative retreat.
Essential Elements:
- Navy or slate blue desk organizers (trays, pen holders)
- A blue-toned ergonomic chair or a velvet accent pillow
- Ceramic vases in various shades of azure and cobalt
- Blue-ink pens and high-quality stationery
- Natural wood or white desk surface for contrast
How to make it
- Clear your entire desk and start with a ‘clean slate,’ wiping down the surface to remove any dust or distractions.
- Place a large blue desk mat in the center to define your primary workspace and provide a soft, tactile surface for your hands and mouse.
- Group your blue accessories by shade—placing darker navy items toward the back and lighter sky-blue items in the foreground—to create a sense of depth.
- Add one or two natural elements, like a small succulent in a blue pot or a piece of driftwood, to soften the ‘office’ feel and add organic texture.
- Organize your drawers using blue dividers, ensuring that even the hidden parts of your office adhere to the calming color story for a truly cohesive experience.
Wrapping Up Your Lifestyle Transformation
Creating a viral-worthy lifestyle isn’t just about the photos you take; it’s about the intention you put into your surroundings. From the way you arrange your porch flowers to the serene blue of your home office, these small changes cultivate a life that feels vibrant and full of joy. I hope these guides inspire you to pick up a paintbrush, plant a new seed, or finally style that dreamy pink flat-lay. Remember, the most beautiful life is the one you create for yourself!
Frequently Asked Questions
How can I make my DIY projects look professional?
The key to a professional finish is all in the preparation and the tools. Always sand your wood, use painter’s tape for clean lines, and don’t rush the drying process. Quality materials like cedar and high-grade exterior paint make a massive difference in the final look.
What are the best flowers for a low-maintenance garden?
Look for perennials that are native to your area. Plants like Lavender, Coneflower (Echinacea), and Sedum are incredibly hardy, drought-tolerant, and come back year after year with very little help from you!
How do I choose the right color palette for my home?
Think about the mood you want to create. Blues and greens are calming and great for offices or bedrooms, while warm pinks and yellows are energizing and perfect for social spaces like kitchens or patios.