
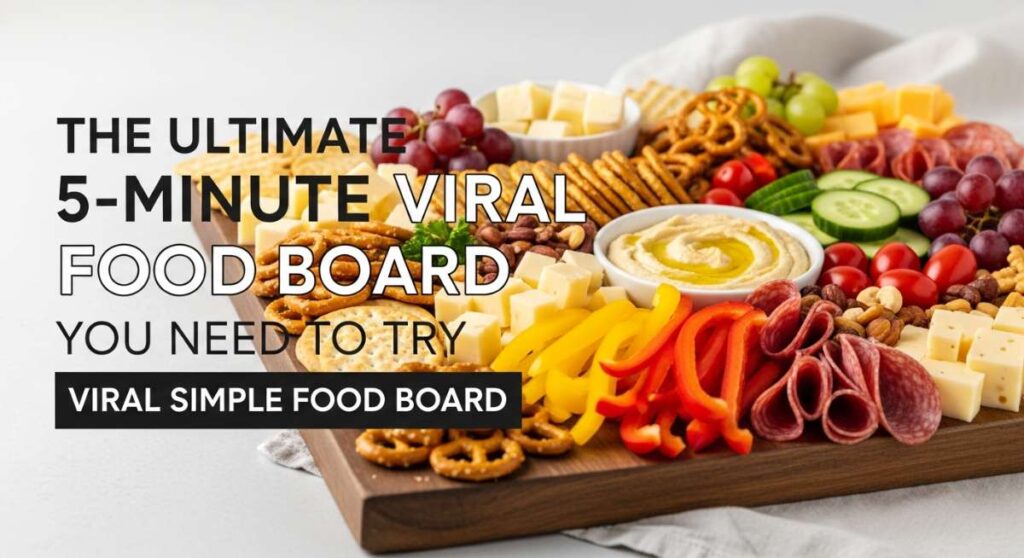
The Ultimate 5-Minute Viral Food Board You Need to Try
There is something truly magical about the way food can transform a mundane Tuesday afternoon into a celebration of color and texture. We’ve all been there—scrolling through our feeds, mesmerized by those perfectly styled boards that look like a work of art, wondering if we could ever recreate that same spark of joy in our own kitchens. The truth is, these viral trends aren’t just about the ‘aesthetic’; they are about the ritual of creating something beautiful that feeds both the soul and the stomach.
I remember the first time I attempted a full-spread board for a small gathering of friends. The room was filled with the scent of toasted coconut and melting chocolate, and as we sat around the table, the conversation flowed as easily as the honey drizzled over the brie. It wasn’t just a meal; it was a sensory journey. This guide is my love letter to those moments—a curated collection of the most viral, eye-catching, and delicious components to build your own ultimate viral food board.
How to make beachy coconut shrimp?
Why we love this
There is nothing quite like the sound of a perfectly crispy coconut shrimp being bitten into; it’s a sharp, satisfying crunch that immediately transports you to a sun-drenched shoreline. The aroma is a heady mix of sweet, toasted coconut and savory, succulent shrimp that makes your mouth water before you even take a seat. As you dip them into a spicy marmalade, the contrast between the hot, golden exterior and the cool, tender meat inside creates a symphony of textures that feels like a vacation on a plate.
Ingredients
- 1 lb large shrimp, peeled and deveined
- 1/2 cup all-purpose flour
- 2 large eggs, beaten
- 1 cup Panko breadcrumbs
- 1 cup sweetened shredded coconut
- Vegetable oil for frying
- Salt and lime wedges for garnish
How to make it
- Set up your breading station by placing the flour in one shallow bowl, the beaten eggs in a second, and a mixture of Panko and shredded coconut in a third. Press the coconut into the Panko to ensure they are well-integrated.
- Pat the shrimp completely dry with paper towels to ensure the coating adheres perfectly; any moisture will cause the breading to steam rather than crisp.
- Dredge each shrimp in flour, shaking off the excess, then dip into the egg wash, and finally press firmly into the coconut-Panko mixture until heavily coated.
- Heat about 1 inch of oil in a heavy skillet over medium-high heat until it reaches 350°F; you can test this by dropping a pinch of breadcrumbs in—if it sizzles immediately, it’s ready.
- Fry the shrimp in small batches for about 2-3 minutes per side until they reach a deep, rich golden brown. Monitor the heat closely, as the sugar in the coconut can burn quickly if the oil is too hot.
- Remove with a slotted spoon and drain on a wire rack (rather than paper towels) to maintain that viral-worthy crunch, then sprinkle with sea salt immediately.
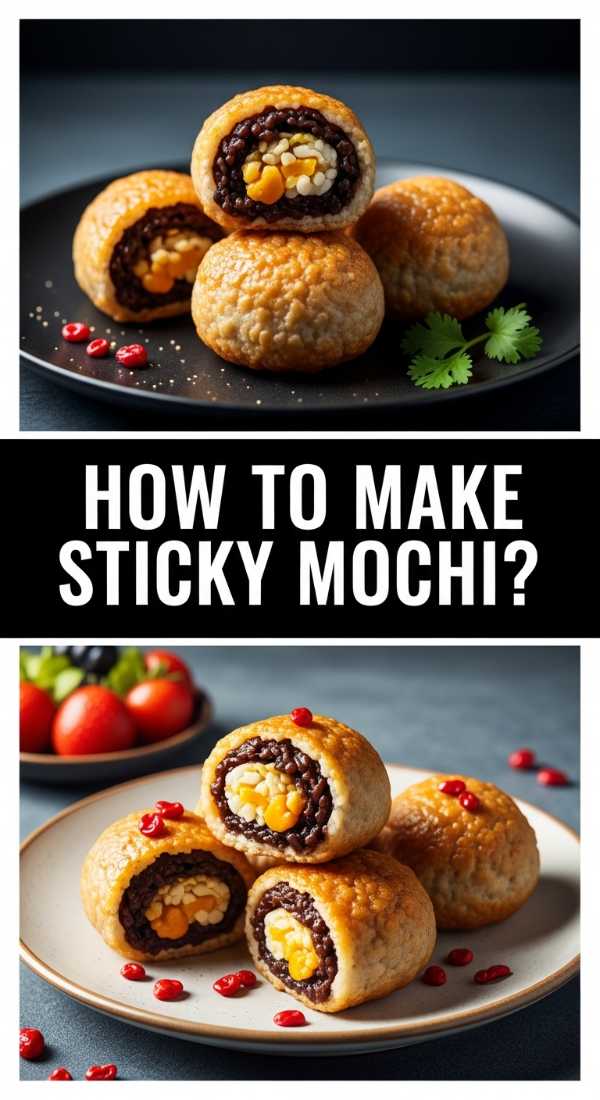
How to make sticky anime mochi?
Why we love this
Anime mochi is the ultimate comfort food for anyone who loves that signature ‘bouncy’ texture that seems to defy gravity. It’s incredibly soft and pillowy, with a delicate sweetness that lingers on the tongue without being overpowering. The process of pulling it apart and seeing that iconic stretch is deeply satisfying, and the dusted coating of cornstarch feels silky and cool against your skin before you reach the chewy, sweet center that feels like a warm hug.
Ingredients
- 1 cup sweet glutinous rice flour (Mochiko)
- 1/4 cup granulated sugar
- 1 cup water
- Cornstarch for dusting
- Optional: Red bean paste or strawberry filling
How to make it
- In a microwave-safe glass bowl, whisk together the glutinous rice flour and sugar until no lumps remain.
- Gradually add the water, stirring constantly until the mixture becomes a smooth, milky liquid.
- Cover the bowl loosely with plastic wrap and microwave on high for 1 minute. Remove and stir with a wet silicone spatula—the mixture will start to look translucent and sticky.
- Microwave for another 30 to 60 seconds until the dough is thick, very sticky, and slightly translucent; if it still looks white and opaque, it needs more time.
- Generously dust a clean work surface with cornstarch and turn the hot dough onto it. Dust the top of the dough with more starch to prevent sticking to your hands.
- Wait for it to cool slightly, then pinch off small pieces and flatten them into discs. Place a teaspoon of filling in the center, pinch the edges shut, and roll into a smooth ball.
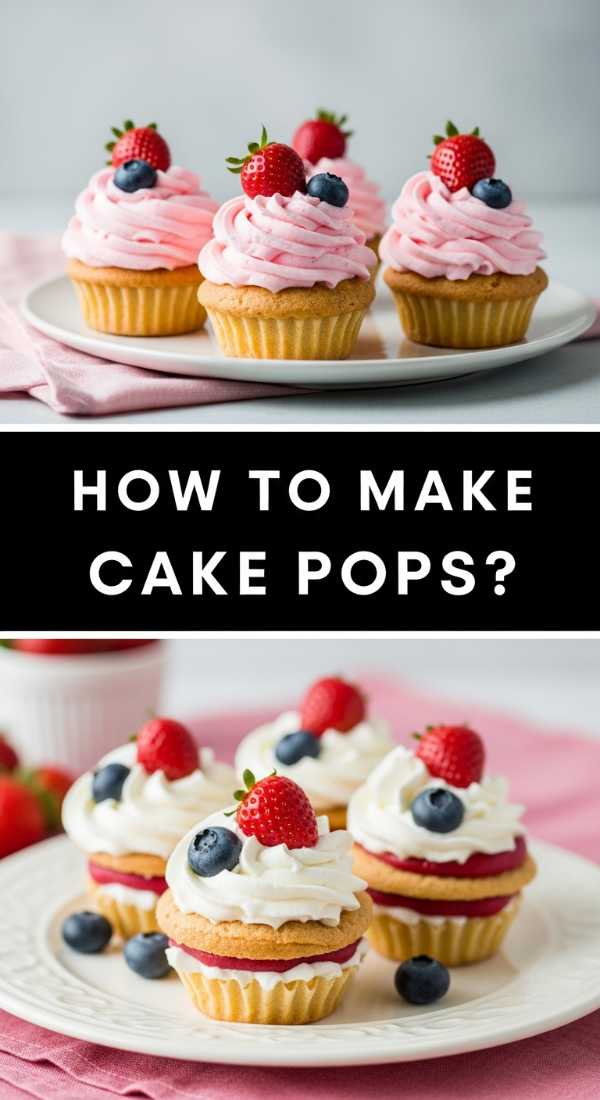
How to bake glittery cake pops?
Why we love this
These are the crown jewels of any dessert board, sparkling under the light like tiny edible disco balls. The texture is a delightful surprise: a hard, snappy chocolate shell that gives way to a dense, fudgy, and incredibly moist cake center that melts in your mouth. There is a whimsical joy in holding a treat on a stick, and the addition of edible glitter adds a layer of glamour that makes every bite feel like a special occasion, leaving a shimmering trail of sweetness behind.
Ingredients
- 1 baked 9×13 cake (any flavor)
- 1/2 cup vanilla or chocolate frosting
- 2 cups candy melts or white chocolate
- 1 tbsp coconut oil
- Edible glitter and sprinkles
- Lollipop sticks
How to make it
- Crumble the cooled cake into a large bowl using your hands until it resembles fine breadcrumbs with no large chunks remaining.
- Add the frosting one tablespoon at a time, mixing thoroughly until the crumbs can be pressed together into a ball that holds its shape without being overly greasy.
- Scoop out rounded tablespoons of the mixture and roll them between your palms into perfectly smooth spheres, then chill in the freezer for 15 minutes to firm up.
- Melt a small amount of candy melts in the microwave. Dip the tip of a lollipop stick into the chocolate, then insert it halfway into a cake ball; this acts as ‘glue’ to keep the pop from falling off.
- Melt the remaining candy melts with coconut oil (for a smoother flow). Dip the chilled cake pops vertically into the chocolate, swirling gently to coat, and tap the stick against the edge of the bowl to remove excess.
- While the chocolate is still wet, generously dust with edible glitter and stand the pops upright in a foam block to dry completely for about 20 minutes.
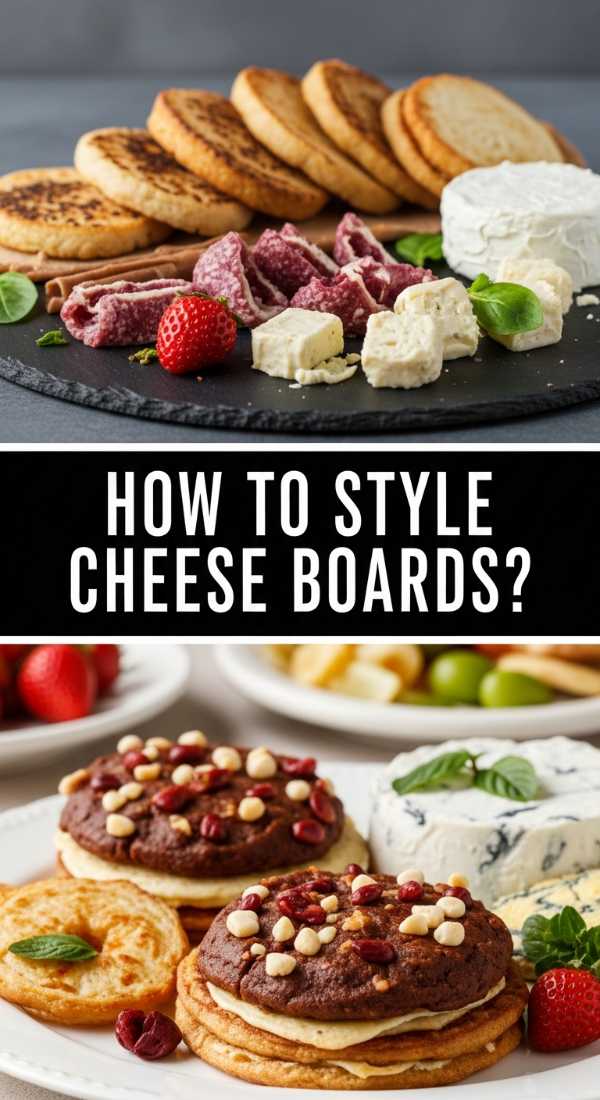
How to style aesthetic cheese boards?
Why we love this
Styling an aesthetic cheese board is an exercise in mindfulness, where you balance the creamy, earthy tones of brie against the vibrant pops of red berries and golden honey. The aroma is a sophisticated blend of aged dairy, fresh herbs, and the woody scent of walnuts. When you finally dig in, the combination of a sharp cheddar paired with a sweet fig jam and a salty cracker creates a complex flavor profile that hits every single taste bud, making it the perfect communal center-piece for slow grazing.
Ingredients
- 3 varieties of cheese (soft, semi-hard, and hard)
- Assorted crackers and a sliced baguette
- Prosciutto or salami ribbons
- Fresh grapes, berries, and fig slices
- Honey and grainy mustard
- Rosemary sprigs and walnuts
How to make it
- Start by placing your largest items first, which are usually the cheeses. Place them in a triangular pattern across the board to create visual balance; slice some and leave others whole for variety.
- Add small bowls for your honey, jams, or mustard. These act as ‘anchors’ for the rest of your ingredients and prevent liquids from running into the crackers.
- Fold your deli meats into ‘ribbons’ or ‘roses’ by folding slices in half and rolling them tightly, then tucking them into the gaps between the cheeses.
- Create ‘rivers’ of crackers and bread slices that curve across the board, leading the eye from one side to the other.
- Fill in the remaining large gaps with clusters of grapes and sliced fruit, ensuring colors are distributed evenly so no one side looks ‘heavier’ than the other.
- Finally, fill the tiny ‘micro-gaps’ with walnuts and fresh rosemary sprigs to add texture and a professional, lush finish.
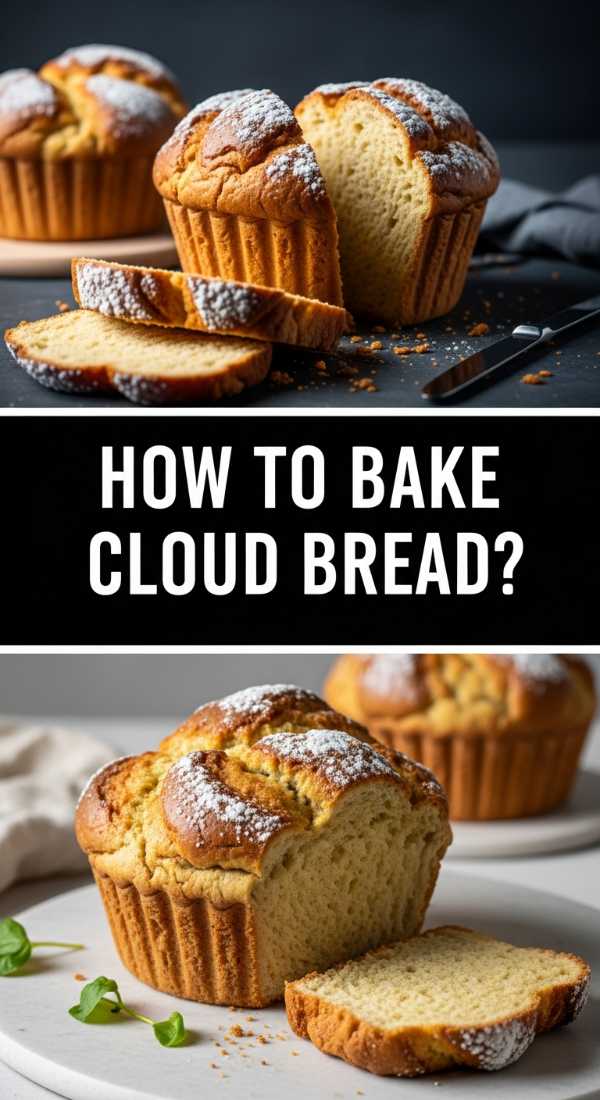
How to bake fluffy cloud bread?

Why we love this
Cloud bread is a viral sensation for a reason—it feels like biting into a sweet, pastel-colored dream. The texture is incredibly light and airy, almost like a cross between a marshmallow and a meringue, and it practically dissolves on the tongue. When you pull a loaf apart, it reveals a soft, wispy interior that looks like real clouds. It’s visually stunning with its soft hues, and the subtle vanilla scent that wafts from the oven makes your entire kitchen feel cozy and inviting.
Ingredients
- 3 egg whites (room temperature)
- 30 grams (2.5 tbsp) granulated sugar
- 10 grams (1 tbsp) cornstarch
- Few drops of vanilla extract
- Food coloring (pastel blue or pink)
How to make it
- In a spotlessly clean glass bowl, beat the egg whites on medium speed until they become frothy and light. Ensure there is no oil or yolk in the bowl, or the whites won’t rise.
- Slowly add the sugar one tablespoon at a time while continuing to beat. Once the sugar is incorporated, sift in the cornstarch.
- Increase the mixer speed to high and beat until stiff, glossy peaks form. You should be able to hold the bowl upside down without the mixture moving.
- Gently fold in the vanilla extract and a drop of food coloring using a rubber spatula. Do not over-mix, or you will deflate the air you just worked so hard to incorporate.
- Mound the mixture onto a baking sheet lined with parchment paper, shaping it into a smooth half-sphere or a ‘cloud’ shape using your spatula.
- Bake at a low temperature of 300°F (150°C) for about 25-30 minutes. The exterior should be set but not browned, maintaining that vibrant pastel color.
How to upgrade instant ramen noodles?
Why we love this
Upgrading instant ramen turns a humble pantry staple into a gourmet experience that is rich, salty, and deeply satisfying. The steam rising from the bowl carries the fragrance of sesame oil, fresh ginger, and garlic, promising a depth of flavor that the seasoning packet alone can’t provide. The silky texture of a soft-boiled egg yolk mingling with the savory broth and the snap of fresh green onions creates a bowl of noodles that feels both decadent and effortless, perfect for those viral ‘noodle lift’ photos.
Ingredients
- 1 pack instant ramen
- 1 egg
- 1 tsp chili oil
- 1 tsp soy sauce
- Handful of spinach or bok choy
- Green onions and sesame seeds for garnish
How to make it
- Bring water to a boil and cook the ramen noodles for exactly one minute less than the package instructions. This ensures they stay ‘al dente’ and don’t get mushy when added to the broth.
- In your serving bowl, whisk together the ramen seasoning packet, soy sauce, chili oil, and a tablespoon of Japanese mayo for a creamy ‘hacked’ broth.
- Soft-boil an egg by placing it in boiling water for exactly 6 minutes and 30 seconds, then immediately shocking it in an ice bath to stop the cooking and keep the yolk jammy.
- Blanch your greens (spinach or bok choy) in the noodle water during the last 30 seconds of cooking.
- Pour a small amount of the hot noodle water into your serving bowl to melt the seasoning mixture, then add the noodles and greens.
- Top with the halved jammy egg, a generous sprinkle of sliced green onions, and toasted sesame seeds for the ultimate professional finish.
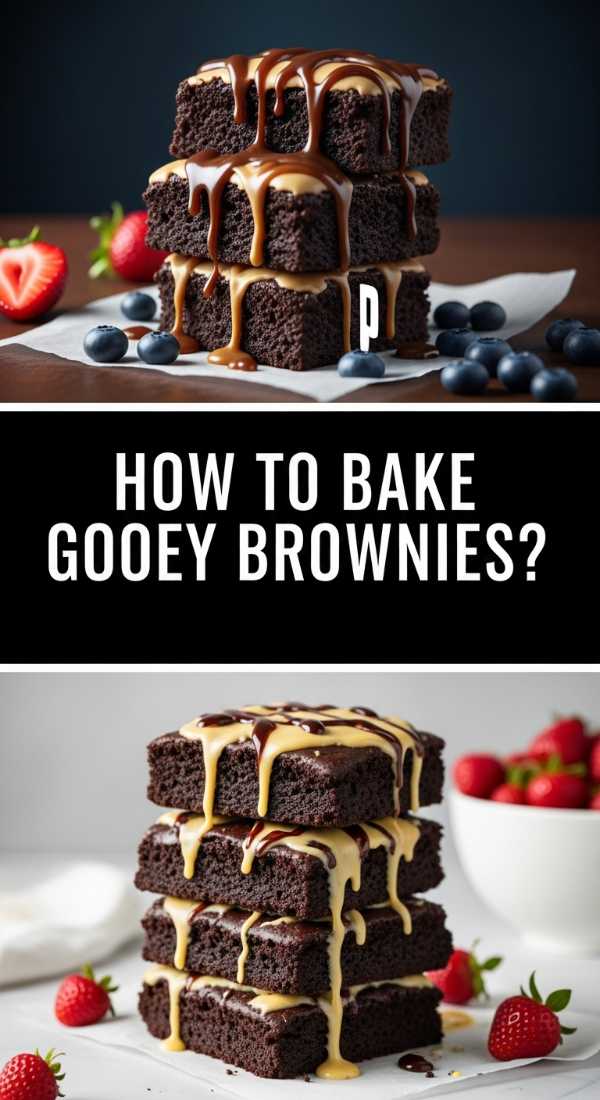
How to bake gooey chocolate brownies?
Why we love this
A truly gooey brownie is the ultimate chocolate lover’s fantasy, featuring a paper-thin, crackly top that shatters perfectly when you bite into it. The center is dense, intensely dark, and almost truffle-like in its richness, coating your palate with the flavor of premium cocoa and browned butter. The smell of chocolate baking in the oven is perhaps the most comforting scent in the world, and the way a warm brownie yields to a fork is pure culinary poetry, especially when served with a cold glass of milk.
Ingredients
- 1/2 cup unsalted butter, melted and browned
- 1 cup granulated sugar
- 2 large eggs
- 1 tsp vanilla extract
- 1/2 cup all-purpose flour
- 1/2 cup high-quality cocoa powder
- 1/4 tsp salt
- 1/2 cup semi-sweet chocolate chunks
How to make it
- Melt the butter in a saucepan over medium heat, swirling until it foams and turns a nutty golden brown; this adds a deep, viral-worthy caramel note to the brownies.
- In a large bowl, whisk the browned butter and sugar vigorously for at least 2 minutes. This aeration is the secret to getting that shiny, crackly top.
- Add the eggs and vanilla, whisking again until the batter lightens in color and becomes smooth.
- Sift in the flour, cocoa powder, and salt. Use a spatula to gently fold the dry ingredients into the wet until just combined—over-mixing at this stage will result in cakey brownies instead of gooey ones.
- Fold in the chocolate chunks and pour the batter into a lined 8×8 baking pan, smoothing the top.
- Bake at 325°F for 20-25 minutes. Use the ‘toothpick test’—it should come out with a few moist crumbs attached, not clean. Let them cool completely in the pan to allow the fudgy center to set.
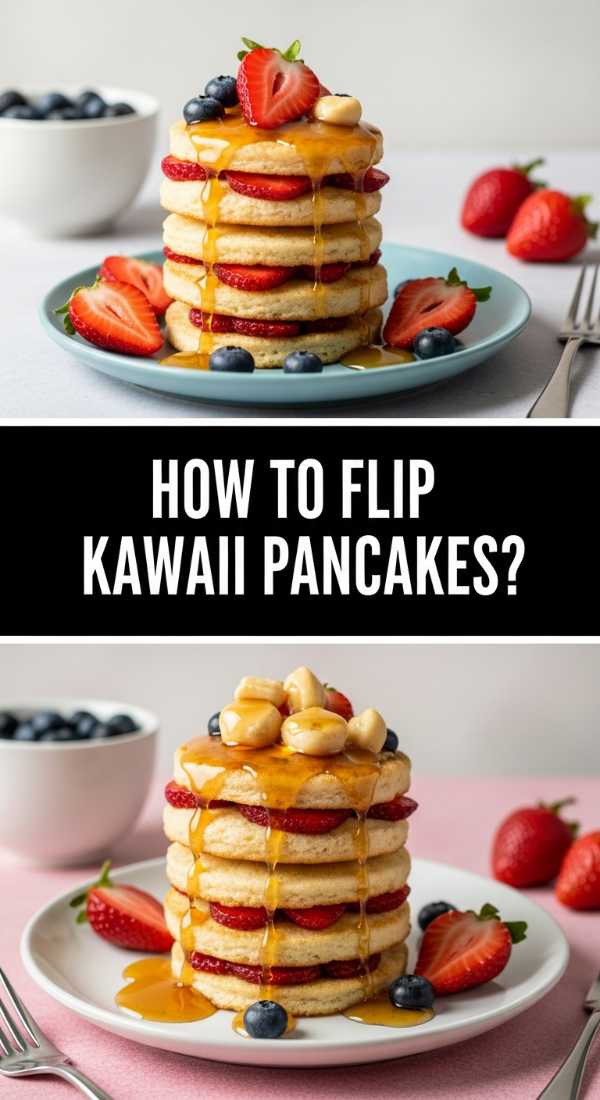
How to flip kawaii animal pancakes?

Why we love this
There is nothing quite like the whimsy of a plate full of tiny, golden pancakes shaped like bears or bunnies to start your morning with a smile. The edges are perfectly crisp and buttery, while the centers remain fluffy and steaming hot. Watching the batter bubble and turn that iconic golden brown is a nostalgic joy, and decorating them with fruit to bring the ‘characters’ to life makes breakfast feel like a creative playground that both kids and adults can’t resist sharing on social media.
Ingredients
- 1 cup pancake mix (or homemade batter)
- 3/4 cup milk
- 1 egg
- 1 tbsp melted butter
- Chocolate chips and sliced fruit for decorating
- A squeeze bottle
How to make it
- Whisk your pancake batter until it is smooth and slightly thick; if it’s too runny, the animal shapes will bleed into blobs. Pour the batter into a clean squeeze bottle.
- Heat a non-stick griddle over medium-low heat. Test the heat with a drop of water—it should dance and evaporate quickly. Lightly grease with a tiny bit of butter.
- Use the squeeze bottle to ‘draw’ the outline of the animal (like ears and a head) first. Let this cook for about 15 seconds so the outline sets.
- Fill in the center of the shape with more batter. This technique creates a ‘two-tone’ effect where the outlines are darker and more defined.
- Wait for bubbles to form on the surface and the edges to look matte and set. Carefully slide a thin spatula underneath and flip in one quick motion.
- Cook the other side for about 45 seconds. Remove and immediately use chocolate chips for eyes and strawberry slices for ears or noses while the pancake is still warm.
How to pipe floral buttercream cupcakes?
Why we love this
Walking into a room filled with floral cupcakes feels like entering a botanical garden made of sugar. The buttercream is silky, smooth, and holds its shape perfectly, allowing for intricate petals that look almost too real to eat. There’s a wonderful contrast between the light, crumbly cake and the rich, velvety frosting that melts away. The visual appeal of a bouquet you can eat is unmatched, and the process of piping each petal is a calming, artistic endeavor that results in pure edible elegance.
Ingredients
- 12 pre-baked vanilla cupcakes
- 1 cup unsalted butter (softened)
- 3 cups powdered sugar
- 1-2 tbsp heavy cream
- Gel food coloring (pink, green, yellow)
- Piping bags and tips (Petal tip 104, Leaf tip 352)
How to make it
- Cream the softened butter for at least 5 minutes until it is pale and fluffy. Gradually add powdered sugar and heavy cream, beating until the frosting is stiff enough to hold a peak but smooth enough to pipe.
- Divide the frosting into bowls and tint them using gel food coloring—gel is essential as liquid coloring will ruin the consistency of your ‘petals’.
- To create a rose: Using the petal tip 104 with the fat end touching the cupcake, pipe a small cone in the center. Pipe three overlapping petals around the cone, then five more around those, keeping the thin end of the tip pointing up.
- To create a hydrangea: Use a small star tip and pipe tiny ‘drops’ close together all over the surface of the cupcake.
- Use the leaf tip 352 with green frosting to tuck small leaves under the edges of your flowers, which hides any gaps and adds a realistic touch.
- Chill the finished cupcakes for 15 minutes to let the flowers ‘crust’ and set, ensuring they stay perfect during transport or display.
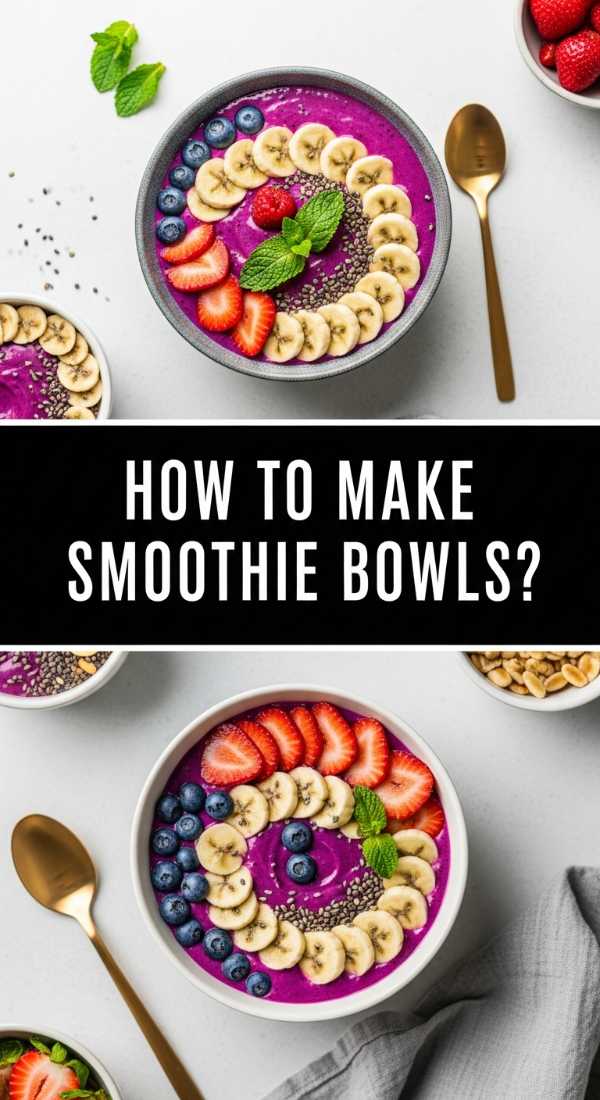
How to prepare colorful smoothie bowls?
[IMAGE_10]
Why we love this
A smoothie bowl is a vibrant explosion of health and flavor that wakes up all your senses. The base is thick, cold, and creamy—almost like eating soft-serve ice cream for breakfast—while the toppings provide a rhythmic crunch of granola and the burst of fresh, tart berries. The deep purples of acai or the bright pinks of pitaya are naturally stunning, making you feel energized just by looking at them. It’s a refreshing, nourishing experience that feels like a clean start to any day.
Ingredients
- 2 cups frozen fruit (blueberries, mango, or dragonfruit)
- 1/2 cup almond milk (add slowly)
- 1 scoop protein powder (optional)
- Toppings: Granola, chia seeds, sliced kiwi, shredded coconut
How to make it
- Place your frozen fruit into a high-powered blender. Using frozen fruit is the absolute key to achieving that thick, scoopable texture that won’t melt immediately.
- Add only a splash of almond milk to start. You want the blender to struggle slightly—use a tamper to push the fruit down into the blades constantly.
- Blend on high until the mixture is completely smooth and resembles thick sorbet. If it’s too liquidy, add a few more pieces of frozen fruit; if it won’t blend, add milk one tablespoon at a time.
- Pour the mixture into a chilled bowl and smooth the top with the back of a spoon to create a flat canvas.
- Arrange your toppings in straight, aesthetic lines across the surface. Start with a line of granola, followed by neatly sliced fruit, then a sprinkle of seeds or coconut.
- Serve immediately before the base loses its thick consistency, and don’t forget to take a photo of those perfectly aligned layers!
Final Thoughts on Your Viral Board Journey
Creating a viral food board is about more than just following a recipe; it’s about the joy of assembly and the pride of presenting something you’ve crafted with care. Whether you are piping delicate buttercream roses or flipping animal-shaped pancakes, these dishes are designed to bring people together and spark a bit of wonder in the everyday. I hope this guide inspires you to get into the kitchen, play with your food, and create a spread that is as delicious to eat as it is beautiful to behold. Happy hosting!