
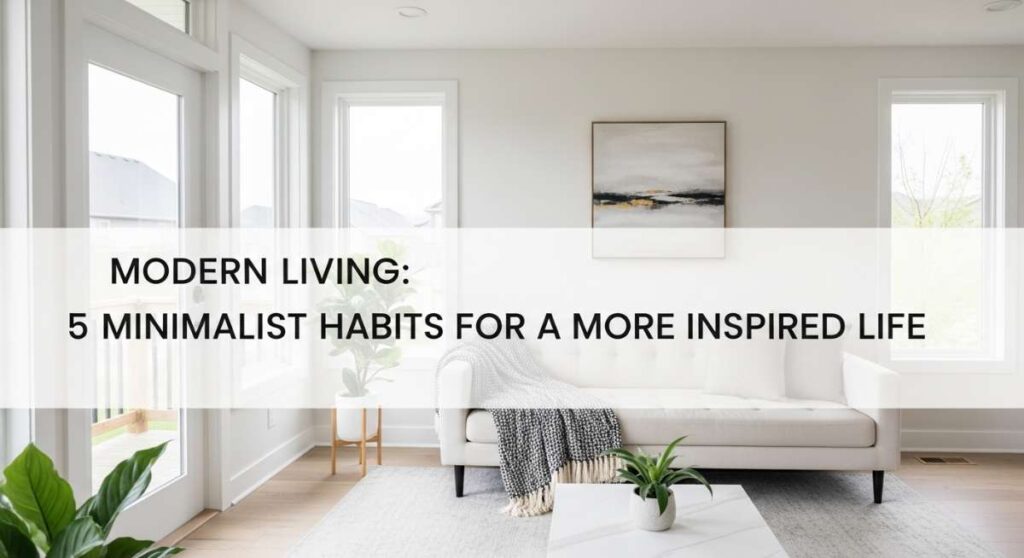
Have you ever walked into a room and felt your shoulders instantly drop? We live in a world that constantly demands our attention, pulling us in a thousand directions with notifications and endless to-do lists. It’s easy to let our homes and habits become a reflection of that chaos, but lately, I’ve been leaning into the idea that modern living shouldn’t be about having more—it should be about feeling more. Creating a space that breathes is like writing a love letter to your future self, promising a soft place to land at the end of a long day.
Minimalism isn’t just about white walls and empty shelves; it’s a mindset of intentionality. It’s about choosing the things that spark a sense of calm, joy, or inspiration. Whether it’s the way the morning light hits a marble countertop or the ritual of arranging fresh stems in a vase, these small moments of curated beauty are what turn a house into a sanctuary. Today, I’m sharing ten of my favorite ways to infuse that ‘inspired life’ vibe into your everyday routine, from whimsical celebrations to the grounding power of earth tones.
How to Curate a Bloom Bar for Eternal Spring Vibes
Why we love this
There is something deeply soul-soothing about the scent of fresh eucalyptus and the velvet touch of a peony petal against your skin. A home bloom bar isn’t just about decor; it’s an interactive experience that invites the outdoors in, filling your living space with the intoxicating aroma of jasmine and sweet pea. The sight of organized, vibrant stems in glass vessels creates an instant focal point that feels both luxurious and life-affirming, mimicking the effortless charm of a Parisian flower market right in your dining room.
Essential Elements:
- Assorted glass vases of varying heights
- Shears or sharp floral snips
- Fresh focal flowers (Peonies, Ranunculus, or Roses)
- Textural greenery (Eucalyptus, Ruscus, or Ferns)
- Filler blooms (Baby’s Breath or Waxflower)
- Floral food and clean, filtered water
How to make it
- Begin by selecting a dedicated surface, like a sideboard or console table, and clearing it of all clutter to ensure the flowers remain the star of the show.
- Prepare your vessels by filling them two-thirds full with lukewarm water mixed with floral preservative; ensure the glass is crystal clear with no water spots for a high-end look.
- Strip all foliage from the bottom half of your stems, ensuring no leaves will sit below the water line, as this prevents bacterial growth and keeps the water smelling fresh.
- Trim each stem at a 45-degree angle under running water to maximize surface area for hydration; do this immediately before placing them in the vases.
- Group your flowers by variety rather than mixing them—this ‘monobotanical’ styling creates a more modern, minimalist aesthetic that is pleasing to the eye.
- Rotate the vases daily and change the water every 48 hours, re-trimming the stems slightly each time to maintain that vibrant, eternal spring appearance.
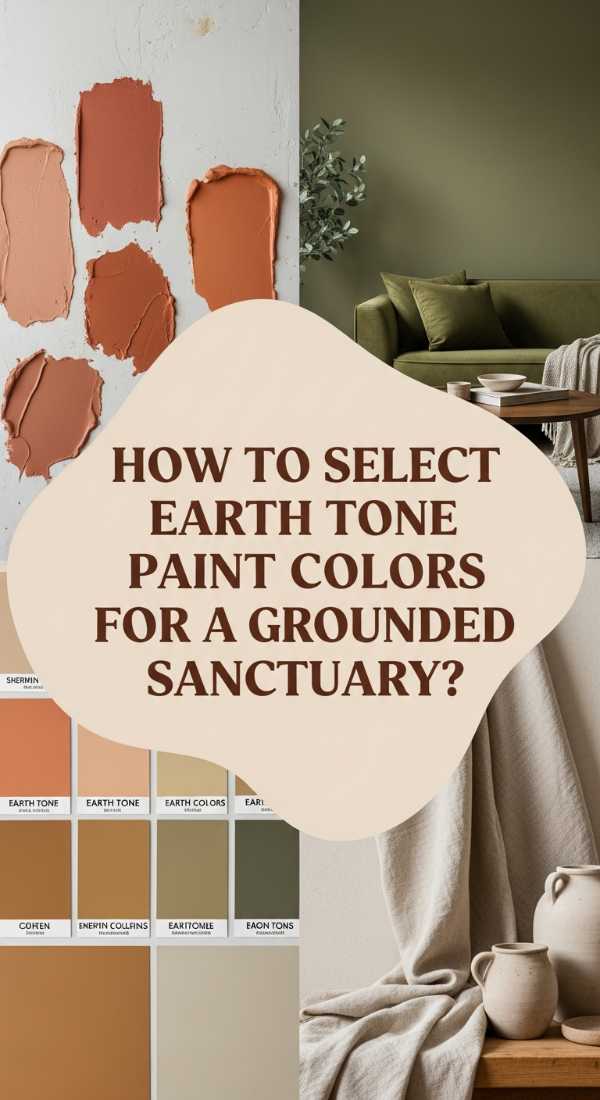
How to Select Earth Tone Paint Colors for a Grounded Sanctuary

Why we love this
Stepping into a room bathed in earth tones feels like a warm embrace from Mother Nature herself. These hues—think muddy terracottas, soft sages, and creamy ochres—carry a visual weight that grounds a room, making high ceilings feel cozy and small corners feel intentional. The matte finish of a clay-based paint catches the light in a way that feels soft and diffused, removing the harsh glare of modern life and replacing it with a serene, organic glow that smells of rain-washed stone and sun-dried linen.
Essential Elements:
- High-quality matte or eggshell paint samples
- Large adhesive swatches or foam boards
- Painter’s tape and drop cloths
- Natural bristle brushes and microfiber rollers
- A compass (to determine light direction)
How to make it
- Identify the orientation of your room using a compass; North-facing rooms need warmer undertones (like sand or peach) to counteract cool light, while South-facing rooms can handle deeper, muddier greens and browns.
- Paint large 2×2 foot swatches onto foam boards rather than directly on the wall; this allows you to move the color around the room to see how it reacts to shadows.
- Observe the colors at three distinct times: 8:00 AM (natural morning light), 2:00 PM (harsh midday sun), and 8:00 PM (under artificial warm lamp light).
- Look for the ‘undertone’—a beige might look pink in the morning or green in the evening—and choose the shade that remains the most neutral throughout the day.
- Apply a high-quality primer if you are transitioning from a cool gray to a warm earth tone to ensure the true pigment of the new color shines through without distortion.
- Complete the look by painting the trim and baseboards in the same color but a satin finish for a sophisticated, monochromatic ‘color-drenched’ effect.
How to Style Easter Front Porch Decor for a Warm Welcome

Why we love this
The front porch is the handshake of your home, and styling it for Easter is the perfect way to celebrate the return of light and growth. We love the mixture of textures: the scratchy, rustic feel of a grapevine wreath paired with the silky sheen of pastel ribbons. There is a nostalgic joy in seeing oversized moss-covered bunnies and nests tucked into planters, evoking the feeling of a whimsical woodland clearing that smells of damp earth and blooming tulips, greeting every guest with a sense of wonder.
Essential Elements:
- Grapevine or boxwood wreath
- Assorted pastel ribbons (linen or velvet)
- Weatherproof ceramic eggs or bunnies
- Potted spring bulbs (Tulips, Hyacinths, Daffodils)
- Natural fiber doormat with a layering rug
- Faux or real moss filler
How to make it
- Start by power-washing your porch and cleaning the front door to create a pristine canvas for your seasonal layers.
- Layer a larger, patterned outdoor rug (perhaps a soft blue stripe) underneath a smaller coir doormat to add visual depth and a touch of modern farmhouse style.
- Create ‘thriller, filler, and spiller’ containers by planting tall snapdragons in the center, surrounded by colorful tulips, and trailing ivy over the edges of your pots.
- Style your wreath by weaving in high-quality silk ribbons in shades of duck-egg blue or pale primrose, allowing the tails to hang long for a romantic, wind-swept look.
- Place a grouping of three varying-sized ceramic rabbits or oversized wooden eggs near the door, using the ‘rule of threes’ to create a balanced, professional-looking vignette.
- Add a final touch of whimsy by tucking bits of reindeer moss into the top of your planters to hide the soil and give the arrangement a finished, garden-inspired feel.
How to Design a Dreamy Pink Layout for Aesthetic Organization
Why we love this
Organization doesn’t have to be clinical; it can be an art form. A dreamy pink layout transforms the mundane task of scheduling into a moment of pure aesthetic bliss. The soft blush tones evoke a sense of calm and creativity, while the smooth glide of a rose-gold pen on cream paper feels like a luxury. It’s about the tactile satisfaction of a linen-bound planner and the visual harmony of coordinated stationery that makes your goals feel not just achievable, but beautiful to pursue.
Essential Elements:
- Blush or dusty rose planner or bullet journal
- Rose gold or copper paperclips and binders
- Washi tape in complementary pastel shades
- High-quality pastel highlighters (mildliners)
- Clear acrylic desk organizers
- Minimalist aesthetic stickers or vellum dividers
How to make it
- Select a ‘base’ pink—either a warm peach-pink or a cool lilac-pink—and stick to that temperature for all your accessories to maintain a cohesive, professional look.
- Map out your layout using a light pencil first, designating specific zones for ‘Top Priorities,’ ‘Habit Tracking,’ and ‘Creative Braindump’ to maximize functionality.
- Use transparent vellum paper as dividers; this adds a soft, frosted layer to your planner that feels incredibly high-end and keeps the layout looking clean.
- Incorporate ‘negative space’ into your design; don’t crowd the pages with stickers, but rather use one or two focal points to let the pink palette breathe.
- Organize your physical desk space using clear acrylic trays so the pink stationery remains visible, turning your functional tools into a part of the decor.
- Color-code your tasks using different shades of pink highlighters (e.g., dark pink for urgent, pale pink for personal) to blend utility with your aesthetic theme.
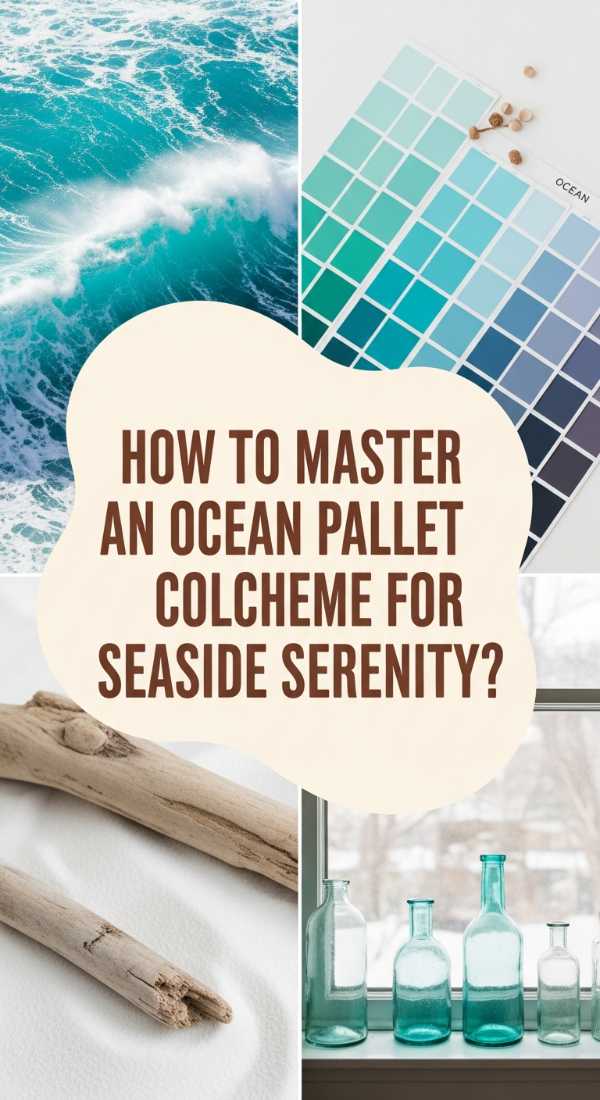
How to Master an Ocean Pallet Color Scheme for Seaside Serenity

Why we love this
There is a specific kind of peace that comes with the ocean—the rhythmic sound of waves and the salt-crusted air. Bringing an ocean palette into your home isn’t just about ‘coastal decor’; it’s about capturing the depth of the Atlantic and the clarity of the Caribbean. We love the interplay of deep navy with translucent sea-glass greens and sandy beiges. It creates a space that feels cool to the touch and incredibly airy, as if a fresh sea breeze is constantly moving through the curtains.
Essential Elements:
- Paint chips in Navy, Seafoam, and Driftwood Gray
- Textured fabrics (linen, jute, and chunky knits)
- Clear and frosted glass accents
- Natural wood elements (unfinished oak or cedar)
- Metallic touches in brushed silver or nickel
How to make it
- Establish your ‘anchor’ color with a large piece of furniture or an accent wall in a deep, moody navy to provide the necessary weight to the room.
- Layer in ‘mist’ colors through sheer window treatments; choose linens in ultra-pale aqua or white that allow natural light to filter through, mimicking the look of coastal fog.
- Incorporate tactile elements like a jute rug or a driftwood coffee table to represent the rugged texture of the shoreline against the smooth ‘water’ of painted walls.
- Accessorize with glass vessels in varying shades of blue; group them on a tray where the sun can hit them, creating ‘shimmer’ effects similar to sunlight on the water.
- Use ‘sand’ tones for your largest upholstered pieces (like the sofa) to keep the room feeling light, bright, and grounded in a natural, neutral base.
- Avoid ‘kitschy’ coastal items; instead, focus on the colors and textures themselves to create a sophisticated, minimalist interpretation of the seaside.
How to Assemble Big Little Basket Ideas for the Ultimate Surprise

Why we love this
The art of the gift basket is all about the ‘reveal.’ A ‘Big Little’ basket is a curated collection of small joys that speak to someone’s soul. We love the rustle of crinkle paper as they dig through layers of silk ribbons, discovery-sized candles that smell of bergamot, and artisanal chocolates wrapped in gold foil. It’s a sensory journey—the weight of the basket, the visual explosion of coordinated colors, and the thoughtfulness behind every tiny item that makes the recipient feel truly seen and celebrated.
Essential Elements:
- A high-quality wicker or wire basket
- Decorative paper shred or tissue filler
- A cohesive color theme (e.g., ‘Golden Hour’ or ‘Midnight Blue’)
- Mix of items: (Self-care, treats, and a keepsake)
- Oversized satin or velvet ribbon
- Personalized handwritten tag
How to make it
- Choose a theme based on a specific feeling or activity (like ‘The Sunday Reset’ or ‘Gardener’s Delight’) to ensure all items feel intentional and connected.
- Place the largest, heaviest items (like a bottle of wine or a thick book) at the back of the basket to create a supportive structure for smaller items.
- Use a generous amount of high-quality paper shred to elevate the items; the products should sit ‘on’ the basket, not ‘in’ it, so they are fully visible.
- Tuck smaller ‘surprises’ like lip balms, fancy matches, or gold-wrapped candies into the crevices to create a sense of abundance and discovery.
- Wrap the entire basket in a high-quality cellophane if traveling, but for an ‘aesthetic’ look, leave it open and tie a massive, multi-loop bow on the handle.
- Ensure the color of the filler matches the ribbon; this small detail creates a professional, boutique-level finish that looks incredibly expensive.
How to Incorporate Vintage Garden Decor for an Enchanted Space
Why we love this
There is a secret-garden magic in vintage decor that modern pieces simply can’t replicate. We love the weathered patina of a rusted iron gate or the mossy, crumbling edge of a stone birdbath. These pieces carry the weight of history and the scent of damp earth and lavender. They transform a backyard into an enchanted escape where time seems to slow down. The contrast between soft, blooming roses and the hard, chipped texture of an antique garden chair creates a romantic tension that is both hauntingly beautiful and deeply comforting.
Essential Elements:
- Wrought iron furniture with a natural patina
- Weathered stone or concrete statuary
- Antique terracotta pots (the crustier, the better)
- Vintage-style lanterns or gas-look flickering lights
- Climbing plants (Ivy, Clematis, or Wisteria)
How to make it
- Scour local estate sales or antique markets for ‘authentic’ weathering; look for items with natural lichen growth or rust, as these provide an immediate sense of age.
- Create a ‘ruin’ effect by partially burying an antique stone urn or placing a weathered bench at the end of a winding, overgrown stone path.
- Mix textures by placing a delicate, lacy iron table next to a heavy, brutalist concrete planter to create visual interest through contrast.
- Use ‘climbing’ elements to marry the decor to the landscape; encourage ivy to grow over a vintage trellis or wrap around the legs of an old garden bench.
- Incorporate vintage lighting, such as oversized copper lanterns, and use warm-toned bulbs (2700K) to mimic the soft, flickering glow of candlelight at dusk.
- Avoid ‘over-cleaning’ your finds; the beauty of vintage garden decor lies in the imperfections, so leave the moss and the rust exactly where they are.
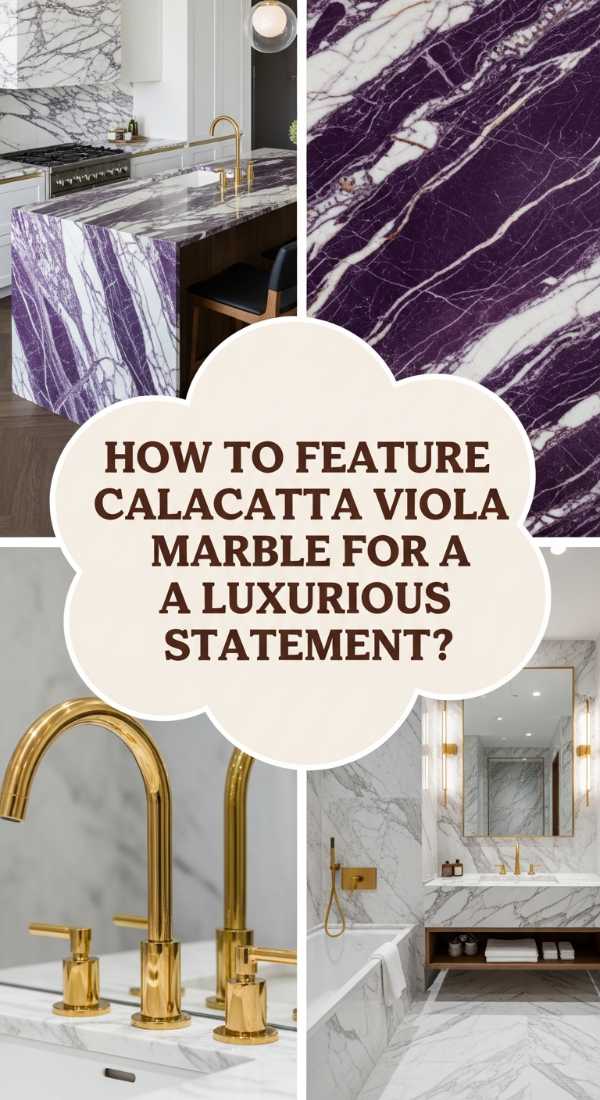
How to Feature Calacatta Viola Marble for a Luxurious Statement
Why we love this
Calacatta Viola is the ‘it’ stone of the decade for a reason—it is unapologetically dramatic. Its deep burgundy and violet veining against a crisp white background feels like a masterpiece painted by the earth itself. Touching its cold, polished surface feels like pure luxury, and the way it reflects light adds a sophisticated shimmer to any kitchen or bath. It smells of clean elegance and looks like a statement of bold confidence, turning a functional countertop into the crowning jewel of a modern, minimalist home.
Essential Elements:
- Calacatta Viola marble slab or tiles
- Neutral cabinetry (Cream, White, or Dark Oak)
- Minimalist brass or gold hardware
- Professional-grade marble sealer
- Integrated LED lighting (to highlight veining)
How to make it
- When selecting your slab, look for a balance of ‘breathing room’ (white space) and ‘movement’ (the purple veining) to ensure it doesn’t overwhelm the room.
- Use the stone in a ‘waterfall’ edge application on a kitchen island; this allows the dramatic veining to spill over the side, maximizing the visual impact of the pattern.
- Pair the marble with very simple, flat-panel cabinetry; the stone is the star, so the surrounding elements should be quiet and understated to avoid visual clutter.
- Carry the marble up the wall as a full-height backsplash; this ‘slab-on-slab’ look is a hallmark of high-end, modern minimalist design.
- Always apply a high-quality impregnating sealer specifically designed for marble, as Calacatta Viola is porous and the white sections can stain if not properly protected.
- Use warm under-cabinet lighting to enhance the purple and wine-colored tones in the stone, making the veining ‘pop’ during evening hours.
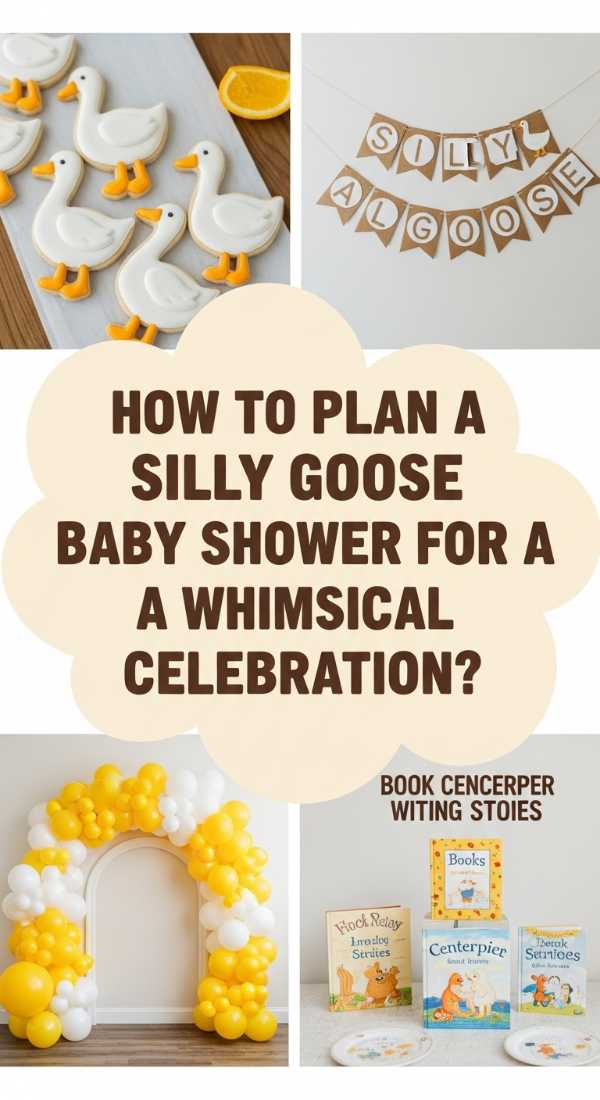
How to Plan a Silly Goose Baby Shower for a Whimsical Celebration

Why we love this
The ‘Silly Goose’ theme is the ultimate antidote to overly formal baby showers. It’s all about the giggles, the soft yellows, and a touch of vintage nursery charm. We love the whimsy of giant white bows and ‘honk’ puns that bring a smile to every guest’s face. The scent of vanilla bean cupcakes and fresh chamomile tea fills the air, creating a warm, fuzzy atmosphere that feels like a big hug. It’s a celebration that doesn’t take itself too long, focusing instead on the pure, silly joy of a new arrival.
Essential Elements:
- Goose-themed invitations (vintage illustrations)
- Soft yellow, white, and sage green color palette
- Miniature goose figurines or plushies
- Gingham or checkered tablecloths
- Custom cookies in goose and egg shapes
- Dried baby’s breath and daisies
How to make it
- Set the tone with a ‘Welcome Little Goose’ wooden sign at the entrance, adorned with a large, floppy cream-colored velvet bow for a touch of ‘coquette’ style.
- Create a ‘nest’ for the gifts using a large wicker basket filled with soft white blankets and a few scattered faux feathers for a playful, literal interpretation.
- Design a centerpiece using clusters of daisies in vintage milk glass vases, interspersed with small wooden goose toys that guests can take home as favors.
- Serve a ‘Goose Juice’ signature mocktail (sparkling lemonade with a splash of elderflower) in individual glass bottles with striped yellow straws.
- Incorporate a ‘Silly Advice’ station where guests write down their funniest parenting tips on cards shaped like goose eggs, providing a keepsake for the parents-to-be.
- Keep the food ‘nest-inspired’ with deviled eggs and small quiches, emphasizing the ‘farm-to-table’ whimsical aesthetic of the entire celebration.
How to Install Plunge Pools for a Private Backyard Oasis
[IMAGE_10]
Why we love this
A plunge pool is the ultimate minimalist luxury for the modern home. It offers the shimmering beauty of turquoise water and the refreshing chill of a summer dip without the massive footprint of a traditional pool. We love the sleek, architectural lines of the concrete and the way the water reflects the sky, creating a focal point of absolute serenity. The sound of a gentle bubbler or waterfall feature masks the noise of the outside world, turning a small backyard into a private sanctuary that smells of chlorine and sun-drenched stone.
Essential Elements:
- Pre-cast concrete or fiberglass plunge pool shell
- Compact filtration and heating system
- Non-slip stone coping (Travertine or Slate)
- Underwater LED lighting
- Surrounding landscaping (Tall grasses or Bamboo for privacy)
How to make it
- Consult with a structural engineer to ensure your ground can support the weight of a concentrated water feature, especially if you are installing on a slope or near a foundation.
- Opt for a ‘cocktail pool’ depth (typically 4-5 feet) which allows for standing and relaxing with a drink, making it a social hub rather than just a lap pool.
- Choose a dark interior finish (like midnight blue or charcoal) to create a ‘reflecting pool’ effect that looks incredibly sophisticated and holds heat from the sun.
- Install a powerful heater or heat pump; because the volume of water is smaller than a standard pool, you can quickly turn it into a giant hot tub for year-round use.
- Frame the pool with oversized stone slabs that have a slight ‘overhang’ over the water; this hides the pool edge and creates a seamless, high-end architectural look.
- Integrate ‘smart’ pool controls so you can turn on the heater and lights from your phone, ensuring your oasis is ready the moment you step through the back door.
Conclusion
Modern living isn’t about perfection; it’s about creating a lifestyle that feels as good as it looks. By incorporating these habits—whether it’s the bold statement of marble or the simple joy of a themed baby shower—you’re building a life that is intentional, beautiful, and uniquely yours. Remember, your home is a living thing; let it grow and evolve with you. Which of these minimalist-inspired habits will you try first? Whatever you choose, do it with heart, and the inspiration will follow.