
Creating a Whimsical Woodland: The Best Mushroom Accents for Every Room
There is something inherently magical about the forest floor, where the damp earth meets the vibrant green of moss and the surprising pops of color from hidden fungi. As the world outside grows more digital and fast-paced, I’ve found myself yearning for that slow, grounded energy that only nature provides. Bringing the ‘cottagecore’ aesthetic into the home isn’t just about a trend; it’s about reclaiming a sense of wonder and turning our living spaces into enchanted sanctuaries where every corner holds a tiny, whimsical secret.
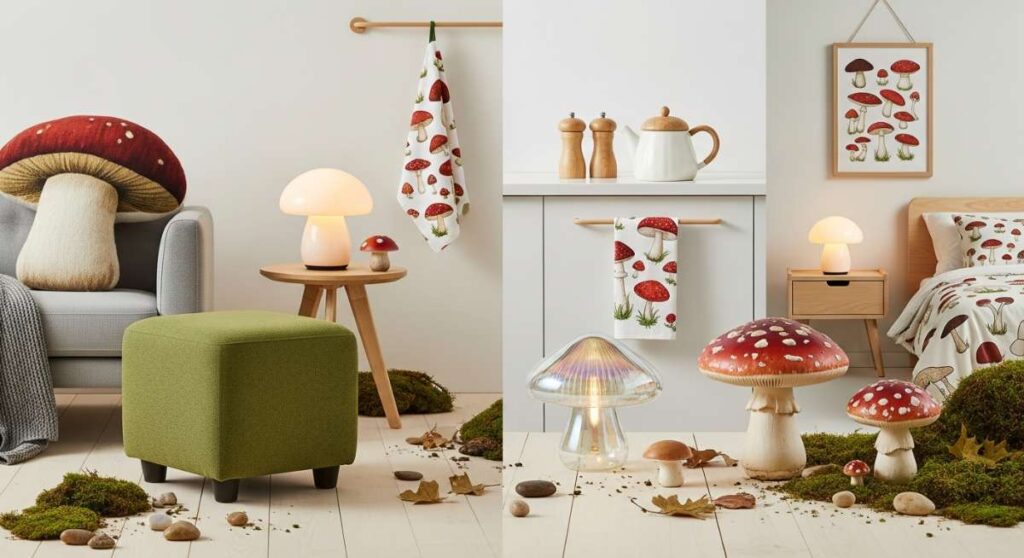
Mushrooms, with their organic shapes and infinite varieties, have become the ultimate symbol of this whimsical woodland movement. Whether it’s a soft velvet stool shaped like a toadstool or a delicate glass lamp that glows with a warm, amber hue, these accents bridge the gap between sophisticated design and childhood imagination. In this guide, we are going to explore how to weave these fungal delights into your home, creating a space that feels like a warm hug from Mother Nature herself.
How to Style Mushroom Decor for a Whimsical Home
Why we love this
Styling mushroom decor allows you to tap into a playful yet refined aesthetic that celebrates the tactile beauty of the natural world. Imagine walking into a room where soft, plush textures meet the cool, smooth surface of ceramic fungi, creating a sensory experience that feels both grounded and ethereal. The earthy aroma of dried moss tucked into a display and the visual softness of rounded mushroom caps provide a comforting, organic contrast to the sharp lines of modern furniture. It is about creating a little pocket of magic that invites you to slow down and appreciate the intricate, often overlooked details of the forest.
Essential Elements:
- Ceramic or velvet mushroom figurines
- Natural preserved moss or lichen
- Glass cloches or vintage apothecary jars
- Warm-toned LED fairy lights
- Wooden trays or sliced log coasters
How to make it
- Begin by selecting a focal point, such as a mantel or a bookshelf, where you want to establish your woodland vignette.
- Layer a base of preserved moss across a wooden tray, ensuring the texture is uneven and natural-looking to mimic a real forest floor.
- Place your largest mushroom accent slightly off-center to create a dynamic visual hierarchy; choose a piece with a contrasting texture like matte ceramic.
- Group smaller mushroom figurines in clusters of three, varying their heights and cap colors to provide depth and interest.
- Incorporate a glass cloche over one of the clusters to add a touch of ‘captured magic’ and protect the delicate moss from dust.
- Finally, weave a thin strand of warm LED fairy lights through the moss to provide a gentle, ethereal glow that highlights the shapes of the mushrooms at night.
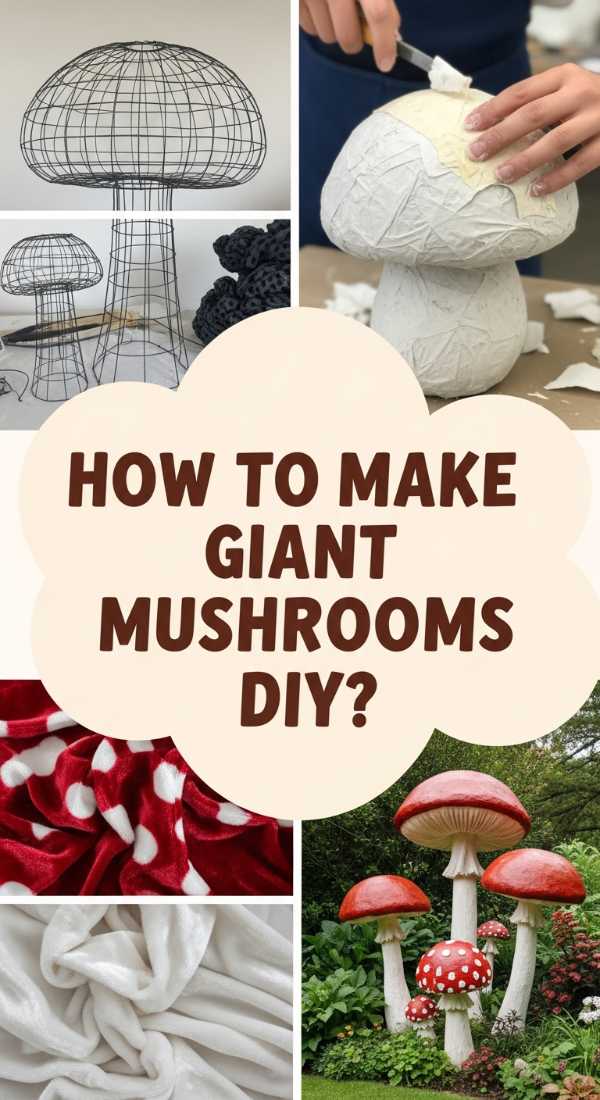
How to Create Giant Mushrooms DIY for Garden Enchantment

Why we love this
Giant mushrooms in a garden create a sense of scale that feels plucked straight from the pages of a storybook, instantly transforming a standard backyard into a realm of enchantment. The rough, cool texture of the concrete or plaster base paired with the vibrant, glossy finish of a painted cap creates a stunning visual anchor amidst the swaying wildflowers. There is a profound satisfaction in seeing these oversized fungi ‘sprouting’ from the soil, their broad caps providing a whimsical shelter for garden gnomes or a resting spot for passing butterflies. They bring a sculptural element to the landscape that stays beautiful through every season.
Essential Elements:
- Large plastic bowls or washbasins (for cap molds)
- PVC piping or thick cardboard tubes (for stems)
- Quick-set concrete or outdoor-rated plaster
- Chicken wire or hardware cloth for reinforcement
- Exterior-grade acrylic paints and waterproof sealant
How to make it
- Prepare your cap mold by lightly coating the inside of a large plastic bowl with cooking spray or mineral oil to ensure easy release.
- Mix your concrete to a thick, peanut-butter-like consistency, and fill the bowl halfway, tapping the sides to remove air bubbles.
- Form a ‘skeleton’ for the stem using chicken wire, shaping it into a slightly tapered cylinder and inserting it into the center of the wet concrete cap.
- Once the cap has cured for 24-48 hours, carefully de-mold it and set the stem upright, securing the base in a bucket of wet concrete to create a stable pedestal.
- Apply a second layer of concrete or outdoor plaster over the wire stem, using a trowel to create organic ridges and ‘gills’ on the underside of the cap.
- After the entire structure is fully dry, paint the cap in a deep crimson or earthy ochre, adding white spots for a classic toadstool look, and finish with a heavy-duty waterproof sealant.
How to Design a Dreamy Home Office with Botanical Touches
Why we love this
Designing a workspace with botanical and mushroom accents fosters a serene, focused environment that mitigates the stress of daily tasks. The sight of lush greenery paired with whimsical fungal motifs evokes a feeling of sitting in a sun-dappled glade, where the air is fresh and creativity flows as naturally as a woodland stream. We love the way the organic shapes of mushroom-themed desk accessories break up the clinical feel of technology, offering a visual rest for the eyes during long hours of work. It’s a design choice that prioritizes mental well-being and inspiration, surrounding you with the quiet, persistent growth of the natural world.
Essential Elements:
- Mushroom-shaped desk lamp with adjustable brightness
- Botanical print wallpaper or framed fern pressings
- Wooden desk with visible grain and organic edges
- Terrarium containing miniature fungi and succulents
- Earth-toned stationery and cork-bound notebooks
How to make it
- Position your wooden desk near a source of natural light to enhance the earthy tones of the furniture and promote plant growth.
- Install a piece of botanical wallpaper on the wall behind your monitor to create a soothing backdrop that reduces eye strain.
- Place a mushroom-shaped lamp on one side of the desk; ensure it uses a warm-spectrum bulb to mimic the golden hour light of a forest.
- Arrange a small terrarium in your line of sight, layering charcoal, pebbles, and moss to house a few ceramic mushroom stakes.
- Use cork boards or wooden clips to hang botanical sketches and mushroom identification charts, creating a gallery of natural inspiration.
- Incorporate a plush, forest-green rug under the desk to ground the space and provide a soft, moss-like texture underfoot.
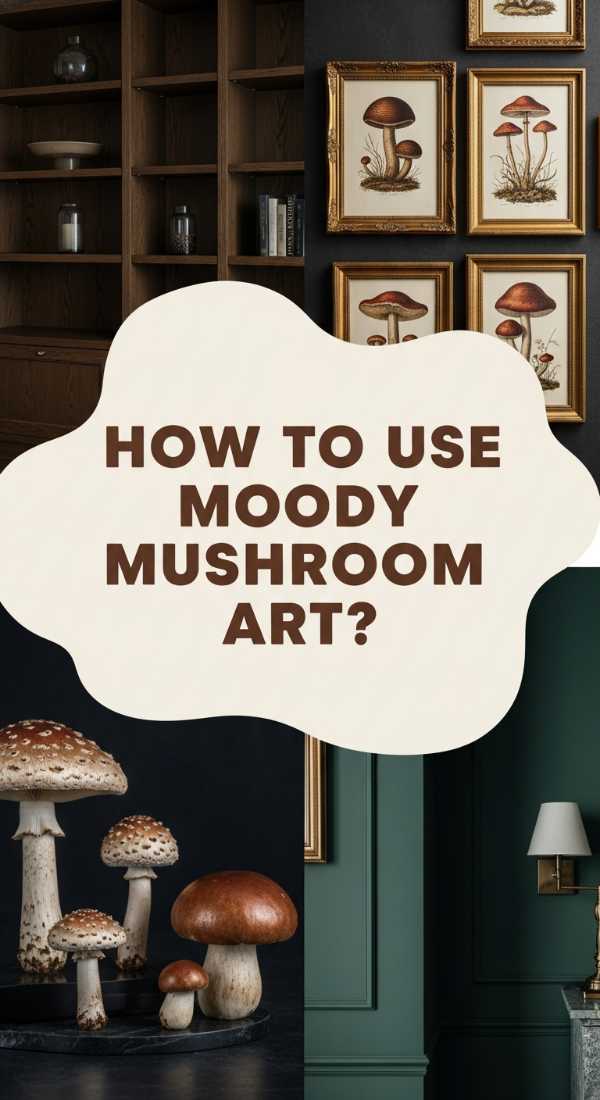
How to Incorporate Mushroom Art for a Moody Aesthetic
Why we love this
Mushroom art is the perfect vehicle for a moody, ‘dark academia’ aesthetic, leaning into the mysterious and slightly shadow-dwelling nature of fungi. Deep, saturated colors like burgundy, midnight blue, and forest green serve as the perfect canvas for the intricate, skeletal details of mushroom gills and spores. We love the way this style feels sophisticated and intellectual, yet deeply connected to the decay and rebirth of the forest floor. It creates a space that feels like an old Victorian study, filled with the scent of old books and the quiet presence of nature’s most enigmatic organisms.
Essential Elements:
- Vintage scientific mushroom illustrations
- Dark-stained wooden or ornate gold frames
- Velvet upholstery in jewel tones
- Dimmer switches or candle-style lighting
- Dried botanical specimens and shadow boxes
How to make it
- Select a dark accent wall—think charcoal or deep navy—to provide a high-contrast background for your artwork.
- Source vintage-style biological prints of mushrooms, focusing on those with intricate details and muted, earthy palettes.
- Frame the prints in heavy, ornate frames; mixing gold leaf and dark mahogany finishes adds to the curated, historical feel.
- Arrange the frames in a tight, symmetrical grid to create a formal, ‘curated museum’ look that feels intentional and moody.
- Incorporate a shadow box containing a real dried mushroom specimen or a wax replica to add a three-dimensional element to the wall.
- Adjust the lighting in the room to be low and warm, using focused spotlights to illuminate the art while leaving the corners of the room in gentle shadow.
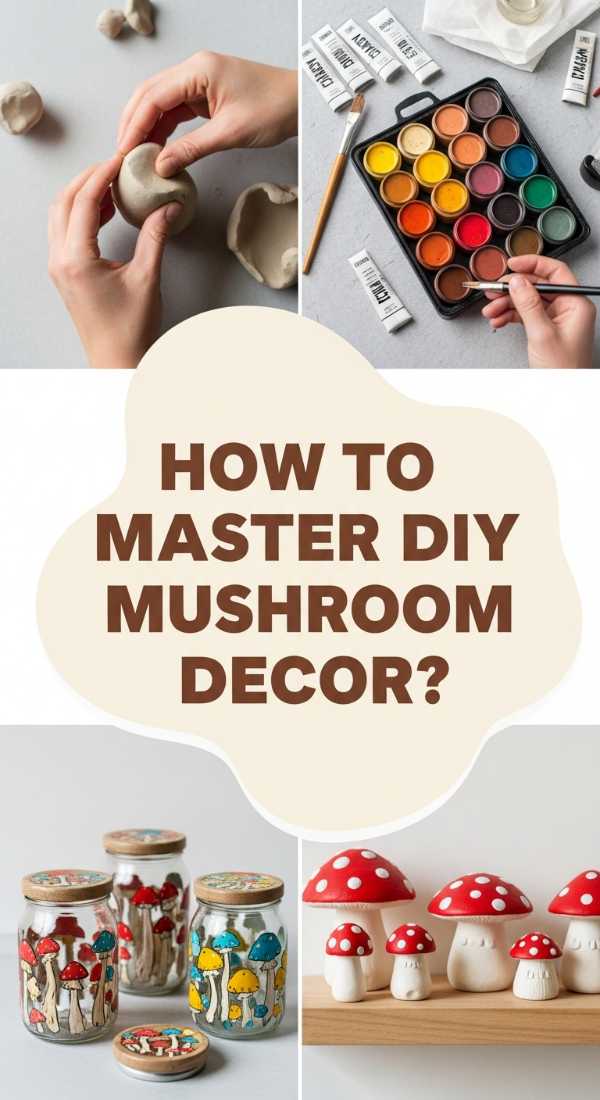
How to Master DIY Mushroom Decor for Budget Friendly Styling

Why we love this
DIY mushroom decor is the ultimate way to personalize your home without breaking the bank, allowing you to turn everyday household items into treasures. There is a unique joy in taking a simple wooden bowl or a scrap of fabric and transforming it into a charming toadstool that looks like it cost a fortune at a high-end boutique. This approach encourages resourcefulness and creativity, resulting in pieces that carry a personal story and a handmade warmth. It proves that a whimsical home isn’t about how much you spend, but how much imagination you pour into the details of your surroundings.
Essential Elements:
- Thrifted wooden bowls and candlesticks
- Acrylic paint and assorted brushes
- Hot glue gun and E6000 adhesive
- Scraps of velvet, felt, or cotton fabric
- Polyester fiberfill for stuffing
How to make it
- Visit a local thrift store to find wooden bowls (for caps) and chunky candlesticks or spindles (for stems) that fit together proportionally.
- Sand the wooden surfaces lightly to remove any old varnish, ensuring the paint or glue adheres properly to the material.
- For a painted version, apply a base coat of red or brown to the bowl and an antique white to the candlestick; once dry, add hand-painted dots.
- For a fabric version, cut a circle of velvet twice the diameter of the bowl, sew a running stitch around the edge, and stuff it with fiberfill.
- Stretch the stuffed fabric over the bowl and secure it with hot glue, then glue the ‘cap’ onto the top of the candlestick stem.
- Finish by gluing a small amount of dried moss around the base of the stem to hide the joint and add a final touch of woodland realism.
How to Elevate Home Design Ideas with Earthy Textures

Why we love this
Earthy textures bring an immediate sense of calm and grounding to any interior, mimicking the complex layering found in a wild forest. By mixing materials like raw wood, rough stone, and soft fungal motifs, you create a tactile environment that feels rich and alive. We love how these textures interact with light—the way a nubby wool throw catches the sun or how a smooth stone mushroom reflects a candle’s flicker. It’s a design philosophy that moves away from the ‘plastic’ and ‘flat’ feel of modern life, embracing the beautiful imperfections of the natural world to create a home that feels deeply settled and authentic.
Essential Elements:
- Jute or sisal area rugs
- Raw-edge wooden furniture
- Stone or clay mushroom sculptures
- Linen curtains and wool blankets
- Woven rattan or wicker baskets
How to make it
- Layer a jute rug over your existing hardwood or tile floors to provide a coarse, earthy foundation for the room.
- Replace standard hardware with stone or ceramic mushroom-shaped knobs on cabinets and drawers for a subtle, tactile surprise.
- Introduce a raw-edge coffee table, allowing the natural knots and cracks of the wood to serve as a primary design feature.
- Drape a heavy linen throw over a sofa, choosing a shade of mushroom taupe or moss green to harmonize with the botanical theme.
- Place a cluster of clay mushroom sculptures on a stone hearth or windowsill, mixing matte and glossy glazes to mimic different fungal species.
- Use woven wicker baskets to store firewood or extra blankets, adding a vertical texture that complements the organic shapes of the mushrooms.
How to Refresh House Decorating Ideas for a Cozy Vibe

Why we love this
A cozy home is all about creating ‘hygge’ moments, and mushroom accents are the perfect whimsical addition to a snug, inviting space. There is something inherently comforting about the rounded, soft shapes of mushrooms—they remind us of fairy tales and quiet forest walks. We love how a simple addition, like a mushroom-patterned pillow or a glowing fungal nightlight, can instantly make a room feel more lived-in and loved. It’s about creating a retreat where you can curl up with a hot cup of tea, surrounded by decor that feels soft to the touch and easy on the eyes.
Essential Elements:
- Mushroom-themed throw pillows and blankets
- Warm-toned ambient lighting (lamps and candles)
- Scented soy candles (notes of cedar, pine, or damp earth)
- Plush area rugs in forest tones
- Soft, oversized knitwear for lounging
How to make it
- Swap out bright overhead lighting for several small ‘mushroom lamps’ placed at different heights around the room to create a soft, diffused glow.
- Layer your sofa with a mix of mushroom-printed velvet pillows and chunky knit throws in deep, warm earth tones.
- Light a candle that features woodsy scents like sandalwood or vetiver to engage the sense of smell and complete the forest atmosphere.
- Place a small, glowing mushroom nightlight in a hallway or corner to provide a whimsical guide through the house at night.
- Arrange a cozy reading nook with a soft armchair, a small side table featuring a mushroom coaster, and a basket of books.
- Add a plush, high-pile rug in a mossy green shade to give the sensation of walking on a soft forest floor while indoors.
How to Mix Home Decor Styles for a Curated Look
Why we love this
The magic of a truly curated home lies in the unexpected pairing of different styles, and mushrooms serve as a fantastic ‘bridge’ element. Whether your home is sleekly modern, ruggedly industrial, or colorfully bohemian, a well-placed mushroom accent adds a touch of organic eccentricity that prevents the space from feeling too ‘catalog-perfect.’ We love the tension between a sharp, metal bookshelf and a delicate, hand-carved wooden mushroom. This blending of styles suggests a life well-traveled and a personality that finds beauty in both the structured and the wild.
Essential Elements:
- Mid-century modern mushroom lamps
- Minimalist line art of fungi
- Industrial metal shelving units
- Handcrafted artisanal mushroom pottery
- Eclectic vintage finds from different eras
How to make it
- Start with your base style—for example, Mid-Century Modern—and identify a piece of furniture that feels iconic, like a walnut sideboard.
- Introduce a ‘bridge’ piece, such as a classic 1970s-style mushroom lamp, which shares the era’s aesthetic but adds an organic shape.
- On an industrial metal shelf, place a few highly detailed, artisanal ceramic mushrooms to soften the coldness of the metal.
- Hang a minimalist line-drawing of a mushroom next to a modern abstract painting to create a dialogue between nature and art.
- Mix textures by placing a sleek glass mushroom vase on a rustic, reclaimed wood stool, highlighting the contrast between the two materials.
- Keep the color palette cohesive across the different styles (e.g., using only blacks, whites, and wood tones) to ensure the mix feels intentional rather than cluttered.
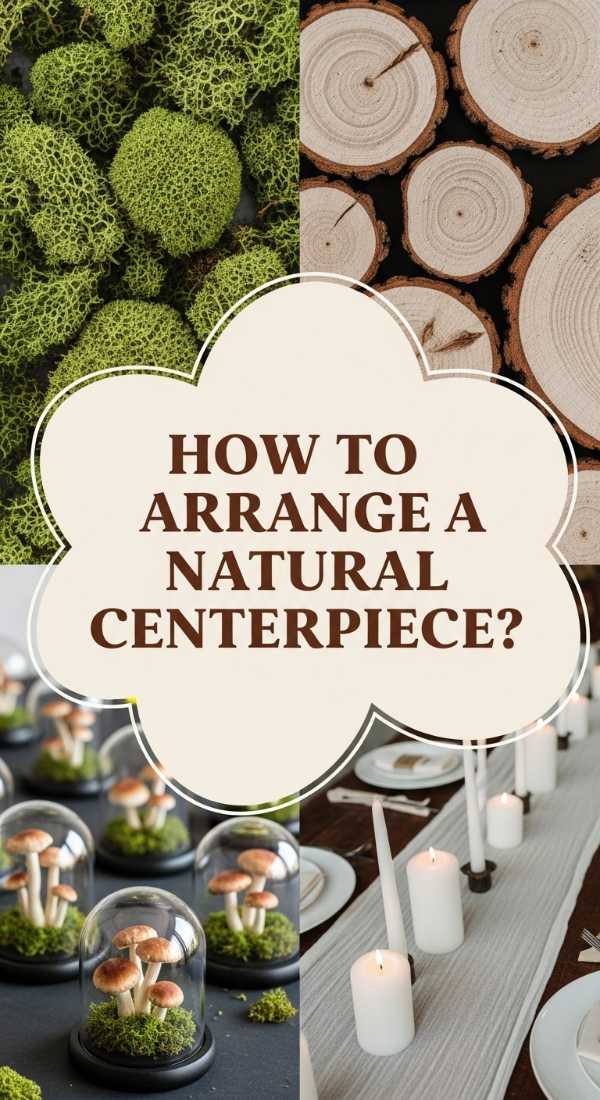
How to Arrange Mushrooms for a Natural Centerpiece
Why we love this
A mushroom centerpiece brings the vibrant life of the forest floor directly to your dining table, creating a conversation piece that is both elegant and wild. Unlike traditional floral arrangements, a mushroom-based centerpiece offers unique textures—the spongy underside of a cap, the woody grain of a bracket fungus, and the velvety softness of moss. We love how this arrangement feels gathered rather than bought, evoking the feeling of a woodland feast. It’s a refreshing departure from standard centerpieces, offering a grounded, earthy beauty that feels sophisticated yet approachable.
Essential Elements:
- A long wooden dough bowl or a flat slate tray
- Assorted dried or ceramic mushrooms of varying scales
- Preserved sheet moss and Spanish moss
- Dried seed pods, acorns, and pinecones
- Small unscented tea light candles
How to make it
- Place your dough bowl or slate tray in the center of the table; if using wood, ensure it has a rich, warm finish to complement the forest theme.
- Lay a thick bed of preserved sheet moss as the foundation, allowing some pieces to spill over the edges for a natural, overgrown look.
- Position three main ‘hero’ mushrooms of different heights in a triangular formation to create a balanced focal point.
- Tuck smaller mushrooms and dried seed pods into the gaps of the moss, varying the angles so they look like they are growing spontaneously.
- Intersperse small pinecones and acorns to add different textures and shades of brown, mimicking the debris of a real forest floor.
- Nestle three tea light candles into the arrangement, ensuring they are placed in glass holders to protect the moss and create a flickering, magical light.
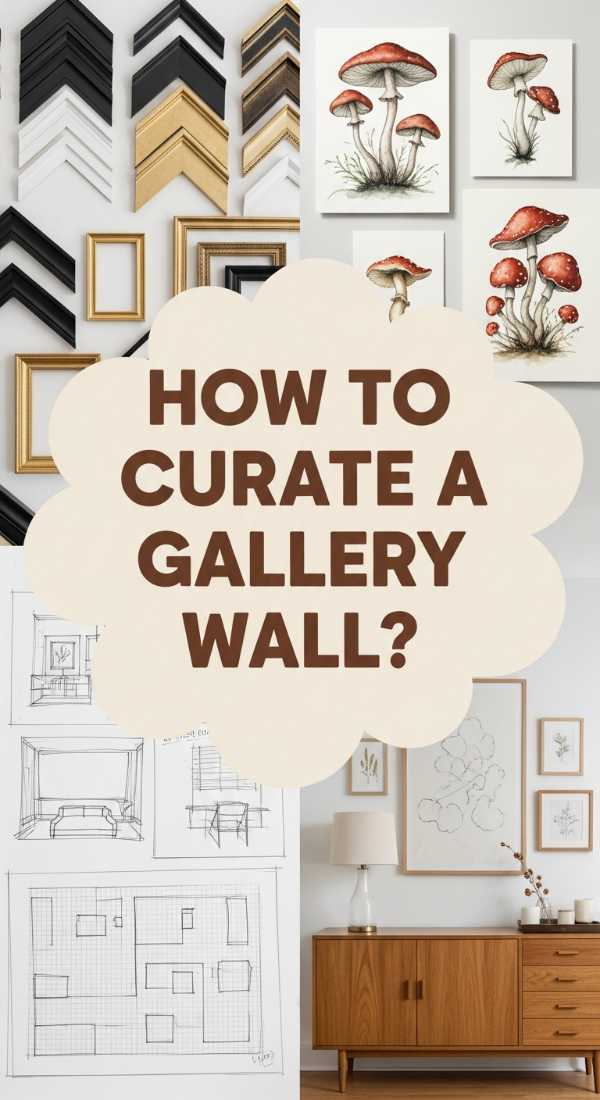
How to Curate Mushroom Art for an Eclectic Gallery Wall
[IMAGE_10]
Why we love this
An eclectic gallery wall featuring mushroom art is a celebration of biodiversity and artistic interpretation, turning a blank wall into a storytelling masterpiece. From scientific sketches to surrealist paintings and 3D fiber art, the variety of fungal representations allows you to showcase your unique personality. We love how the repetitive motif of the mushroom provides a sense of rhythm and unity, even when the artistic styles vary wildly. It’s a way to display a collection that feels curated over time, inviting guests to step closer and discover the tiny details of each individual piece.
Essential Elements:
- A mix of framed prints, canvases, and 3D art
- Frames in varying sizes, colors, and materials
- Mushroom-themed embroidery or textile art
- Command strips or a hammer and nails
- A large floor space for layout planning
How to make it
- Collect a variety of mushroom-themed art, including vintage prints, modern watercolors, and perhaps a piece of 3D felted mushroom art.
- Lay all your pieces out on the floor in front of the wall you intend to use; this allows you to experiment with the arrangement without making holes.
- Start with your largest or most vibrant piece as the ‘anchor’ and place it slightly off-center to create a sense of movement.
- Surround the anchor with smaller pieces, mixing different frame styles (e.g., a sleek black frame next to an ornate vintage silver frame) for an eclectic feel.
- Integrate non-framed items, like a small wall-mounted mushroom shelf or a piece of textile art, to break up the lines of the frames.
- Maintain a consistent gap (about 2-3 inches) between all pieces to ensure the wall looks organized despite the variety of styles.
Conclusion
Embracing the whimsical woodland aesthetic is about more than just home decor; it’s about inviting a sense of peace, curiosity, and natural beauty into your everyday life. By incorporating mushroom accents—whether through DIY projects, carefully curated art, or tactile textures—you transform your home into a sanctuary that honors the magic of the earth. I hope this guide inspires you to look at your space through a more whimsical lens and discover the joy of living amongst the ‘fungi’ of your dreams. Happy decorating!