

Do you ever feel like life is just a series of rushing from one task to the next, leaving little room for those small moments of magic that truly make a house feel like a home? I’ve spent years trying to find that perfect balance between keeping things organized and actually enjoying the space I live in. Recently, I’ve discovered that the secret isn’t about big renovations or expensive overhauls; it’s about the simple, viral lifestyle hacks that turn ordinary days into something extraordinary.
I remember sitting on my back porch last summer, looking at a cracked concrete slab and feeling overwhelmed by the work it needed. But then, I leaned into the world of ‘slow living’ and realized that with a little bit of creativity and a few budget-friendly tools, I could transform that space—and my entire daily routine—into something peaceful and effortless. These hacks are more than just tasks; they are invitations to breathe deeper and enjoy your environment more fully.
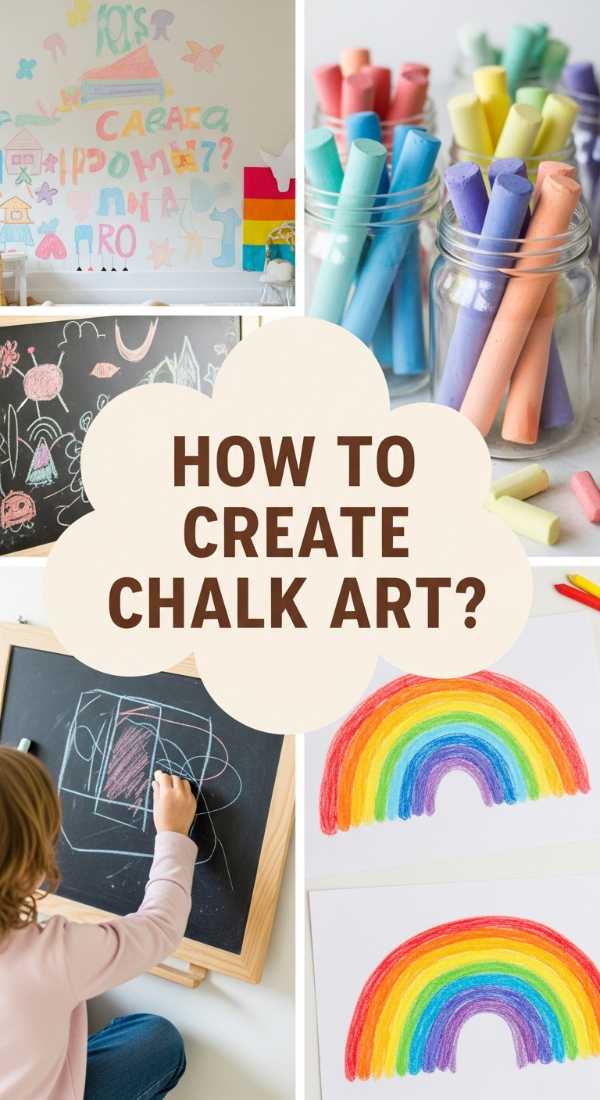
How to Master Artistic Chalk Designs for a Beautiful Home Entrance
Why we love this
There is nothing quite like the soft, dusty texture of high-quality chalk meeting the rough grit of a front walkway to signal a warm welcome. We love this because it offers an immediate, low-stakes burst of color that changes with the weather, keeping your entrance feeling fresh and seasonally relevant. Imagine the smell of rain-washed pavement and the visual delight of pastel florals or geometric patterns greeting your guests before they even ring the doorbell; it creates a whimsical, tactile experience that feels both grounded and fleetingly beautiful.
Essential Elements:
- Multi-colored jumbo sidewalk chalk
- A small bucket of water for blending
- Sponge brushes or old rags
- Masking tape for sharp geometric lines
- A clear sealant spray (optional for longevity)
How to make it
- Begin by sweeping your entrance thoroughly to remove loose dirt and debris, ensuring the chalk adheres smoothly to the concrete or stone.
- If you want crisp, modern lines, use masking tape to block out a geometric pattern or a border; press the edges down firmly to prevent pigment bleed.
- Dip your chalk sticks into water for about 10 seconds before drawing; this technique, known as ‘wet chalking,’ makes the colors appear significantly more vibrant and creates a paint-like consistency.
- Apply the base colors in thick layers, then use a damp sponge or your fingers to blend the transitions between shades, creating a soft ombre effect that mimics fine art.
- Once the design is dry, carefully peel back any tape at a 45-degree angle to reveal sharp, professional edges, and lightly mist with a fixative if you want the design to survive a light breeze or foot traffic.
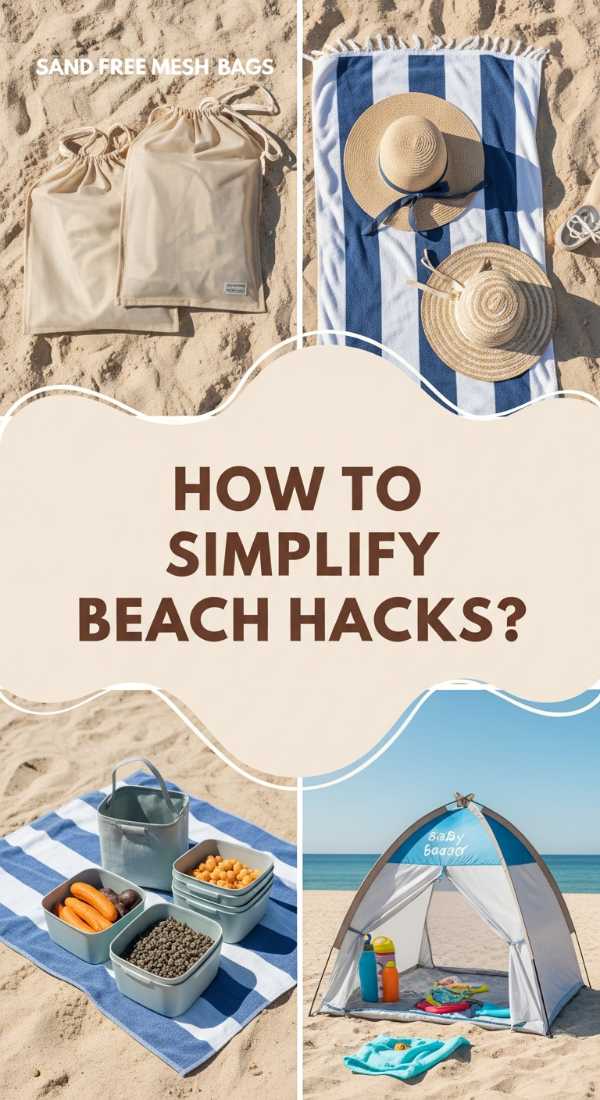
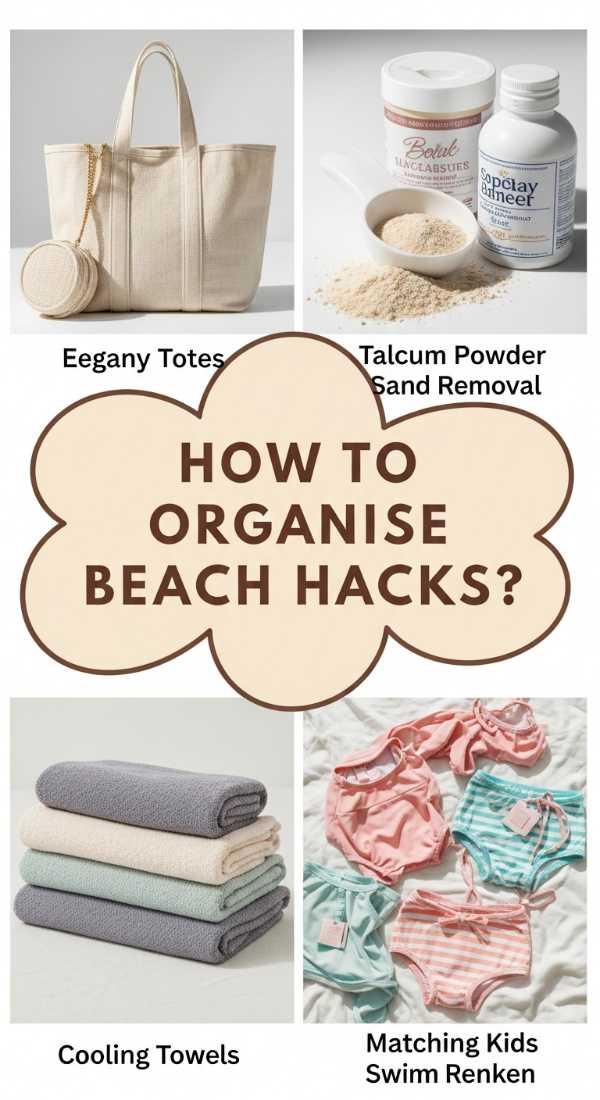
How to Simplify Beach Hacks for Kids to Ensure a Stress Free Vacation
Why we love this
The beach should be a place of rhythmic waves and warm sun, not a battleground against stubborn sand and sticky fingers. These hacks bring a sense of calm to the seaside chaos, allowing you to enjoy the salty air and the feeling of the warm breeze without the usual logistics headache. We love how a few simple household items can preserve the sensory joy of the ocean—the cool water on skin and the soft sand between toes—while eliminating the grit that usually follows you home in the car.
Essential Elements:
- Mesh laundry bags for toy storage
- Talc-free baby powder
- Fitted bed sheet (to create a sand-free zone)
- Frozen water balloons (for coolers)
- Spray bottle with fresh water
How to make it
- Place a large fitted sheet upside down on the sand and put heavy bags or coolers in the four corners to pull the sides up, creating a ‘walled’ play area that keeps sand out of snacks and blankets.
- When it’s time to leave, sprinkle talc-free baby powder liberally on sandy legs and arms; the powder absorbs moisture, allowing the sand to fall off instantly with a gentle rub of the hand.
- Store all beach toys in a mesh laundry bag; before heading to the car, shake the bag vigorously to ensure the sand stays at the beach rather than in your trunk.
- Fill a spray bottle with fresh water and keep it in the shade to mist down salty faces or rinse off sticky hands after a snack, providing instant cooling relief.
- Use frozen water balloons in your cooler instead of loose ice; they keep food dry, stay cold longer, and provide a fun, chilled activity for the kids once they start to melt.
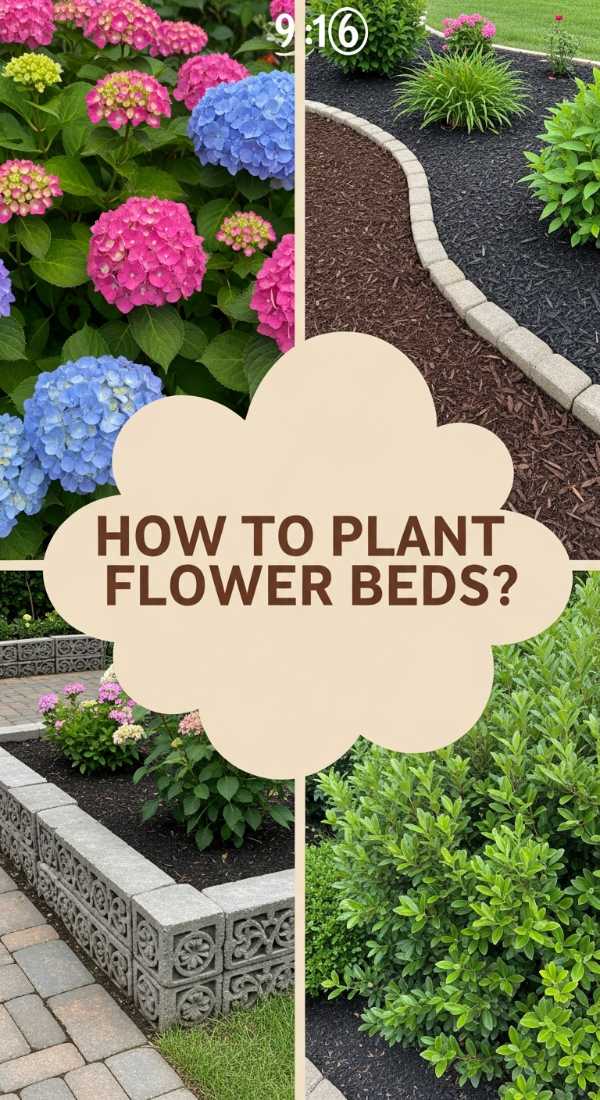
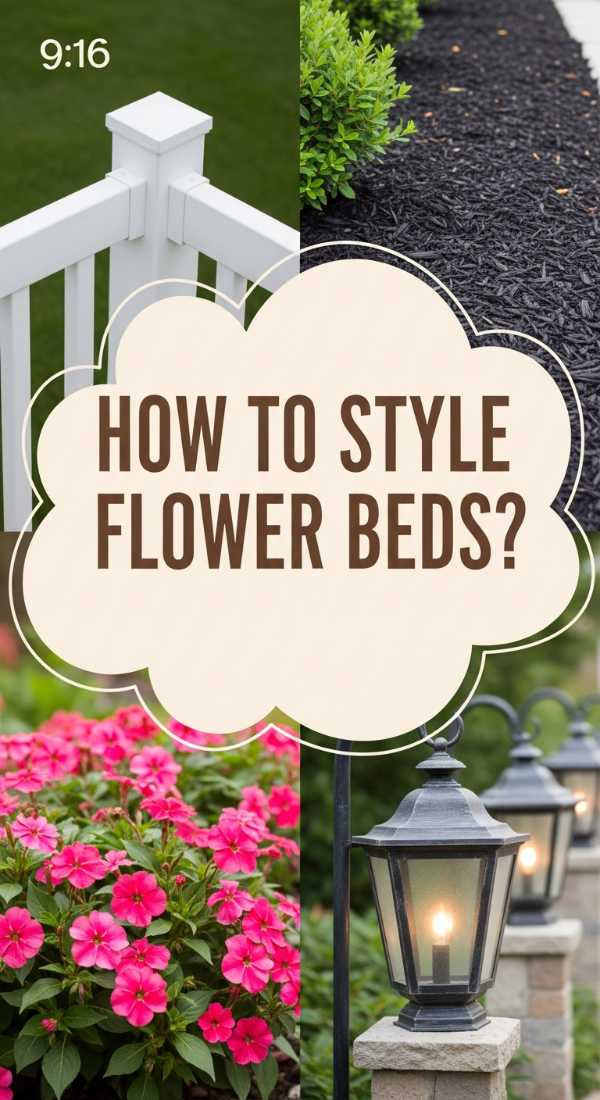
How to Plant Corner Flower Bed Ideas for a Lush Garden Oasis
Why we love this
A corner flower bed is like a secret embrace for your backyard, turning an overlooked angle into a sanctuary of scent and color. We love the layering of textures—the velvet petals of roses paired with the architectural spikes of lavender—that creates a deep, immersive sensory experience. Walking past this oasis, you’ll be hit with the sweet, earthy aroma of damp soil and blooming nectar, making even a small garden feel like an expansive, professionally landscaped retreat that invites butterflies and peace.
Essential Elements:
- High-quality organic compost and topsoil
- Structural shrubs (like Boxwood or Hydrangea)
- Perennial flowers (Coneflowers, Salvia)
- Natural cedar mulch
- Edging stones or bricks
How to make it
- Clear the corner of all grass and weeds, digging down at least 6 inches to loosen the soil and mixing in a generous amount of compost to provide a nutrient-rich base.
- Arrange your plants while they are still in their pots to visualize the heights; place the tallest ‘thriller’ plants in the very back corner, followed by ‘filler’ perennials in the middle.
- Dig holes twice as wide as the root balls, ensuring the crown of each plant sits level with the soil surface to prevent rot.
- Gently tease the roots before planting and backfill with soil, pressing down firmly to eliminate air pockets around the root system.
- Apply a 2-inch layer of cedar mulch across the entire bed, keeping it an inch away from the stems of the plants to retain moisture and suppress weeds, then water deeply until the soil is saturated.
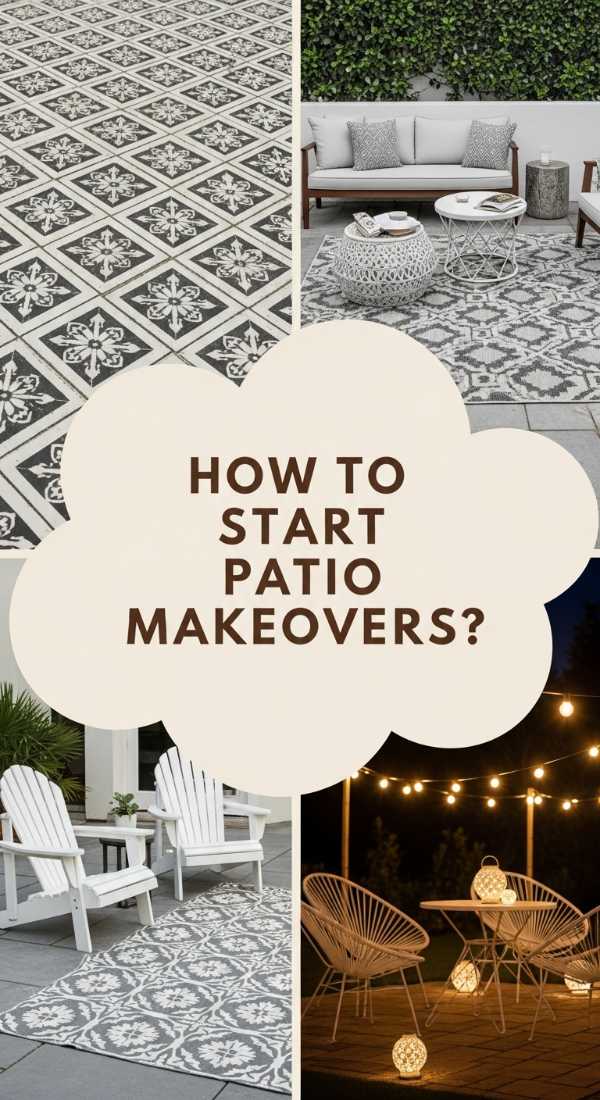
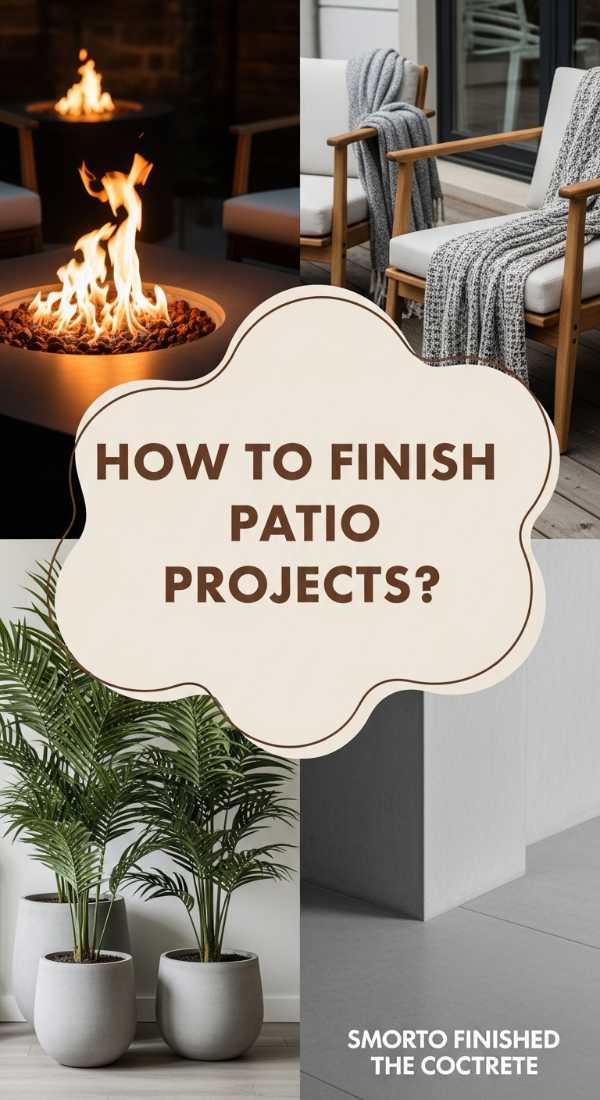
How to Start a Concrete Slab Patio Makeover for the Ultimate Outdoor Retreat
Why we love this
There is something incredibly satisfying about taking a cold, grey concrete slab and turning it into a warm, inviting extension of your living room. We love the transformation of the hard, industrial surface into a visual feast of patterns and soft finishes that feel smooth underfoot. It’s about creating a space where the aroma of grilled food and the sound of laughter can linger, making your outdoor area feel like a high-end resort without the high-end price tag.
Essential Elements:
- Concrete cleaner and a stiff scrub brush
- Concrete-safe outdoor paint or stain
- Stencil (large-scale patterns work best)
- Low-nap paint roller and painter’s tape
- Outdoor clear sealant
How to make it
- Thoroughly power wash or scrub the concrete with a heavy-duty degreaser to ensure every bit of oil and dirt is gone, as any residue will prevent the paint from bonding.
- Apply a base coat of outdoor porch and patio paint using a long-handled roller, working in small sections and maintaining a wet edge to avoid visible lap marks.
- Once the base is dry (usually 24 hours), secure your stencil in the corner with painter’s tape and apply a contrasting color using a ‘dry brush’ technique to prevent bleeding under the stencil.
- Repeat the pattern across the entire slab, being careful to align the stencil registration marks perfectly for a seamless, rug-like appearance.
- Allow the design to cure for at least 48 hours before applying two coats of clear, anti-slip outdoor sealant to protect the finish from UV rays and heavy foot traffic.
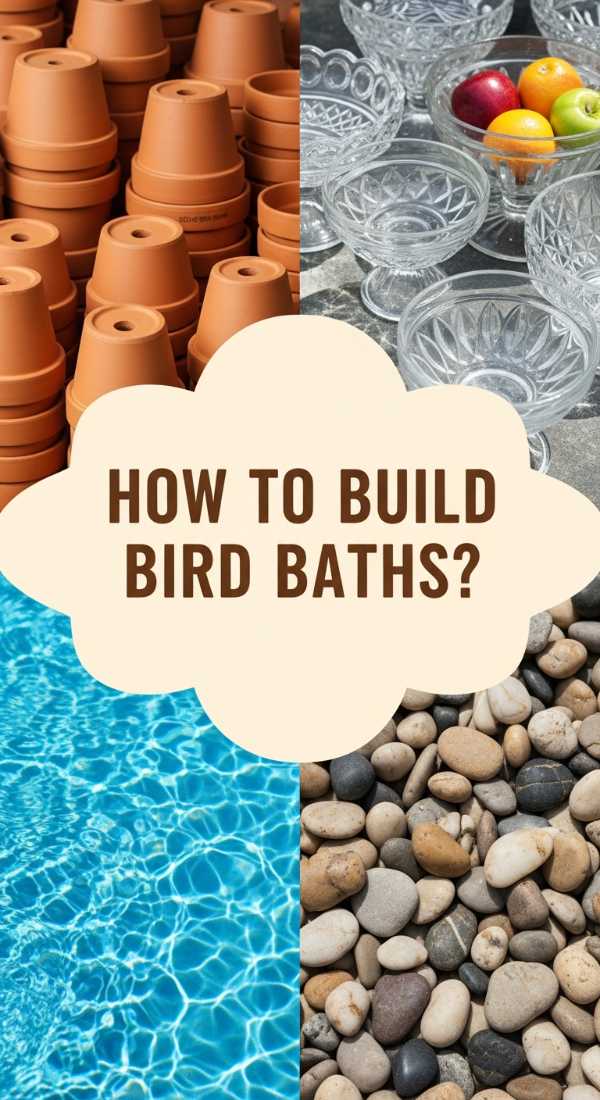
How to Build a DIY Bird Bath from the Dollar Store for a Charming Nature Sanctuary
Why we love this
Watching birds splash in clear water is one of life’s simplest joys, providing a rhythmic, calming soundtrack to your morning coffee. We love this hack because it uses humble, everyday materials to create something that looks like a custom ceramic piece. The sight of sparkling water catching the sunlight and the gentle sound of chirping visitors transforms any garden corner into a lively, interactive sanctuary that feels connected to the natural world.
Essential Elements:
- Two or three glass or ceramic bowls (different sizes)
- One sturdy glass vase or a large planter pot
- Waterproof epoxy or glass adhesive
- Decorative river stones or marbles
- Solar-powered fountain pump (optional)
How to make it
- Clean all glassware thoroughly with rubbing alcohol to ensure a perfect bond for the adhesive, removing all labels and sticky residue.
- Invert the largest bowl or pot to serve as the base; apply a generous bead of waterproof epoxy to the bottom (now the top) and center your vase or support column onto it.
- Allow the base to cure for the full time recommended on the adhesive package (usually 24 hours) in a dry, room-temperature environment.
- Attach the widest, shallow bowl to the top of the column using more epoxy, ensuring it is perfectly level so the water doesn’t spill out one side.
- Fill the top bowl with clean water and add river stones to give the birds a safe place to land, then place it in a shaded spot in your garden to keep the water cool.
How to Create Whimsical Chalk Designs for an Enchanting Playroom Atmosphere
Why we love this
In a playroom, imagination should have no boundaries, and chalk designs offer an ever-changing canvas for storytelling. We love the soft, matte finish of chalk on a chalkboard wall, which adds a cozy, vintage feel to a modern home. The gentle ‘scritch-scratch’ of chalk and the dusty, vibrant hues create a sensory playground where children can see their dreams come to life, from enchanted forests to outer space adventures, all within the safety of their own room.
Essential Elements:
- Chalkboard paint or a large framed chalkboard
- Dustless chalk or chalk markers
- Microfiber cloth for erasing
- Small buckets for chalk organization
- Stencils for complex shapes (clouds, stars)
How to make it
- If starting from scratch, apply two coats of chalkboard paint to a smooth wall section, allowing 72 hours for the paint to fully cure before ‘seasoning’ the surface.
- Season the board by rubbing the side of a piece of white chalk over the entire surface and then erasing it; this prevents ‘ghosting’ where your first drawings leave permanent shadows.
- Use light, airy strokes to sketch out large background elements like mountains or trees, using the side of the chalk to create soft, blended textures.
- Add fine details using chalk markers for crisp lines on foreground objects like fairies, robots, or animals, giving the scene a professional, layered look.
- Change the designs monthly to reflect new interests or holidays, always erasing with a slightly damp microfiber cloth to keep the black background deep and saturated.
How to Organise Beach Hacks for Kids to Achieve the Perfect Sunny Afternoon
Why we love this
Organization is the ultimate gift you can give yourself during a family outing; it turns a chaotic scramble into a choreographed dance of fun. We love how a well-organized beach kit feels—the click of lids, the neatly stacked towels, and the ease of finding exactly what you need when a child asks. It’s about maximizing those golden hours of sunshine by minimizing the time spent digging through bags for sunscreen or snacks, allowing you to stay present in the moment.
Essential Elements:
- Clear plastic zippered pouches
- Color-coded dry bags for clothing
- Insulated snack containers
- Clip-on hand sanitizers
- Small first-aid kit
How to make it
- Categorize all items into ‘zones’: sun protection, hydration, snacks, and dry clothes, so everyone knows exactly where to look for specific needs.
- Pack a ‘wet bag’ and a ‘dry bag’ separately; the wet bag should be made of waterproof material to hold damp swimsuits at the end of the day, preventing moisture from ruining your other gear.
- Use clear pouches for sunscreens and lip balms; this allows you to see when you’re running low and prevents any leaks from ruining the interior of your main beach bag.
- Pre-chill all snacks and place them in a hard-sided cooler with reusable ice packs at the bottom, which provides a more stable temperature than loose ice.
- Hang a small mesh bag on the outside of your main tote for frequently used items like sunglasses or spray-on sunblock, ensuring they are always within arm’s reach for quick reapplication.
How to Style Corner Flower Bed Ideas for a Welcoming Curb Appeal
Why we love this
First impressions start at the curb, and a styled corner bed is like a warm ‘hello’ to everyone who passes by. We love the way structured evergreens provide year-round greenery while seasonal blooms offer a rotating palette of vibrant color. The visual weight of a well-placed boulder or an elegant birdhouse adds a touch of sophistication, making your home feel cared for and intentional, while the scent of blooming jasmine or gardenias fills the air as you walk toward the door.
Essential Elements:
- Specimen tree or large shrub (for height)
- Coordinating perennials and annuals
- Decorative landscape rocks or boulders
- Solar-powered spotlighting
- Durable metal or wood edging
How to make it
- Define a curved edge for your corner bed using a garden hose to mark the shape; curves feel more organic and welcoming than harsh 90-degree angles.
- Install a focal point, such as a tall weeping Japanese Maple or a classic garden statue, slightly off-center to create a dynamic, professional aesthetic.
- Plant in odd numbers (groups of 3 or 5) to create a natural rhythm that leads the eye toward the front door rather than away from it.
- Incorporate silver-leafed plants like Dusty Miller or Lamb’s Ear; their light-reflecting foliage makes the garden glow during the ‘golden hour’ and into the evening.
- Position solar spotlights at the base of your focal tree, angling them upward to cast dramatic shadows and ensure your curb appeal remains stunning even after the sun goes down.
How to Finish a Concrete Slab Patio Makeover for Cozy Evening Gatherings
Why we love this
The magic happens when the sun sets and the patio transforms into a glowing retreat for intimate conversations. We love how adding layers of soft light and comfortable textiles can make a hard concrete surface feel as cozy as a den. The smell of a citronella candle mixing with the cool evening air, and the warmth of a plush outdoor rug underfoot, creates an atmosphere where time seems to slow down and the stresses of the day simply melt away into the shadows.
Essential Elements:
- Outdoor string lights (Edison bulbs recommended)
- All-weather area rug
- Propane fire table or portable fire pit
- Comfortable seating with outdoor pillows
- Potted tall grasses for privacy
How to make it
- Anchor an outdoor rug over your painted concrete to define the ‘living’ area; ensure the rug is large enough that all furniture legs sit on it, which grounds the space visually.
- String lights in a ‘zigzag’ or ‘crisscross’ pattern overhead using sturdy poles or attaching them to the house eaves; keep the tension tight for a polished look.
- Place a fire table in the center of your seating group, ensuring it is at least 10 feet away from any flammable structures or low-hanging branches for safety.
- Layer in soft textures with UV-resistant throw pillows and lightweight blankets draped over chairs, choosing colors that complement your stenciled patio design.
- Group large planters filled with tall ornamental grasses like Miscanthus around the perimeter to create a ‘living wall’ that provides privacy and a gentle rustling sound in the wind.
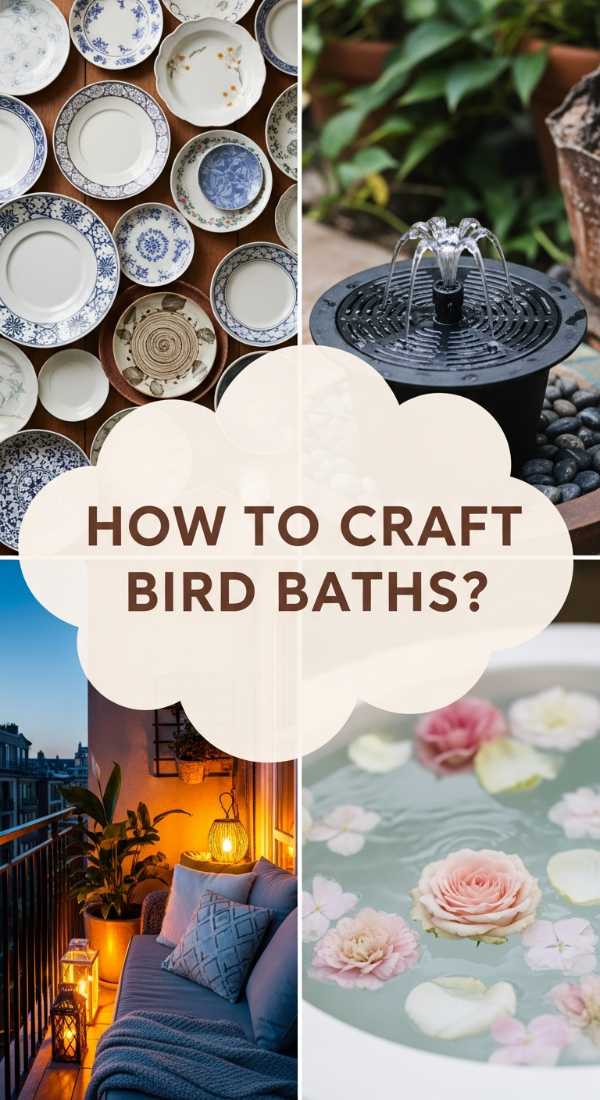
How to Craft a DIY Bird Bath from the Dollar Store for a Serene Balcony Space
[IMAGE_10]
Why we love this
Even if you only have a small balcony, you can still invite the serenity of nature to your doorstep. We love the compact elegance of a tabletop bird bath that brings the gentle ripple of water and the flash of colorful wings right to your window. It’s about creating a miniature ecosystem that feels sophisticated and expensive, using ceramic textures and cool tones to turn a small outdoor corner into a peaceful sanctuary for reflection and observation.
Essential Elements:
- A large ceramic pasta bowl
- A decorative garden gnome or heavy ceramic bird
- Smooth river stones
- Weatherproof silicone sealant
- A small solar water bubbler
How to make it
- Choose a heavy, wide-rimmed bowl that won’t tip over in the wind; a ceramic or heavy plastic bowl with a glossy finish works best to prevent algae growth.
- Use silicone sealant to attach a small decorative figure (like a ceramic bird) to the edge of the bowl, providing a charming visual and a ‘perch’ for real birds.
- Place a single layer of smooth river stones at the bottom of the bowl; these provide traction for the birds and create a beautiful, naturalistic look under the water.
- Fill the bowl with only 1-2 inches of water, as birds prefer shallow depths for bathing and drinking safely.
- Add a small solar-powered bubbler to the center; the moving water will attract more birds and prevent mosquitoes from breeding in the still water, keeping your balcony space serene and pest-free.
Embracing the Simple Life
Transforming your daily life doesn’t require a lottery win or a month-long sabbatical. As we’ve seen, it’s the little things—the way the sun hits a DIY birdbath, the organized ease of a beach trip, or the creative joy of a chalk-decorated entrance—that build a life of beauty and ease. By taking just a few hours this weekend to implement one of these viral hacks, you’re not just checking a task off a list; you’re investing in your own peace of mind and the warmth of your home. Happy hacking!