
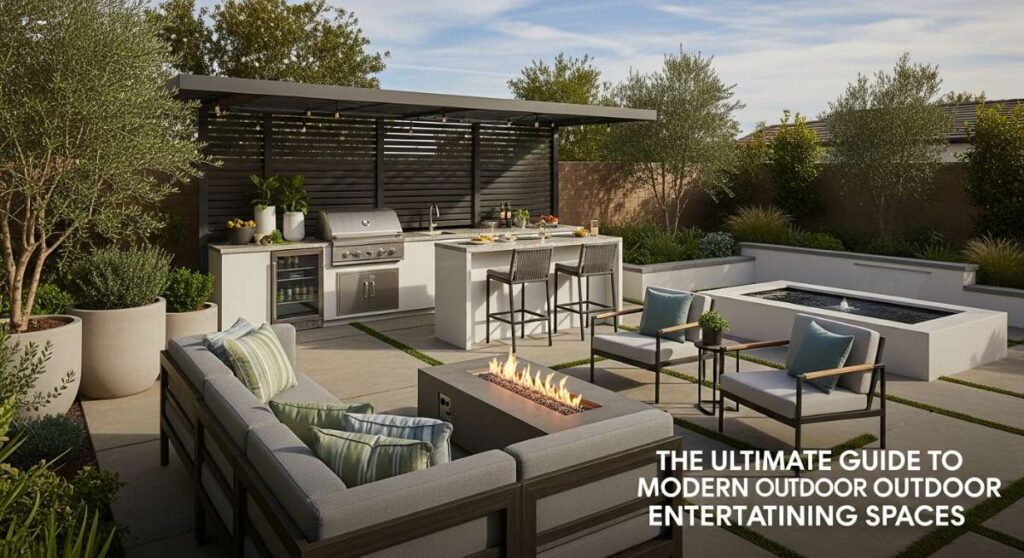
The Ultimate Guide to Modern Outdoor Entertaining Spaces
There is something truly transformative about the magic of a golden hour spent in your own backyard. As the sun dips below the horizon, casting long, amber shadows across the grass, the transition from a simple yard to a curated sanctuary becomes the heartbeat of the home. It’s where the clinking of ice cubes against glass mingles with the evening breeze, and where the scent of blooming jasmine creates an effortless backdrop for memories that linger long after the stars come out.
Creating a modern outdoor entertaining space isn’t just about furniture; it’s about intentionality and the way a space makes you feel. Whether you’re dreaming of a secluded reading nook draped in greenery or a vibrant patio designed for neighborhood gatherings, the right DIY touches can elevate your home style from ordinary to extraordinary. This guide is your roadmap to building a lifestyle that celebrates the outdoors with sophistication, warmth, and a dash of artistic flair.
How to Build a Floating Deck for Luxurious Summer Entertaining

Why we love this
A floating deck offers an immediate sense of architectural luxury, providing a low-profile platform that feels like an island retreat right in your backyard. We adore the way the warm, sun-drenched wood feels beneath bare feet and the earthy, resinous aroma of freshly stained cedar that fills the air on a humid afternoon. It creates a distinct zone for lounging that doesn’t require permanent attachments to your home, giving you the freedom to design a layout that follows the natural rhythm of your landscape while offering a smooth, level surface for chic outdoor sofas and cocktail tables.
Essential Elements:
- Pressure-treated 2×6 or 2×8 lumber for the frame
- Concrete deck blocks or pavers
- Leveling gravel or sand
- Galvanized wood screws and joist hangers
- Cedar or composite decking boards
- Exterior wood stain or sealant
- Spirit level and string lines
How to make it
- Begin by clearing the area of all grass and debris, digging down approximately 4 inches to create a stable base. Lay down a weed barrier and cover it with a 2-inch layer of leveling gravel, tamping it down firmly until it is perfectly flat and compressed.
- Position your concrete deck blocks at each corner and at 4-foot intervals along where your joists will sit. Use a long straightedge and a spirit level to ensure every block is perfectly level with its neighbors, as this foundation determines the success of the entire structure.
- Construct the outer box frame using pressure-treated lumber, securing the corners with heavy-duty galvanized screws. Place this frame onto the blocks and check for square by measuring the diagonals; they must be identical to ensure your decking boards lay straight later.
- Install interior joists every 16 inches on center using joist hangers. This spacing is critical to prevent the deck boards from sagging over time, especially during high-heat summer months when wood can expand.
- Lay your decking boards across the joists, using 1/8-inch spacers between each board to allow for drainage and natural expansion. Secure each board with two screws at every joist intersection, ensuring the screw heads are slightly countersunk for a smooth, professional finish.
- Sand any rough edges with 80-grit sandpaper and apply a high-quality UV-resistant stain or sealant using a long-handled roller. Apply the stain when the wood is cool to the touch—ideally in the early morning—to prevent the finish from drying too quickly and becoming blotchy.
How to Use Solar Light Ideas for an Enchanted Garden Pathway

Why we love this
There is a profound sense of enchantment that occurs when a garden path begins to twinkle as dusk settles in. We love the soft, amber glow of solar lighting because it mimics the flickering light of fireflies, guiding your guests through the garden with a romantic, ethereal touch. The visual texture of shadows dancing against gravel or mulch adds depth to your nighttime landscape, while the lack of messy wires allows the natural beauty of your hostas and ferns to remain the focal point, creating a safe and inviting journey from the patio to the fire pit.
Essential Elements:
- Solar-powered stake lights or lanterns
- Decorative glass pebbles or crushed white quartz
- Measuring tape or garden twine
- Small hand trowel
- Outdoor-rated adhesive (if mounting to stone)
- Replacement rechargeable solar batteries
How to make it
- Survey your pathway during the day to identify the areas that receive at least 6-8 hours of direct sunlight, as solar panels require maximum exposure to charge the internal batteries for a vibrant night-long glow.
- Mark your light placement using garden twine to ensure a rhythmic, symmetrical flow. For a professional look, space the lights approximately 3 to 5 feet apart, staggering them on either side of the path to create a sense of movement and width.
- Use a small trowel to soften the soil before inserting the stakes; never force them into hard ground as this can crack the plastic or metal stems. If the ground is dry, water it thoroughly an hour before installation to make the earth more pliable.
- Assemble the solar units by removing the pull-tab from the battery compartment and ensuring the light sensor is clean and unobstructed by overhanging foliage or tall grass.
- Enhance the glow by placing a small bed of white crushed quartz or reflective glass pebbles around the base of each light. This technique reflects the downward beam of the LED, magnifying the brightness and creating a high-end, polished appearance.
- Test the placement at nightfall. If certain areas feel too dark, adjust the angle of the light heads or move the stakes slightly closer together to ensure a seamless ribbon of light that eliminates tripping hazards.
How to Paint Shed Murals for a Vibrant Backyard Statement

Why we love this
A shed mural is the ultimate expression of backyard personality, turning a utilitarian structure into a breathtaking piece of living art. We love the bold, saturated colors that pop against the greenery of a lawn, providing a visual anchor that draws the eye and sparks conversation. The process of painting outdoors allows you to breathe in the fresh air while channeling your creativity, resulting in a textured, multi-dimensional focal point that feels like a private gallery tucked away behind your flower beds.
Essential Elements:
- Exterior-grade acrylic paint or spray paint
- High-quality primer for wood or metal
- Various sizes of synthetic brushes and rollers
- Painter’s tape and drop cloths
- Clear UV-resistant topcoat
- Chalk or a projector for outlining
How to make it
- Thoroughly clean the shed surface using a power washer or a stiff brush with soapy water to remove all dirt, cobwebs, and oxidation. Allow the surface to dry completely for at least 24 hours to ensure the paint bonds correctly.
- Apply a high-adhesion exterior primer specifically formulated for the shed’s material. This step is non-negotiable; it prevents the wood tannins from bleeding through and provides a “tooth” for your mural colors to grip onto.
- Sketch your design onto the primed surface using chalk, which can be easily wiped away if you make a mistake. For complex geometric patterns, use painter’s tape to create crisp, sharp lines that give the mural a professional, modern edge.
- Start painting the background colors first using a large roller, working from the top of the shed down to the bottom to manage any drips. Use high-pigment exterior paints that offer excellent coverage in one or two coats.
- Layer in your detail work with smaller brushes. Focus on creating contrast—dark shadows and bright highlights—to make the mural “pop” from a distance. If using spray paint, maintain a distance of 8-10 inches and use steady, sweeping motions to avoid pooling.
- Once the mural is dry, apply two coats of a clear, non-yellowing UV-resistant sealer. This protects your hard work from fading in the harsh sun and prevents moisture from peeling the paint during the winter months.
How to Create a Planter Privacy Wall for a Secluded Oasis

Why we love this
Nothing beats the feeling of a “green hug” provided by a living privacy wall. We love the way a planter wall softens the hard edges of a property line, replacing cold fences with the lush textures of cascading ivy, fragrant rosemary, and silver-toned eucalyptus. The scent of damp earth and aromatic herbs creates a therapeutic atmosphere, while the physical barrier offers a sense of seclusion and peace, making your patio feel like a hidden sanctuary where you can truly disconnect from the outside world.
Essential Elements:
- Vertical planter frames or heavy-duty wooden troughs
- High-quality potting mix with perlite
- A variety of climbing and trailing plants (Clematis, Pothos, Creeping Jenny)
- Drip irrigation kit or watering wand
- Landscape fabric for lining
- Hooks, brackets, or free-standing supports
How to make it
- Select a location that provides the appropriate light for your chosen plants. If you want a dense screen, choose a spot with at least 6 hours of sun and select vigorous climbers that will fill in the gaps quickly.
- Construct or purchase sturdy planter boxes. If building from wood, line the inside with landscape fabric to prevent soil from leaking out while still allowing for essential drainage through the bottom holes.
- Fill the planters with a premium potting soil that contains moisture-retaining crystals and slow-release fertilizer. This ensures your vertical garden remains lush even during the heat of mid-summer when small containers tend to dry out rapidly.
- Install your vertical support structure—whether it’s a wooden trellis, a wire mesh grid, or a series of stacked wall planters. Ensure it is securely anchored to the ground or a wall to withstand wind resistance once the plants become heavy with foliage.
- Space your plants approximately 8 to 12 inches apart. Place trailing varieties at the edges to spill over the sides and climbing varieties in the center, gently weaving their tendrils into the trellis as you plant them.
- Water deeply immediately after planting. For a professional maintenance routine, install a simple battery-operated drip irrigation system to ensure consistent moisture, which is the secret to achieving that thick, impenetrable wall of green.
How to Apply Concrete Stencil Patterns for a High End Patio Look
Why we love this
Concrete stenciling is a design revelation that transforms gray, uninspiring slabs into high-end works of art that mimic expensive Moroccan tiles or European cobblestones. We love the cool, smooth feel of the finished surface underfoot and the rhythmic, hypnotic beauty of a repeating pattern. It’s an incredibly cost-effective way to add visual weight and sophistication to your outdoor dining area, creating a polished look that feels custom-tailored to your home’s unique aesthetic.
Essential Elements:
- Large-scale floor stencils
- Concrete-specific paint or acid stain
- Low-nap foam rollers and stencil brushes
- Painter’s tape and repositionable adhesive spray
- Concrete degreaser and cleaner
- High-gloss or matte concrete sealer
How to make it
- Deep-clean the concrete surface using a heavy-duty degreaser and a stiff scrub brush. Any oil spots or dirt will prevent the paint from adhering, leading to premature peeling. Rinse thoroughly and allow to dry for 48 hours.
- Apply a base coat of concrete paint in your chosen “grout” color. Use a long-handled roller for even coverage and let it cure completely—usually 24 hours—before you begin the stenciling process.
- Lightly coat the back of your stencil with repositionable adhesive spray. This is the professional secret to preventing paint from bleeding under the edges of the pattern, ensuring your lines stay razor-sharp.
- Position the stencil starting at the most visible corner of the patio. Secure the edges with painter’s tape. Use a low-nap foam roller and very little paint (the “dry brush” technique) to apply the pattern color. Too much paint on the roller is the number one cause of blurry edges.
- Carefully lift the stencil and move it to the next section, aligning the registration marks built into the stencil design to ensure the pattern remains perfectly straight across the entire patio surface.
- Allow the pattern to dry for 24 hours, then apply two coats of clear concrete sealer. This locks in the color and provides a protective barrier against foot traffic, patio furniture scratches, and UV fading.
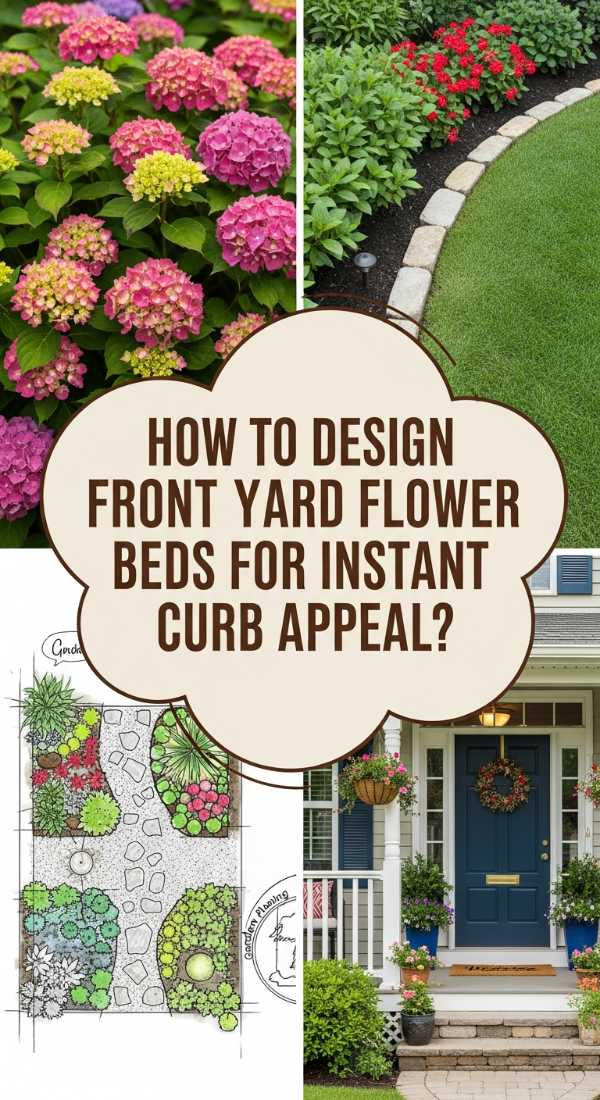
How to Design Front Yard Flower Beds for Instant Curb Appeal

Why we love this
A well-designed flower bed is the “smile” of your home, offering an immediate, warm welcome to every visitor. We love the rich, earthy scent of fresh mulch and the vibrant symphony of colors—from deep purple salvias to bright yellow black-eyed Susans—that bring a sense of life and movement to the front of the house. It creates a layered, textured transition between the street and your front door, providing a habitat for butterflies and hummingbirds that adds a touch of nature’s magic to your daily routine.
Essential Elements:
- Assorted perennials and annuals (varied heights)
- Dark hardwood mulch or pine bark
- Garden edging (stone, metal, or plastic)
- Organic compost or soil conditioner
- Transplanting spade and garden fork
- Pre-emergent weed preventer
How to make it
- Define the shape of your beds using a garden hose to layout soft, organic curves. Avoid straight lines for a more modern, professional landscape look that flows with the natural topography of your yard.
- Remove the grass within the marked area using a spade, or use the “no-dig” method by covering the grass with cardboard and a thick layer of soil. Work organic compost into the top 6 inches of soil to provide a nutrient-rich environment for new roots.
- Arrange your plants while they are still in their nursery pots. Place the tallest plants at the back (near the house), medium-height plants in the center, and low-growing groundcovers at the very front edge. This “stadium seating” arrangement ensures every bloom is visible.
- Dig holes twice as wide as the root ball but no deeper. Tease the roots gently if they are pot-bound and set them in the hole, backfilling with soil and tamping down lightly to remove air pockets.
- Apply a 3-inch layer of dark mulch over the entire bed, keeping it a few inches away from the stems of the plants to prevent rot. The dark color of the mulch provides a high-contrast background that makes the flower colors appear more vivid.
- Water the beds deeply immediately after planting and every morning for the first two weeks. A consistent watering schedule is vital for establishing strong root systems that will allow your plants to thrive through the summer heat.
How to Style a Teen Room for the Ultimate Nostalgic Vibe
Why we love this
While the rest of the home focuses on sleek lines, a teen room is a sanctuary for self-expression and cozy nostalgia. We love the tactile mix of soft velvet pillows, the warm glow of neon signage, and the organized chaos of polaroid photos clipped to fairy lights. It’s a space that feels like a warm hug, smelling of vanilla candles and clean linen, where memories of the 90s and Y2K eras meet modern comfort to create a retreat that is as much about feeling good as it is about looking cool.
Essential Elements:
- LED strip lights or neon wall art
- Textured throw blankets and oversized floor pillows
- Gallery wall supplies (frames, clips, washi tape)
- Low-profile platform bed or bean bag chairs
- Vintage-inspired desk accessories
- Sheer curtains for soft light diffusion
How to make it
- Start with a neutral base on the walls to allow the colorful decor to stand out. Choose a warm white or a soft greige that reflects natural light during the day but creates a cozy, enclosed feeling once the evening lights are turned on.
- Layer your lighting to create mood zones. Install LED strips along the ceiling line for a futuristic glow, and add a warm-toned neon sign above the bed as a focal point. Avoid harsh overhead lighting in favor of floor lamps with warm-spectrum bulbs.
- Create a dedicated “memory zone” using a large corkboard or a wire grid. Encourage the display of physical items—concert tickets, polaroids, and hand-written notes—to lean into that tactile, nostalgic aesthetic that digital screens can’t replicate.
- Incorporate varied textures to add depth. Mix a chunky knit throw with a faux-fur rug and corduroy cushions. This sensory variety makes the room feel high-end and lived-in rather than like a sterile showroom.
- Organize with “visible storage.” Use clear acrylic bins or open shelving for collections of books, sneakers, or vinyl records. In a teen room, the hobbies are part of the decor, so displaying them proudly is key to the vibe.
- Scent the space with an ultrasonic diffuser or soy candles. Choosing a signature scent like sandalwood or lavender completes the sensory experience, making the room a true escape from the stresses of school and social life.
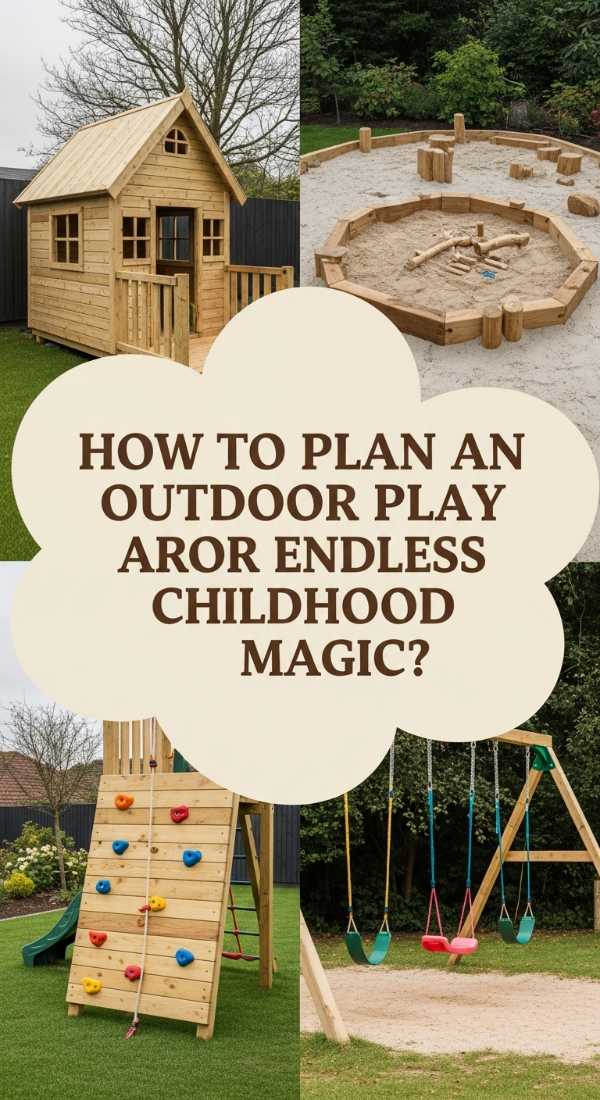
How to Plan an Outdoor Play Area for Endless Childhood Magic
Why we love this
An outdoor play area is where imagination takes flight, and we love it for the pure, unbridled joy it brings to a backyard. The smell of cedar wood chips and the sound of wind chimes hanging from a playhouse create a multisensory environment that encourages kids to put down the tablets and engage with the world. It’s a dedicated zone that balances safety with adventure, featuring soft landing spots and vibrant colors that make the backyard feel like a private park designed for endless childhood magic.
Essential Elements:
- Rubber mulch or engineered wood fiber
- Landscape timber for borders
- Weather-resistant play equipment (swings, slides, climbing walls)
- Sun shades or a colorful canopy
- Outdoor chalkboard or sensory table
- Solar-powered safety path lights
How to make it
- Choose a level spot in the yard that is visible from a kitchen or patio window. Safety starts with supervision, so ensure you have a clear line of sight to the entire play zone at all times.
- Excavate the area to a depth of 6-9 inches. This is a professional safety standard; a deep base of loose-fill material like rubber mulch provides the necessary impact absorption to prevent injuries from falls.
- Install a sturdy border using pressure-treated landscape timbers secured with rebar. This keeps the mulch contained and prevents grass from encroaching on the play space, maintaining a clean and professional look.
- Assemble and anchor all play equipment according to the manufacturer’s instructions. For swing sets, use concrete footings buried below the mulch level to ensure the structure doesn’t tip or sway during vigorous use.
- Add a sensory layer by incorporating an outdoor chalkboard or a sand and water table. This appeals to different types of play and keeps children engaged for longer periods by offering both physical and creative outlets.
- Hang a UV-rated sun shade sail over the main play area. This not only protects delicate skin from the sun’s rays but also keeps the equipment—especially plastic slides and metal bars—cool to the touch during the peak heat of the day.
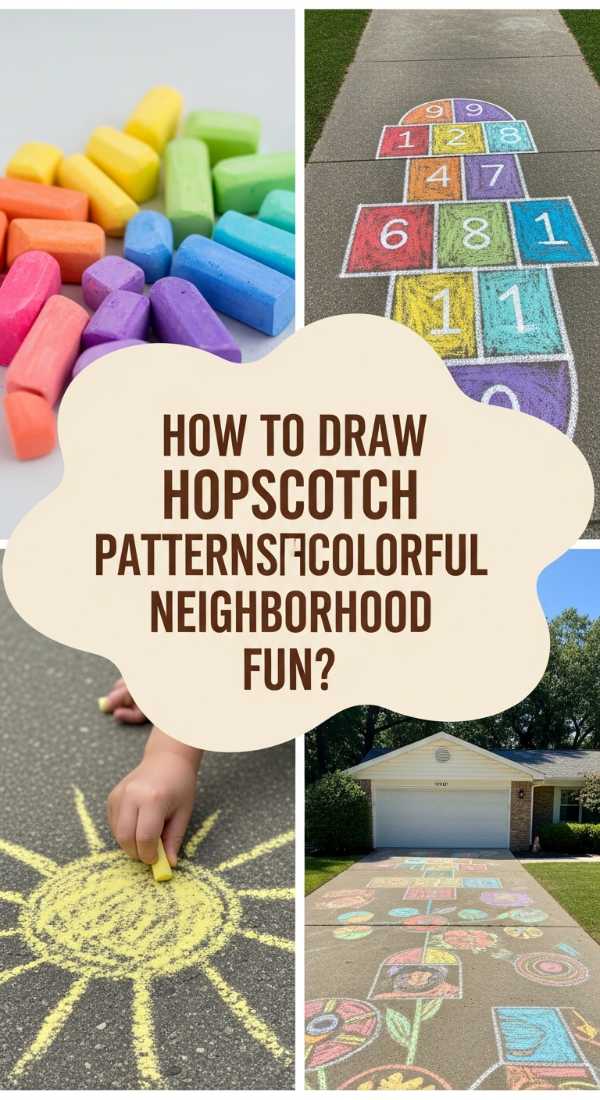
How to Draw Hopscotch Patterns for Colorful Neighborhood Fun
Why we love this
There is a beautiful, fleeting simplicity in a chalk-drawn hopscotch grid that brings a burst of color to a gray sidewalk. We love the rhythmic thud of feet jumping through the squares and the dusty, nostalgic scent of sidewalk chalk on a warm afternoon. It’s a gesture of neighborhood kindness that invites every passerby to play, turning a mundane walkway into a vibrant, interactive canvas that celebrates community and the simple pleasures of being active outdoors.
Essential Elements:
- Jumbo sidewalk chalk in vibrant colors
- Painter’s tape (optional, for crisp lines)
- Small stones or bean bags as markers
- Stencil for numbers (or a steady hand)
- Measuring tape or a wooden ruler
- A bucket of water (for cleaning/blending)
How to make it
- Sweep the sidewalk or driveway thoroughly to remove all loose sand and pebbles. A clean surface allows the chalk pigment to grip the concrete more effectively, resulting in brighter, more saturated colors.
- Measure out your squares to ensure they are consistent. A standard hopscotch square is roughly 12 to 18 inches wide. Use a ruler and light chalk marks to map out the classic “1-2-1” pattern before you start filling it in.
- For a modern, professional “street art” look, use painter’s tape to outline your squares. This allows you to color inside the lines quickly and, once the tape is pulled up, leaves behind perfect, crisp concrete borders that make the colors pop.
- Apply the chalk in thick, heavy layers. To get a smooth, blended look, you can use a slightly damp sponge to spread the chalk dust into the pores of the concrete, creating a mural-like finish that won’t blow away in a light breeze.
- Decorate the numbers with contrasting colors. Use a bright yellow for the number and a deep blue for the background to ensure they are highly visible to players who are jumping at high speeds.
- Add “bonus” challenges around the grid, such as “Spin 3 times” or “Touch your toes,” to extend the path and turn a simple game into a full-scale backyard adventure that delights kids and adults alike.
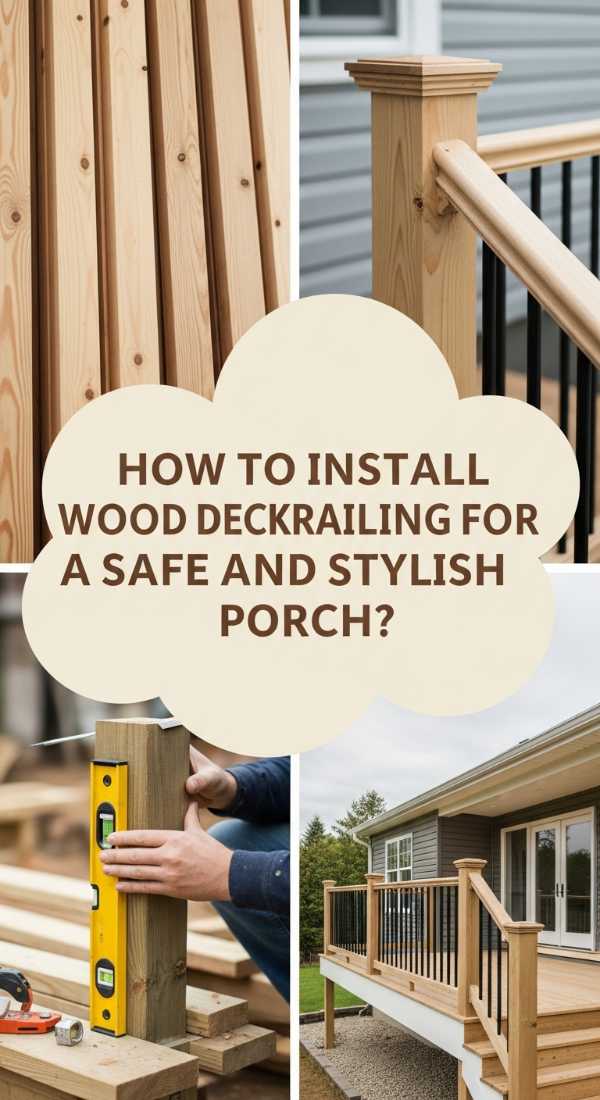
How to Install Wood Deck Railing for a Safe and Stylish Porch
[IMAGE_10]
Why we love this
A wood deck railing is the finishing touch that frames your outdoor world like a piece of art. We love the sturdy, reliable weight of a well-built handrail and the way the polished wood grain gleams under the glow of porch lights. It provides the essential safety needed for elevated entertaining while adding a sophisticated vertical element that defines the boundaries of your space, making the porch feel like a secure, private room that is open to the beauty of the surrounding landscape.
Essential Elements:
- 4×4 pressure-treated posts
- 2×4 top and bottom rails
- Pre-cut wood balusters or metal spindles
- Structural deck screws (3-inch and 5-inch)
- Post level and miter saw
- Exterior wood glue and waterproof sealant
How to make it
- Begin by mounting your 4×4 posts to the deck frame. Use heavy-duty structural bolts rather than standard screws; the posts must be able to withstand significant lateral pressure to meet safety codes. Use a post level to ensure they are perfectly vertical on all sides.
- Measure the distance between posts and cut your 2×4 top and bottom rails to fit. For a professional look, ensure the bottom rail sits 2-3 inches above the deck surface to allow for easy debris removal and water drainage.
- Install the bottom rail first using pocket hole screws or L-brackets hidden on the underside. This creates a clean visual line without visible hardware from the top.
- Space your balusters no more than 4 inches apart. This is a critical safety rule to prevent small children or pets from slipping through. Use a 4-inch block of wood as a spacer to ensure perfectly even gaps throughout the entire run.
- Secure the balusters to the rails using exterior wood glue and two screws at each end to prevent twisting as the wood seasons. Once the balusters are in place, install the top “cap” rail—usually a 2×6 board—which provides a flat surface for resting drinks or small potted plants.
- Sand the handrail with 120-grit sandpaper until it is buttery smooth to the touch, preventing splinters for anyone leaning on the railing. Finish with a high-quality oil-based transparent stain to highlight the wood’s natural beauty while protecting it from the elements.
Creating Memories in Your New Oasis
Designing an outdoor entertaining space is a journey that pays dividends in laughter, relaxation, and a renewed connection to your home. By combining these DIY elements—from the structural elegance of a floating deck to the whimsical charm of sidewalk art—you create a multifaceted environment that caters to every mood and occasion. Remember that the most important element of any home style trend is how it serves your life. So, light the lanterns, pour a cool drink, and enjoy the sanctuary you’ve built with your own two hands.