
Sky-High Style: Designing Your Dream Backyard on a Budget
There is a specific kind of magic that happens when the sun begins to dip below the horizon, casting a golden glow over a space you created with your own two hands. We often think that a luxury outdoor oasis requires a designer price tag, but true elevated living is about the intention we pour into our surroundings. It’s the sound of wind through the trees, the smell of damp earth after a rain, and the feeling of soft grass or cool stone beneath your feet that turns a simple backyard into a sanctuary.
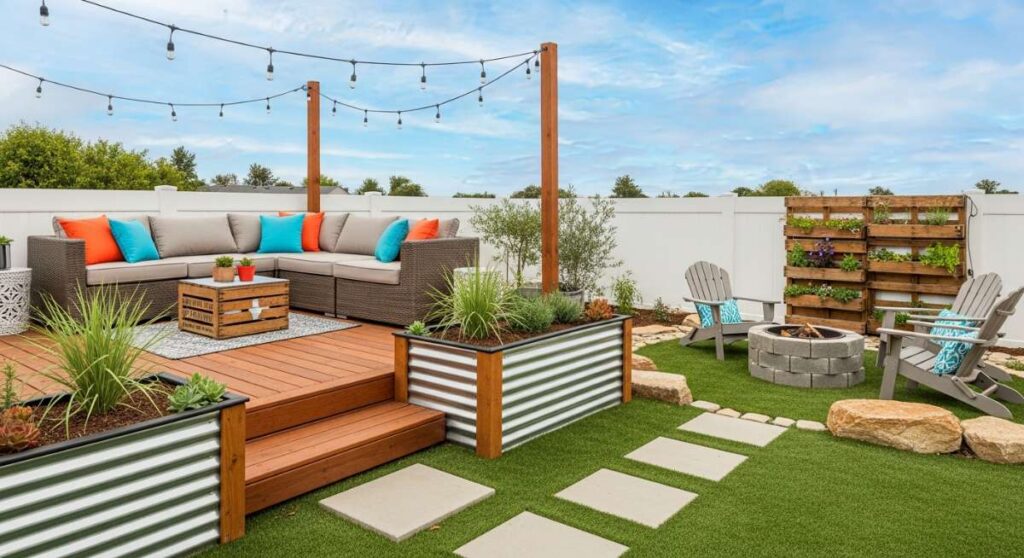
In this guide, I’m sharing my favorite ways to transform your outdoor space into a high-end retreat without breaking the bank. From the playful clinking of mud kitchen accessories to the serene steam rising from a secluded hot tub, these projects are designed to nourish your soul and spark your creativity. Let’s roll up our sleeves and reclaim our outdoor spaces as the ultimate extension of our homes.
How to Style Mud Kitchen Accessories for Endless Outdoor Play
Why we love this
There is something profoundly nostalgic and grounding about watching children lose themselves in sensory play. We love styling mud kitchen accessories because it turns a simple corner of the garden into a rustic, miniature bistro where imagination runs wild. The tactile sensation of smooth wooden spoons, the metallic ring of stainless steel pots, and the earthy aroma of wet soil create a rich sensory experience that screens simply cannot replicate. It’s about creating a space that feels lived-in, loved, and beautifully messy.
Essential Elements:
- Weather-resistant wooden spoons and spatulas
- Stainless steel mixing bowls and colanders
- Assorted glass jars for ‘forest finds’ (acorns, petals, pebbles)
- A collection of thrifted vintage teapots
- Miniature cast iron pans for weight and texture
- Chalkboard for the ‘Daily Special’
How to make it
- Curate your collection by mixing textures; pair shiny metallic bowls with matte wooden utensils to create visual interest. Look for items with varying weights to enhance the sensory feedback for little hands.
- Install a row of brass or black hooks along the backsplash of the kitchen to hang whisks and measuring cups. This keeps the workspace clear and teaches children that every tool has its place.
- Arrange jars of ‘ingredients’ like dried lavender, smooth river rocks, and pinecones on a high shelf. Visual cues are key here—place the most colorful items at eye level to invite immediate engagement.
- Season your wooden accessories with a food-safe mineral oil. This isn’t just for protection; it deepens the grain of the wood, giving the kitchen a high-end, professional chef aesthetic.
- Position the larger pots on lower shelves to anchor the space. Use the visual cue of ‘triangulation’—placing three similar items in a triangle pattern—to make the styling look intentional rather than cluttered.
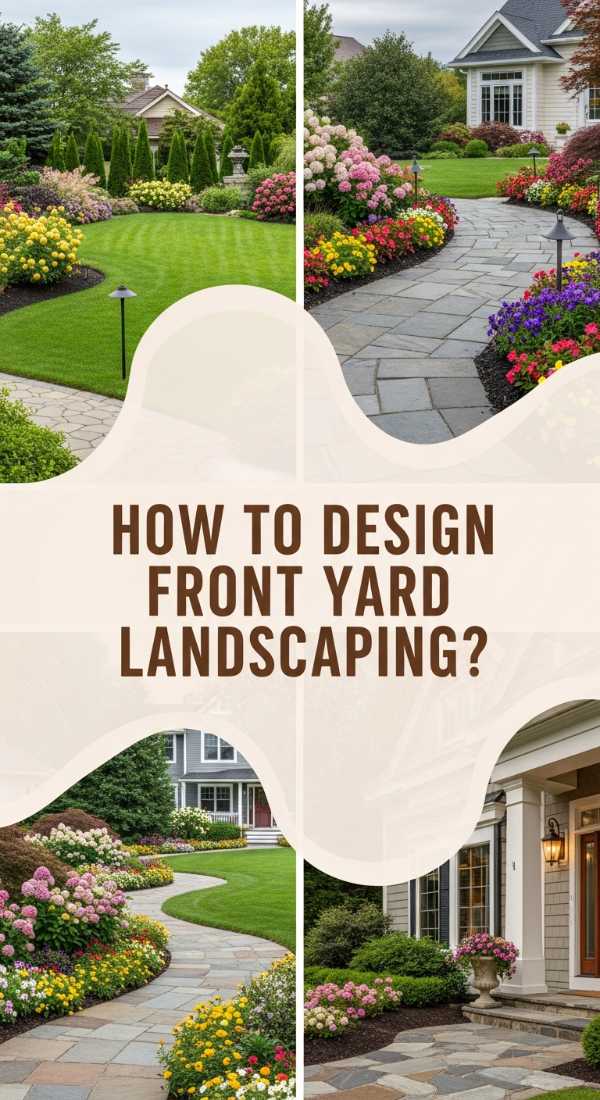
How to Design Front Yard Landscaping Ideas for Instant Curb Appeal
Why we love this
Your front yard is the handshake of your home; it offers the very first impression to every guest and passerby. We love designing for curb appeal because it’s the ultimate gift to yourself every time you pull into the driveway. Think of the fragrance of blooming jasmine wafting toward the porch, the crisp visual contrast of dark mulch against vibrant green Hostas, and the architectural elegance of a well-placed Japanese Maple. It’s about creating a transition between the busy world and your private haven.
Essential Elements:
- A defined focal point tree or large shrub
- Layered perennial plantings for year-round color
- Crisp edging materials (metal, brick, or stone)
- Architectural lighting (path lights and uplights)
- A clean, inviting walkway
- A pop of color via a painted front door or oversized planters
How to make it
- Begin by assessing the ‘sightlines’ from the street. Stand at your curb and identify the visual center of your home; this is where your most dramatic plantings should live to draw the eye upward.
- Prepare the soil by tilling in three inches of organic compost. A rich, dark soil base provides a professional-looking backdrop that makes the green of your plants pop with high-definition intensity.
- Design in ‘drifts’ rather than single rows. Group 3, 5, or 7 plants of the same variety together. This technique creates a ‘wash’ of color that looks like a high-end botanical garden rather than a hardware store DIY.
- Install edge restraints carefully. Use a flat-head spade to cut a 4-inch deep ‘V’ trench between the lawn and the garden bed. This visual cue of a crisp line is the secret to a professional finish.
- Place path lights at a 45-degree angle pointing toward focal points. Avoid the ‘runway’ look by staggering lights on alternating sides of the path to create a soft, rhythmic glow.
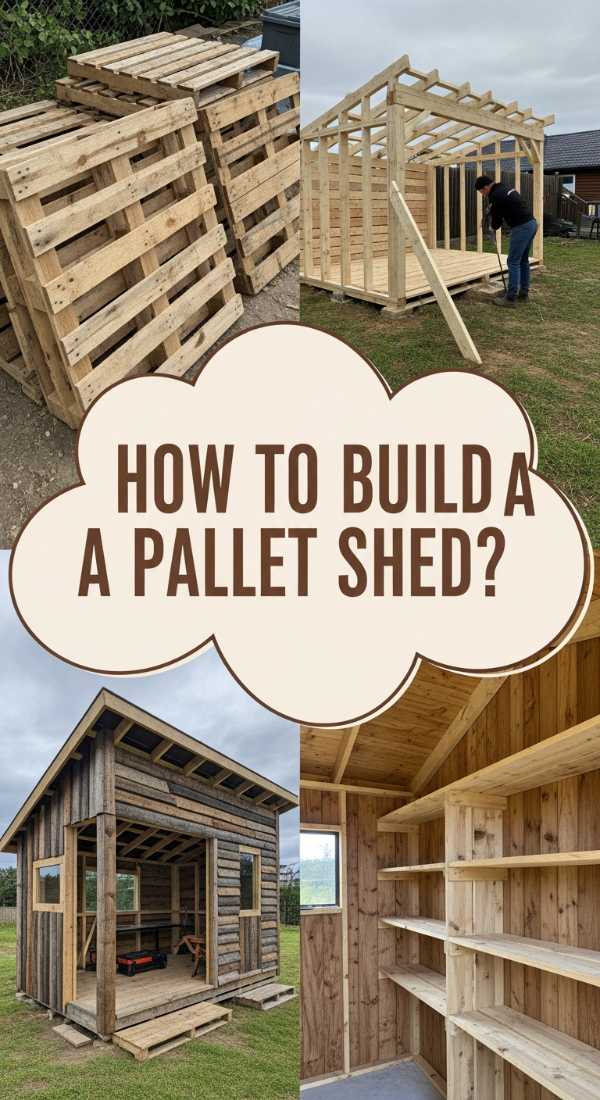
How to Build a Sustainable Shed Out of Pallets for Garden Storage
Why we love this
Sustainability meets rugged charm in this pallet shed project. We love it because it’s an exercise in creative reuse, turning discarded industrial materials into a functional piece of garden architecture. There’s a raw, tactile beauty in the weathered wood grain and the sturdy, heavy feel of the structure once it’s assembled. It smells of cedar and pine, and it provides a quiet, earthy sanctuary for your tools to rest, connecting your gardening practice back to the environment it serves.
Essential Elements:
- At least 15-20 heat-treated (HT) pallets
- Pressure-treated 4×4 posts for the foundation
- Corrugated metal or reclaimed tin for the roof
- Heavy-duty exterior deck screws
- Galvanized hinges and a rustic latch
- Eco-friendly wood stain or sealant
How to make it
- Select only pallets marked ‘HT’ (Heat Treated). Avoid ‘MB’ (Methyl Bromide) pallets for safety. Inspect for structural integrity; you want boards that are straight and free of major rot.
- Level your ground and set four 4×4 posts into concrete footings. Ensure they are perfectly plumb using a spirit level; this foundation is the most critical phase for a shed that won’t lean over time.
- Fasten the pallets to the posts using 3-inch deck screws. Drive the screws at a slight downward angle (toenailing) to create a stronger mechanical bond between the pallet frame and the post.
- Sheath the exterior with additional pallet slats, overlapping them like ‘lap siding.’ This visual cue of overlapping wood provides a professional, weather-tight finish that looks like a custom cabin.
- Install the corrugated roof with a 15-degree pitch to ensure water runoff. Use rubber-washer roofing screws to prevent leaks, ensuring every screw is driven into a solid pallet runner for maximum hold.
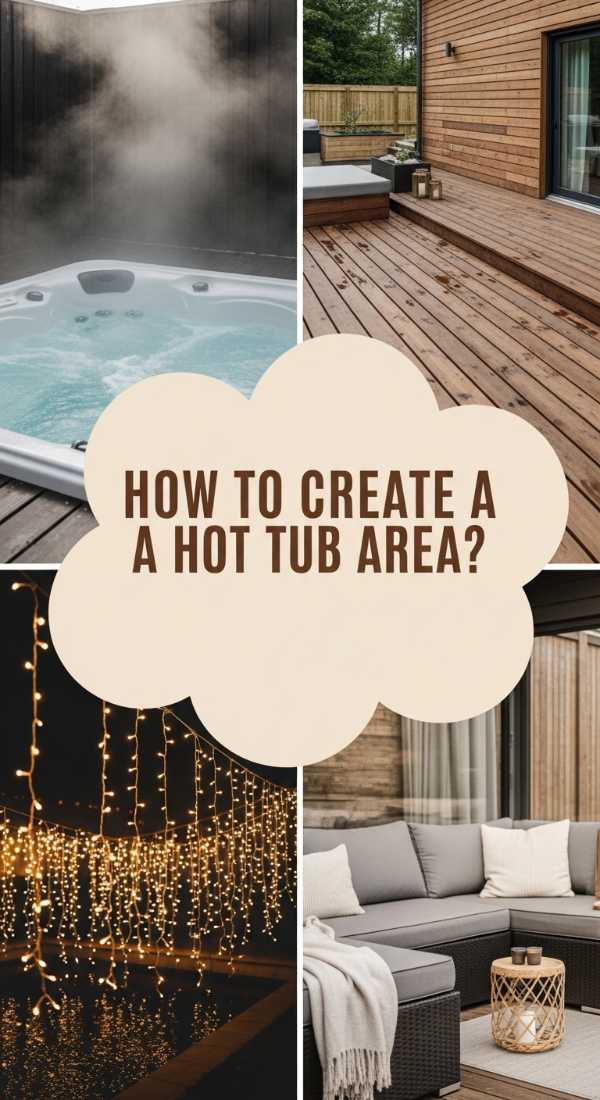
How to Create a Dreamy Hot Tub Area for Ultimate Relaxation
Why we love this
The hot tub is the crown jewel of backyard relaxation, a place where the world’s noise fades into the rhythmic hum of bubbling water. We love creating these spaces because they appeal to every sense: the warmth of the steam against cool night air, the soft glow of amber lighting reflecting off the water’s surface, and the feeling of weightlessness as you soak. It’s an immersive experience that transforms your backyard into a private spa retreat, perfect for stargazing or quiet morning reflections.
Essential Elements:
- A sturdy, level concrete or gravel pad
- Privacy screening (cedar slats or tall grasses)
- Weatherproof outdoor rugs for soft footing
- Towel rack or ‘spa station’
- Dimmable string lights or lanterns
- Potted aromatic plants like eucalyptus or mint
How to make it
- Determine the electrical path first. Ensure your tub is placed within reach of a dedicated GFCI outlet, but keep the visual clutter of wires hidden behind planters or decorative skirting.
- Prepare a 6-inch deep gravel base, tamping it down until it is rock-hard. A visual cue for a perfectly level base is using a 2×4 board with a level on top to check multiple angles across the pad.
- Build a ‘privacy surround’ using vertical cedar slats spaced 1/2 inch apart. This technique allows for airflow while creating a cocoon-like feeling of seclusion from neighbors.
- Position the tub so the ‘best view’ from the seats faces your garden’s most beautiful feature. This intentional orientation elevates the experience from just ‘sitting in water’ to ‘immersing in nature.’
- Add a side table at the same height as the tub’s rim. Use heavy stone or teak wood to anchor the area, providing a stable, high-end surface for candles or drinks.
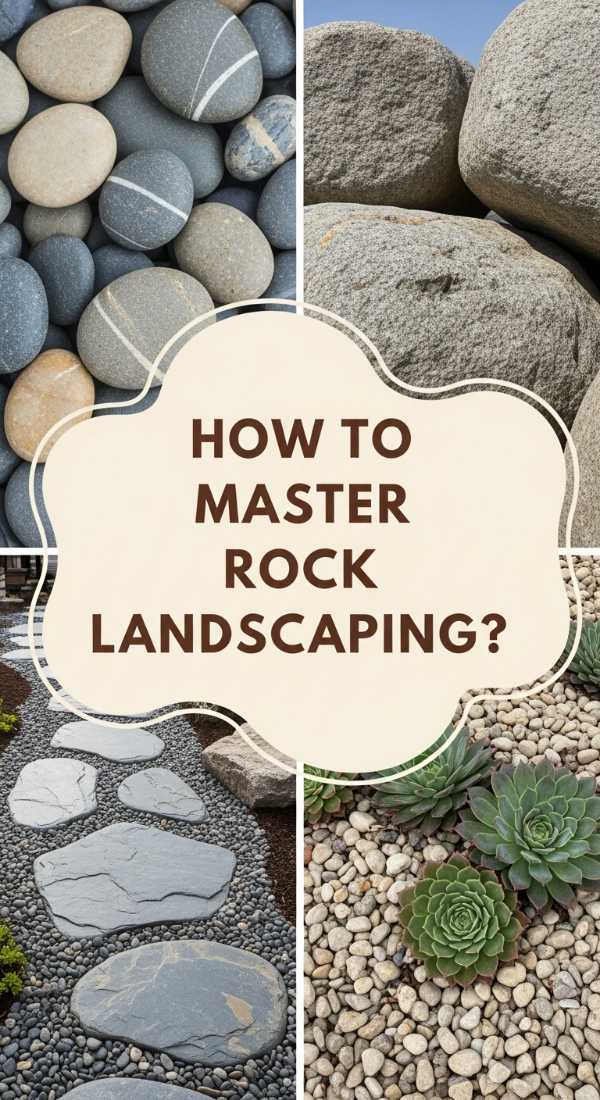
How to Master Rock Landscaping Ideas for a Beautiful Low Maintenance Yard

Why we love this
Rock landscaping is the ultimate marriage of form and function. We love it because it introduces a permanent structural element that looks stunning in every season, regardless of the weather. The crunch of gravel underfoot provides a satisfying auditory cue, while the various textures—from smooth river stones to jagged slate—add incredible visual depth. It’s a low-maintenance dream that stays crisp and clean, allowing the organic shapes of your plants to stand out in sharp, beautiful relief.
Essential Elements:
- Commercial-grade landscape fabric
- A mix of sizes (pea gravel, river rock, and boulders)
- Metal or heavy-duty plastic edging
- Drought-tolerant plants (succulents, grasses)
- Organic-shaped ‘feature’ rocks
- Plate compactor or heavy tamper
How to make it
- Clear the area of all weeds and debris, then grade the soil away from your home’s foundation at a 2% slope. This ensures that heavy rains flow away from the house rather than pooling under the rocks.
- Lay down heavy-duty landscape fabric, overlapping seams by at least 6 inches. Secure with landscape staples every 12 inches to prevent the fabric from shifting and showing through the stone later.
- Place your ‘anchor’ boulders first. Bury them 1/3 of the way into the ground; this technique makes them look like they are naturally occurring features of the landscape rather than just sitting on top.
- Spread your primary stone (like river rock) to a depth of 3 inches. A visual cue for the correct depth is when you can no longer see the fabric even when scuffing the surface with your shoe.
- Finish with a light hosing of the rocks to wash away dust. This reveals the true colors and textures of the stone, giving the entire yard an instant ‘finished’ and professional polish.
How to Organize Mud Kitchen Accessories for a Tidy Play Space
Why we love this
An organized mud kitchen is a thing of beauty; it bridges the gap between wild outdoor play and thoughtful domesticity. We love this because order creates a sense of calm that invites more complex play. Seeing miniature whisks aligned by size and colorful stones sorted into jars is visually soothing and incredibly satisfying. It turns ‘messy play’ into an organized ‘laboratory’ where children can focus on their ‘recipes’ without the frustration of searching for a lost spoon in the grass.
Essential Elements:
- Magnetic tool strips for metal utensils
- Weatherproof wicker or plastic bins
- Pegboards with custom outlines
- Hanging herb drying racks
- Labelled crates for ‘earth ingredients’
- Small galvanized buckets for water transport
How to make it
- Mount a magnetic knife strip (the heavy-duty garage kind) to the side of the kitchen. This provides a sleek, modern way to store metal ladles and spoons, keeping them dry and within easy reach.
- Utilize the ‘vertical real estate’ by installing a pegboard. Paint it a deep forest green or charcoal to make the colorful plastic or wooden accessories pop, and draw outlines for each tool to encourage kids to ‘match’ them during cleanup.
- Group accessories by function: ‘Prep’ (bowls and knives), ‘Cooking’ (pots and pans), and ‘Serving’ (plates and cups). Use clear bins so the visual cue of the contents is immediate.
- Install a small tension rod under the main counter to hang ‘kitchen towels’ or s-hooks for buckets. This technique maximizes storage in small footprints.
- Create a ‘dry zone’ for items like chalk and aprons. Use a lidded, gasket-sealed bin to ensure these stay moisture-free even during a rainstorm, maintaining a professional level of organization.
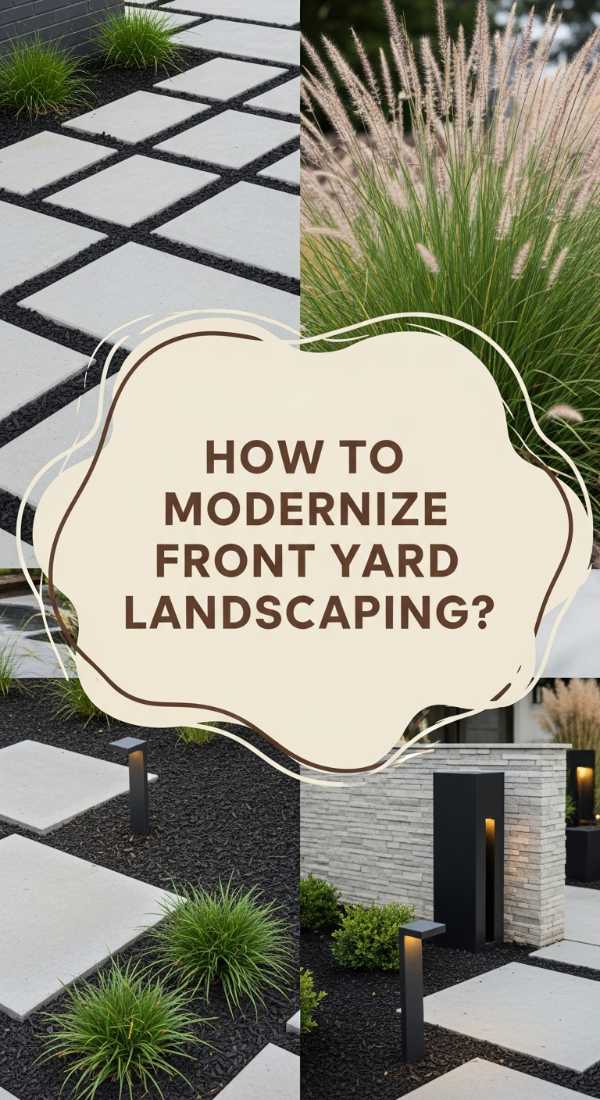
How to Modernize Front Yard Landscaping Ideas for a Sleek Entrance
Why we love this
Modern landscaping is all about clean lines, geometric shapes, and a ‘less is more’ philosophy that feels incredibly refreshing. We love this style because it brings a sense of sophisticated calm to the home’s entrance. The contrast between rigid architectural elements—like concrete pavers or black metal planters—and the soft, swaying textures of ornamental grasses creates a dynamic visual tension. It feels intentional, polished, and effortlessly cool, providing a sleek backdrop for modern life.
Essential Elements:
- Large-format concrete pavers
- Black basalt or white marble chips
- Boxwood or structural evergreens
- Minimalist LED bollard lights
- Monochromatic color palette
- Corten steel or matte black planters
How to make it
- Define your geometry. Use a string line to mark perfectly straight edges for your beds and walkways. Modern design relies on the visual cue of precision, so even a half-inch deviation will be noticeable.
- Install ‘floating’ pavers by spacing large concrete slabs 2 inches apart and filling the gaps with black basalt stone. This creates a high-end, rhythmic pattern that feels like a boutique hotel entrance.
- Select plants with strong silhouettes. Agave, Horsetail Reed, or clipped Boxwood spheres provide the architectural ‘bones’ needed to maintain a sleek look year-round.
- Use ‘mass planting’ of a single species. Instead of a mix, plant a solid 10-foot row of Mexican Feather Grass. The repetition is a key technique in modern design for creating high-impact, low-clutter visuals.
- Apply a dark mulch or stone finish to all beds. Black mulch acts as a ‘shadow,’ making the green foliage of your plants look more vibrant and the lines of your hardscaping look sharper.
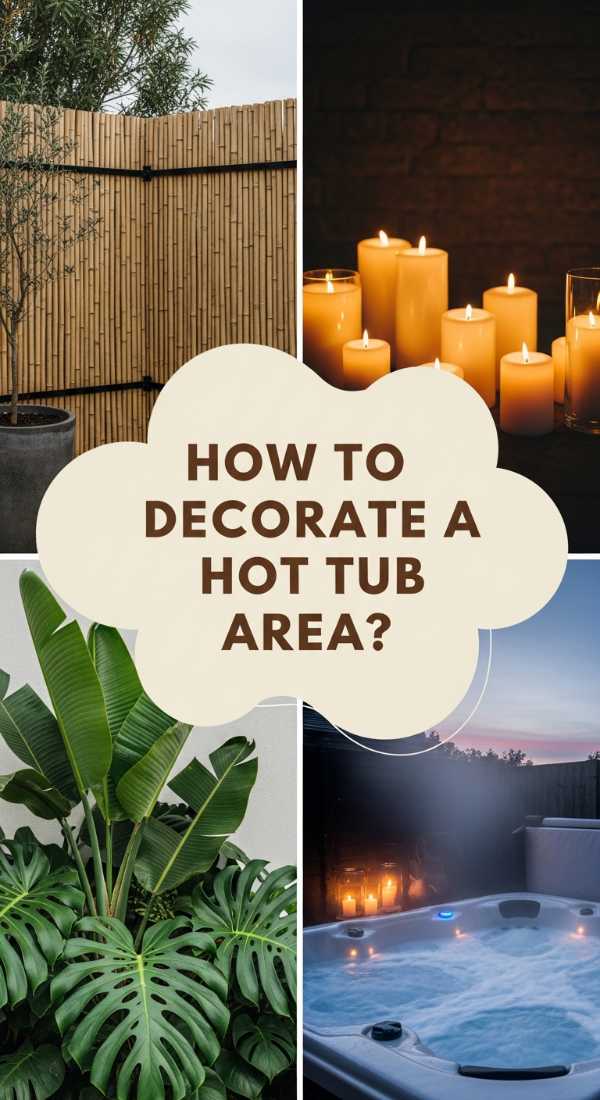
How to Decorate a Secluded Hot Tub Area for a Romantic Retreat
Why we love this
Transforming a hot tub area into a romantic retreat is about layering softness and intimacy into a functional space. We love the romantic aesthetic because it appeals to the heart; it’s the glow of Moroccan lanterns, the scent of night-blooming jasmine, and the plushness of oversized Turkish towels waiting on a cedar bench. It’s about creating a world for two where the rest of the universe ceases to exist. The atmosphere is thick with tranquility, warmth, and the gentle flickering of candlelight against steam.
Essential Elements:
- Solar-powered amber fairy lights
- Outdoor-safe velvet or linen floor cushions
- A cluster of varying-height hurricane lanterns
- Potted Jasmine or Honeysuckle for natural perfume
- Privacy curtains made of weather-resistant sheer fabric
- A small, stylish teak bar cart
How to make it
- Layer your lighting. Combine overhead string lights (on a dimmer) with low-level lanterns. This technique creates a ‘warm glow’ rather than a ‘bright light,’ which is essential for a romantic atmosphere.
- Install a curtain rod between two posts or trees. Use weighted sheer white curtains to create a soft, billowing boundary. The visual cue of moving fabric adds a dreamlike, ethereal quality to the space.
- Saturate the area with scent. Place pots of Jasmine or Gardenia at shoulder height (on tables or pedestals) so the fragrance is carried directly on the breeze toward the hot tub.
- Introduce soft textures. Place a high-pile outdoor rug leading to the tub and drape a waterproof throw blanket over a nearby chair. Contrast the hard surface of the tub with these ‘interior’ comforts.
- Create a ‘beverage station’ using a tray with crystal glasses and a carafe of infused water. Small, high-end details like this signal that the space is prepared for a special, slow-paced experience.
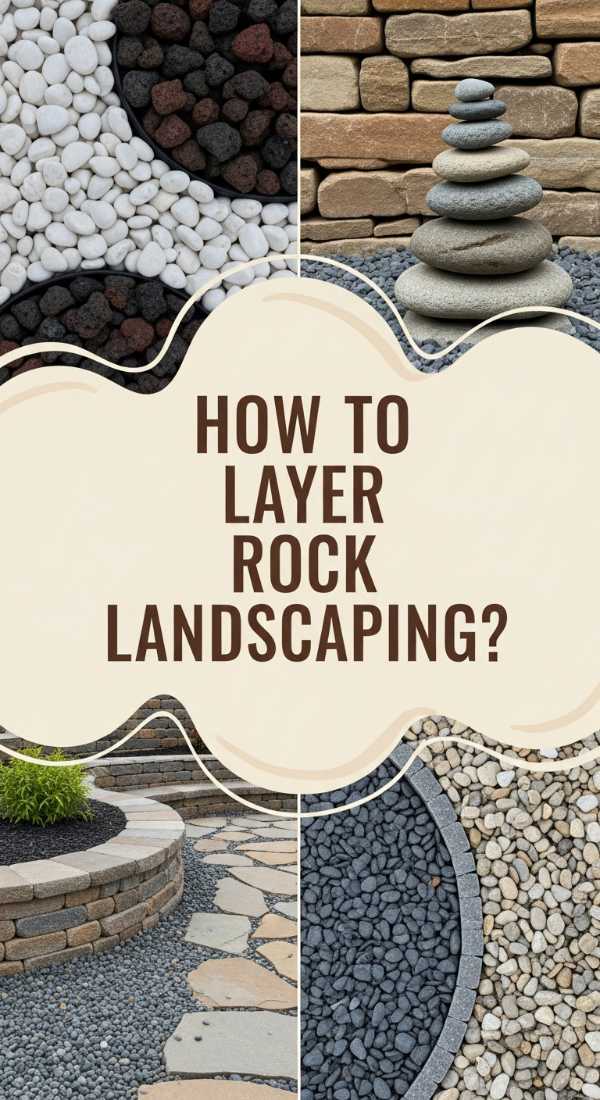
How to Layer Rock Landscaping Ideas for a Professional Textured Look
Why we love this
Layering rocks is the secret technique that separates an amateur yard from a professional landscape design. We love this approach because it creates incredible depth and a sense of ‘ordered chaos’ that mimics the natural world. By mixing sizes, colors, and shapes, you create a landscape that changes as you move through it. The interplay of shadows between large boulders and tiny pebbles adds a sophisticated texture that makes even the simplest garden feel like a curated piece of art.
Essential Elements:
- Base layer of 1-2 inch crushed stone
- Medium river rocks (4-6 inches) for transition
- Large accent boulders (12+ inches)
- Contrasting colors (e.g., slate grey vs. tan sandstone)
- Flagstone for ‘stepping stone’ paths
- Low-voltage ‘well lights’ for nighttime shadows
How to make it
- Start with your largest ‘hero’ stones. Place them in odd-numbered groups (3 or 5) and bury the base of each rock. This visual cue of the rock ’emerging’ from the earth is essential for a professional, naturalistic look.
- Create a ‘dry creek bed’ effect. Use medium-sized river rocks to create a winding path through your base gravel. This technique adds movement to a static landscape and provides a natural channel for drainage.
- Mix textures intentionally. Place jagged, dark slate chips next to smooth, light-colored river stones. The high-contrast boundary creates a focal point that draws the eye and defines different ‘zones’ in the garden.
- Incorporate ‘spillover’ plants. Place creeping thyme or sedum in the crevices between rocks. As they grow, they soften the hard edges, creating a professional ‘aged’ look that suggests the rocks have been there for decades.
- Use ‘top dressing.’ Once the main layers are in, sprinkle a handful of very fine pea gravel over the transitions. This acts as a visual ‘blend,’ smoothing the gap between different rock sizes for a cohesive finish.
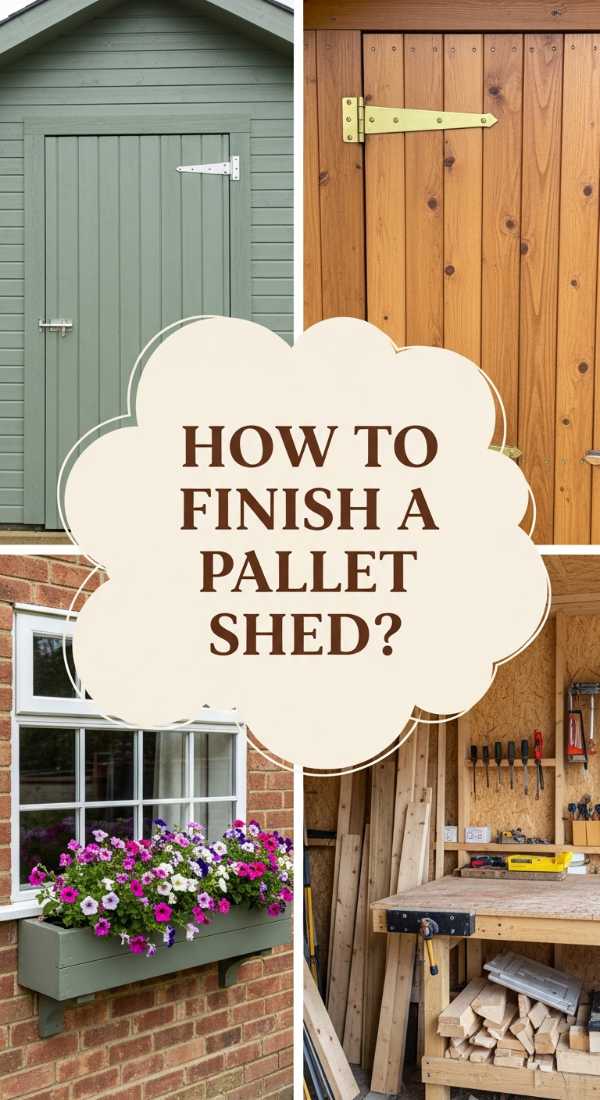
How to Finish an Aesthetic Shed Out of Pallets for a Cozy Workshop
[IMAGE_10]
Why we love this
Finishing a pallet shed is where the structure truly finds its soul. We love this phase because it’s about turning a raw wooden box into a cozy, inspiring workshop that smells of cedar and beeswax. It’s the feeling of a sturdy workbench under your palms, the sight of tools neatly hung against a warm wood backdrop, and the soft glow of a vintage-style bulb illuminating your projects. This is where ‘storage’ becomes ‘sanctuary,’ a place that sparks productivity and quiet craftsmanship.
Essential Elements:
- A solid, level wooden workbench
- Vintage-style Edison bulb lighting
- Internal shelving made from pallet scraps
- A small window (reclaimed if possible)
- Deep-penetrating exterior wood stain (Walnut or Oak)
- Decorative ‘finishing touches’ (a clock, a small rug, or art)
How to make it
- Sand every visible surface of the pallet wood. Start with 80-grit and finish with 120-grit. The visual cue for ‘done’ is a smooth, slight sheen on the wood that makes the grain pop when stained.
- Apply a high-quality oil-based stain using a wide natural-bristle brush. Work in the direction of the grain and use long, steady strokes to avoid ‘lap marks.’ This gives the reclaimed wood a rich, expensive furniture finish.
- Build a built-in workbench at a 36-inch height (standard for standing work). Use double-thick pallet boards for the top to ensure the surface is heavy and stable enough for hammering and sawing.
- Install ‘task lighting.’ Position a bright LED or Edison bulb directly over the workbench. Use black conduit for the wiring to give the interior a professional, industrial-chic aesthetic.
- Personalize the space with ‘comfort’ cues. Hang a magnetic strip for small metal parts and add a sturdy stool. These small ergonomic additions turn a shed into a workspace that you’ll actually want to spend hours in.
Conclusion: Your Backyard Legacy
Building a dream backyard isn’t about how much money you spend; it’s about the memories you create within the spaces you build. Whether you are watching your children ‘cook’ in their stylized mud kitchen or enjoying a quiet evening in your secluded hot tub retreat, these projects add layers of joy to your daily life. By using these professional techniques and focusing on the small, sensory details, you’ve turned a simple budget into a high-end lifestyle. Now, go outside, breathe in the fresh air, and enjoy the masterpiece you’ve created.