
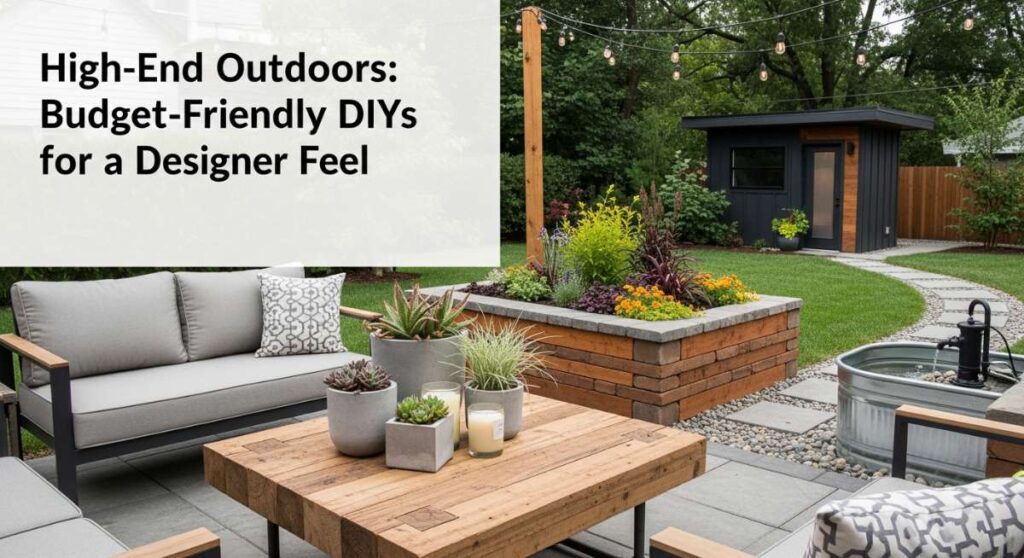
I used to stare at glossy home magazines, sighing over those fifty-thousand-dollar backyard transformations that felt worlds away from my reality. There’s something about a perfectly manicured outdoor space—the way the light catches a stone path or the sound of water trickling in the background—that makes a home feel like a true sanctuary. I realized that the ‘designer look’ isn’t actually about the price tag; it’s about intentionality, texture, and creating those little moments of luxury that invite you to slow down and breathe.
Today, I’m sharing my secrets for achieving that high-end, elevated feel without the high-end budget. We are diving deep into the world of DIY landscaping and outdoor styling, focusing on projects that use natural materials like stone, water, and wood to create a cohesive, expensive-looking environment. Whether you have a sprawling lawn or a tiny concrete slab, these projects are designed to turn your outdoor space into a haven where you’ll actually want to spend every waking hour of the summer.
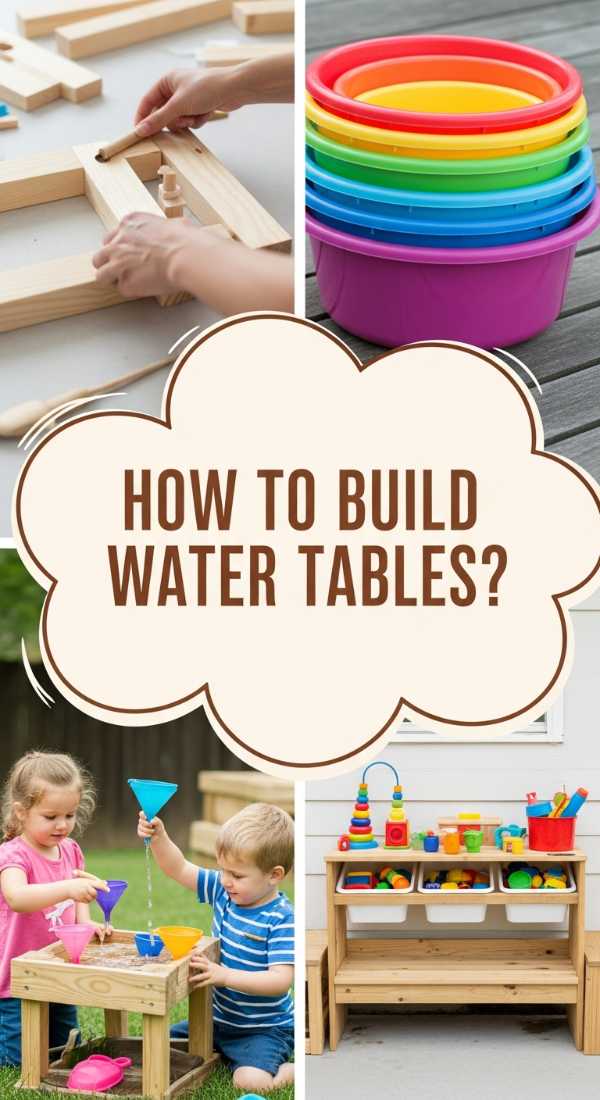
How to Create a Backyard Water Station for Endless Summer Joy
Why we love this
There is nothing quite like the sound of ice clinking against glass on a humid July afternoon, and having a dedicated water station makes your backyard feel like a five-star resort. This isn’t just about hydration; it’s about the aesthetic of transparency—clear glass dispensers filled with floating sprigs of mint, citrus slices, and crystal-clear ice. The visual of condensation beads rolling down the side of a vessel against a backdrop of weathered wood creates an immediate sense of refreshment and hospitality that guests will gravitate toward instantly.
Essential Elements:
- A weather-resistant console table or reclaimed wooden potting bench.
- Two large glass beverage dispensers with stainless steel spigots.
- A galvanized metal tray to catch drips and house glassware.
- Fresh aromatics: Lemon slices, cucumber ribbons, and fresh mint leaves.
- Substantial ice buckets and a stainless steel scoop.
How to make it
- Select a shaded area of your patio or deck to prevent the water from warming too quickly; a location near a door is ideal for easy refills.
- Position your console table and ensure it is level, using shims if necessary, to prevent the glass dispensers from wobbling.
- Thoroughly sanitize your glass dispensers and fill them with filtered water, leaving about three inches of headspace at the top.
- Prepare your infusions: Thinly slice lemons and cucumbers, and bruise the mint leaves slightly to release their natural oils before dropping them into the water.
- Add a generous amount of large-scale ice cubes (which melt slower than crushed ice) just before guests arrive to keep the water chilled without diluting the flavor too quickly.
- Arrange stackable acrylic or heavy-duty glass cups on a tray to the side, ensuring the spigot of the dispenser overhangs the edge of the table slightly for easy pouring.
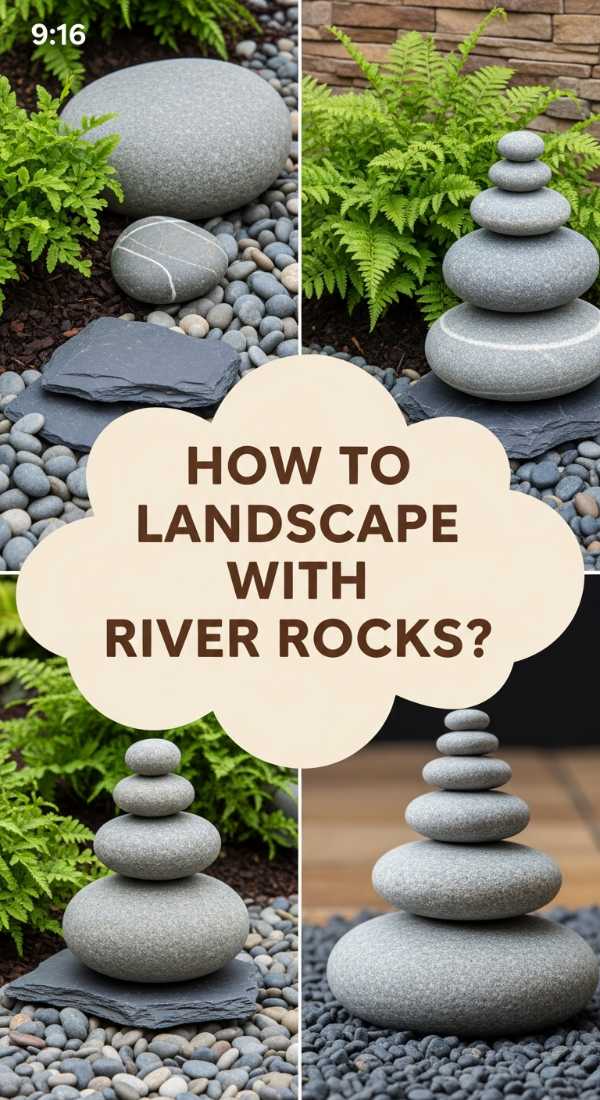
How to Design a Serene Rock River Bed for Ultimate Curb Appeal
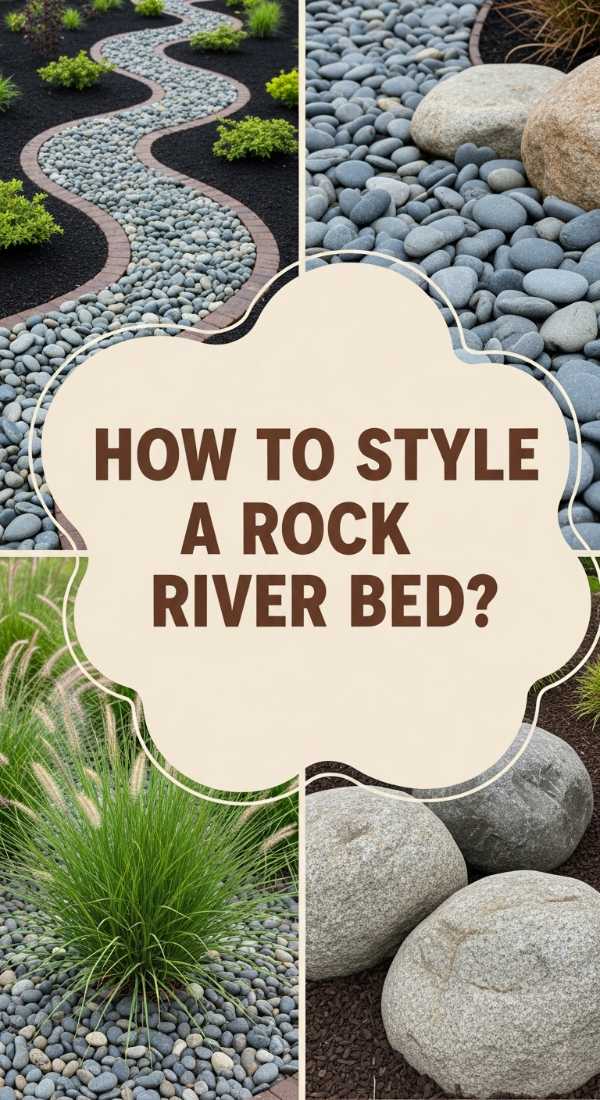
Why we love this
A rock river bed brings a profound sense of architectural movement to a static garden, mimicking the organic flow of a mountain stream even when it’s bone-dry. The texture of smooth, multi-tonal river rocks against the soft green of hostas or ferns creates a high-contrast look that screams professional landscaping. On a rainy day, watching the water navigate the stones adds a meditative quality to your yard, while the earthy scent of wet stone provides a grounded, natural aroma that is incredibly soothing.
Essential Elements:
- River rocks in various sizes (from small pebbles to large boulders).
- Heavy-duty landscape fabric to prevent weed growth.
- A spade or trenching shovel.
- Steel garden edging for a clean border.
- Low-voltage spotlighting to highlight the texture at night.
How to make it
- Map out a natural, meandering path for your river bed using a garden hose to visualize the curves before you begin digging.
- Excavate a shallow trench along your path, roughly 4-6 inches deep, ensuring the center is the lowest point to create a natural “V” or “U” shape.
- Line the entire trench with professional-grade landscape fabric, securing it with garden staples to ensure no soil mixes with your clean stones over time.
- Install steel edging along the perimeter to keep the grass from encroaching and to hold the stones firmly in place.
- Begin by placing your largest “anchor” boulders at the curves of the path to look like natural obstacles the water would have flowed around.
- Fill the remainder of the trench with a mixture of medium and small river rocks, varying the sizes and colors to create a realistic, layered appearance that mimics nature.
How to Install a Stylish Budget Patio for Outdoor Evening Relaxation

Why we love this
Transforming an unused corner of the yard into a functional patio is the ultimate way to reclaim your living space, creating a zone where the transition between indoor and outdoor feels seamless. There is a specific magic to sitting on a patio as the sun dips below the horizon, feeling the residual warmth of the stones beneath your feet while the air begins to cool. This project adds a structured, intentional feel to the landscape, providing a solid foundation for cozy chairs, flickering lanterns, and long conversations under the stars.
Essential Elements:
- Large-format concrete pavers (12×12 or 16×16 inches).
- Fine pea gravel or decomposed granite for the gaps.
- Leveling sand and a base of crushed gravel.
- A rubber mallet and a long 2×4 for leveling.
- Landscape fabric.
How to make it
- Measure and mark your patio area, then remove the sod and topsoil to a depth of about 4 inches, ensuring the ground slopes slightly away from any house foundations.
- Lay down a 2-inch layer of crushed gravel and compact it thoroughly using a plate compactor or a hand tamper until it provides a rock-solid base.
- Spread a 1-inch layer of leveling sand over the gravel, using a long 2×4 board to screed the surface until it is perfectly flat and even.
- Place your pavers starting from one corner, leaving a consistent 2-inch gap between each stone for a modern, airy aesthetic.
- Use a rubber mallet to gently tap each paver into the sand, checking frequently with a level to ensure no stones are tripping hazards.
- Fill the gaps between the pavers with pea gravel or crushed stone, sweeping it into the crevices until they are flush with the top of the pavers for a polished finish.
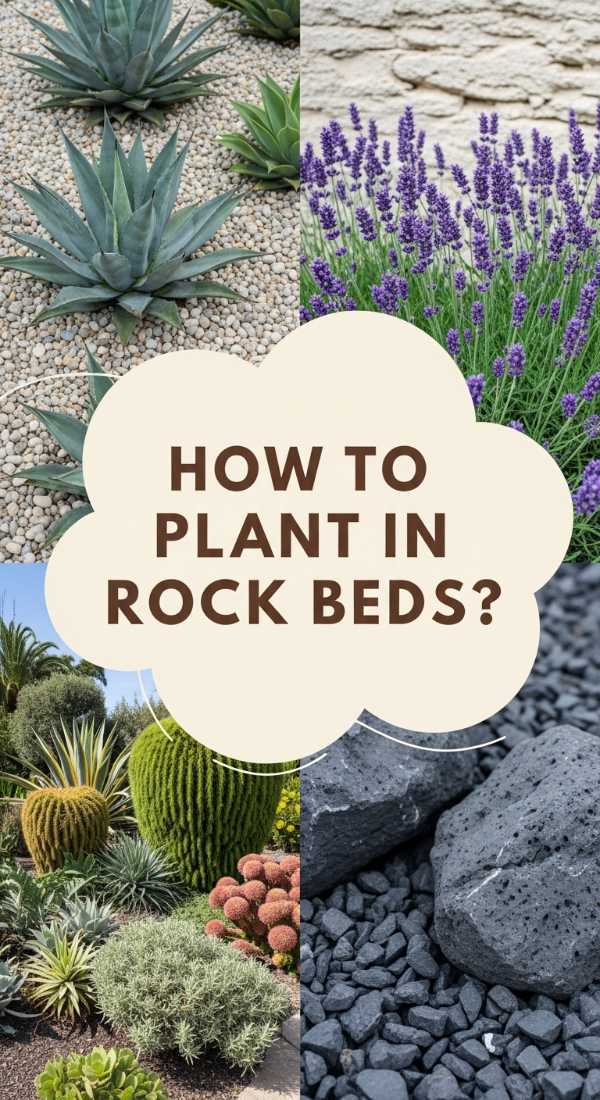
How to Build Elegant Rock Flower Beds for a Stunning Home Entrance
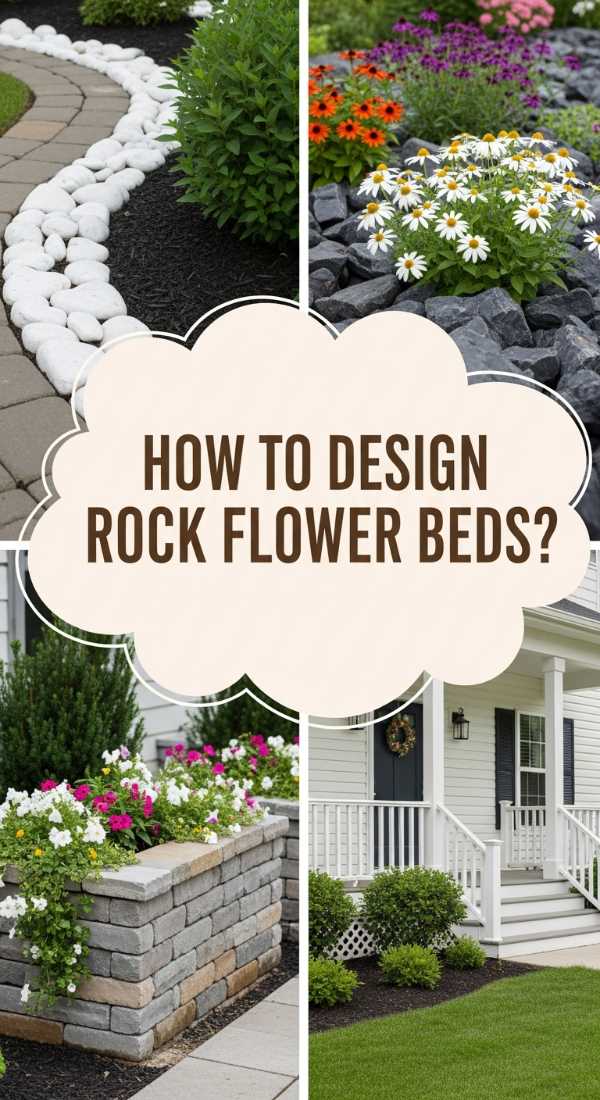
Why we love this
Standard mulch beds can look messy after a single season, but rock flower beds offer a permanent, sculptural beauty that frames your home with a sense of permanence. We love the way the grey and tan hues of the stones make the vibrant reds of geraniums or the deep purples of lavender pop with incredible intensity. The tactile coolness of the stones also helps retain moisture in the soil beneath, keeping your plants hydrated and happy while providing a clean, modern look that requires almost zero maintenance.
Essential Elements:
- Decorative stone mulch (such as lava rock, marble chips, or river pebbles).
- Perennial plants with varied heights and textures.
- Plastic or metal heavy-duty edging.
- Landscape weed barrier.
- Organic potting soil for planting holes.
How to make it
- Clear all existing weeds and grass from the entrance area, then define your bed’s shape with a crisp edge using a half-moon edger or spade.
- Install your edging material deep enough into the soil to prevent grass roots from creeping under into your new rock bed.
- Lay down a thick landscape fabric over the entire area, cutting small “X” shapes only where you intend to place your plants.
- Dig your planting holes through those cuts, enriching the soil with high-quality compost before tucking your plants into the ground.
- Spread your decorative stone across the fabric at a depth of at least 2 inches, ensuring the fabric is completely covered and the stones are distributed evenly.
- Rinse the stones with a garden hose to remove any dust from the bags, instantly revealing their true colors and giving the entrance a fresh, “just-finished” glow.
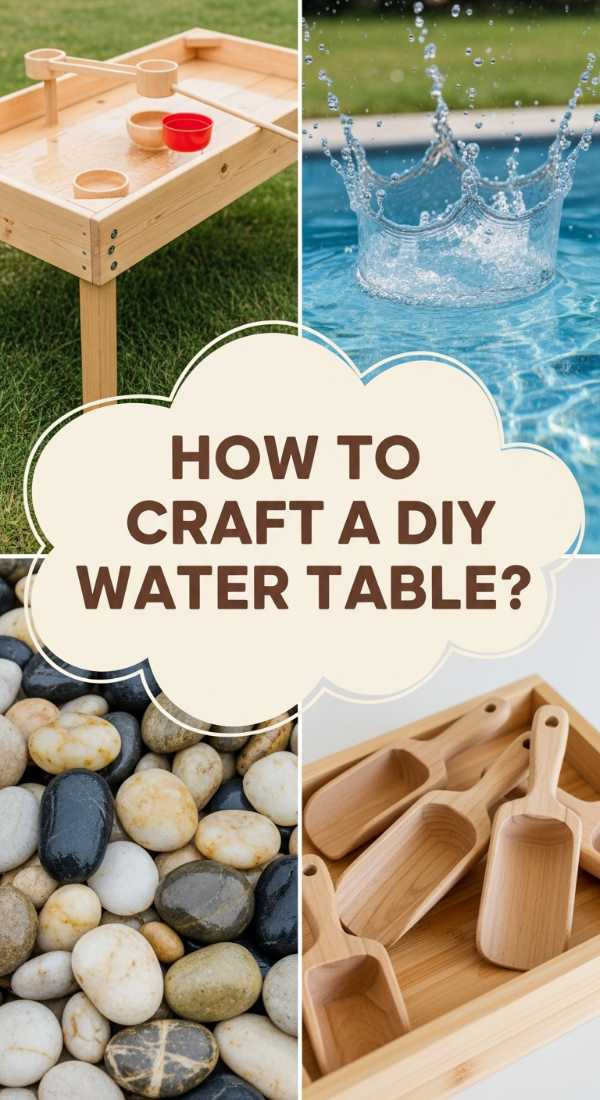
How to Craft a Natural Sensory Water Table for Curious Young Minds

Why we love this
Children are naturally drawn to the tactile world, and a DIY water table made from natural materials is far more beautiful than a plastic store-bought version. It creates a dedicated space for “quiet play” where the gentle splashing of water and the smooth feel of river stones provide a grounding sensory experience. We love that this can be styled to match your garden, using cedar and stone so it feels like a piece of functional art rather than a toy cluttering the yard.
Essential Elements:
- A sturdy wooden frame (cedar is best for water resistance).
- A deep, heavy-duty plastic or metal insert bin.
- Smooth river stones and large sea shells.
- Natural scoops: Wooden bowls, bamboo pipes, and metal ladles.
- A small solar-powered pump for moving water.
How to make it
- Build or source a wooden stand at waist-height for a child, ensuring all edges are sanded perfectly smooth to prevent splinters.
- Fit the plastic bin into the frame, ensuring it sits securely and cannot be easily tipped over by enthusiastic little hands.
- Add a layer of large, smooth river stones to the bottom of the bin to provide visual interest and different weights for children to explore.
- Fill the bin with clean water and add your solar pump to create a gentle fountain or stream, which adds an auditory element to the play.
- Incorporate various “tools” like bamboo segments for pouring and wooden spoons for stirring, avoiding plastic to maintain the high-end, natural aesthetic.
- Position the table in a partially shaded area to keep the water cool and prevent the sun from heating the bin surfaces.
How to Landscape a Dry Creek Bed for Sustainable Garden Beauty
Why we love this
A dry creek bed is the ultimate solution for problem areas where grass won’t grow or water tends to pool, turning a landscape flaw into a designer feature. It adds a rugged, naturalistic vibe to the garden, reminiscent of a wild woodland or a desert arroyo. We love how the varied textures—from crunchy gravel to massive, moss-covered stones—create a rich visual tapestry that changes with the light throughout the day, providing architectural interest even in the dead of winter.
Essential Elements:
- A mix of stone sizes: fines, 1-3 inch cobbles, and 6-12 inch boulders.
- Permeable landscape fabric.
- Native grasses and drought-tolerant perennials for the “banks.”
- A sturdy shovel and wheelbarrow.
How to make it
- Dig a trench that varies in width—wider at the curves and narrower in the straightaways—to mimic how water naturally carves the earth.
- Line the trench with permeable fabric to allow for drainage while keeping the stones from sinking into the mud during heavy rains.
- Place large “impact stones” along the edges of the creek, slightly burying their bases so they look like they’ve been there for decades.
- Layer in the medium cobbles, focusing them in the center of the bed to create the “flow” line.
- Fill the remaining gaps with smaller pebbles or gravel to stabilize the larger stones and provide a finished look.
- Plant native grasses like Blue Fescue or Sedge along the edges of the rocks to soften the lines and create a lush, established feeling.
How to Upgrade Your Concrete Patio for a Chic Modern Vibe

Why we love this
Standard grey concrete can feel industrial and cold, but with a little effort, it can be transformed into a high-end surface that looks like expensive slate or polished stone. The way a fresh stain or stencil catches the afternoon sun can completely change the mood of your outdoor dining area, making it feel warm and sophisticated. It is the perfect canvas for a designer rug and teak furniture, providing a clean, intentional foundation that makes the whole backyard feel like a curated outdoor room.
Essential Elements:
- Concrete cleaner and a stiff-bristled scrub brush.
- Concrete stain or high-quality porch and patio paint.
- A large-scale geometric stencil (optional).
- A long-handled paint roller and a small brush for edges.
- Outdoor concrete sealer for a glossy or matte finish.
How to make it
- Power wash the concrete surface thoroughly to remove all dirt, oil, and old paint, as any residue will prevent the new finish from bonding.
- Apply a concrete degreaser and scrub the surface, then rinse and let it dry completely for at least 24 to 48 hours.
- If using a stencil, secure it with painter’s tape and use a “dry brush” technique with a roller to prevent the paint from bleeding under the edges.
- Apply your base coat of stain or paint in thin, even layers, allowing each coat to dry fully before applying the next to ensure a durable finish.
- Use a small brush to touch up any imperfections or edges along the house or garden beds.
- Once the color is dry, apply two coats of high-quality concrete sealer to protect the design from UV rays and foot traffic, giving it that high-end, professional sheen.
How to Arrange Drought Resistant Rock Gardens for Low Maintenance Living
Why we love this
There is a sculptural elegance to a well-designed rock garden that plants alone can’t achieve; it’s all about the balance of the “hard” and the “soft.” We love the low-stress nature of this project—once it’s in, it stays beautiful regardless of heatwaves or watering bans. The visual contrast of a jagged, dark rock nestled against the soft, geometric petals of a succulent creates a striking, modern look that feels incredibly sophisticated and thoughtful.
Essential Elements:
- A sunny, well-drained area of the yard.
- A variety of rocks: large feature stones and smaller crushed gravel.
- Drought-resistant plants like Echeveria, Sedum, and Agave.
- Cactus-grade potting mix for the planting pockets.
How to make it
- Select a sloped area or create a small mound of soil to ensure perfect drainage, which is critical for drought-resistant plants.
- Position your largest stones first, burying them about one-third deep in the soil so they look like natural outcroppings rather than just sitting on top.
- Fill the spaces between the large stones with a mixture of well-draining soil and gravel, creating various levels and pockets.
- Tuck your succulents and cacti into the soil pockets, grouping them in odd numbers for a more natural, designer-approved aesthetic.
- Cover all exposed soil with a thin layer of decorative gravel or pea stone to unify the look and prevent moisture from sitting against the plant stems.
- Give the plants a light watering to settle the soil, then enjoy a garden that looks like a high-end desert oasis with almost zero effort.
How to Transform Your Front Yard for a Welcoming Neighborhood Feeling
![]()
Why we love this
Your front yard is the first thing you see when you come home, and a high-end transformation can instantly lift your mood. We love using a mix of structured stone paths and soft, billowing flowers to create a “secret garden” feel right on the street. It’s about more than just curb appeal; it’s about creating a space that feels like an invitation to your neighbors, fostering a sense of community while making your home stand out as the jewel of the block.
Essential Elements:
- Flagstone or large pavers for a clear walking path.
- A mix of evergreen shrubs for year-round structure.
- Fragrant flowers like roses or jasmine.
- A high-quality, modern mailbox or house numbers.
- Solar-powered path lighting.
How to make it
- Start by defining a clear path from the sidewalk or driveway to the front door using large stones or pavers to create a sense of arrival.
- Incorporate “layers” of planting: tall shrubs in the back near the house, mid-sized perennials in the middle, and low groundcovers near the path.
- Choose a color palette of 2-3 colors for your flowers to ensure the yard looks cohesive and professionally designed rather than cluttered.
- Update your hardware: replacing an old mailbox or adding modern, oversized house numbers can provide a high-end finishing touch for very little money.
- Install solar path lights at regular intervals to illuminate the walkway at night, providing safety and a warm, glowing welcome.
- Add a single, high-quality bench or a pair of modern chairs near the entrance to suggest a place of rest and neighborly interaction.
How to Build a Custom Play Water Table for Toddler Developmental Growth
Why we love this
Watching a toddler’s eyes light up as they pour water over smooth stones is one of the simplest joys of parenthood. This custom table isn’t just a toy; it’s a sensory laboratory that fits beautifully into a high-end outdoor design. We love that it encourages fine motor skills and scientific curiosity—like observing what floats and what sinks—all while the child is surrounded by the natural textures of wood and stone rather than neon-colored plastics.
Essential Elements:
- A sturdy, low-profile wooden table (30 inches high is usually perfect).
- Two removable stainless steel or BPA-free plastic basins.
- Smooth glass beads and polished river rocks.
- Small pitchers, funnels, and measuring cups.
- A cover to keep the water clean when not in use.
How to make it
- Construct a simple frame using pressure-treated lumber or cedar, ensuring the height is ergonomic for a standing toddler.
- Cut two holes in the tabletop exactly the size of your basins, so they drop in and hang by their rims for easy removal and cleaning.
- Sand every square inch of the wood, focusing on corners and edges, then seal it with a non-toxic, water-resistant outdoor finish.
- Fill one basin with water and the other with “dry” sensory materials like polished stones or sand to provide a variety of textures.
- Provide a selection of high-quality tools like metal measuring cups and wooden scoops that are easy for small hands to grip.
- Keep the table in a consistent spot on the patio to create a dedicated “discovery zone” where the child can play independently while you relax nearby.
Creating Your Outdoor Sanctuary
Building a high-end outdoor space doesn’t require a contractor or a massive bank account; it just takes a bit of sweat equity and an eye for natural beauty. By focusing on materials that age gracefully—like stone, wood, and water—you create a timeless environment that only gets better with the seasons. I hope these projects inspire you to get outside, get your hands a little dirty, and finally create the backyard oasis you’ve been dreaming of. Remember, the best part of a DIY project isn’t just the finished result—it’s the memories you make while building it and the countless relaxing afternoons you’ll spend enjoying it afterward.