
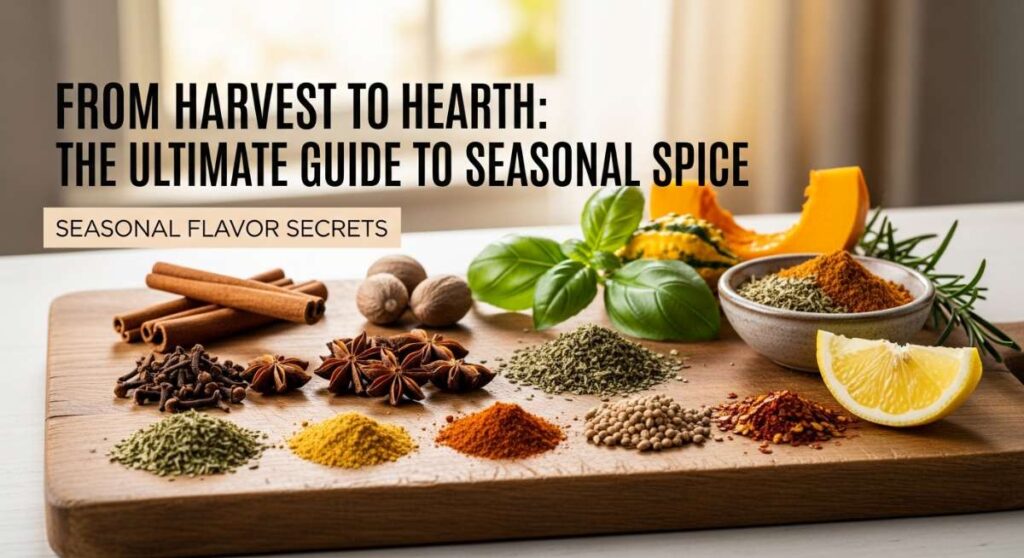
Welcome back to my little corner of the world, my loves! As the seasons gently shift and the air begins to hum with the promise of new beginnings, I find myself drawn back to the hearth, the very heart of our homes. There is something so incredibly grounding about the ritual of preparing a meal, of taking the treasures from a harvest and turning them into memories that linger long after the last bite is gone. I’ve spent the last few weeks gathering my most cherished secrets and kitchen whispers just for you, hoping to bring a touch of soft, cloud-like comfort to your daily table.
Today, we are embarking on a journey through flavor and time, exploring recipes that feel like a warm embrace on a chilly morning or a cool breeze on a humid afternoon. Whether you are looking for that nostalgic taste of childhood or a modern, healthy twist on a classic favorite, these dishes are designed to nourish more than just your body—they are here to feed your soul. Grab a cozy mug of tea, settle into your favorite chair, and let’s dive into the magic of seasonal spice together, because life is simply too short for meals that don’t make your heart sing.
The Secret To Perfectly Refreshing Lemon Spring Pasta

Why we love this
There is something truly magical about the way a bright lemon zest can wake up a tired soul after a long, grey winter, my loves. This pasta is like a soft, citrusy hug that celebrates the first green peeks of spring dancing in your garden soil. I find myself making this on those golden afternoons when the window is finally cracked open and the breeze smells like fresh rain and hope. It is incredibly light yet satisfyingly creamy without being heavy at all, making it the perfect transition meal for our busy, beautiful lives.
Ingredients
- 1 lb Linguine or Fettuccine
- 3 large organic lemons (zest and juice)
- 1/2 cup high-quality extra virgin olive oil
- 4 cloves garlic, minced very fine
- 1 cup fresh green peas
- 1/2 cup grated Parmesan cheese
- Handful of fresh basil leaves, torn
- Sea salt and cracked black pepper to taste
How to make it
- Bring a large pot of heavily salted water to a rolling boil and cook your pasta until it is perfectly al dente, usually about 8-10 minutes.
- While the pasta cooks, heat the olive oil in a large skillet over low heat and gently sauté the minced garlic until it is fragrant and soft but not browned.
- Add the lemon juice and half of the zest to the oil, whisking gently to create a light, emulsified sauce that glows like liquid sunshine.
- Just before the pasta is done, toss the fresh peas into the boiling water for 60 seconds to blanch them until they are bright green and tender.
- Reserve one cup of the starchy pasta water, then drain the pasta and peas and add them directly into the lemon and garlic oil skillet.
- Toss everything together with the Parmesan cheese and a splash of the pasta water, adding more liquid as needed to create a silky coating.
- Finish the dish with the remaining lemon zest, the torn basil, and a generous crack of black pepper before serving in warmed bowls.
Unreal Juicy Flame Grilled Chicken Secret Technique

Why we love this
Oh, the smoky aroma of a grill firing up is the true anthem of a sun-drenched weekend spent with the people we cherish most. We have all struggled with dry, uninspired chicken before, but this secret technique ensures every single bite is dripping with flavor and moisture. It creates a beautiful charred exterior that gives way to a center so tender it practically melts away on your tongue like a summer dream. Bringing this to the table feels like sharing a little piece of sunshine directly from my hearth to your very own.
Ingredients
- 4 large chicken breasts or thighs (skin-on preferred)
- 2 cups full-fat buttermilk
- 1 tablespoon smoked paprika
- 1 teaspoon onion powder and garlic powder
- 2 tablespoons local honey
- 1 tablespoon apple cider vinegar
- Kosher salt and coarse black pepper
- Fresh rosemary sprigs for the grill
How to make it
- In a large glass bowl, whisk together the buttermilk, smoked paprika, onion powder, garlic powder, honey, and apple cider vinegar until fully combined.
- Place the chicken pieces into the marinade, ensuring they are completely submerged, then cover and refrigerate for at least 4 hours, though overnight is best.
- Prepare your grill for two-zone cooking, creating a hot searing side and a cooler indirect heat side, then lightly oil the grates.
- Remove the chicken from the buttermilk marinade and pat it partially dry with paper towels, then season generously with salt and pepper.
- Place the chicken on the hot side of the grill and sear for 3-4 minutes per side until beautiful grill marks form and the skin is crispy.
- Move the chicken to the cooler side of the grill, toss the rosemary sprigs onto the coals for fragrance, and close the lid to finish cooking.
- Use a meat thermometer to ensure the internal temperature reaches exactly 165 degrees Fahrenheit, then let the meat rest for 10 minutes before slicing.
Nostalgic Strawberry Pie Better Than Shoneys

Why we love this
This pie is a sweet trip down memory lane, a ruby-red treasure that reminds me of Sunday dinners and sticky fingers under a big oak tree. It is vibrant, glossy, and filled with the essence of peak-summer berries that have been kissed by the sun until they are bursting. There is a specific kind of comfort in a classic strawberry pie that balances a buttery crust with a cool, refreshing glaze. It is the kind of dessert that makes everyone at the table lean in a little closer and share a smile of pure nostalgia.
Ingredients
- 1 pre-baked 9-inch pie crust (homemade or store-bought)
- 2 lbs fresh strawberries, hulled and halved
- 1 cup granulated sugar
- 3 tablespoons cornstarch
- 1 cup water
- 3 oz box of strawberry flavored gelatin
- Whipped cream for topping
- 1 teaspoon vanilla extract
How to make it
- Begin by preparing your pie crust, baking it until it is a lovely golden brown, then set it aside to cool completely on a wire rack.
- In a medium saucepan, combine the sugar, cornstarch, and water, whisking over medium heat until the mixture thickens and becomes clear.
- Remove the saucepan from the heat and stir in the strawberry gelatin powder and vanilla extract until the powder is fully dissolved and smooth.
- Allow the glaze to cool slightly to room temperature so it doesn’t wilt the fresh berries, but don’t let it set completely in the pan.
- Arrange the fresh, hulled strawberries inside the cooled pie crust, packing them tightly so there are no large gaps between the fruit.
- Slowly pour the slightly cooled gelatin glaze over the strawberries, ensuring every single berry is tucked under a glossy red coat.
- Place the pie in the refrigerator for at least 4 hours to set firmly, then serve with a massive, cloud-soft dollop of fresh whipped cream.
Famous Southern Style Dirty Spaghetti Comfort Dish

Why we love this
Southern comfort food has a way of grounding us like nothing else, and this dirty spaghetti is a hearty, soul-soothing masterpiece. It is a savory symphony of spices and textures that feels like a warm quilt wrapped around your shoulders on a rainy Tuesday evening. I love how the rich, deep flavors of the meat and vegetables meld together to create something much more than the sum of its parts. It is rustic, unpretentious, and deeply satisfying, proving that the best meals are often the ones born from simple, honest ingredients.
Ingredients
- 1 lb spaghetti noodles
- 1 lb ground beef or pork sausage
- 1/2 lb chicken livers, finely minced (optional but traditional)
- 1 large onion, finely chopped
- 1 green bell pepper, diced
- 2 stalks celery, sliced thin
- 3 cloves garlic, minced
- 2 tablespoons Creole seasoning
- 1 cup beef broth
How to make it
- Cook the spaghetti in a large pot of boiling salted water until al dente, then drain and set aside with a little oil to prevent sticking.
- In a large deep skillet or Dutch oven, brown the ground beef and the finely minced chicken livers over medium-high heat until fully cooked.
- Drain the excess fat from the pan, then add the onion, bell pepper, and celery (the holy trinity) to the meat mixture.
- Sauté the vegetables for about 8 minutes until they are soft and translucent, then stir in the garlic and Creole seasoning for another minute.
- Pour in the beef broth, scraping the bottom of the pan to release all those beautiful browned bits of flavor and let it simmer for 10 minutes.
- Add the cooked spaghetti noodles into the skillet, tossing them thoroughly so they absorb the savory sauce and the meat is evenly distributed.
- Cover the pan and let it sit for 5 minutes off the heat to allow the flavors to marry perfectly before serving with a side of cornbread.
Creamy Healthy Avocado Egg Salad No Mayo

Why we love this
If you are looking for a lunch that feels like a fresh start, this creamy avocado egg salad is your new best friend, my loves. By swapping heavy mayo for the natural, velvety richness of a ripe avocado, we create a dish that is both light and incredibly nourishing. It has this gorgeous vibrant green hue that just looks like health and happiness served in a bowl or on a piece of crusty bread. I adore how the lime juice adds a bright pop of flavor that keeps the avocado from browning and lifts the whole experience.
Ingredients
- 6 large hard-boiled eggs, peeled and chopped
- 2 ripe avocados, pitted and peeled
- 1 tablespoon fresh lime juice
- 1/4 cup red onion, finely minced
- 1/2 cup fresh cilantro, chopped
- 1/2 teaspoon garlic powder
- Pinch of red pepper flakes
- Sea salt and pepper to taste
How to make it
- Place the flesh of the two ripe avocados into a medium mixing bowl and mash them with a fork until they reach your desired consistency.
- Stir in the fresh lime juice immediately to prevent oxidation and to give the base a zesty, bright acidic kick that balances the fat.
- Add the finely minced red onion, chopped cilantro, garlic powder, salt, pepper, and red pepper flakes into the avocado mash and mix well.
- Gently fold in the chopped hard-boiled eggs, being careful not to over-mix if you prefer having larger chunks of egg for texture.
- Taste the salad and adjust the seasoning with extra salt or lime juice if needed to make the flavors really dance on your palate.
- Serve the salad immediately on toasted whole-grain bread, inside a lettuce wrap, or even scooped up with cucumber slices for a crunch.
- If you have leftovers, store them with the avocado pit in the container and plastic wrap pressed directly against the surface to keep it green.
Addictive Copycat Grillos Pickle Dip Secret

Why we love this
For my fellow pickle enthusiasts, this dip is an absolute revelation that will have you hovering over the snack table all evening long. It captures that specific, garlicky, dill-forward crunch of a classic Grillo’s pickle and transforms it into a creamy, spreadable delight. This is the ultimate party appetizer because it is so unexpected yet universally loved once people take that first tang-filled bite. It feels like a cool, crisp celebration of garden flavors, whipped into a cloud of savory goodness that pairs perfectly with almost anything.
Ingredients
- 8 oz cream cheese, softened to room temperature
- 1/2 cup sour cream
- 1 cup Grillo’s pickles (or similar fresh dill pickles), finely chopped
- 2 tablespoons fresh dill, chopped
- 1 teaspoon garlic powder
- 1 tablespoon pickle juice from the jar
- 1/2 teaspoon onion powder
- Cracked black pepper
How to make it
- In a medium mixing bowl, beat the softened cream cheese and sour cream together until the mixture is completely smooth and free of lumps.
- Stir in the garlic powder, onion powder, and black pepper, ensuring the spices are evenly distributed throughout the creamy base.
- Add the tablespoon of pickle juice to the mixture, which thins it slightly and infuses every bite with that signature tangy brine flavor.
- Gently fold in the finely chopped pickles and the fresh dill using a spatula, making sure you don’t over-process the pickles so they stay crunchy.
- Transfer the dip to a serving bowl and cover it tightly, then let it chill in the refrigerator for at least one hour to let flavors develop.
- Before serving, give it one last quick stir and garnish with an extra sprig of fresh dill or a few more chopped pickles on top.
- Serve with thick-cut potato chips, pretzels, or fresh veggie sticks for the perfect balance of creamy, salty, and crunchy textures.
Effortless Sourdough Discard Recipes For Baking

Why we love this
There is a quiet, rhythmic beauty in the life of a sourdough starter, but we often find ourselves with more discard than we know what to do with. These recipes are my favorite way to honor that slow fermentation process without letting a single drop of magic go to waste in the kitchen. Using discard adds a subtle, sophisticated tang and a lovely moisture to baked goods that you simply cannot get from commercial yeast alone. It feels like a sustainable act of love, turning what was once ‘extra’ into a centerpiece of your morning breakfast routine.
Ingredients
- 1 cup sourdough discard (unfed)
- 2 cups all-purpose flour
- 1/2 cup melted butter (slightly cooled)
- 1/4 cup honey or maple syrup
- 1 teaspoon baking soda
- 1/2 teaspoon salt
- 1 teaspoon vanilla extract
- Optional: 1/2 cup chocolate chips or blueberries
How to make it
- In a large mixing bowl, whisk together the sourdough discard, melted butter, honey, and vanilla extract until the mixture is smooth and combined.
- In a separate smaller bowl, sift together the all-purpose flour, baking soda, and salt to ensure there are no clumps in your dry ingredients.
- Slowly fold the dry ingredients into the wet discard mixture using a spatula, stirring just until no streaks of flour remain to keep it tender.
- If you are adding chocolate chips or berries, gently fold them in now, being careful not to overwork the batter which can make it tough.
- Preheat your oven to 350 degrees Fahrenheit and grease a muffin tin or a small loaf pan depending on the shape you desire for your bake.
- Spoon the batter into the prepared pan and bake for 20-25 minutes (for muffins) or 45 minutes (for a loaf) until a toothpick comes out clean.
- Let the baked goods cool in the pan for 10 minutes before transferring them to a wire rack to finish cooling completely before slicing.
Tropical Non Alcoholic Virgin Pina Colada Mocktail

Why we love this
Sometimes we need a little escape to a sun-soaked beach, and this virgin pina colada is a tropical vacation in a glass for everyone to enjoy. It is incredibly creamy and rich, with the perfect balance of sweet pineapple and nutty coconut that dances across your tongue like a warm island breeze. I love serving these at garden parties because they feel so special and celebratory without the need for any spirits at all. It is a kid-friendly, soul-soothing treat that brings a bit of exotic magic to even the most ordinary afternoon at home.
Ingredients
- 1 cup frozen pineapple chunks
- 1/2 cup fresh pineapple juice
- 1/2 cup canned coconut cream (the thick part)
- 1 tablespoon lime juice
- 1 tablespoon agave nectar or simple syrup
- 2 cups of ice
- Garnish: Fresh pineapple wedges and maraschino cherries
How to make it
- Place the frozen pineapple chunks into a high-powered blender, which helps create a thick, frosty texture without diluting the flavor with too much ice.
- Add the fresh pineapple juice, the thick coconut cream, lime juice, and agave nectar into the blender on top of the fruit.
- Add the ice cubes last, then secure the lid and blend on high speed until the mixture is completely smooth and has a snowy consistency.
- Taste the mocktail and add a bit more agave if you prefer it sweeter, or another squeeze of lime if you want more of a tropical zing.
- Pour the creamy mixture into tall hurricane glasses or your favorite festive glassware, allowing it to mound slightly at the top.
- Garnish each glass with a fresh pineapple wedge on the rim and a bright red cherry dropped right into the center of the frosty cloud.
- Serve immediately with a straw, ideally while sitting in a patch of sunlight where you can pretend the ocean is just a few steps away.
Soft Chewy Spring Cookies For Every Occasion

Why we love this
These cookies are like biting into a soft, sweet cloud that has been decorated with the colors of a springtime meadow. They have a delicate, melt-in-your-mouth texture that makes them absolutely addictive, yet they are sturdy enough to be shared at every potluck and picnic. I love the way the light vanilla notes play with the pastel sprinkles, creating a visual treat that is just as delightful as the flavor itself. Making these cookies is a wonderful way to involve little hands in the kitchen, spreading joy through simple, sweet ingredients and love.
Ingredients
- 1 cup unsalted butter, softened
- 1 1/2 cups granulated sugar
- 2 large eggs
- 1 tablespoon vanilla extract
- 3 cups all-purpose flour
- 1 teaspoon baking powder
- 1/2 teaspoon salt
- 1/2 cup pastel spring sprinkles
How to make it
- In a large bowl, cream together the softened butter and granulated sugar until the mixture is light, fluffy, and pale yellow in color.
- Beat in the eggs one at a time, followed by the vanilla extract, ensuring each ingredient is fully incorporated before adding the next one.
- In a separate bowl, whisk together the flour, baking powder, and salt, then gradually add this to the wet ingredients at a low speed.
- Once a soft dough has formed, gently fold in the pastel spring sprinkles by hand to prevent them from breaking or bleeding color into the dough.
- Cover the dough and chill it in the refrigerator for at least 30 minutes, which is the secret to getting that perfect chewy, soft texture.
- Preheat your oven to 350 degrees Fahrenheit and line a baking sheet with parchment paper, then scoop rounded tablespoons of dough onto the sheet.
- Bake for 10-12 minutes until the edges are just barely set and the tops look soft; let them cool on the sheet for 5 minutes before moving.
Traditional Authentic Hispanic Capirotada Recipe
[IMAGE_10]
Why we love this
Tapping into the rich, soulful traditions of Hispanic culture, this bread pudding is a beautiful tapestry of sweet, savory, and spicy notes that dance together. It feels like sitting at a crowded family table where the stories are as rich as the syrup soaking into the toasted bolillo rolls. There is a deep, earthy warmth from the piloncillo that grounds the brightness of the fruit and the saltiness of the cheese. Making this is an act of love and remembrance, a way to honor the hands that cooked before us and the hearths that stayed warm through generations.
Ingredients
- 4 bolillo rolls or French bread, sliced and toasted
- 2 cones of piloncillo (or 1.5 cups dark brown sugar)
- 3 cups water
- 2 cinnamon sticks and 3 whole cloves
- 2 cups shredded Monterey Jack or Longhorn cheese
- 1/2 cup raisins
- 1/2 cup peanuts or slivered almonds
- 1/2 cup sprinkles (Colaciones) for garnish
How to make it
- In a medium pot, combine the water, piloncillo cones, cinnamon sticks, and cloves to create a traditional spiced syrup.
- Simmer the mixture over medium heat until the piloncillo has completely dissolved and the liquid has thickened slightly into a fragrant syrup.
- Slice the bread into thick rounds and toast them in the oven or on a comal until they are very dry and golden brown on both sides.
- Grease a deep baking dish and place a layer of the toasted bread rounds along the bottom, fitting them tightly together like a puzzle.
- Drizzle a generous amount of the spiced syrup over the bread, then top with a layer of cheese, raisins, and nuts.
- Repeat the layers until all ingredients are used, ending with a final soak of syrup and a thick layer of cheese on top.
- Bake at 350 degrees Fahrenheit for 20-30 minutes until the cheese is melted and bubbly, then garnish with colorful sprinkles before serving warm.
Bringing the Heart Back Home
My loves, I hope these recipes bring a sense of peace and deliciousness to your kitchen as we transition through the beautiful seasons of life. Whether you’re whisking a bright lemon sauce or layering a traditional Capirotada, remember that the most important ingredient is always the love you pour into the process. Your kitchen is a sanctuary, and every meal shared is a chance to connect and create something lasting. Until next time, keep your hearth warm and your heart full. Sending you so much light and flavor!