

Why This Simple Food Board is the Only Appetizer You’ll Ever Need
There is something almost primal about gathering around a table, isn’t there? The way the air changes when a massive board laden with savory treats is set down, the communal reach for a perfect bite, and the hum of conversation that follows. I’ve spent years trying to find the perfect party trick, but I’ve realized that the ‘Simple Food Board’ isn’t about fancy crackers—it’s about mastering the soul-warming staples that keep people coming back for seconds.
In a world of over-complicated recipes and tiny hors d’oeuvres that leave you hungry, there is a quiet power in serving real, hearty food. This viral concept focuses on bringing high-quality, perfectly cooked elements to the table, allowing guests to graze on everything from succulent steak to crispy greens. It’s about the texture of a slow-cooked roast and the comfort of creamy mash, all presented in a way that feels effortless yet incredibly indulgent. Let’s dive into the ten skills you need to build the board of your dreams.
How to cook perfect pot roast
Why we love this
There is nothing quite like the aroma of a pot roast that has been slow-cooking for hours, filling every corner of your home with a rich, savory scent that promises comfort. When done correctly, the beef becomes so tender that it yields to the mere suggestion of a fork, falling into succulent, juice-soaked ribbons. The deep, caramelized exterior provides a beautiful contrast to the melt-in-your-mouth interior, creating a sensory experience that feels both rustic and luxurious. It is the ultimate centerpiece for a communal board, offering a hearty warmth that grounds the entire meal.
Ingredients
- 3-4 lb Chuck roast
- Salt and black pepper
- 2 tbsp Vegetable oil
- 1 large Onion, chopped
- 3 cloves Garlic, smashed
- 2 cups Beef broth
- 1 tbsp Tomato paste
- Fresh rosemary and thyme
How to make it
- Begin by patting the roast completely dry with paper towels; moisture is the enemy of a good sear. Season aggressively with salt and pepper on all sides.
- Heat the oil in a heavy Dutch oven over medium-high heat until it is shimmering and just starting to smoke.
- Sear the meat for 5-7 minutes per side. Do not rush this; wait for a deep, dark brown crust to form before flipping.
- Remove the meat and add onions to the pot, sautéing until translucent. Stir in the tomato paste and garlic for 60 seconds until fragrant.
- Deglaze the pot with beef broth, scraping up all the brown bits (the fond) from the bottom.
- Return the beef to the pot, add herbs, and cover with a tight-fitting lid.
- Transfer to a 300°F oven and cook for 3 to 4 hours. You will know it is done when the meat is "fork-tender," meaning it pulls apart with zero resistance.
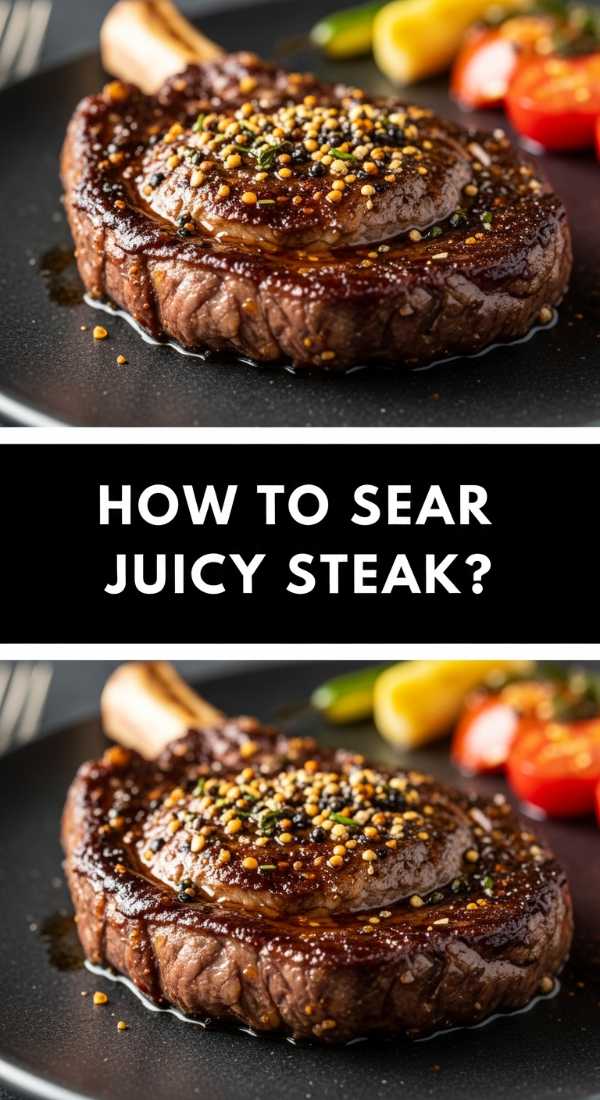
How to sear juicy steak

Why we love this
A perfectly seared steak is a masterclass in texture; the initial bite offers a salty, buttery crust that gives way to a center so tender and juicy it feels like silk. The rich, umami-packed flavor of high-quality beef, enhanced by the Maillard reaction, creates a complex profile that is both smoky and sweet. Watching the butter foam and brown as it bathes the steak in garlic and herbs is a visual and auditory delight that elevates the cooking process into an art form. It adds a sophisticated, high-protein element to any board that guests will gravitate toward instantly.
Ingredients
- 2 Ribeye or New York Strip steaks (room temperature)
- 2 tbsp Kosher salt
- 1 tbsp Cracked black pepper
- 2 tbsp High-smoke point oil (grapeseed or canola)
- 3 tbsp Unsalted butter
- 3 cloves Garlic
- Fresh thyme sprigs
How to make it
- Temper your meat by letting it sit at room temperature for at least 45 minutes before cooking to ensure even heat distribution.
- Pat the steaks bone-dry and season heavily with salt and pepper.
- Heat a cast-iron skillet over high heat until it is screaming hot. Add the oil; it should shimmer instantly.
- Place steaks in the pan, pressing down slightly to ensure contact. Sear for 3 minutes without moving them to develop a thick crust.
- Flip the steaks and immediately add the butter, garlic, and thyme to the pan.
- As the butter melts and foams, tilt the pan and use a large spoon to continuously baste the steak with the flavored butter for another 3-4 minutes.
- Use an instant-read thermometer to pull the steak at 130°F for medium-rare. Let it rest for 10 minutes before slicing against the grain.
How to make creamy mash

Why we love this
Creamy mashed potatoes are the quintessential comfort food, acting as a velvety canvas for the richer meats on your board. When prepared correctly, they should be light and airy, yet dense enough to hold a pool of golden butter or rich gravy. The taste is a delicate balance of earthy potato, sweet cream, and a hint of salt, creating a mouthfeel that is incredibly smooth and satisfying. It’s the dish that everyone reaches for when they need a bit of culinary nostalgia, providing a soft, pillowy contrast to the charred and roasted elements.
Ingredients
- 3 lbs Yukon Gold potatoes, peeled and cubed
- 1 cup Heavy cream
- 1/2 cup Unsalted butter, softened
- 4 cloves Garlic, minced
- Salt and white pepper to taste
- Fresh chives for garnish
How to make it
- Place cubed potatoes in a large pot of cold, salted water. Starting with cold water ensures the outside doesn’t turn to mush before the inside is cooked.
- Bring to a boil, then reduce to a simmer and cook for 15-20 minutes until the potatoes are very tender when pierced with a knife.
- Drain the potatoes and return them to the hot pot for 2 minutes over low heat to steam off any excess moisture. This step is crucial for a non-watery mash.
- In a small saucepan, warm the heavy cream, butter, and garlic until the butter is melted.
- Use a potato ricer or food mill for the smoothest texture, or a masher for a more rustic feel.
- Slowly fold in the warm cream mixture. Do not overmix, as this releases too much starch and makes the potatoes gummy.
- Season with salt and white pepper, then garnish with fresh chives.
How to bake chocolate bars
Why we love this
There is a unique joy in breaking apart a homemade chocolate bar, hearing that distinctive snap that indicates a perfect temper or bake. The deep, cocoa-heavy aroma that wafts from the oven is intoxicating, promising a treat that is far superior to anything store-bought. These bars offer a rich, decadent finish to a food board, providing a sweet counterpoint to the savory meats and vegetables. The texture can vary from a fudgy, brownie-like consistency to a crisp, snap-able dark chocolate, depending on your preference, making it a versatile dessert option.
Ingredients
- 1 cup High-quality cocoa powder
- 1/2 cup Coconut oil or cocoa butter
- 1/4 cup Maple syrup or honey
- 1 tsp Vanilla extract
- Pinch of sea salt
- Optional: Chopped nuts or dried fruit
How to make it
- Set up a double boiler by placing a heat-proof bowl over a pot of simmering water, ensuring the bottom of the bowl does not touch the water.
- Melt the coconut oil or cocoa butter completely until it is clear and fluid.
- Whisk in the cocoa powder slowly to avoid lumps, followed by the maple syrup and vanilla extract.
- Continue whisking over the heat for 2-3 minutes until the mixture is glossy and smooth.
- Line a small baking sheet or mold with parchment paper and pour the chocolate mixture in, spreading it to your desired thickness.
- Sprinkle with sea salt or toppings while the chocolate is still wet.
- Place in the freezer for at least 1 hour to set. Once firm, snap into irregular, artisanal shards for serving.
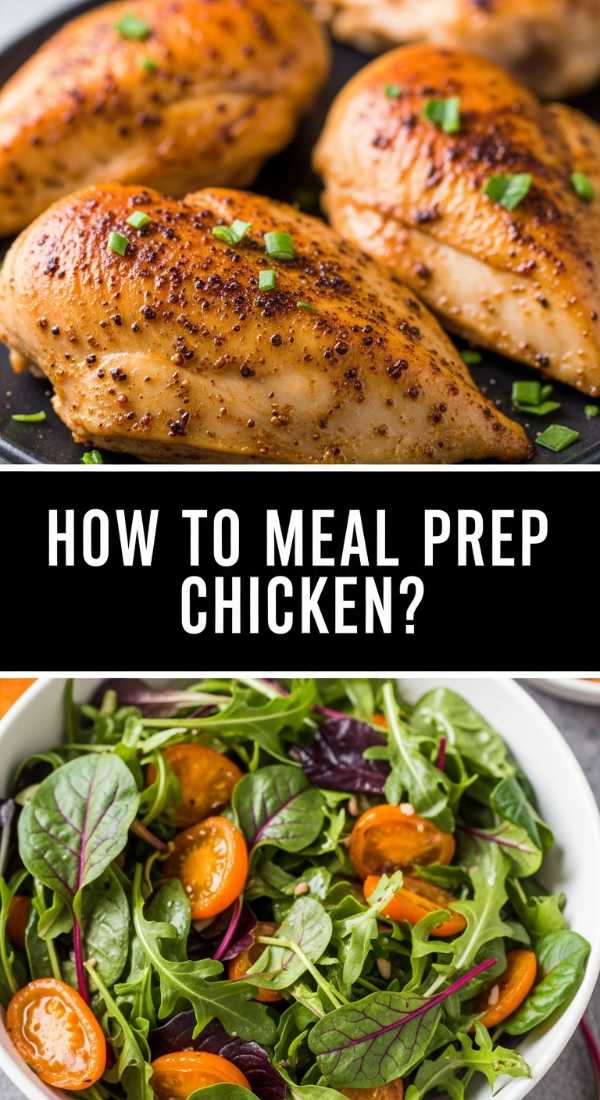
How to meal prep chicken

Why we love this
Meal-prepped chicken doesn’t have to be boring; when done with care, it becomes a juicy, versatile protein that anchors a healthy board. The secret lies in the seasoning and the cooking method, which preserves the moisture and prevents the meat from becoming stringy or dry. We love this because it provides a lean, satisfying option that pairs beautifully with roasted vegetables or fresh dips. It is the ultimate time-saver that doesn’t sacrifice flavor, offering a clean, savory taste that feels light yet nourishing after a long day.
Ingredients
- 2 lbs Chicken breasts or thighs
- 2 tbsp Olive oil
- 1 tsp Smoked paprika
- 1 tsp Garlic powder
- 1 tsp Dried oregano
- Salt and pepper
- Lemon wedges
How to make it
- If using breasts, pound them to an even thickness using a meat mallet. This is the most important step for ensuring the chicken cooks evenly without drying out the thin ends.
- Toss the chicken in olive oil and all the dry spices until every inch is coated.
- Heat a large skillet over medium-high heat. Add the chicken, being careful not to crowd the pan.
- Cook for 5-6 minutes on the first side until a golden-brown crust forms.
- Flip and cook for another 5 minutes. Use a meat thermometer to check for an internal temperature of 165°F.
- Remove the chicken from the pan and let it rest for at least 8 minutes before slicing. Resting allows the juices to redistribute through the fibers.
- Squeeze fresh lemon juice over the top to brighten the flavors before storing or serving.
How to roast crispy broccoli
Why we love this
Roasting broccoli transforms it from a humble side dish into a crave-worthy snack with charred, nutty edges and tender stalks. The high heat of the oven caramelizes the natural sugars in the vegetable, creating a depth of flavor that is miles away from the bitterness of steamed greens. We love the contrast between the crunchy floret tops and the soft, buttery centers, especially when finished with a squeeze of lemon or a dusting of parmesan. It adds a vibrant pop of color and a healthy, fiber-rich crunch to your appetizer board.
Ingredients
- 2 large heads of Broccoli, cut into florets
- 3 tbsp Olive oil
- 4 cloves Garlic, sliced thin
- 1/2 tsp Red pepper flakes
- 1/2 tsp Salt
- 1/4 cup Grated Parmesan cheese
How to make it
- Preheat your oven to 425°F. A high temperature is essential for achieving that "crispy" rather than "soggy" texture.
- Ensure the broccoli florets are completely dry. If they are wet, they will steam instead of roast.
- In a large bowl, toss the broccoli with olive oil, salt, red pepper flakes, and the sliced garlic.
- Spread the florets onto a large baking sheet in a single layer. Do not overlap them; space is required for the hot air to circulate.
- Roast for 20-25 minutes, tossing halfway through. Look for dark brown, charred edges on the florets.
- Immediately after removing from the oven, sprinkle with Parmesan cheese so it melts slightly onto the hot vegetables.
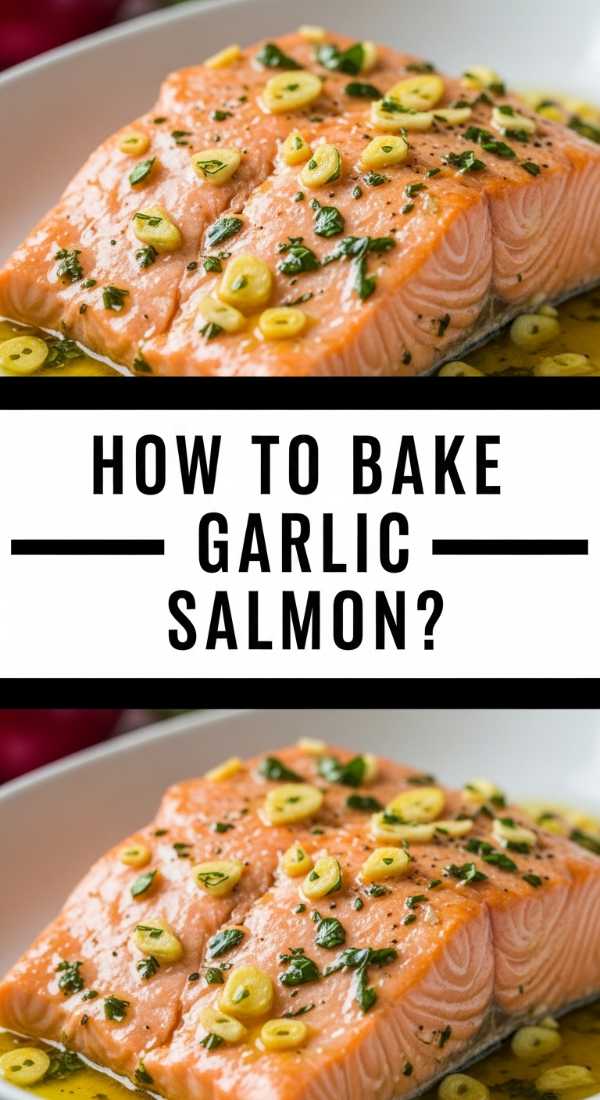
How to bake garlic salmon

Why we love this
Baked garlic salmon is the epitome of "fancy made easy," offering a flaky, melt-in-your-mouth texture that feels like a special occasion meal. The richness of the omega-3 fats is perfectly balanced by the sharp, aromatic bite of fresh garlic and the brightness of lemon. When cooked just right, the salmon should pull apart into translucent, tender flakes that are incredibly moist and flavorful. It provides a lighter, elegant protein option for your board that appeals to those looking for something sophisticated yet deeply satisfying.
Ingredients
- 1 large Salmon side (about 2 lbs)
- 4 tbsp Unsalted butter, melted
- 3 cloves Garlic, minced
- 1 tbsp Fresh parsley, chopped
- 1 Lemon, thinly sliced
- Salt and cracked black pepper
How to make it
- Preheat your oven to 375°F and line a baking sheet with foil or parchment paper for easy cleanup.
- Place the salmon on the sheet and pat the skin and flesh dry.
- In a small bowl, whisk together the melted butter, minced garlic, parsley, salt, and pepper.
- Brush the garlic butter generously over the top of the salmon, ensuring the entire surface is covered.
- Lay the lemon slices over the top of the fillet.
- Bake for 12-15 minutes. The timing depends on the thickness of the fish; check for an internal temperature of 145°F or until the fish flakes easily with a fork.
- For a slightly crispy top, turn on the broiler for the last 2 minutes of cooking, watching closely to prevent burning.
How to make cheesy pasta

Why we love this
A big bowl of cheesy pasta is the ultimate crowd-pleaser, bringing a gooey, indulgent element to your spread that everyone finds irresistible. The sound of the creamy sauce coating the noodles is pure music to a food lover’s ears, promising a rich and savory bite every time. We love the way the sharp cheese clings to the ridges of the pasta, creating a cohesive dish that is both filling and comforting. It acts as the perfect "filler" on a food board, ensuring that no guest leaves the table feeling anything less than completely satisfied.
Ingredients
- 1 lb Rigatoni or Penne pasta
- 2 cups Sharp Cheddar, shredded
- 1 cup Gruyere or Fontina, shredded
- 2 cups Whole milk
- 3 tbsp Butter
- 3 tbsp All-purpose flour
- 1/2 tsp Nutmeg
- Salt and black pepper
How to make it
- Boil a large pot of heavily salted water. Cook the pasta for 1 minute less than the package directions for true "al dente" texture.
- While the pasta cooks, melt the butter in a saucepan over medium heat. Whisk in the flour and cook for 2 minutes to create a roux (it should smell slightly nutty).
- Slowly pour in the milk, whisking constantly to prevent lumps. Continue cooking until the sauce thickens enough to coat the back of a spoon.
- Remove from heat and stir in the nutmeg, salt, and pepper.
- Add the shredded cheese one handful at a time, stirring until completely melted and glossy.
- Drain the pasta, reserving a 1/2 cup of pasta water.
- Toss the pasta with the cheese sauce, adding a splash of the reserved water if the sauce is too thick. Serve immediately while the cheese is stretchy.
How to cook fluffy pancakes
Why we love this
There is a whimsical charm to including fluffy pancakes on a food board, bridging the gap between brunch and dinner in the most delicious way possible. These golden-brown rounds are incredibly soft, with a subtle sweetness that pairs surprisingly well with salty elements like steak or ribs. We love the visual of a tall stack dripping with syrup, offering a light, airy texture that provides a break from the more dense, savory components. It turns your board into an all-day affair, making it perfect for those "brunch for dinner" kind of nights.
Ingredients
- 2 cups All-purpose flour
- 2 tbsp Sugar
- 1 tbsp Baking powder
- 1/2 tsp Salt
- 1 1/2 cups Milk
- 1 large Egg
- 4 tbsp Butter, melted and cooled
- 1 tsp Vanilla extract
How to make it
- Whisk the dry ingredients together in a large bowl. In a separate bowl, whisk the milk, egg, melted butter, and vanilla.
- Pour the wet ingredients into the dry. Stir with a spatula just until combined; lumps are okay! Overmixing will lead to tough, flat pancakes.
- Heat a non-stick griddle or skillet over medium heat. Lightly grease with a tiny bit of butter or oil.
- Pour 1/4 cup of batter for each pancake.
- Wait for bubbles to form on the surface and the edges to look set and matte. This is the visual cue that it’s time to flip.
- Flip carefully and cook for another 1-2 minutes until golden brown on the bottom.
- Keep them warm in a 200°F oven until you are ready to assemble your board.
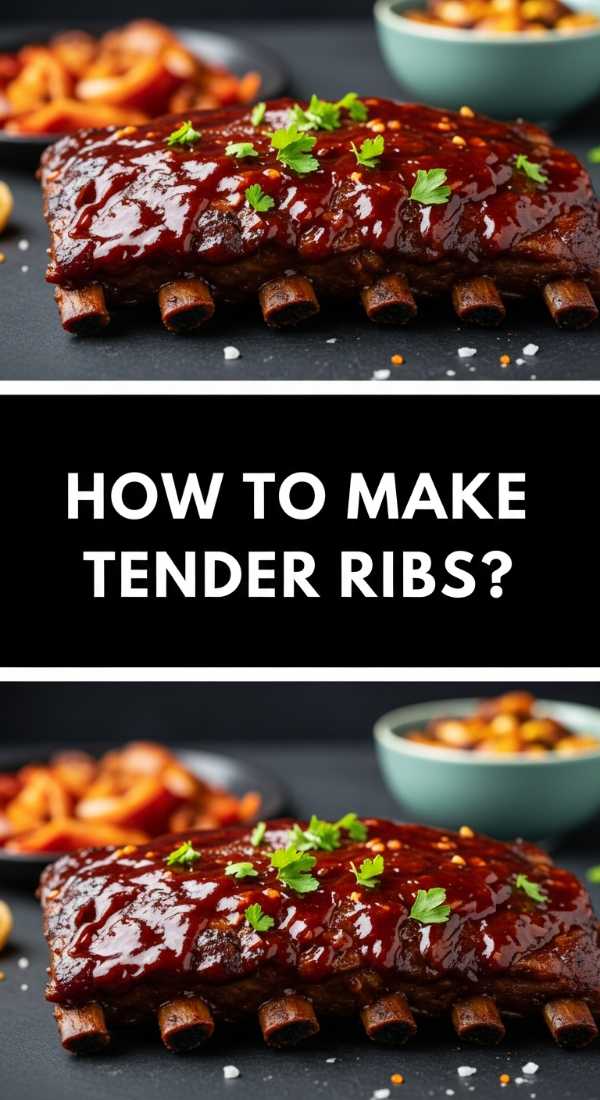
How to make tender ribs
[IMAGE_10]
Why we love this
Tender, fall-off-the-bone ribs bring a smoky, sticky, and primal energy to the table that is hard to beat. The long, slow cooking process breaks down the tough connective tissue, resulting in meat that is incredibly flavorful and moist, coated in a thick, caramelized glaze. We love the hands-on nature of eating ribs, which encourages a relaxed and communal atmosphere where guests aren’t afraid to get a little messy. The combination of sweet, salty, and smoky flavors makes these a standout addition that adds a real "wow" factor to any appetizer spread.
Ingredients
- 1 rack Baby Back Ribs
- 1/4 cup Brown sugar
- 1 tbsp Smoked paprika
- 1 tsp Garlic powder
- 1 tsp Onion powder
- 1 cup BBQ sauce
- 1/2 cup Apple juice (for braising)
How to make it
- Remove the thin membrane (silverskin) from the back of the ribs by loosening it with a knife and pulling it off with a paper towel.
- Mix the dry spices and sugar to create a rub. Coat the ribs generously on both sides.
- Preheat your oven to 275°F. Place the ribs on a large piece of heavy-duty aluminum foil.
- Pour the apple juice into the foil packet, then seal it tightly so no steam can escape.
- Bake for 2.5 to 3 hours. The ribs should be tender but not quite falling apart yet.
- Carefully remove from the foil and brush a thick layer of BBQ sauce over the top.
- Place the ribs under the broiler for 3-5 minutes, watching closely until the sauce is bubbling and charred in spots. Let them rest for 10 minutes before slicing into individual ribs.
Conclusion
Building the perfect food board isn’t about following strict rules; it’s about creating a landscape of flavors that speak to the heart. By mastering these ten essential dishes, you can mix and match to create a spread that fits any mood or occasion. Whether you’re going for a heavy, meat-focused board or a lighter, vegetable-forward assembly, the key is the love and detail put into each component. So, grab your largest platter, gather your favorite people, and start building your own version of the only appetizer you’ll ever need.