
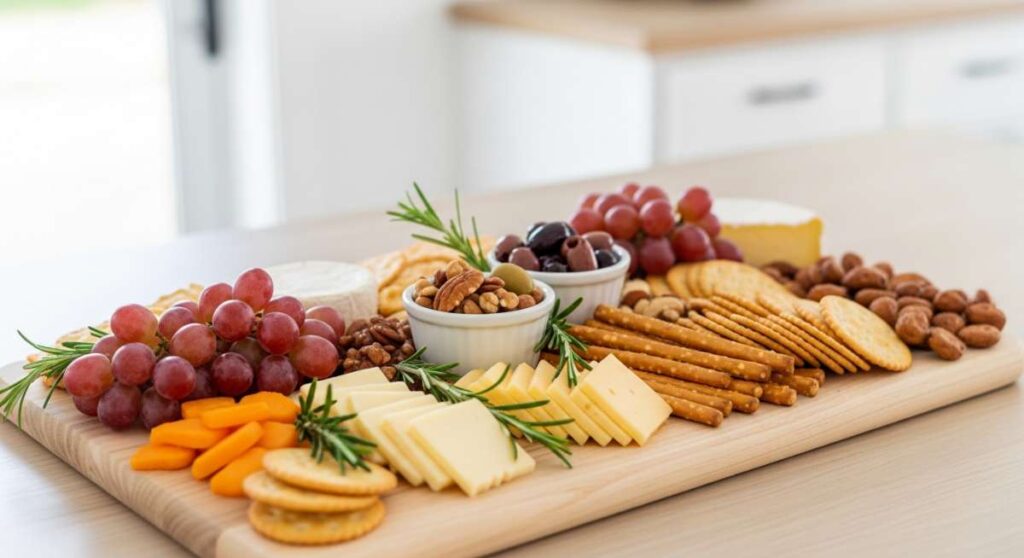
There is something magical about the way a gathering transforms when a massive, colorful food board is placed in the center of the table. It’s more than just a meal; it’s an invitation to linger, to reach across for that perfect bite, and to share stories over the crackle of crispy crusts and the aroma of roasted herbs. In a world that often feels rushed, the viral food board trend reminds us that the best moments are spent grazing and connecting in the comfort of our own homes.
I remember the first time I set out a themed board for my friends—it wasn’t just about the food, it was about the collective ‘ooh’ and ‘aah’ as everyone found their favorite treat. Whether you’re hosting a cozy movie night or a festive dinner party, these boards are the ultimate way to show your love through flavor. Today, I’m showing you how to master the individual components that make a viral food board truly legendary, from sizzling steaks to delicate gyoza.
How to cook juicy steak?

Why we love this
There is nothing quite as primal and satisfying as the scent of a high-quality steak hitting a scorching hot cast-iron skillet. The way the exterior develops a deep, mahogany-colored crust while the center remains a succulent, buttery pink is a culinary art form that awakens every sense. As you baste the meat in foaming butter infused with garlic and woody rosemary, the kitchen fills with an intoxicating richness that promises a melt-in-your-mouth experience. It’s the ultimate centerpiece for a luxury food board, offering a bold, savory contrast to lighter snacks.
Ingredients
- 1.5-inch thick Ribeye or New York Strip
- 2 tablespoons unsalted butter
- 3 cloves garlic, smashed
- 2 sprigs fresh rosemary
- Kosher salt and coarse black pepper
- High-smoke point oil (avocado or grapeseed)
How to make it
- Remove the steak from the refrigerator at least 45 minutes before cooking to allow it to reach room temperature, ensuring an even cook throughout.
- Pat the steak extremely dry with paper towels; any moisture on the surface will create steam instead of a crust. Season aggressively with salt and pepper on all sides.
- Heat a cast-iron skillet over high heat until it is wispy-thin with smoke, then add two tablespoons of oil.
- Carefully lay the steak away from you into the pan. Sear for 3-4 minutes without moving it until a thick, dark crust forms.
- Flip the steak and immediately add the butter, smashed garlic, and rosemary to the pan.
- Tilt the pan slightly and use a large spoon to continuously pour the hot, flavored butter over the steak for the remaining 3-4 minutes of cooking.
- Remove the steak when the internal temperature reaches 130°F (54°C) for medium-rare, and let it rest on a cutting board for at least 10 minutes before slicing against the grain.
How to make crispy tempura?

Why we love this
The beauty of tempura lies in its ethereal lightness—a golden, lacy cocoon that shatters upon the first bite to reveal the tender, steaming vegetable or seafood within. Unlike heavy batters, a perfect tempura is barely-there, allowing the natural sweetness of a shrimp or the earthiness of a sweet potato to shine through without being weighed down by grease. The contrast between the ice-cold batter and the shimmering hot oil creates those iconic ‘blooming’ flakes that look like delicate coral on your food board, making it as visually stunning as it is delicious.
Ingredients
- Large shrimp or assorted vegetables (sweet potato, broccoli, bell pepper)
- 1 cup all-purpose flour (chilled)
- 1 egg yolk
- 1 cup ice-cold sparkling water
- Cornstarch for dusting
- Neutral oil for deep frying
How to make it
- Prep your ingredients by slicing vegetables thinly and cleaning shrimp; dust them lightly with cornstarch to help the batter adhere.
- Heat your oil in a deep pot to exactly 340-350°F (170-175°C); consistent temperature is vital for preventing sogginess.
- In a chilled bowl, lightly beat the egg yolk, then pour in the ice-cold sparkling water.
- Add the flour all at once and mix with chopsticks for only 10-15 seconds; leave the lumps in, as over-mixing develops gluten and makes the batter tough.
- Dip the cold ingredients into the batter, then immediately drop them into the hot oil.
- Fry for 2-3 minutes, using a wire skimmer to remove any loose bits of batter (‘tenkasu’) to keep the oil clean.
- Drain the pieces on a wire rack—not paper towels—to maintain maximum airflow and prevent the bottom from becoming soft.
How to roast garlic chicken?

Why we love this
Roast garlic chicken is the quintessential comfort food, filling the home with a warm, nostalgic perfume that signals a feast is near. The skin becomes a crackling, golden-brown sheet of savory goodness, while the meat beneath remains incredibly moist and infused with the mellow, sweet notes of softened garlic cloves. Tearing into a perfectly roasted wing or thigh while the juices run clear is a sensory delight that brings a rustic, farmhouse charm to any viral food board spread. It is simple, elegant, and universally adored by guests of all ages.
Ingredients
- 1 whole chicken (about 4 lbs)
- 2 whole heads of garlic, halved crosswise
- 4 tablespoons softened butter
- 1 tablespoon lemon zest
- Fresh thyme and sage
- Salt and cracked black pepper
How to make it
- Preheat your oven to 425°F (220°C). High heat is essential for getting that initial sear on the skin.
- Thoroughly pat the chicken dry inside and out. Any moisture left on the skin will prevent it from crisping.
- Mix the softened butter with lemon zest, chopped thyme, and sage, then rub this mixture under the skin of the breast and all over the exterior.
- Stuff the cavity with half a head of garlic and a bunch of herbs; tie the legs together with kitchen twine to ensure even cooking.
- Place the chicken in a roasting pan surrounded by the remaining garlic halves.
- Roast for 60-75 minutes, or until the thickest part of the thigh reaches 165°F (74°C).
- Let the chicken rest for 20 minutes before carving; this allows the juices to redistribute so the meat stays tender when sliced for the board.
How to prepare fresh sushi?

Why we love this
Preparing sushi is an exercise in mindfulness, resulting in bites that are the definition of clean, vibrant flavor. There is a deep satisfaction in the snap of the toasted nori followed by the seasoned tang of perfectly vinegared rice and the buttery texture of fresh fish or crisp cucumber. It adds a sophisticated, artisan touch to your board, offering a refreshing palate cleanser between richer, heavier items. The bright colors of the ingredients make the board pop with a professional, high-end aesthetic that guests can’t wait to photograph.
Ingredients
- Sushi-grade fish (Tuna or Salmon)
- 2 cups sushi rice (short-grain)
- 3 tablespoons rice vinegar
- 1 tablespoon sugar
- Nori sheets
- Wasabi, pickled ginger, and soy sauce
How to make it
- Rinse the sushi rice under cold water at least 5 times until the water runs completely clear to remove excess starch.
- Cook the rice with a 1:1.1 ratio of water to rice, then immediately fold in the mixture of rice vinegar, sugar, and salt while the rice is hot.
- Fan the rice as you fold it to help it cool quickly and give it that signature glossy sheen.
- Place a sheet of nori on a bamboo mat, and with wet hands, spread a thin, even layer of rice over the bottom two-thirds of the sheet.
- Lay your thinly sliced fish or vegetables in a neat line across the center of the rice.
- Using the mat, roll the nori tightly away from you, applying firm pressure to ensure the roll is compact.
- Use a very sharp, damp knife to slice the roll into 6-8 even pieces, cleaning the knife between every cut for a professional finish.
How to bake loaded potatoes?

Why we love this
A loaded potato is a masterpiece of textures: the skin is salty and crisp, the interior is fluffier than a cloud, and the toppings provide a decadent explosion of flavor. It is the ultimate vessel for creativity, acting as a warm, starchy base for melting sharp cheddar and the salty crunch of crumbled bacon. The sight of steam rising from a freshly split potato, topped with a cool dollop of sour cream and a sprinkle of bright green chives, is enough to make anyone’s mouth water. It adds a hearty, rustic soul to your food board that feels both indulgent and familiar.
Ingredients
- 4 large Russet potatoes
- Olive oil and sea salt
- 1 cup shredded sharp cheddar
- 1/2 cup sour cream
- 6 slices cooked crispy bacon, crumbled
- Fresh chives, chopped
How to make it
- Preheat your oven to 400°F (200°C). Scrub the potatoes clean and pat them completely dry.
- Pierce the potatoes 5-6 times with a fork to allow steam to escape, preventing them from bursting.
- Rub the skins generously with olive oil and roll them in sea salt; this creates that iconic, flavorful, crispy exterior.
- Place the potatoes directly on the oven rack (with a tray below to catch drips) and bake for 60 minutes until the skin is brittle and the center is soft.
- Immediately after removing, slice a line down the center and push the ends inward to fluff up the steaming interior with a fork.
- While hot, pile on the shredded cheese so it melts into the potato fibers, then top with bacon bits.
- Finish with a cold scoop of sour cream and chives just before serving to maintain the temperature contrast.
How to simmer tasty ramen?

Why we love this
Ramen is all about the depth of the soul-warming broth, a liquid gold that has simmered until it is packed with umami. There is a rhythmic joy in slurping the springy, alkaline noodles while they are coated in a rich, savory liquid that has been layered with ginger, garlic, and soy. The addition of a jammy, marinated egg and tender pork transforms a simple bowl into a complex landscape of flavors. On a food board, serving small bowls of ramen provides a cozy, interactive element that encourages guests to slow down and savor the warmth.
Ingredients
- 2 packs fresh or dried ramen noodles
- 4 cups high-quality chicken or pork broth
- 2 tablespoons soy sauce
- 1 tablespoon miso paste
- Soft-boiled marinated eggs (Ajitama)
- Sliced green onions and nori for garnish
How to make it
- In a large pot, bring your broth to a gentle simmer; avoid a rolling boil to keep the broth clear and prevent it from becoming cloudy.
- Whisk in the soy sauce, ginger, and miso paste—be sure to dissolve the miso completely in a small bowl of hot broth first before adding it to the pot.
- In a separate pot of boiling water, cook the ramen noodles for exactly the time specified on the package (usually 2-3 minutes for fresh) to ensure they stay ‘al dente’.
- Drain the noodles thoroughly; do not rinse them, as the starch helps the broth cling to the strands.
- Divide the hot broth into bowls and add the noodles, gently lifting them with chopsticks to aerate them.
- Top with the halved soft-boiled eggs, ensuring the yolks are still gooey and rich.
- Garnish with a generous handful of green onions and a square of nori for that authentic toasted aroma.
How to grill glazed salmon?

Why we love this
Glazed salmon is a showstopper, boasting a glossy, caramelized finish that glitters under the lights of a dinner party. The contrast between the sweet, sticky glaze and the rich, fatty flakes of the fish creates a balance that is both sophisticated and incredibly craveable. As the salmon grills, the sugars in the glaze char slightly, adding a smoky dimension that perfectly complements the tender, moist interior. It’s a healthy yet decadent addition to a board, offering a vibrant pink hue that contrasts beautifully with green garnishes and wooden serving platters.
Ingredients
- 2 large salmon fillets
- 1/4 cup soy sauce
- 2 tablespoons honey
- 1 teaspoon grated fresh ginger
- 1 clove minced garlic
- Sesame seeds for garnish
How to make it
- Whisk together the soy sauce, honey, ginger, and garlic in a small bowl until the honey is fully incorporated.
- Marinate the salmon in half of this mixture for 20 minutes; keep the other half aside to use as a fresh glaze.
- Preheat your grill or grill pan to medium-high heat and lightly oil the grates to prevent sticking.
- Place the salmon skin-side down first. This protects the delicate flesh and allows the skin to become crispy and edible.
- Grill for 4-5 minutes without moving the fish, then carefully flip using a wide spatula.
- Brush the reserved glaze generously over the cooked side and grill for another 3-4 minutes until the salmon flakes easily with a fork.
- Remove from heat and apply one final coat of glaze for a high-shine finish, then sprinkle with toasted sesame seeds.
How to fry savory gyoza?

Why we love this
The magic of gyoza is the ‘pan-fry-steam’ method, which results in a dumpling that is golden and crunchy on the bottom while being soft and translucent on top. One bite releases a burst of savory juice and the pungent, aromatic kick of ginger and garlic-infused pork. They are the perfect finger food for a board—compact, easy to pick up, and incredibly addictive when paired with a tangy dipping sauce. The sight of a row of perfectly pleated dumplings, their bottoms toasted to a dark amber, is a hallmark of a viral-worthy food spread.
Ingredients
- 1 pack gyoza wrappers
- 1/2 lb ground pork
- 1 cup finely shredded cabbage (salted and squeezed dry)
- 2 cloves garlic, minced
- 1 tablespoon sesame oil
- 1/4 cup water (for steaming)
How to make it
- Mix the ground pork, dried cabbage, garlic, and sesame oil in a bowl until the mixture becomes slightly tacky and well combined.
- Place a small teaspoon of filling in the center of a wrapper; wet the edges with a finger dipped in water.
- Fold the wrapper over and create 4-6 pleats along one side, pressing firmly to seal out any air bubbles.
- Heat a tablespoon of oil in a non-stick skillet over medium-high heat and arrange the gyoza in a circular pattern.
- Fry for 2 minutes until the bottoms are deeply golden brown.
- Pour in 1/4 cup of water and immediately cover with a tight-fitting lid to trap the steam.
- After 3 minutes, remove the lid and allow the remaining water to evaporate, which recrisps the bottoms before serving.
How to make japanese curry?

Why we love this
Japanese curry is the culinary equivalent of a warm hug, with its thick, velvety gravy and a mild sweetness that comes from slow-cooked onions and carrots. It lacks the sharp heat of other curries, focusing instead on a deep, stew-like richness that is incredibly satisfying. When served on a board in a central bowl, it acts as a communal dipping pool for bread or a base for rice, bringing a cozy, homestyle energy to the meal. The dark, glossy sauce and chunky vegetables provide a wonderful textural variety that rounds out a diverse food selection.
Ingredients
- 1 box Japanese curry roux (medium-hot)
- 1 lb beef chuck, cubed
- 2 onions, sliced thin
- 2 carrots, chopped into bite-sized pieces
- 2 potatoes, cubed
- 3 cups water or beef stock
How to make it
- In a heavy-bottomed pot, sear the beef cubes in oil over high heat until browned on all sides, then remove and set aside.
- In the same pot, sauté the onions on medium heat for at least 10-15 minutes until they are soft and beginning to caramelize; this is the secret to a sweet, deep base.
- Add the carrots and potatoes, then pour in the water or stock and bring to a boil.
- Return the beef to the pot, lower the heat, and simmer for 20 minutes or until the vegetables are fork-tender.
- Turn off the heat and break the curry roux blocks into the pot, stirring constantly until they are completely melted and the sauce thickens.
- Simmer on low for an additional 5 minutes to let the flavors meld together.
- Serve hot, ensuring the gravy is thick enough to coat the back of a spoon.
How to braise tender beef?

Why we love this
Braising is a slow-motion transformation where a tough cut of beef yields to time and heat, becoming so tender it can be shredded with nothing more than a dull fork. The meat bathes in a reduction of red wine and aromatics, absorbing every drop of flavor until it is dark, succulent, and intensely savory. This is the ‘star’ dish that people will be talking about long after the board is cleared. The richness of the braising liquid becomes a built-in sauce, making every bite a decadent experience that feels like it belongs in a five-star bistro.
Ingredients
- 2 lbs beef chuck roast, cut into large chunks
- 2 cups dry red wine (Cabernet or Merlot)
- 2 cups beef bone broth
- 2 tablespoons tomato paste
- 3 sprigs fresh rosemary and thyme
- Pearl onions and carrots
How to make it
- Preheat your oven to 325°F (160°C). Season the beef chunks heavily with salt and sear them in a Dutch oven until a dark crust forms on all sides.
- Remove the beef and sauté the pearl onions and carrots in the rendered fat until they are slightly browned.
- Stir in the tomato paste and cook for 2 minutes to take off the raw edge, then deglaze the pan with the red wine, scraping up all the brown bits (fond) from the bottom.
- Add the beef back into the pot along with the bone broth and herbs; the liquid should cover about two-thirds of the meat.
- Bring to a simmer on the stove, then cover with a tight lid and transfer to the oven.
- Braise for 2.5 to 3 hours, checking occasionally to ensure the liquid hasn’t evaporated too much.
- The beef is done when it offers zero resistance to a fork; let it rest in the liquid for 15 minutes before serving to keep it juicy.
Conclusion
Building a viral food board is all about embracing variety and putting your own spin on these classic techniques. Whether you choose to focus on the crunch of tempura or the slow-cooked richness of braised beef, the key is to present it with love and a bit of artistic flair. Now, grab your largest platter, gather your favorite people, and start creating your own edible masterpiece!