
Hello, my loves! There is something so incredibly magical about the quiet hush of a weekend morning, isn’t there? It is that precious time when the world slows down, and we can finally trade our hectic schedules for the soft, warm embrace of our kitchens. I have been spending so much time lately scrolling through my favorite feeds, and I’ve gathered a collection of recipes that are truly breaking the internet right now—but more importantly, they are the kind of dishes that make your heart feel full.
I wanted to curate a space today that feels like a gentle hug for your soul. Whether you are looking to host a sunny brunch or just want to treat yourself to a quiet, decadent dinner after a long week, these ideas are here to spark that little flicker of joy in your eyes. Let’s dive into these viral sensations together, making memories one delicious bite at a time, and turning our kitchens into the most beautiful sanctuaries of flavor and light.
Secret Glazed Lemon Bars Recipe

Why we love this
These lemon bars are like holding a piece of pure sunshine right in the palm of your hand, offering a zesty brightness that wakes up your palate. We absolutely adore how the buttery, shortbread crust crumbles perfectly against the silky, tart lemon curd that sits on top like a yellow velvet blanket. It is the ultimate balance of sweet and sour that feels both nostalgic and incredibly fresh for a lovely spring afternoon snack. Every bite is a reminder that simple, high-quality ingredients can create a moment of absolute bliss when shared with the people you love most.
Ingredients
- 1 cup unsalted butter, softened
- 1/2 cup granulated sugar
- 2 cups all-purpose flour
- 4 large eggs
- 1 1/2 cups granulated sugar (for filling)
- 1/4 cup flour (for filling)
- 2/3 cup fresh lemon juice
- Powdered sugar for dusting
How to make it
- Preheat your oven to 350°F (175°C) and grease a 9×13 inch baking dish with butter or parchment paper.
- In a medium bowl, cream together the softened butter, 1/2 cup sugar, and 2 cups of flour until a soft dough forms.
- Press the dough firmly into the bottom of your prepared pan and bake for 20 minutes or until it is lightly golden brown.
- While the crust is baking, whisk together the 4 eggs, 1 1/2 cups sugar, 1/4 cup flour, and the fresh lemon juice until the mixture is completely smooth and frothy.
- Pour the lemon mixture over the hot crust and return the pan to the oven for another 20 to 25 minutes until the topping is set.
- Allow the bars to cool completely at room temperature before refrigerating them for at least two hours to ensure they are firm enough to slice.
- Dust generously with powdered sugar right before serving to create that beautiful, snowy finish we all adore.
Essential Garlic Butter Chicken Dinner
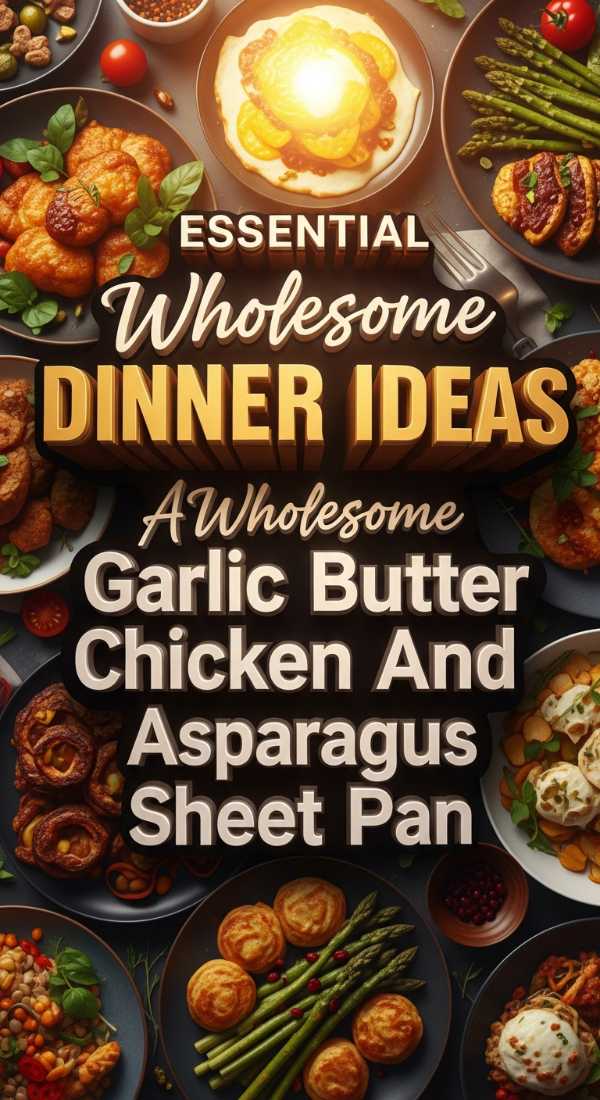
Why we love this
This dish is the epitome of comfort, wrapping you in a warm, savory hug that makes the stresses of the day simply melt away into the background. The way the garlic infuses into the melted butter creates an aroma that fills your home with a sense of cozy invitation and culinary sophistication. We love it because it is remarkably simple to prepare yet tastes like it came from a high-end bistro in the heart of a bustling city. It is the perfect centerpiece for a family dinner where stories are shared and laughter flows as freely as the delicious, golden sauce.
Ingredients
- 4 boneless, skinless chicken breasts
- 1/2 cup unsalted butter
- 6 cloves garlic, minced
- 1 teaspoon dried oregano
- 1/2 teaspoon red pepper flakes
- Fresh parsley, chopped
- Salt and black pepper to taste
How to make it
- Season your chicken breasts generously on both sides with salt, pepper, and a little bit of the dried oregano for an earthy base.
- In a large skillet over medium-high heat, melt two tablespoons of butter and sear the chicken until it is golden brown on both sides.
- Remove the chicken from the skillet and set it aside on a plate while you prepare the magic garlic butter sauce in the same pan.
- Lower the heat to medium and add the remaining butter, minced garlic, oregano, and red pepper flakes, stirring constantly so the garlic doesn’t burn.
- Once the butter is bubbling and the garlic is fragrant, return the chicken to the skillet, spooning the sauce over the meat repeatedly.
- Simmer for about 5-7 minutes until the chicken is cooked through and has absorbed the rich, buttery flavors from the pan.
- Garnish with a handful of fresh parsley and serve immediately while the sauce is still warm and velvety.
Fresh Berry Energy Parfait

Why we love this
When you need a gentle nudge of energy in the morning, this parfait is your best friend, acting as a vibrant and healthy start to a beautiful day. The layers of creamy yogurt and bursting, juicy berries provide a texture that is both satisfying and incredibly light on the stomach. We love the contrast between the crunch of the granola and the softness of the fruit, creating a symphony of sensations in every single spoonful. It’s a visual masterpiece in a glass that makes you feel like you are treating your body with the utmost kindness and care.
Ingredients
- 2 cups Greek yogurt (plain or vanilla)
- 1 cup fresh blueberries
- 1 cup sliced strawberries
- 1 cup honey-almond granola
- 2 tablespoons chia seeds
- 1 tablespoon honey or maple syrup
How to make it
- Begin by gathering clear glass jars or bowls so you can see the beautiful layers you are about to create for your breakfast.
- Place a generous dollop of Greek yogurt at the bottom of each container, smoothing it out with a spoon to create an even base.
- Add a layer of sliced strawberries and a few blueberries, pressing them gently into the yogurt so they stay in place against the glass.
- Sprinkle a layer of granola and a teaspoon of chia seeds over the fruit to provide that essential crunch and a boost of healthy fats.
- Repeat the layers of yogurt, fruit, and granola until you reach the top of your container, ending with a final flourish of berries.
- Drizzle a small amount of honey or maple syrup over the top for a touch of natural sweetness that ties all the flavors together.
- Serve immediately or let it sit in the fridge for ten minutes if you prefer the granola to soften slightly into the yogurt.
Ultimate Decadent Carrot Cake
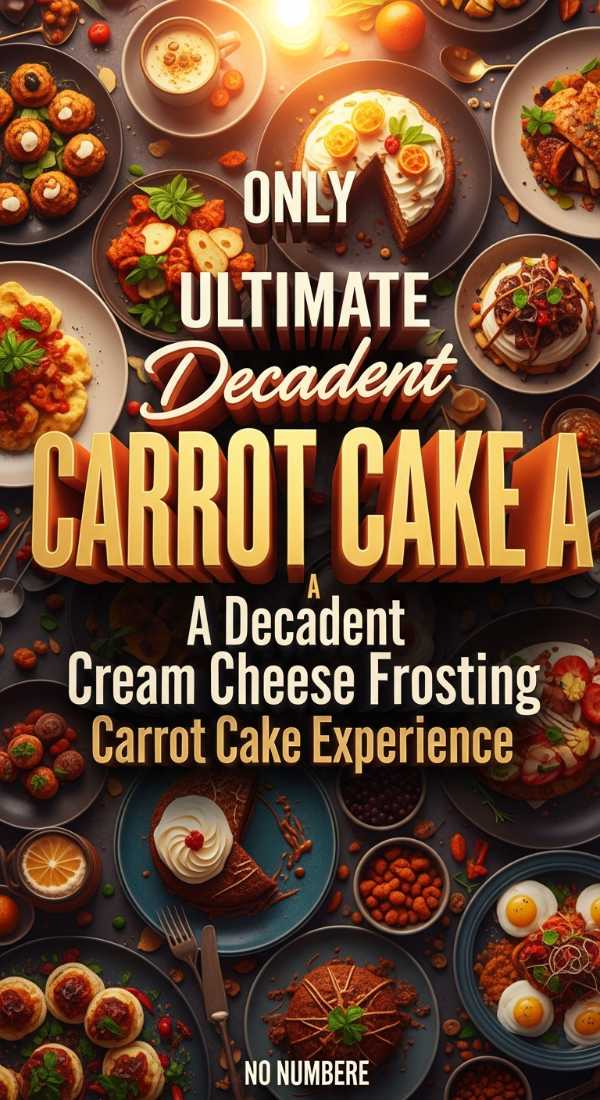
Why we love this
There is something deeply soulful about a carrot cake that is perfectly spiced and incredibly moist, reminding us of home-cooked meals and long Sunday afternoons. This recipe is a showstopper because it doesn’t shy away from being rich, featuring a thick layer of cream cheese frosting that feels like a soft cloud. We love the complexity of the flavors, from the earthy carrots to the sweet hints of cinnamon and nutmeg that dance on your tongue. It is a celebration of texture and warmth, making it the ideal dessert for any gathering that requires a touch of rustic elegance.
Ingredients
- 2 cups all-purpose flour
- 2 cups granulated sugar
- 1 teaspoon baking soda
- 2 teaspoons ground cinnamon
- 3 large eggs
- 1 cup vegetable oil
- 3 cups grated raw carrots
- 8 oz cream cheese, softened
- 1/2 cup butter, softened
- 3 cups powdered sugar
How to make it
- Preheat your oven to 350°F (175°C) and grease two 9-inch round cake pans to ensure your layers release perfectly after baking.
- In a large mixing bowl, whisk together the flour, sugar, baking soda, and cinnamon until there are no clumps remaining in the dry mix.
- Add the eggs and vegetable oil to the dry ingredients, mixing until well combined before folding in the three cups of freshly grated carrots.
- Divide the batter evenly between the two prepared pans and bake for 30-35 minutes or until a toothpick comes out clean from the center.
- Allow the cakes to cool in the pans for 10 minutes before transferring them to wire racks to cool completely to room temperature.
- Prepare the frosting by beating the cream cheese and butter together until smooth, then gradually adding powdered sugar until it reaches a fluffy consistency.
- Once the cakes are cold, frost the top of one layer, place the second layer on top, and cover the entire cake in a thick, luscious coat of frosting.
Craveable Creamy Vegetable Pasta
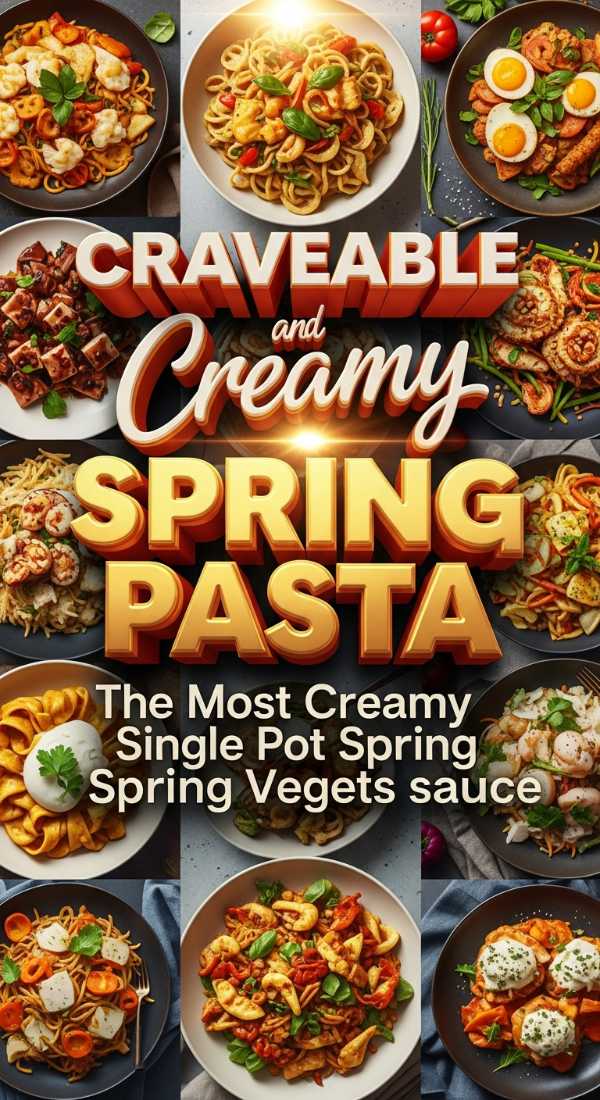
Why we love this
This pasta is the answer to those nights when you want something that feels indulgent but is secretly packed with the goodness of the garden’s best offerings. The cream sauce is so silky it coats every strand of pasta like a dream, while the vegetables add pops of color and bursts of freshness. We love how versatile this recipe is, allowing you to use whatever seasonal greens you have on hand to create a unique masterpiece every time. It’s a bowl of pure, unadulterated comfort that proves healthy eating can be just as satisfying as any traditional heavy meal.
Ingredients
- 12 oz fettuccine or penne pasta
- 2 cups broccoli florets
- 1 red bell pepper, sliced
- 1 cup heavy cream
- 1/2 cup grated Parmesan cheese
- 2 cloves garlic, minced
- 1 tablespoon olive oil
- Salt and pepper to taste
How to make it
- Bring a large pot of salted water to a boil and cook your pasta according to the package directions until it reaches an al dente texture.
- In a large skillet, heat the olive oil over medium heat and sauté the broccoli and red bell peppers until they are tender yet still vibrant.
- Add the minced garlic to the vegetables and cook for just one minute until the aroma fills your kitchen with savory goodness.
- Pour the heavy cream into the skillet and bring it to a gentle simmer, allowing it to thicken slightly as it bubbles softly.
- Stir in the Parmesan cheese until it is completely melted, creating a smooth and glossy sauce that smells absolutely heavenly.
- Toss the cooked pasta directly into the skillet, ensuring every single piece is thoroughly coated in the creamy, vegetable-flecked sauce.
- Season with extra salt and pepper as needed and serve in warm bowls for the ultimate cozy dining experience at home.
Irresistible Homemade Garden Dip

Why we love this
This garden dip is a total game-changer for your weekend snacking, offering a refreshing explosion of herbs and cool creaminess that is simply addictive. We love it because it celebrates the vibrant flavors of fresh dill, parsley, and chives, making it feel like a walk through a blooming meadow. It’s the perfect companion for crisp crackers or colorful vegetable crudités, acting as the social hub of any appetizer spread you might be planning. Simple to whip up but complex in flavor, this dip is the kind of secret weapon every host needs in their culinary repertoire.
Ingredients
- 1 cup sour cream
- 1/2 cup mayonnaise
- 1/4 cup fresh dill, finely chopped
- 2 tablespoons fresh chives, snipped
- 1 tablespoon fresh parsley, minced
- 1 teaspoon garlic powder
- 1/2 teaspoon onion powder
- Salt to taste
How to make it
- In a medium-sized mixing bowl, combine the sour cream and mayonnaise, whisking them together until the base is perfectly smooth and creamy.
- Gently fold in the fresh dill, chives, and parsley, ensuring the herbs are evenly distributed throughout the white creamy base for a beautiful green speckle.
- Stir in the garlic powder, onion powder, and a pinch of salt, tasting as you go to ensure the seasoning is exactly to your liking.
- Cover the bowl with plastic wrap and refrigerate for at least one hour to allow all the herbal flavors to meld and intensify beautifully.
- Transfer the chilled dip into a decorative serving bowl and garnish with an extra sprig of fresh dill for a professional, inviting look.
- Serve alongside a platter of sliced cucumbers, baby carrots, and your favorite artisanal crackers for a light and refreshing snack that everyone will love.
- Store any leftovers in an airtight container in the fridge for up to three days, though it rarely lasts that long because it’s so tasty.
Magic Delicate Strawberry Tart
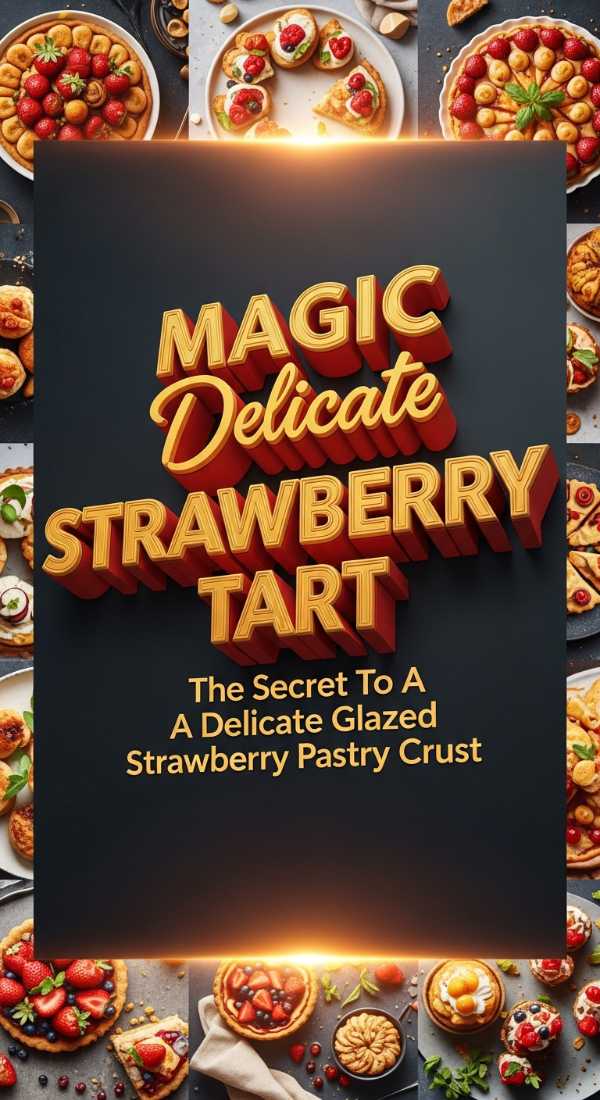
Why we love this
The magic of this strawberry tart lies in its stunning presentation and the delicate balance of a crisp pastry shell against a sweet, velvety filling. We love how the bright red strawberries are arranged like a blooming flower, making it a centerpiece that is almost too beautiful to eat—almost. It captures the very essence of summer in a single bite, providing a light and airy finish to any meal that feels both sophisticated and deeply joyful. This tart is a love letter to the season’s best fruit, wrapped in a buttery crust that melts away the moment it touches your tongue.
Ingredients
- 1 pre-baked 9-inch tart shell
- 8 oz mascarpone cheese or cream cheese
- 1/2 cup heavy cream
- 1/4 cup powdered sugar
- 1 teaspoon vanilla extract
- 2 lbs fresh strawberries, hulled and halved
- 1/4 cup apricot preserves (for glaze)
How to make it
- In a large bowl, beat the mascarpone cheese, heavy cream, powdered sugar, and vanilla extract together until the mixture is thick and forms soft peaks.
- Spread this creamy filling evenly across the bottom of your pre-baked and cooled tart shell, smoothing it out with an offset spatula for a clean finish.
- Starting from the outside edge, arrange the strawberry halves in concentric circles, overlapping them slightly to create a beautiful rose-like pattern.
- In a small microwave-safe bowl, heat the apricot preserves for about 20 seconds until they are liquid and easy to stir.
- Using a pastry brush, gently dab the warm preserves over the strawberries to give them a professional, high-gloss shine that protects the fruit.
- Chill the tart in the refrigerator for at least 30 minutes to let the filling set and the flavors harmonize before you attempt to slice it.
- Serve cold, perhaps with a tiny dusting of powdered sugar or a sprig of fresh mint for that extra touch of elegance and charm.
Luxury Sophisticated Spring Salmon
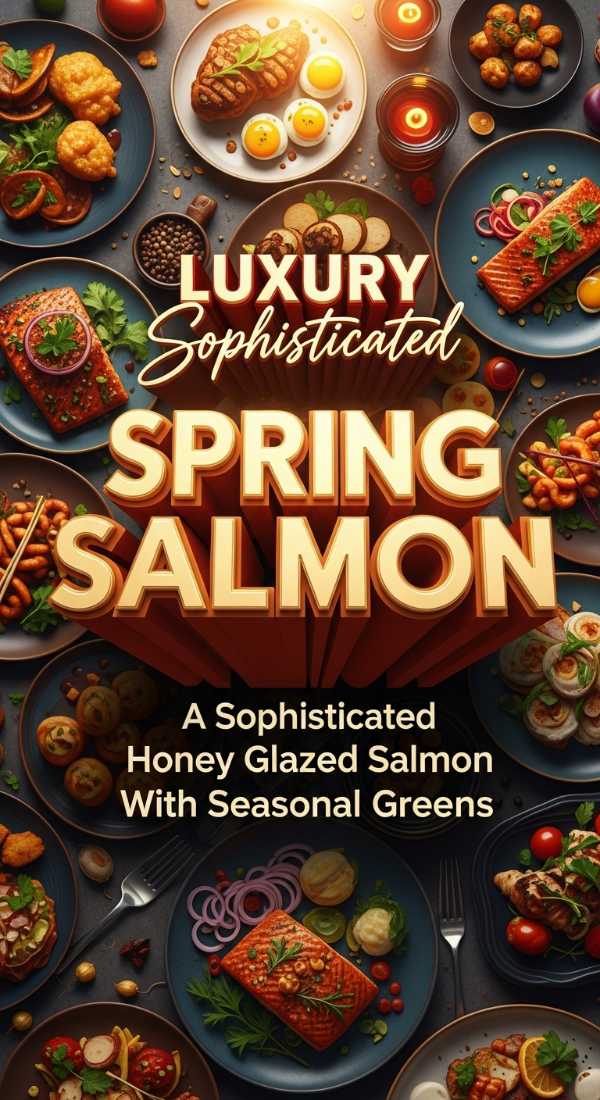
Why we love this
This salmon recipe is for those moments when you want to feel like you are dining at a five-star resort without ever having to leave your cozy home. The fish is seared to perfection, resulting in a buttery texture that flakes away effortlessly under your fork, paired with the bright acidity of lemon. We love the sophistication it brings to the table, proving that healthy, protein-rich meals can be incredibly luxurious and satisfying for the senses. It’s a clean, elegant dish that honors the natural beauty of the ingredients, leaving you feeling nourished, light, and completely pampered by your own cooking.
Ingredients
- 2 large salmon fillets
- 2 tablespoons olive oil
- 1 lemon, thinly sliced
- 3 cloves garlic, smashed
- 4 sprigs fresh thyme
- 2 tablespoons unsalted butter
- Salt and cracked black pepper
How to make it
- Pat the salmon fillets completely dry with a paper towel and season the skin and flesh sides generously with salt and cracked black pepper.
- Heat the olive oil in a heavy-bottomed skillet over medium-high heat until it begins to shimmer but is not yet smoking.
- Place the salmon fillets in the pan, skin-side down, and press gently with a spatula to ensure even contact for a perfectly crispy skin.
- Cook for about 4-5 minutes without moving them, then carefully flip the fillets over to sear the other side for another 2-3 minutes.
- Add the butter, smashed garlic, lemon slices, and thyme sprigs to the pan, letting the butter melt and foam around the fish.
- Tilt the pan slightly and use a large spoon to baste the salmon with the fragrant, hot garlic butter for the final minute of cooking.
- Remove from heat and serve the salmon topped with the softened lemon slices and a drizzle of the remaining pan juices for a burst of flavor.
Perfect Fluffy Berry Muffins

Why we love this
Muffins are the ultimate kitchen hug, and these berry-filled delights are no exception, rising high in the oven with golden, sugar-crusted tops that are simply irresistible. We love the way the berries burst during baking, creating little pockets of warm jam throughout the soft, tender crumb of the muffin. They make your whole house smell like a professional bakery, inviting everyone to the kitchen for a warm treat and a cup of coffee. Whether it’s a rainy morning or a sun-drenched brunch, these muffins bring a sense of homey comfort that is impossible not to smile at.
Ingredients
- 2 cups all-purpose flour
- 1/2 cup granulated sugar
- 1 tablespoon baking powder
- 1/2 teaspoon salt
- 1 egg
- 1 cup whole milk
- 1/3 cup vegetable oil
- 1 1/2 cups mixed berries (blueberries, raspberries)
How to make it
- Preheat your oven to 400°F (200°C) and line a standard 12-cup muffin tin with paper liners to prevent sticking and make cleanup easy.
- In a large bowl, whisk together the flour, sugar, baking powder, and salt until the dry ingredients are thoroughly combined and airy.
- In a separate smaller bowl, beat the egg slightly before whisking in the milk and vegetable oil until the wet mixture is uniform.
- Pour the wet ingredients into the dry ingredients and stir gently with a spatula just until combined; be careful not to overmix the batter.
- Gently fold in the fresh or frozen mixed berries, distributing them evenly so every muffin gets a generous portion of fruit.
- Spoon the batter into the prepared muffin cups, filling them nearly to the top to ensure you get those beautiful, tall bakery-style muffin tops.
- Bake for 18-20 minutes until the tops are golden brown and a toothpick inserted into the center comes out clean and free of wet batter.
Refreshing Flavorful Shrimp Tacos

Why we love this
Shrimp tacos are like a mini-vacation on a plate, bringing a bright, zesty, and playful energy to your weekend dinner routine that everyone will enjoy. We love the combination of the snap from the perfectly seasoned shrimp and the cool, crunchy texture of a fresh cabbage slaw drizzled with lime. It is a meal that feels light and festive, encouraging everyone to build their own perfect taco and linger over the table for just a bit longer. These tacos are a celebration of bold spices and fresh produce, proving that fast and easy can also be incredibly vibrant and gourmet.
Ingredients
- 1 lb medium shrimp, peeled and deveined
- 2 tablespoons taco seasoning
- 1 tablespoon olive oil
- 8 small corn or flour tortillas
- 2 cups shredded cabbage
- 1/2 cup sour cream
- 1 lime, juiced
- Fresh cilantro for garnish
How to make it
- Toss the shrimp in a bowl with the taco seasoning and olive oil until every piece is thoroughly coated in the savory spice blend.
- In a separate bowl, whisk together the sour cream, lime juice, and a pinch of salt to create a zesty crema for drizzling.
- Mix the shredded cabbage with a spoonful of the lime crema to make a simple, crunchy slaw that will provide the base for your tacos.
- Heat a large skillet over medium-high heat and cook the shrimp for about 2 minutes per side until they are pink, opaque, and slightly charred.
- While the shrimp are cooking, lightly char your tortillas over a gas flame or in a dry pan until they are warm and pliable for folding.
- Assemble the tacos by placing a heap of the cabbage slaw on each tortilla, followed by 3-4 pieces of the seasoned, hot shrimp.
- Drizzle generously with the remaining lime crema and garnish with fresh cilantro and an extra squeeze of lime before serving to your hungry guests.
A Weekend of Flavor and Connection
I hope these recipes bring a little bit of extra light into your kitchen this weekend, my loves. There is something so restorative about taking the time to cook for yourself and your family, turning simple ingredients into a celebration of life. Remember that the secret ingredient is always a little bit of love and a lot of presence. Enjoy every bite, and I can’t wait to see which of these viral ideas you decide to try first in your own beautiful homes!