
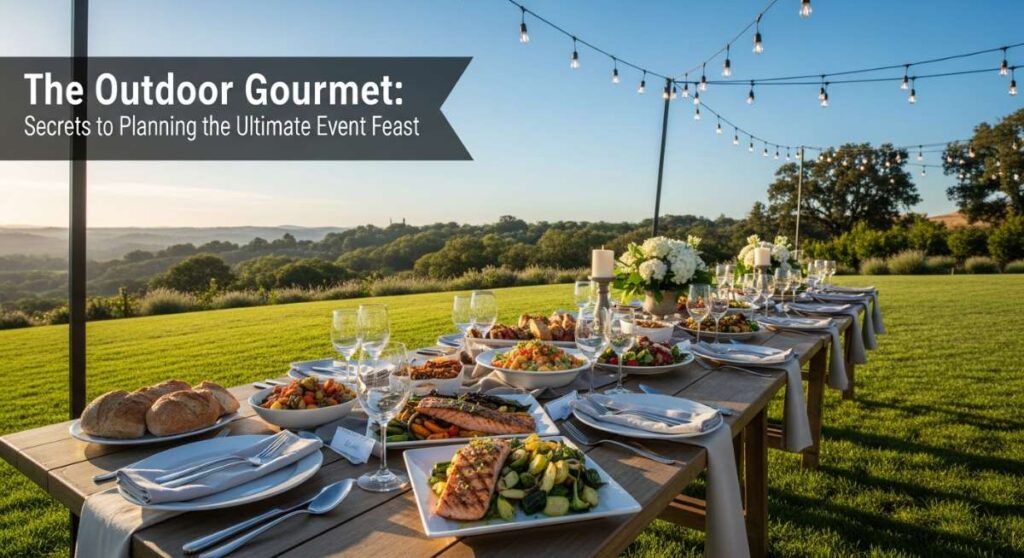
Hello, my loves! There is something truly magical about the way food tastes when it is shared under the wide-open sky. Whether it’s the smoky aroma of a campfire breakfast dancing on the morning breeze or the elegant spread of a bridal shower set against a sun-drenched garden, outdoor dining captures a piece of our hearts that indoor tables just can’t reach. It’s about the laughter that carries across the lawn and the feeling of the grass beneath our feet as we celebrate life’s biggest milestones.
Today, I want to wrap you in a warm, cloud-soft embrace and guide you through the art of the outdoor feast. We are diving deep into those secrets that turn a simple gathering into a soulful experience your guests will talk about for years. From the rustic charm of a cast-iron skillet to the polished sophistication of a professional-grade dessert table, let’s explore how to nourish the people you love with style, grace, and plenty of flavor.
The Secret To Making The Ultimate Campfire Breakfast Skillet

Why we love this
There is something so profoundly grounding about waking up to the smell of pine and woodsmoke while a heavy cast iron skillet sizzles over an open flame. This breakfast is more than just a meal; it is a ritual of slow living that gathers everyone around the heat, rubbing sleep from their eyes as the sunrise paints the sky in shades of gold and apricot. It’s the perfect way to fuel your body for a day of hiking or simply sitting by the lake, soaking in the quiet. We love how the smoky heat from the charcoal transforms simple potatoes into something truly legendary.
Ingredients
- 1 lb thick-cut bacon, chopped
- 2 lbs russet potatoes, cubed small
- 1 large sweet onion, diced
- 2 bell peppers (red and green), chopped
- 8 large farm-fresh eggs
- 2 cups shredded sharp cheddar cheese
- Fresh chives and sliced avocado for garnish
- Salt, pepper, and smoked paprika
How to make it
- Begin by preparing a steady bed of hot coals in your fire pit; place a sturdy grill grate over the flames to create a level cooking surface.
- Place your large cast iron skillet on the grate and add the chopped bacon, frying it until it is perfectly crispy and has rendered its flavorful fat.
- Remove the bacon with a slotted spoon, leaving the drippings in the pan, and toss in your cubed potatoes, seasoning them generously with salt, pepper, and paprika.
- Cover the skillet with a lid or foil and cook for about 15-20 minutes, stirring occasionally, until the potatoes are tender on the inside and golden-brown on the outside.
- Stir in the onions and peppers, cooking for another 5 minutes until they are soft and fragrant, then mix the crispy bacon back into the medley.
- Use a spoon to create eight small wells in the mixture and carefully crack an egg into each hole, then sprinkle the entire skillet with cheese.
- Cover once more for 3-5 minutes until the egg whites are set but the yolks remain beautifully runny, then top with chives and avocado before serving directly from the pan.
These Easy Graduation Finger Food Ideas Will Impress Every Single Guest

Why we love this
Graduations are such whirlwind days of joy, and the last thing you want is for your guests to be tethered to a heavy plate while they try to mingle. These finger foods are designed to be light, sophisticated, and incredibly easy to handle while holding a glass of bubbly in the other hand. They bring a touch of gourmet flair to the party without requiring you to spend the entire afternoon in the kitchen. We adore how these bites look like miniature pieces of art, adding a sense of celebration to every single tray that passes through the crowd.
Ingredients
- Miniature phyllo shells
- Creamy brie cheese, cut into small cubes
- Fig jam or apricot preserves
- Fresh rosemary sprigs
- Prosciutto slices, torn into strips
- Honey for drizzling
- Toasted walnut halves
How to make it
- Preheat your oven to 350°F and line a large baking sheet with parchment paper to ensure your delicate pastry shells don’t stick.
- Arrange the mini phyllo shells in neat rows on the baking sheet, ensuring there is a little space between each one for even heat distribution.
- Place a small cube of brie cheese into each shell, followed by a half-teaspoon of fig jam tucked right alongside the cheese.
- Bake the shells for 8 to 10 minutes, just until the brie is meltingly soft and the phyllo edges have turned a deep, appetizing golden brown.
- While they are still warm, top each bite with a small strip of salty prosciutto and a single toasted walnut half for a satisfying crunch.
- Finish each piece with a tiny needle of fresh rosemary and a very light drizzle of golden honey to balance the savory and sweet notes.
- Transfer the appetizers to a beautiful wooden board or a slate platter and serve them while the cheese is still wonderfully gooey.
Creating The Most Elegant Bridal Shower Food Table Display Ever

Why we love this
A bridal shower is a celebration of love and new beginnings, and the food table should feel like a physical manifestation of that romance. By focusing on height, texture, and a soft color palette, you can create a display that feels like a dream pulled from the pages of a high-end lifestyle magazine. We love how a well-thought-out display acts as the centerpiece of the room, drawing guests in with its beauty before they even take their first bite. It’s all about creating an atmosphere where the bride feels truly cherished and the guests feel pampered.
Ingredients
- A mix of vintage glass and ceramic cake stands
- Fresh eucalyptus and blush-colored roses
- Linen table runners in soft cream or champagne
- Gourmet crackers and artisanal breadsticks
- Selection of soft and hard cheeses
- Seasonal fruits like grapes, berries, and sliced pears
- Handwritten parchment labels for each food item
How to make it
- Start by draping your linen runner across the table in an intentional, slightly ruffled way to create a soft, romantic foundation for your display.
- Position your tallest cake stands toward the back and center of the table, using them to anchor the visual weight and create varying levels of height.
- Tuck fresh eucalyptus and roses around the bases of the stands, weaving them through the platters to create a lush, garden-like feeling across the surface.
- Place your largest items, like cheese wheels and bread baskets, on the lower levels, filling the gaps with small bowls of olives, nuts, and glistening fruits.
- Ensure that colors are distributed evenly; for example, if you have red strawberries on one side, balance them with red grapes or a berry tart on the opposite side.
- Add the finishing touch by placing your handwritten parchment labels next to each dish so guests know exactly what delicacies they are about to enjoy.
- Step back and adjust any crowded areas, ensuring there is a natural flow that allows guests to move easily around the table without disturbing the decor.
The Easiest Graduation Party Food Ideas For Large Crowds

Why we love this
When you are hosting a large crowd for a graduation, the goal is to provide maximum flavor with minimum stress, allowing you to actually enjoy the milestone with your graduate. A self-serve station is the ultimate secret weapon for large parties because it empowers guests to customize their own meals while keeping the host out of the kitchen. We love this approach because it feels abundant and generous without requiring a plated service or a complicated timeline. It creates a relaxed, festive vibe where everyone can eat exactly what they like at their own pace.
Ingredients
- Slow-cooked pulled pork or seasoned shredded chicken
- Large brioche buns and slider rolls
- Creamy coleslaw and tangy pickles
- Assorted BBQ sauces (sweet, spicy, and mustard-based)
- Large trays of baked mac and cheese
- A giant bowl of mixed greens with vinaigrette on the side
- Bulk bags of kettle-cooked potato chips
How to make it
- Prepare your proteins in large slow cookers or roasting pans the morning of the party, ensuring they are kept at a food-safe, warm temperature throughout the event.
- Set up a long buffet table with a clear starting point, placing your stack of sturdy plates and napkins at the very beginning of the line.
- Arrange the buns in large baskets next to the meat, followed by a variety of toppings like pickles, onions, and different styles of BBQ sauce for customization.
- Place the side dishes like mac and cheese and coleslaw in large chafing dishes or insulated bowls to maintain their temperature and freshness for hours.
- Create a separate “crunch station” with various bowls of potato chips, which are easy for guests to grab and add to their plates as a side.
- Make sure to provide long-handled serving spoons and tongs for every dish to keep the line moving quickly and maintain hygiene for your many guests.
- Keep a small backup of each item in the kitchen or a cooler so you can quickly replenish the platters as they start to run low during the peak of the party.
Perfectly Seasoned Camping Food Ideas For Your Next Outdoor Trip
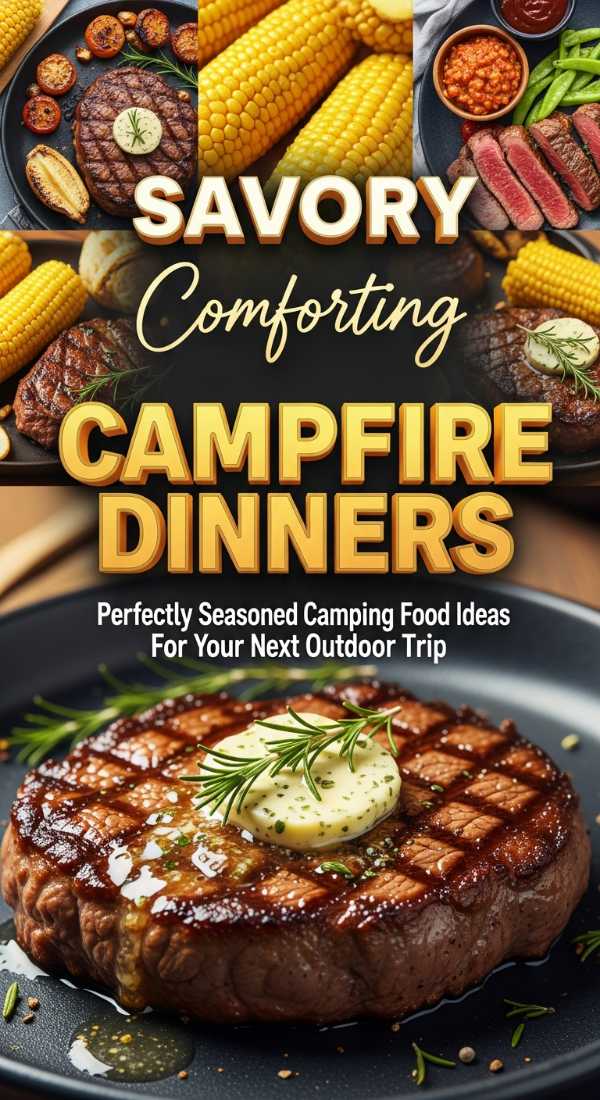
Why we love this
Camping food shouldn’t just be about survival; it should be a culinary highlight of your trip that brings everyone together after a long day of adventure. The secret lies in pre-mixing your seasonings at home so that you can achieve complex, chef-quality flavors with very little effort in the middle of the woods. We love how a well-seasoned foil packet or grilled skewer can turn a simple tent-side dinner into a gourmet experience that rivals any backyard BBQ. It’s about bringing that touch of home-cooked comfort to the rugged beauty of the great outdoors.
Ingredients
- Steak tips or chicken thighs, cut into bite-sized pieces
- Pre-mixed “Signature Rub” (garlic powder, smoked paprika, cumin, dried oregano, salt, pepper)
- Corn on the cob, cut into rounds
- Zucchini and bell peppers, sliced thick
- Olive oil or melted butter
- Heavy-duty aluminum foil
- Fresh lemon wedges for finishing
How to make it
- At home, mix your signature spices into a small airtight container and pre-cut your meats and vegetables to save time and reduce mess at the campsite.
- When you’re ready to cook, lay out large squares of heavy-duty aluminum foil and place a portion of meat and vegetables in the center of each.
- Drizzle the ingredients generously with olive oil and sprinkle a heavy dose of your pre-mixed seasoning over everything, tossing lightly to coat.
- Fold the foil tightly to create a sealed packet, making sure to leave a little bit of air space inside for the steam to circulate and cook the food evenly.
- Place the packets directly onto the hot grill grate or nestled in the glowing coals of your campfire, avoiding the direct flames to prevent burning.
- Cook for about 15-20 minutes, flipping once halfway through, until the meat is cooked through and the vegetables are tender and slightly caramelized.
- Carefully open the packets—watch out for the hot steam!—and squeeze a fresh lemon wedge over the top before eating right out of the foil for zero cleanup.
The Most Popular Graduation Finger Food Ideas For Your Celebration

Why we love this
There is a reason certain appetizers become staples at every graduation party: they are the crowd-pleasers that bridge the gap between generations. These popular picks combine familiar, comforting flavors with a presentation that feels elevated enough for a major life achievement. We love how these classic bites bring a sense of nostalgia to the party while still feeling fresh and relevant for the modern graduate. They are the dishes that guests reach for again and again, ensuring that no one leaves your celebration feeling anything less than perfectly satisfied.
Ingredients
- Caprese Skewers: Cherry tomatoes, mini mozzarella pearls, fresh basil
- Chicken Satay: Thin strips of chicken breast, peanut dipping sauce
- Mini Quiches: Pre-made pastry shells, eggs, spinach, and feta
- Vegetable Spring Rolls with sweet chili sauce
- Swedish Meatballs with decorative cocktail toothpicks
- Balsamic glaze for drizzling
- Fresh parsley for a pop of color
How to make it
- For the Caprese skewers, thread a tomato, a basil leaf, and a mozzarella pearl onto a small bamboo stick, then arrange them in a circular pattern on a white platter.
- Prepare the chicken satay by marinating the meat in a mix of soy sauce and ginger before grilling them on skewers until they have beautiful charred marks.
- Bake your mini quiches in a muffin tin or buy high-quality pre-made ones, serving them at room temperature so they are easy for guests to grab as they walk by.
- Arrange the spring rolls and meatballs on separate trays, ensuring each has its own dedicated small bowl of dipping sauce placed right in the center.
- Before serving, drizzle the Caprese skewers with a thick balsamic glaze and sprinkle chopped parsley over the meatballs and quiches for a professional finish.
- Use tiered serving platters to display these items, which not only saves space on your table but also makes the food look more abundant and inviting.
- Keep a small supply of napkins and a discarded toothpick bin nearby to ensure the food station remains clean and tidy throughout the entire celebration.
A Dreamy Bridal Shower Food Table Display That Looks Professional

Why we love this
The difference between a nice food table and a professional-looking display is all in the details and the intentional use of a cohesive theme. When you walk into a room and see a table that perfectly matches the bride’s personality and the event’s aesthetic, it sets an immediate tone of elegance and care. We love how using a singular focal point—like a towering floral arrangement or a curated beverage station—can anchor the entire look. It’s about creating a visual story that makes the food feel like an integrated part of the decor rather than just an afterthought.
Ingredients
- Uniform serving platters (all white or all marble for a clean look)
- Gold or silver serving tongs and spoons
- A variety of heights (using boxes hidden under the tablecloth)
- Votive candles in glass holders
- A large centerpiece floral arrangement
- High-quality paper napkins that match the color scheme
- Decorative framed menu listing the items
How to make it
- Choose a color palette of three main tones (like sage, cream, and gold) and ensure every element on the table, from the food to the flowers, fits this theme.
- Create an “invisible architecture” by placing sturdy boxes or crates on the table first, then draping your tablecloth over them to create various levels for your platters.
- Place your largest, most impressive dish on the highest level in the center to serve as the visual anchor for the entire display.
- Distribute smaller dishes and bowls around the focal point, ensuring there is a balance of textures and shapes to keep the eye moving across the table.
- Tuck small votive candles and sprigs of greenery into any empty spaces to create a sense of depth and a warm, inviting glow that feels very high-end.
- Place a beautifully framed menu at one end of the table so guests can read about the offerings, adding an extra layer of professional polish to the setup.
- Check the lighting in the room; if possible, position the table near a window for natural light or use soft warm lamps to highlight the food’s natural colors.
Creative Easy Graduation Party Food Ideas For A Sweet Dessert Table

Why we love this
The dessert table is often the most photographed part of a graduation party, and it’s the perfect place to let your creativity shine through. By mixing homemade treats with clever store-bought shortcuts, you can create a sugar-filled wonderland that looks like it was catered by a boutique bakery. We love how dessert tables allow you to incorporate the graduate’s school colors and personal favorites in a way that feels playful and celebratory. It’s the final sweet note of the event, leaving your guests with a lingering sense of joy and a little bit of a sugar rush as they head home.
Ingredients
- “Diploma” Cookies: Pirouettes or rolled wafers tied with thin red ribbons
- Graduation Cap Cupcakes: Reese’s cups topped with a square chocolate bar
- Assorted macarons in the graduate’s school colors
- A giant bowl of color-coordinated M&Ms or jelly beans
- Miniature fruit tarts with a glossy glaze
- A central “Class of [Year]” cake or large cookie cake
- Clear glass jars of varying sizes for candy
How to make it
- Start by building the “Diploma” cookies: take rolled wafer cookies and carefully tie a small piece of thin ribbon around the center of each to resemble a scroll.
- Assemble the “Grad Cap” cupcakes by frosting a standard cupcake, placing a miniature peanut butter cup upside down on top, and attaching a thin chocolate square with a dab of icing.
- Arrange your apothecary jars and candy bowls at different heights using small pedestals, filling them with color-matched sweets for a vibrant pop.
- Place the macarons on a tiered stand, alternating colors to create a beautiful ombre effect that looks incredibly sophisticated and modern.
- Position the main celebration cake in the center of the table, making sure it is elevated so it remains the undisputed star of the sweet display.
- Scatter small decorations like graduation cap confetti or tiny scrolls across the tablecloth between the plates to tie the entire theme together.
- Provide small “to-go” bags or boxes so guests can take a few treats home with them, which serves as both a dessert and a party favor in one.
Easy And Filling Camping Food Ideas To Keep Everyone Happy
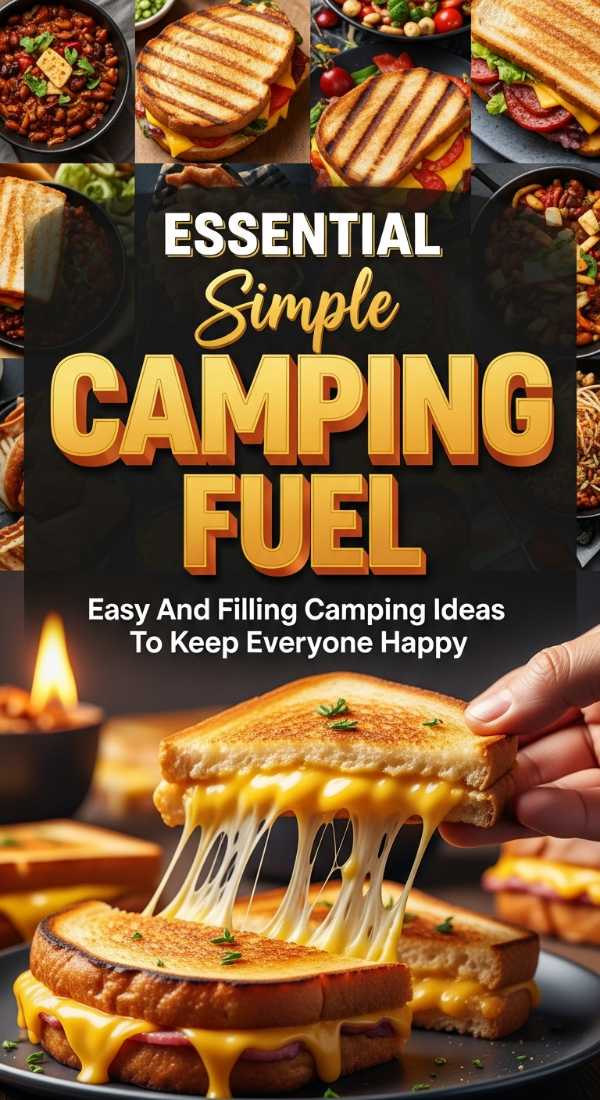
Why we love this
When you are spending your days outdoors, hunger hits differently—it’s a deep, soul-level craving for something hearty and satisfying. These filling camping meals are designed to be substantial enough to keep the most active hikers happy while being simple enough to cook over a basic camp stove or fire. We love how these one-pot wonders minimize cleanup while maximizing the “cozy factor,” making you feel pampered even when you are miles away from civilization. There is a special kind of magic in sharing a big, steaming pot of something delicious while the stars begin to twinkle overhead.
Ingredients
- 1 lb ground beef or turkey
- 2 cans of chili beans in sauce
- 1 can of diced tomatoes with green chilies
- 1 large onion, chopped
- Cheddar cheese and sour cream for topping
- A bag of corn chips (for “Walking Tacos”)
- Chili powder, cumin, and garlic salt
How to make it
- In a large Dutch oven or heavy pot over the camp stove, brown the ground meat along with the chopped onions until the meat is fully cooked and onions are translucent.
- Drain any excess fat carefully, then stir in the beans, diced tomatoes, and all of your spices, mixing thoroughly to combine the flavors.
- Let the mixture simmer gently for at least 20 minutes, allowing the liquid to thicken and the spices to penetrate every bite of the meat and beans.
- While the chili simmers, prepare the toppings and open individual-sized bags of corn chips if you plan on serving them as “Walking Tacos.”
- Ladle the hot chili directly into the chip bags or into sturdy bowls, then pile on the shredded cheese and a generous dollop of sour cream.
- If you have a campfire going, you can place the pot on the edge of the grate to keep it warm for second helpings, which are almost guaranteed.
- Enjoy the meal with sturdy spoons, and remember that the best part of camping chili is how the flavors deepen if you happen to have any leftovers for breakfast!
Elevate Your Celebration With These Unique Graduation Finger Food Ideas

Why we love this
To truly set your graduation party apart, it’s wonderful to include a few unexpected flavors that surprise and delight your guests’ palates. Moving beyond the standard sliders and chips shows a level of thoughtfulness and culinary curiosity that reflects the graduate’s bright future and new horizons. We love these unique bites because they spark conversation and give people a chance to try something they might not have had before in a party setting. They are the “secret ingredients” of a truly memorable event, adding a layer of gourmet sophistication that feels both modern and deeply personal.
Ingredients
- Watermelon and Feta Cubes: Fresh watermelon, feta block, mint leaves
- Mini Avocado Toasts: Small baguette rounds, smashed avocado, chili flakes
- Shrimp Cocktail Shooters: Individual shot glasses, shrimp, spicy cocktail sauce
- Cucumber Rounds with herbed goat cheese and smoked salmon
- Bacon-wrapped dates stuffed with almonds
- Lime wedges for garnishing the shrimp
- Microgreens for a high-end garnish
How to make it
- Create the watermelon bites by cutting the fruit and feta into identical 1-inch cubes, stacking them, and securing them with a toothpick topped with a fresh mint leaf.
- Toast your mini baguette rounds until they are crisp, then spread a thick layer of seasoned avocado on each and finish with a pinch of chili flakes and microgreens.
- For the shrimp shooters, put a tablespoon of cocktail sauce in the bottom of a shot glass and hang a perfectly chilled, cooked shrimp over the rim with a tiny lime wedge.
- Slice cucumbers into thick rounds and use a piping bag to add a swirl of herbed goat cheese to each, followed by a small ribbon of smoked salmon.
- Stuff each date with a whole almond, wrap it in a half-slice of bacon, and bake at 400°F until the bacon is crispy and the date is warm and sweet.
- Arrange these unique items on clean, modern platters, grouping them by color or type to create a visually striking and organized appetizer station.
- Finish the presentation by lightly misting the fruit and vegetable bites with a touch of cold water to keep them looking fresh and vibrant under the sun.
Conclusion: The Heart of the Feast
As we wrap up our journey through the art of the outdoor gourmet, remember that the most important ingredient in any feast is the love you pour into it. Whether you are scrubbing a cast iron skillet by a river or arranging delicate roses on a silk runner, your effort speaks volumes to the people you hold dear. These gatherings are the snapshots of our lives—the moments where we slow down enough to truly see one another and celebrate the beauty of being together. So go forth, my loves, and create your own ultimate feasts. May your fires be warm, your tables be beautiful, and your hearts be forever full. Until next time, keep dreaming and keep dining under the stars.