
Beyond the Polish: Secret Techniques for Luxury Aesthetic Nail Art
Hello, my loves. There is something so incredibly grounding about taking a moment for ourselves, isn’t there? In the rush of our daily lives, our hands do so much work—they type, they hold, they comfort—and I truly believe they deserve to be treated like the masterpieces they are. When we talk about luxury aesthetic nail art, we aren’t just talking about a color; we’re talking about a feeling, a soft whisper of elegance that follows you through your day.
Lately, I’ve been diving deep into the world of professional techniques that elevate a simple manicure into a work of art. It’s about more than just the polish; it’s about the soul behind the brush. I want to share these little secrets with you, so you can transform your self-care ritual into a high-end experience that feels like a warm, cloud-soft embrace for your spirit.
0. Gorgeous Dreamy Swirl Nail Designs

Who it’s Best For
This style is for the dreamers and the poets at heart. If you love organic movement and designs that feel fluid and free-spirited rather than rigid, these dreamy swirls will speak to your soul. It’s perfect for those who want a touch of artistic flair without losing that soft, feminine touch.
Key Features & Techniques
The secret to the perfect swirl is a long, thin striper brush and a very light hand. You want the lines to look like they are dancing across the nail. Pro tip: use a ‘wet-on-wet’ technique with gel to let the colors bleed slightly at the edges for that truly ethereal, marble-adjacent flow.
Maintenance & Styling Routine
Because these designs often use multiple colors, they grow out quite gracefully. I recommend a high-shine top coat every 5 days to keep the lines looking crisp and the colors vibrant. Pair these with delicate gold rings to emphasize the movement of the art.
Must-Have Products
- Long-handle striper brush (11mm+)
- Creamy pastel gel polishes
- Non-wipe high gloss top coat
- OPI ‘Bubble Bath’ as a base
1. Breathtaking Ethereal Aura Nail Looks
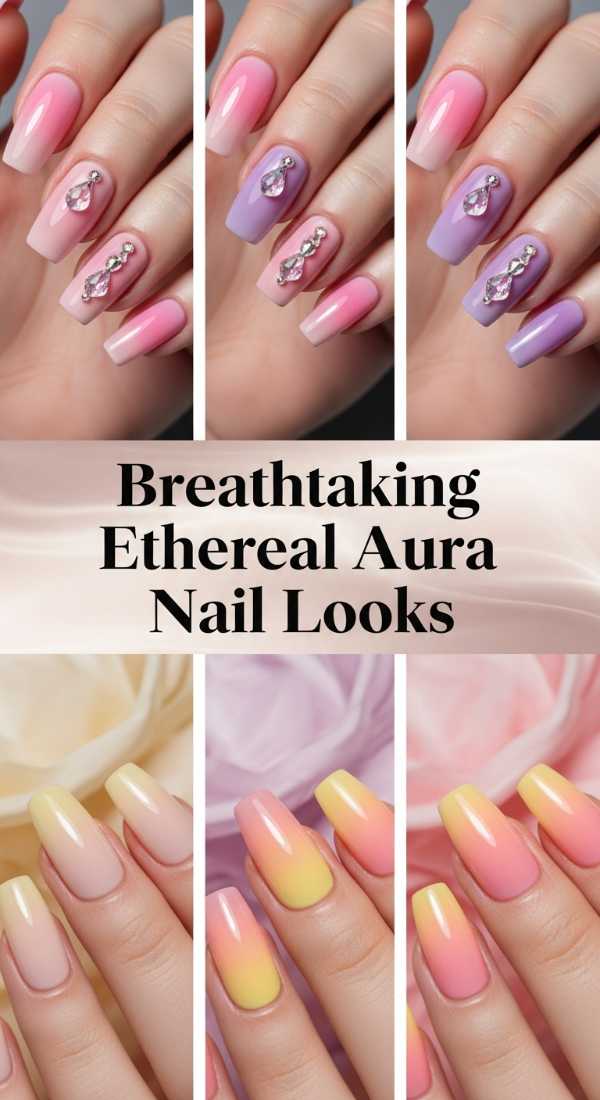
Who it’s Best For
Aura nails are for the soft-hearted and the spiritually inclined. If you want your nails to reflect your inner glow or your ‘vibe’ for the month, this blurred, gradient look is your perfect match. It’s subtle, yet undeniably modern and chic.
Key Features & Techniques
Achieving that seamless ‘glow’ in the center requires either a handheld airbrush or a very fine makeup sponge. The trick is to apply the center color in thin, tapping layers, moving outward to create a soft halo effect that disappears into the base color.
Maintenance & Styling Routine
Since the center color is thin, it can sometimes fade. Ensure you are using a UV-protective top coat to prevent the ‘aura’ from yellowing. This look pairs beautifully with oversized cashmere sweaters and soft, dewy makeup.
Must-Have Products
- Mini airbrush machine or sponge applicators
- Highly pigmented jelly polishes
- Matte top coat (optional for a velvet finish)
- Essie ‘Sugar Daddy’ base
2. Stunning Radiant Chrome Nail Styles
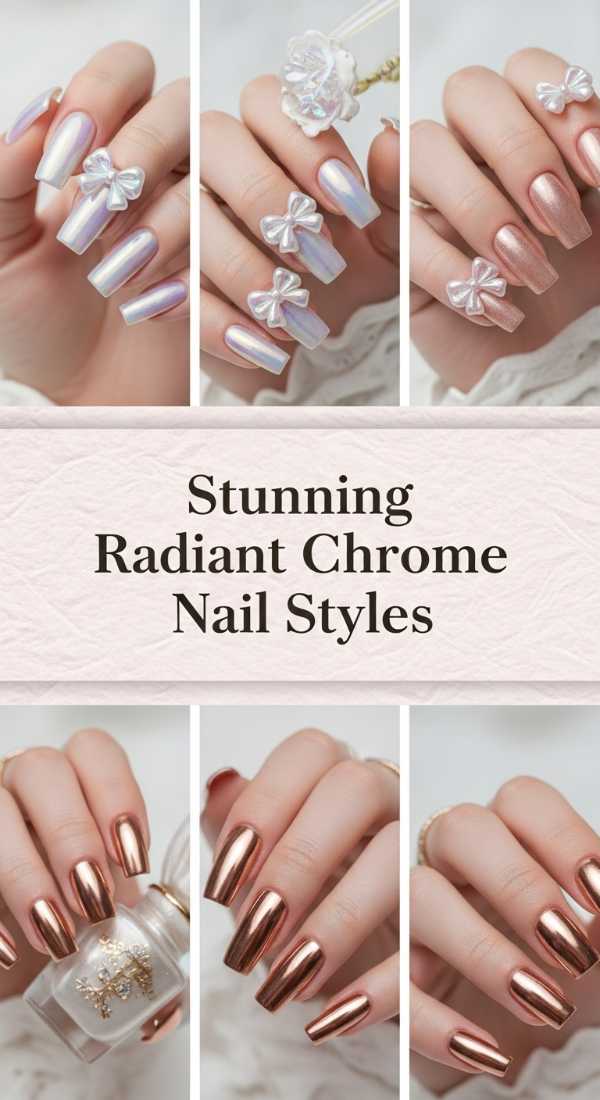
Who it’s Best For
For my loves who want to shine like a literal diamond. This is for the woman who walks into a room and wants her presence felt. It’s bold, it’s futuristic, and it’s incredibly sophisticated when done with the right undertones.
Key Features & Techniques
The secret is the ‘rub-in’ method. You must apply a non-wipe top coat first, cure it for only 30 seconds (so it’s still slightly ‘tacky’ at a molecular level), and then buff the chrome powder in with a silicone tool until it turns into a mirror.
Maintenance & Styling Routine
Chrome can chip if the edges aren’t sealed. Always double-seal the free edge with a base coat and then a final top coat. Keep a small bottle of cuticle oil in your bag; nothing ruins chrome like dry skin!
Must-Have Products
- Fine-milled silver or gold chrome powder
- Silicone buffing tool
- Kupa High Gloss Top Coat
- Lint-free wipes
3. Elegant Glamorous Rhinestone Nail Art
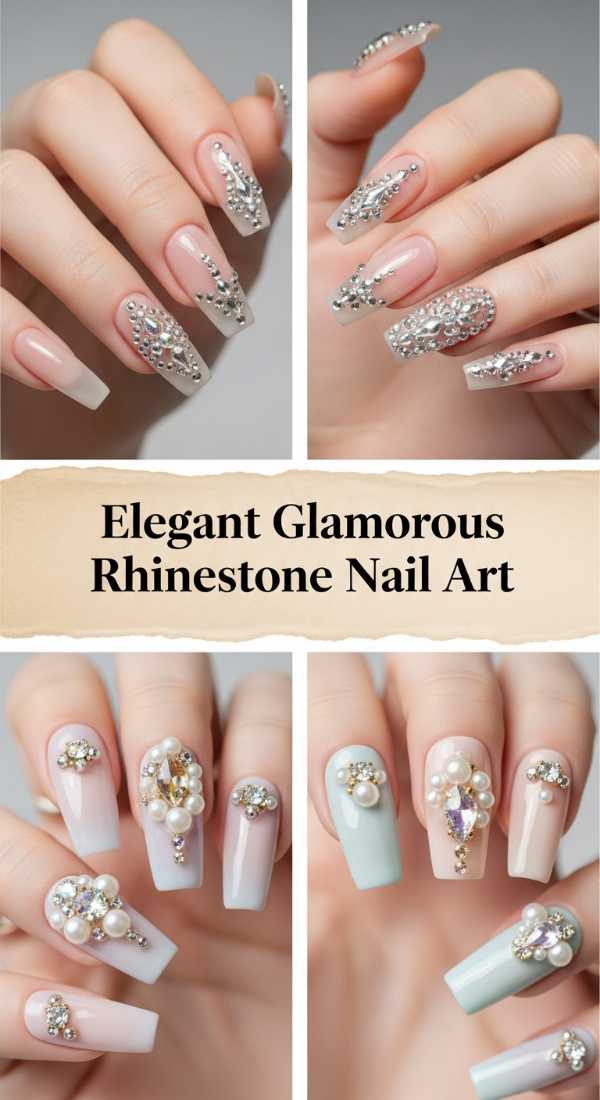
Who it’s Best For
This is for the unapologetic lover of glamour. If your motto is ‘more is more,’ but you still want to keep it tasteful, rhinestone accents are your best friend. It’s perfect for special occasions or whenever you need that extra spark of joy.
Key Features & Techniques
Never use regular glue! For a luxury finish, use a dedicated ‘bling gel’ or a thick builder gel to set your stones. Place them near the cuticle or in a vertical line to elongate the nail bed. Always use genuine glass crystals for that high-end refraction.
Maintenance & Styling Routine
Avoid harsh chemicals or scrubbing while wearing 3D art. Use a soft nail brush to clean around the stones. This look is best styled with a simple, elegant silk slip dress to let the nails be the statement piece.
Must-Have Products
- Swarovski or high-quality glass flatback crystals
- Crystal Katana picker tool
- Loyal-T Bling Gel
- Precision needle-nose gel applicator
4. Best Sophisticated Marble Nail Art
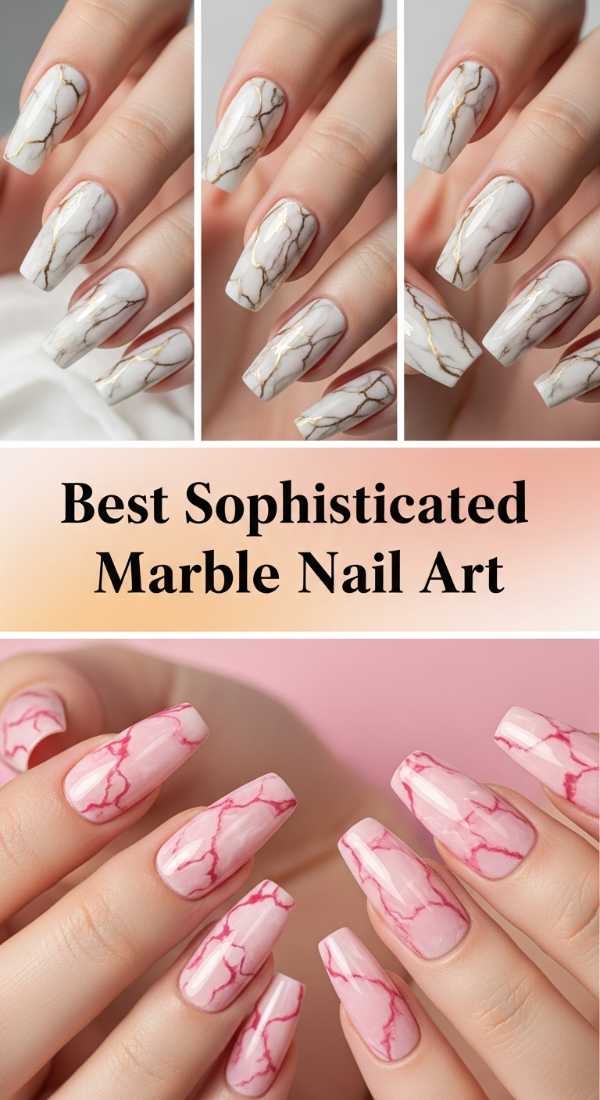
Who it’s Best For
Marble is for the classic beauty who appreciates the finer things in life—like a quiet morning in a museum or a marble-topped cafe table. It’s sophisticated, timeless, and works beautifully on both short and long nails.
Key Features & Techniques
The ‘Blooming Gel’ technique is the gold standard here. You apply a layer of clear blooming gel, and while it’s wet, you drop small amounts of color into it. Watch as the color spreads naturally to mimic the veins of real stone.
Maintenance & Styling Routine
Marble looks best when it has depth. I recommend a ‘sandwich’ technique—layering a thin coat of milky white over your first marble layer, then adding a few more veins on top. It makes the design look three-dimensional.
Must-Have Products
- Kupa Mani-E Bloom Gel
- Deep grey and gold leaf accents
- Milky white gel polish
- Alcohol-based ink for extra-fine veins
5. Sparkly Luxe Glitter Ombre Nails
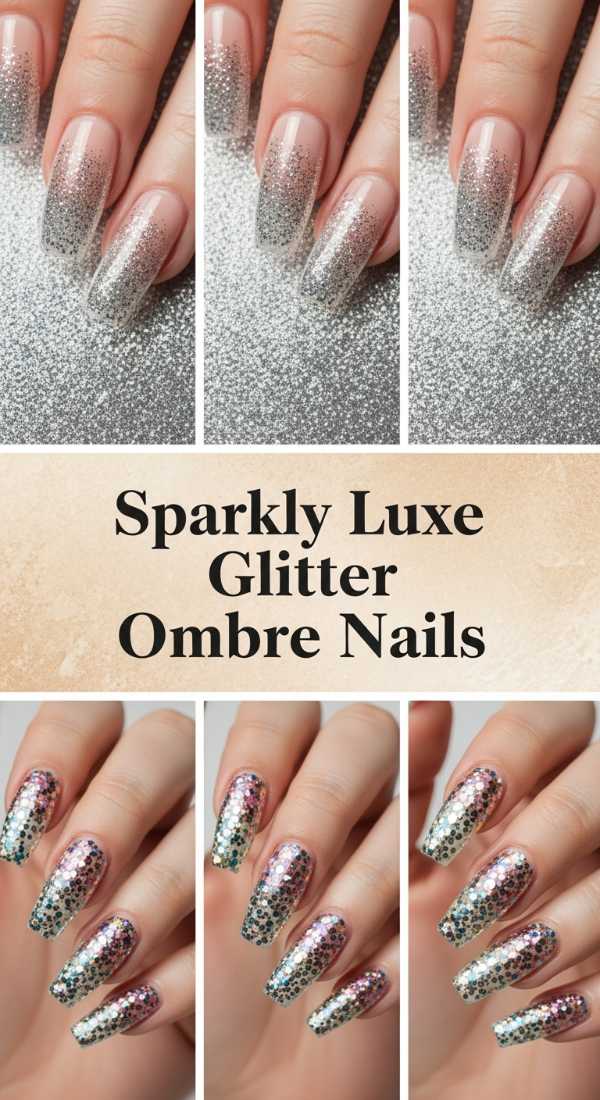
Who it’s Best For
This is for the person who loves a bit of magic. Glitter ombre is the perfect bridge between a classic French manicure and a full-glam look. It’s celebratory without being overwhelming, making it great for weddings or birthdays.
Key Features & Techniques
The key is ‘tapering’ the glitter. Start with a dense application at the tip (or base) and use a dry, fluffy brush to pull the glitter pieces toward the center of the nail, thinning them out as you go. This creates a soft, gradient sparkle.
Maintenance & Styling Routine
Glitter can feel textured, so ensure you apply two layers of top coat for a smooth, glass-like finish. This look transitions perfectly from the office to a cocktail party.
Must-Have Products
- Loose holographic fine glitter
- Ombre blending brush
- Structure gel (for a smooth surface)
- Nude base gel
6. Cute Viral Bow Nail Designs

Who it’s Best For
If you’re currently obsessed with the coquette aesthetic or anything ‘balletcore,’ this is for you. It’s incredibly feminine, sweet, and playful. It’s for the person who finds beauty in the smallest, most charming details.
Key Features & Techniques
You can either hand-paint these using a detail brush (focus on two triangles and two flowing tails) or use 3D resin charms. For the luxury look, keep the bows small and delicate. Placement is key—try putting them on just the ring finger or at the base of a French tip.
Maintenance & Styling Routine
3D bows can catch on hair. Use a thick top coat to ‘fill in’ the gaps between the charm and the nail. Pair this with lace textures and soft pink accessories.
Must-Have Products
- 3D Resin Bow Charms
- Ultra-fine detailing brush (000 size)
- Solid nail glue gel
- Soft pink or cream polish
7. Modern Aesthetic Pastel Nail Art
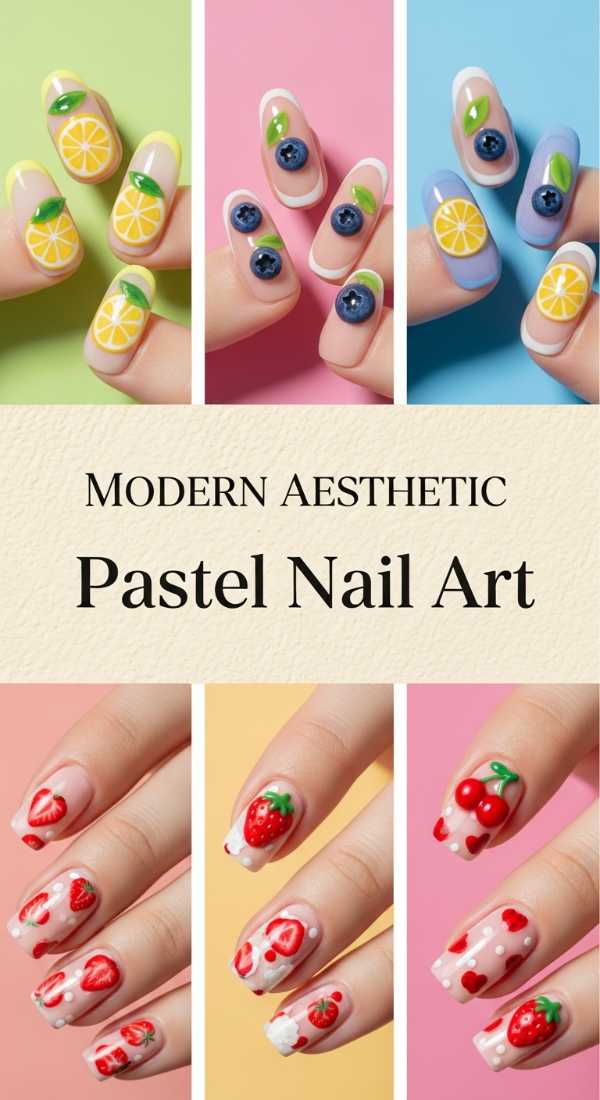
Who it’s Best For
This is for the minimalist who still wants to play with color. If your wardrobe is full of linens and neutrals, a modern pastel design adds just the right pop of seasonal freshness without clashing with your aesthetic.
Key Features & Techniques
The modern edge comes from ‘negative space.’ Instead of painting the whole nail, try geometric pastel shapes or ‘mismatched’ colors on each finger. Use a matte top coat on pastels to give them a sophisticated, velvet-like ‘suede’ finish.
Maintenance & Styling Routine
Light colors can show dirt easily. Wipe your nails with an alcohol pad every few days to keep them looking fresh. This style is best worn with clean, minimalist jewelry.
Must-Have Products
- Pastel set (mint, lavender, butter yellow)
- Matte top coat
- Striping tape for clean lines
- Nail concealer base
8. Fancy Pearlescent Chrome Nail Art
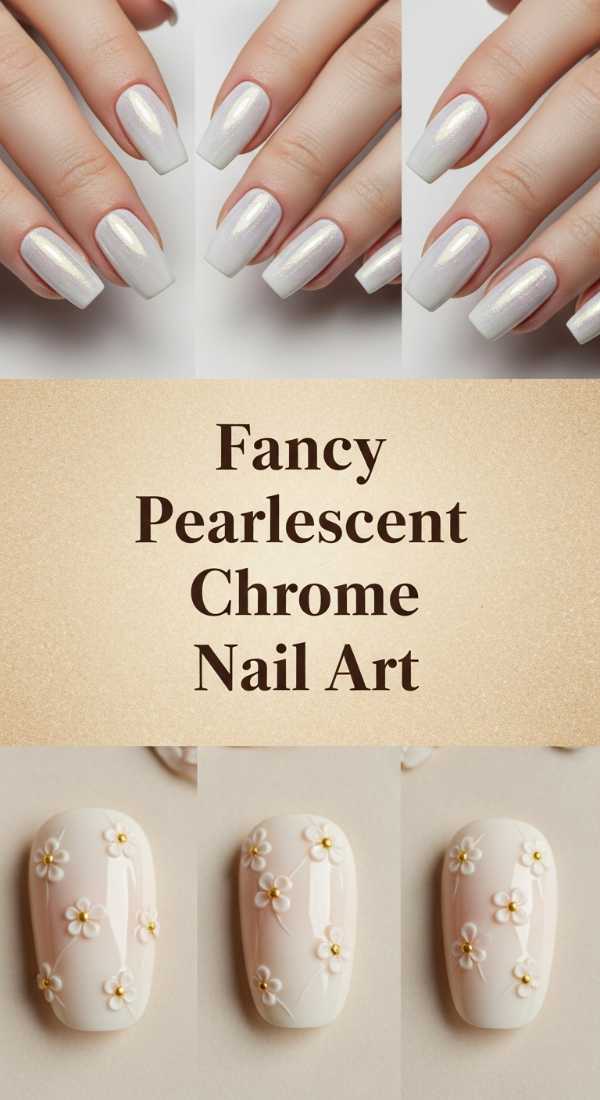
Who it’s Best For
This is the ‘Glazed Donut’ vibe elevated. It’s for the person who wants a clean, expensive look. It’s the ‘quiet luxury’ of the nail world—it looks natural at a distance but reveals a stunning, iridescent glow up close.
Key Features & Techniques
The magic happens with white pearl powder over a sheer nude base. The technique is the same as chrome, but you must be very careful not to over-buff, or you’ll lose the translucent, pearly quality that makes it look expensive.
Maintenance & Styling Routine
This is the lowest maintenance of the luxury looks! It grows out almost invisibly. Just keep your cuticles hydrated with a high-quality oil to maintain the overall ‘clean’ aesthetic.
Must-Have Products
- White Pearl Chrome Powder
- Sheer nude gel (like Bio Seaweed Gel ‘Chai’)
- Soft dusting brush
- Vitamin E cuticle oil
9. Vibrant Fresh Summer Fruit Nails
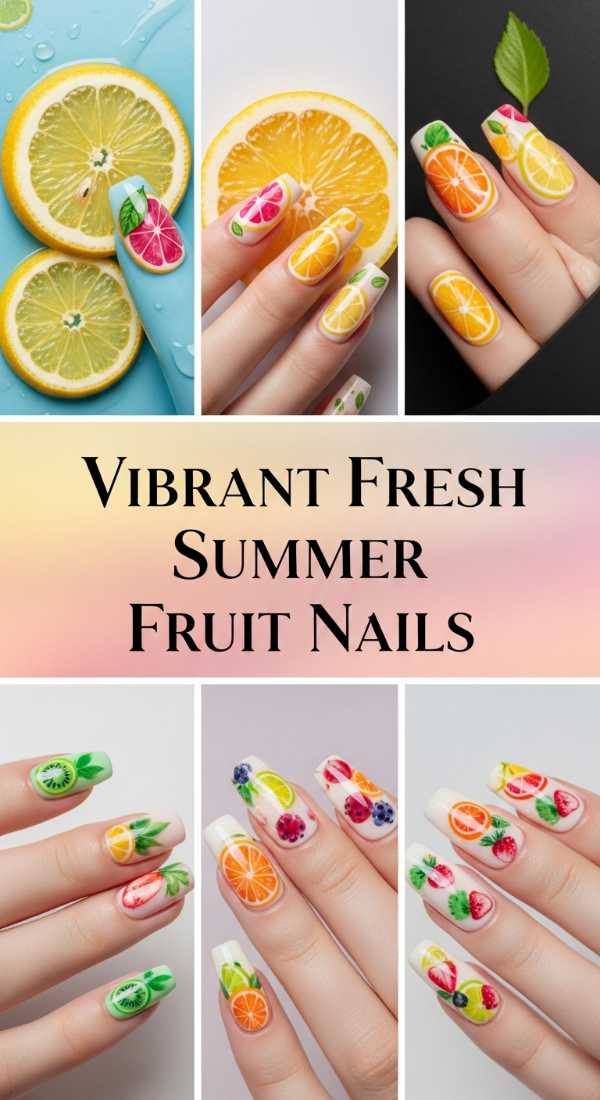
Who it’s Best For
This is for the joyful soul who lives for sunshine and garden parties. It’s playful, vibrant, and a total conversation starter. If you have a fun-loving personality and want your nails to be a ‘tiny party’ on your fingers, go for the fruit!
Key Features & Techniques
To keep it luxury rather than ‘childish,’ use 3D ‘water droplets’ made of thick builder gel over your fruit designs (like tiny lemon slices or strawberries). It adds a realistic, fresh-from-the-vine texture that looks incredible in photos.
Maintenance & Styling Routine
Because of the bright pigments, these can sometimes fade in the sun. Use a UV-top coat and re-apply every week. Perfect for beach days and wearing with your favorite sun hat.
Must-Have Products
- High-viscosity 3D builder gel
- Vibrant red and green detail liners
- Dotting tool for seeds
- Sunscreen-safe top coat
Closing Thoughts: Your Hands, Your Heart
My loves, I hope these techniques inspire you to take a little extra time for yourself this week. Remember, luxury isn’t about the price tag of the polish; it’s about the intention and the love you pour into your self-care. Whether you choose a soft pearlescent glow or a bold chrome statement, let it be a reflection of the beautiful soul you are. You deserve to feel polished, pampered, and absolutely radiant. Sending you so much light and beautiful nails!
Frequently Asked Questions
How long should a luxury manicure last?
With proper prep and high-quality gel products, a luxury manicure should last 2-3 weeks. The key is in the cuticle prep and the sealing of the edges.
Can I achieve these looks with regular polish?
While techniques like chrome and blooming marble are best achieved with gel, you can mimic the swirl and pastel looks with regular polish by using a steady hand and a fast-drying top coat.
Is 3D nail art practical for everyday life?
It can be! The secret is to ensure the charms are ‘flooded’ at the base with top coat so they don’t have sharp edges that catch on clothing. Start with small gems first!
How do I keep my nails healthy under gel art?
Never peel your polish off! Always soak it off gently with acetone and keep your nail beds hydrated with daily cuticle oil applications.