

Spring Nail Mastery: The Ultimate Guide to Seasonal Manicures
Hello, my loves! Can you feel it? There is a gentle hum in the air, a soft awakening of the earth that always makes me want to reach for my favorite polish bottles and start anew. Spring isn’t just a season; it’s a feeling of renewal, a time to shed the heavy layers of winter and embrace the light, the color, and the sheer joy of a fresh set of nails.
I’ve spent the last few weeks in my sun-drenched nook, playing with textures and tones to bring you this ultimate guide. Whether you’re feeling a bit moody and goth or looking for that clean, milky-white aesthetic, I want your hands to feel like a work of art every time you reach for your morning latte. Let’s dive into these beautiful transformations together, shall we?
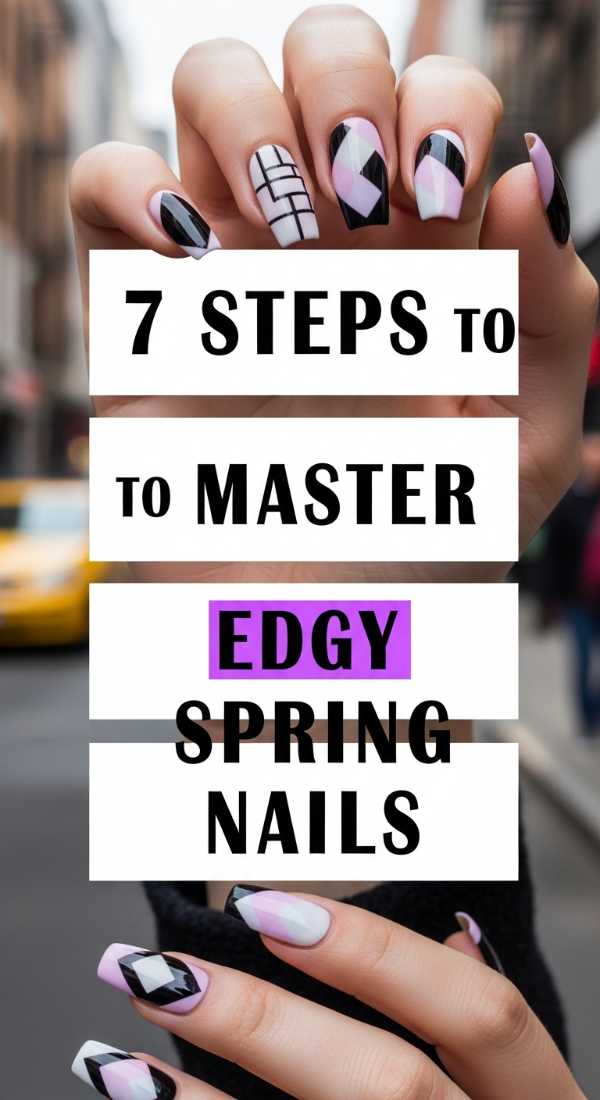
7 Steps to Master Edgy Spring Nails
Why to love this Design:
This design is for my darlings who love a bit of contrast. It’s that perfect balance between the softness of the season and a sharp, modern attitude that says you’re ready for anything. It’s unconventional, cool, and utterly chic.
Essential Elements:
- Neon pastel accents
- Negative space geometry
- Matte top coat
- Micro-studs or wire art
How to Prepare:
- Cleanse nails with a gentle dehydrator.
- Apply a sheer nude base coat and cure.
- Map out geometric lines using a fine detail brush.
- Fill alternate sections with high-contrast spring colors.
- Add a single metal stud at the base of the ring finger.
- Seal with a velvet-matte top coat for that edgy texture.
- Hydrate cuticles with a citrus-scented oil.
Budget Range
- Zoya Professional Lacquer ($12)
- Born Pretty Nail Art Wire ($5)
- Essie Matte About You Top Coat ($10)
Get Almond Spring Nails in 4 Minutes

Why to love this Design:
The almond shape is like a soft hug for your fingers—it elongates the hand and looks effortlessly feminine. This quick routine is my secret for those busy mornings when I still want to feel put-together and elegant.
Essential Elements:
- Almond-shaped press-ons or natural tips
- Peach-toned sheer polish
- Rapid-dry spray
How to Prepare:
- Gently push back cuticles to maximize surface area.
- Swipe a peach-tinted strengthening base across the nail.
- Apply a second thin coat for a hint of color.
- Mist with a rapid-dry spray to set in seconds.
Budget Range
- Olive & June Press-On Kit ($10)
- OPI Infinite Shine in ‘Coastal Sand-tuary’ ($14)
- Seche Vite Dry Fast Top Coat ($9)
Apply White Spring Nails in 6 Easy Steps

Why to love this Design:
There is nothing quite as crisp as a white manicure against the blooming flowers of May. It’s clean, it’s refreshing, and it acts as a perfect canvas for all your colorful spring outfits.
Essential Elements:
- High-pigment opaque white polish
- Leveling base coat
- Glossy sealant
How to Prepare:
- Buff the nail surface to ensure absolute smoothness.
- Apply a ridge-filling base coat to prevent streaks.
- Paint one thin layer of white, focusing on the center.
- Apply a second layer to achieve full opacity.
- Clean up the edges with a brush dipped in acetone.
- Finish with a high-shine top coat for a porcelain effect.
Budget Range
- Essie ‘Marshmallow’ or ‘Blanc’ ($9)
- Holler and Glow Nail File ($3)
- Sally Hansen Insta-Dri Top Coat ($7)
Achieve Chrome Spring Nails in 3 Simple Phases

Why to love this Design:
Chrome is like the morning dew on a tulip—iridescent, magical, and full of light. This look captures the sun and reflects it back in the most mesmerizing way, giving your spring look a futuristic glow.
Essential Elements:
- No-wipe gel top coat
- Pearl or iridescent chrome powder
- Silicone applicator
How to Prepare:
- Phase 1: Apply and cure your base color (a soft pink works beautifully).
- Phase 2: Apply a no-wipe top coat, cure halfway, and burnish the chrome powder over the surface.
- Phase 3: Seal with a final layer of top coat and cure fully to lock in the shimmer.
Budget Range
- Artdone Pearl Chrome Powder ($8)
- Beetles No Wipe Gel Top Coat ($7)
- SunUV LED Nail Lamp ($25)
Design Goth Spring Nails in 5 Creative Steps

Why to love this Design:
Who says darkness doesn’t belong in the spring? I love ‘Spring Goth’—it’s all about deep moody purples and blacks paired with delicate floral filigree. It’s romantic, mysterious, and deeply soulful.
Essential Elements:
- Deep plum or black polish
- Floral nail decals in silver
- Fine liner brush
How to Prepare:
- Apply two coats of a deep, moody violet.
- Use a liner brush to paint tiny, ‘dead’ vine patterns in black.
- Place a silver floral decal on the accent nail.
- Add a tiny dark rhinestone to the center of the flower.
- Seal with a high-gloss finish to make the dark colors pop.
Budget Range
- ILNP ‘Eclipse’ Multichrome Polish ($12)
- Nail Art Rhinestone Kit ($6)
- Maniology Stamping Polish ($8)
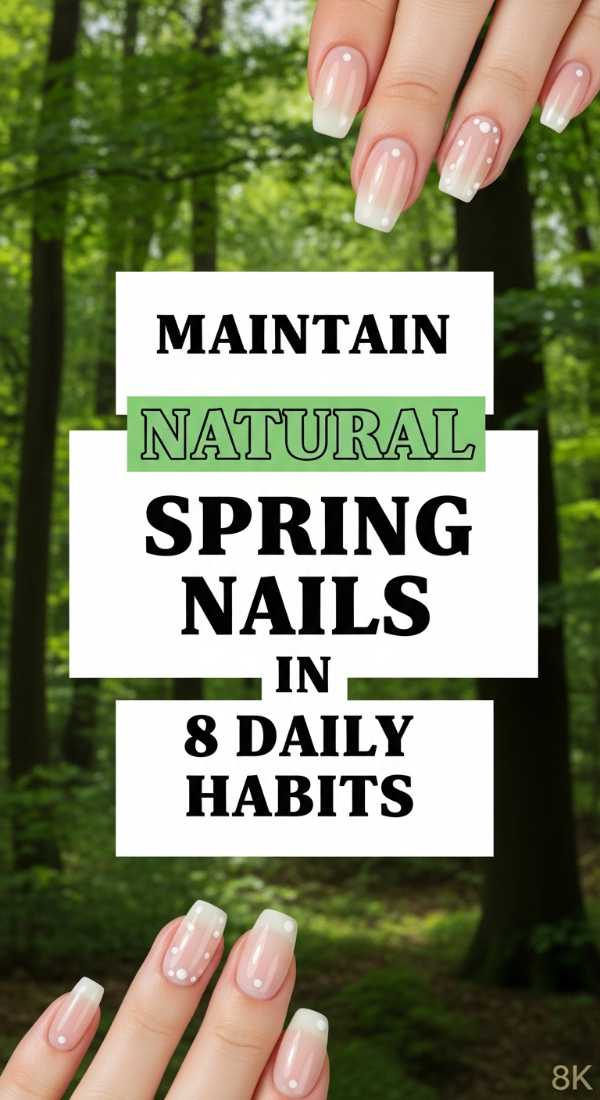
Maintain Natural Spring Nails in 8 Daily Habits
Why to love this Design:
Sometimes, the most beautiful thing we can wear is our own health. Focusing on natural nail care allows your hands to rest and breathe, glowing with a quiet, understated radiance that is so ‘quiet luxury’.
Essential Elements:
- Glass nail file
- Cuticle butter
- Biotin-infused base
How to Prepare:
- Oil your cuticles every morning.
- Use a glass file to prevent peeling.
- Wear gloves while gardening or cleaning.
- Massage your nail beds to stimulate blood flow.
- Apply a clear strengthening treatment every three days.
- Keep nails at a functional, short length.
- Hydrate from the inside out with plenty of water.
- Avoid using nails as tools to prevent micro-trauma.
Budget Range
- Burt’s Bees Lemon Butter Cuticle Cream ($6)
- Mont Bleu Glass Nail File ($10)
- Orly Nailtrition ($15)
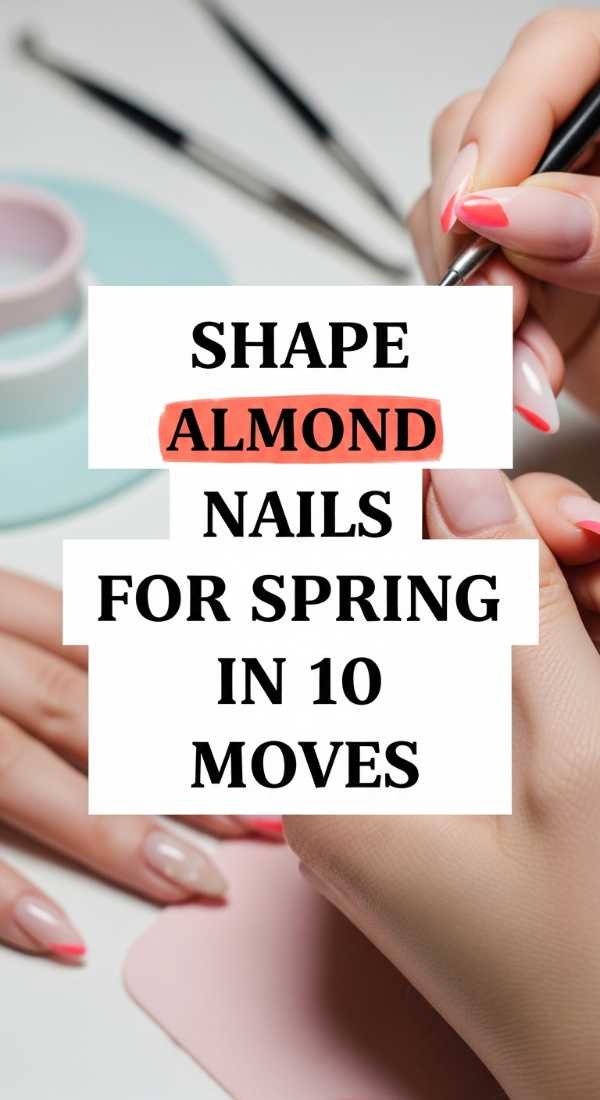
Shape Almond Nails for Spring in 10 Moves
Why to love this Design:
The perfect almond shape is an art form. It’s elegant and sophisticated, making your fingers look long and slender. Mastering this shape at home is a game-changer for your DIY manicure routine.
Essential Elements:
- 180/240 grit nail file
- Buffing block
- Nail clipper
How to Prepare:
- Mark the center point of your nail tip with a dot of polish.
- Clip the sides at a 45-degree angle toward the dot.
- File the left side in one direction toward the center.
- Repeat on the right side with symmetrical strokes.
- Round out the tip to remove any sharp points.
- Check the ‘C-curve’ by looking at the nail head-on.
- Smooth the edges with a higher grit file.
- Buff the surface to remove any burrs.
- Wash hands to remove dust.
- Apply a base coat to protect the new shape.
Budget Range
- Revlon Emery Boards ($4)
- Flowery Blue Buffer Block ($2)
- Tweezerman Stainless Steel Clipper ($12)
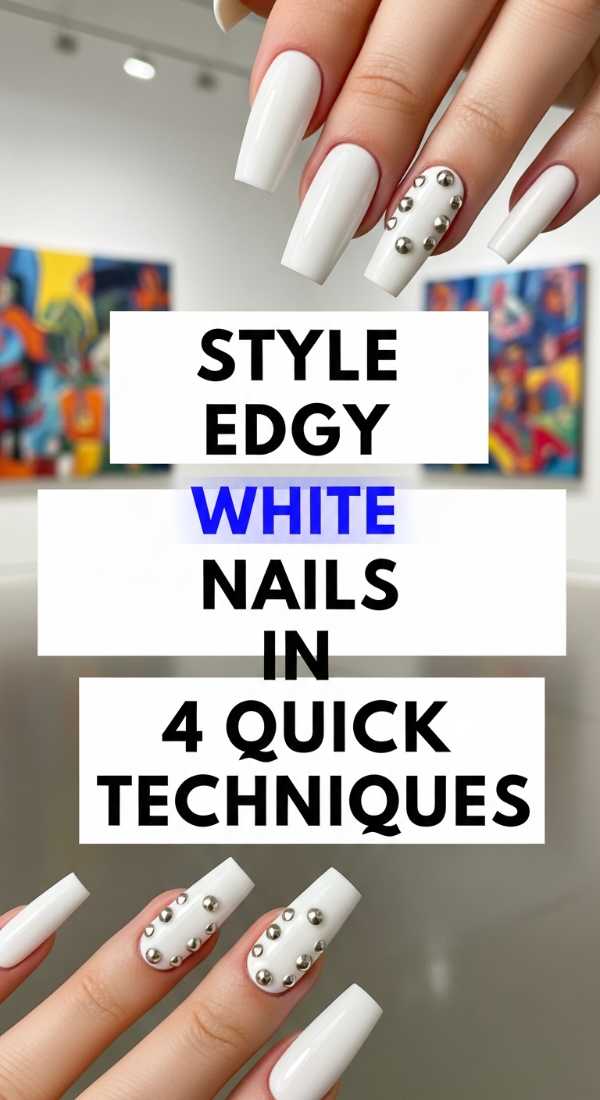
Style Edgy White Nails in 4 Quick Techniques
Why to love this Design:
This is for the minimalist with a rebellious heart. We’re taking that classic, clean white and giving it a ‘downtown’ makeover. It’s fast, punchy, and looks incredible with silver jewelry.
Essential Elements:
- Crisp white polish
- Black striping tape
- Matte topper
How to Prepare:
- Apply two coats of opaque white and let dry completely.
- Place black striping tape vertically down the center of each nail.
- Apply a matte top coat over the tape and polish.
- Peel the tape away while the top coat is slightly tacky for a crisp ‘void’ line.
Budget Range
- Sally Hansen Xtreme Wear ‘White On’ ($4)
- Line Art Striping Tape ($5)
- NYC Matte Me Crazy ($6)
Paint Chrome Almond Nails in 6 Professional Steps
Why to love this Design:
This is the ‘it-girl’ manicure of the season. Combining the grace of the almond shape with the high-fashion mirror finish of chrome, it’s a look that commands attention and feels incredibly luxurious.
Essential Elements:
- Gel base and top coat
- Lavender chrome pigment
- UV/LED lamp
How to Prepare:
- Shape nails into a precise almond and buff smooth.
- Apply gel base coat and cure for 30 seconds.
- Apply a lavender gel color and cure fully.
- Apply a no-wipe top coat and cure for only 15 seconds.
- Firmly rub the chrome powder until a mirror finish appears.
- Apply a final top coat, ensuring you cap the free edge, and cure for 60 seconds.
Budget Range
- Gelish Mini Soak-Off Gel Polish ($12)
- PrettyDiva Mermaid Chrome Powder ($10)
- Modelones Gel Liner Set ($15)
Prepare Natural Goth Nails in 2 Easy Minutes

Why to love this Design:
I call this ‘Sheer Mystery.’ It’s for those days when you want a hint of darkness without the commitment of heavy polish. It looks like a silk veil over your nails—ethereal and slightly moody.
Essential Elements:
- Black ‘jelly’ polish or sheer tint
- Glossy top coat
How to Prepare:
- Apply one single, very thin coat of sheer black jelly polish.
- Immediately follow with a quick-dry glossy top coat to blend any streaks.
Budget Range
- Cirque Colors ‘Spotted’ or ‘Marsala Jelly’ ($12)
- Wet n Wild Fast Dry AF ($4)
- Essence Extreme Gel Gloss ($4)
A Season of Beautiful Hands
As we wrap up our journey through the colors and textures of spring, I hope you feel inspired to take a little time for yourself. Your hands do so much for you—they create, they comfort, and they connect you to the world. Giving them a bit of love through a beautiful manicure is a simple but powerful act of self-care. Go ahead, my loves, pick a design that speaks to your soul and let your creativity bloom alongside the cherry blossoms. I can’t wait to see what you create!