

From Ordinary to Iconic: Daily Habits Going Viral for All the Right Reasons
Have you ever scrolled through your feed and felt that sudden spark of inspiration—the kind that makes you want to drop everything and rearrange your entire living room? We are living in an era where the mundane is being reimagined as something magical. It is no longer just about ‘getting things done’; it is about the ritual, the aesthetic, and the intentionality behind every corner of our homes and every moment of our days.
Lately, I have been mesmerized by how the smallest shifts—a pop of floral wallpaper or a perfectly curated blue desk setup—can completely transform our mental clarity and home vibe. It’s about creating a sanctuary that reflects the most iconic version of ourselves. Today, I’m diving deep into the viral trends that are actually worth the hype, giving you the step-by-step secrets to bring that high-end, ‘Pinterest-perfect’ lifestyle into your own reality.
How to Build a DIY Planter Light Post for the Ultimate Curb Appeal

Why we love this
There is something incredibly sophisticated about a stately light post that also serves as a vessel for seasonal blooms. Imagine pulling into your driveway as the sun sets, greeted by the soft, amber glow of a vintage-style lantern reflected against the vibrant petals of cascading petunias. The air carries the faint, sweet scent of damp earth and evening blossoms, while the sturdy cedar post adds a grounded, architectural element to your home’s exterior. It is the ultimate statement piece that says your home is a place of warmth, light, and curated beauty.
Essential Elements:
- 4×4 Pressure-treated cedar or pine post
- Large wooden or heavy-duty resin planter box
- Solar or hardwired outdoor lantern head
- Quick-set concrete mix
- Decorative post cap and molding
- Exterior grade paint or stain
- High-quality potting soil and seasonal flowers
How to make it
- Begin by measuring your 4×4 post to your desired height, typically 6 to 7 feet, and sand the surface until it is smooth to the touch.
- Center the post inside your chosen planter box. Mix a bag of quick-set concrete in a separate bucket until it reaches the consistency of thick peanut butter, then pour it into the base of the planter around the post.
- Use a level to ensure the post is perfectly vertical as the concrete sets; hold it in place for 5-10 minutes or use temporary braces.
- Once the concrete is fully cured (usually 24 hours), drill drainage holes in the planter just above the concrete line to prevent water from rotting the post.
- Apply your exterior stain or paint in a color that complements your home’s trim, ensuring even coverage on all sides of the post and the planter exterior.
- Install the lantern head to the top of the post according to the manufacturer’s instructions; if using solar, ensure the sensors are unobstructed.
- Add a layer of gravel for drainage, fill the remaining space with premium potting soil, and plant a mix of ‘thriller, filler, and spiller’ flowers for a lush, professional look.
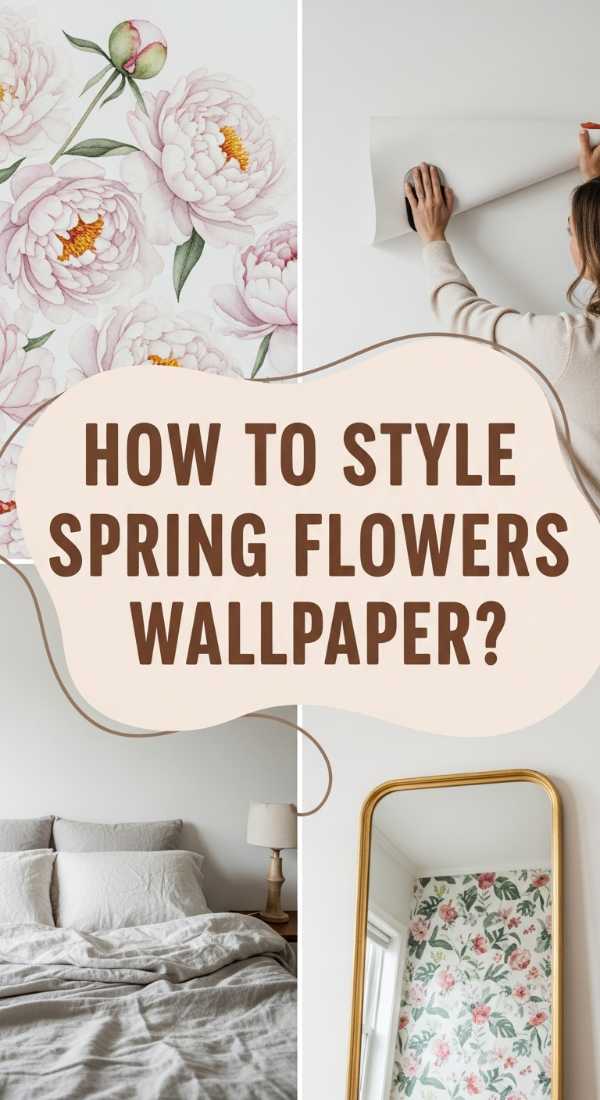
How to Apply Spring Flowers Wallpaper for a Fresh Bedroom Glow
Why we love this
Walking into a bedroom adorned with delicate spring florals is like stepping into an eternal garden party. The visual texture of soft watercolor petals and winding green vines creates a rhythmic, calming atmosphere that instantly lowers your cortisol levels. You can almost feel the softness of the morning light hitting the paper, bringing out the subtle hues of blush, sage, and buttercream. It turns a plain sleeping space into a romantic retreat where the air feels fresher and the mornings feel more purposeful and inspired.
Essential Elements:
- High-quality peel-and-stick or prepasted floral wallpaper
- Wallpaper smoothing tool or squeegee
- Precision craft knife with extra blades
- Tape measure and level
- Sponge and mild cleaning solution
- Step ladder
How to make it
- Start by thoroughly cleaning your walls with a damp sponge to remove dust or oils, then let them dry for at least 24 hours to ensure the best adhesive bond.
- Measure the height of your wall and add 2-3 inches of ‘overage’ to your first wallpaper strip to allow for trimming at the ceiling and baseboard.
- Use a level and a pencil to draw a faint vertical plumb line on the wall; this is the most critical step to ensure your pattern doesn’t end up crooked.
- Peel back about 12 inches of the backing paper and align the edge of the strip with your plumb line at the top of the wall.
- Slowly smooth the paper downward and outward from the center using your smoothing tool, removing all air bubbles as you go.
- When you reach the next strip, carefully align the floral pattern at eye level first, ensuring the seam is tight but not overlapping.
- Use a sharp precision knife and a metal straight edge to trim the excess paper at the ceiling and floor for a crisp, professional finish.
How to Install Low Retaining Wall Ideas for a Polished Garden Look

Why we love this
A low retaining wall provides the structural skeleton that every great garden needs, offering a sense of order and timeless elegance. The cool, rugged texture of stacked stone or smooth concrete blocks creates a beautiful contrast against the soft, swaying leaves of ornamental grasses. As you run your hand along the sun-warmed surface of the wall, you feel the solidity and permanence of a well-designed landscape. It’s not just a barrier; it’s a tiered stage that elevates your plants and gives your outdoor space a multi-dimensional, professional designer feel.
Essential Elements:
- Retaining wall blocks or natural stones
- Crushed leveling gravel (paver base)
- Landscape fabric (weed barrier)
- Level and rubber mallet
- Concrete adhesive (for top caps)
- Shovel and tamper
- Perforated drainage pipe
How to make it
- Mark the layout of your wall using stakes and string, then dig a trench approximately 6 inches deep and twice as wide as your blocks.
- Fill the trench with 3-4 inches of crushed gravel and use a hand tamper to pack it down until it is incredibly firm and perfectly level.
- Lay the first course of blocks, using a level on every single stone and a rubber mallet to tap them into place; this base layer is the foundation for the entire wall.
- Install a layer of landscape fabric behind the first row and place a perforated drainage pipe to prevent water pressure from building up behind the wall.
- Stack subsequent rows, staggering the seams like bricks (running bond pattern) to ensure maximum structural integrity.
- Check for levelness and plumb frequently as you build up, backfilling the space behind the blocks with gravel for drainage as you go.
- Apply a beads of heavy-duty concrete adhesive to the top of the final row before placing your ‘cap’ stones to lock everything into a finished, polished look.
How to Create a Cute Campsite Setup for a Cozy Outdoor Retreat

Why we love this
Forget the gritty, uncomfortable camping of the past; the viral ‘cute campsite’ is all about bringing the soul of a boutique hotel to the great outdoors. Picture a canvas tent illuminated by the soft flicker of battery-operated candles, with plush Moroccan rugs covering the grass and the scent of pine needles mixing with freshly brewed coffee. The tactile experience of sinking into a pile of wool blankets while watching the stars through a mesh ceiling is pure magic. It’s about creating a space where nature and luxury coexist, making every moment feel like a scene from a dream.
Essential Elements:
- Bell tent or aesthetic A-frame tent
- Outdoor-friendly area rugs or woven mats
- String lights (Edison bulbs) and lanterns
- Portable fire pit
- Inflatable mattress with high-thread-count linens
- Foldable wooden chairs and side tables
- Throws, pillows, and soft textiles
How to make it
- Select a flat, high-ground site and clear it of any sharp rocks or debris that could puncture your tent floor or create discomfort.
- Lay down a heavy-duty tarp slightly smaller than your tent footprint to keep moisture from seeping through the bottom.
- Pitch your tent, ensuring the guylines are taut and the entrance is facing the most scenic view or the direction of the morning sun.
- Layer the interior floor with woven rugs or foam tiles to provide insulation and a soft surface for bare feet.
- Set up your sleeping area with a raised air mattress, real pillows, and several layers of blankets to handle fluctuating outdoor temperatures.
- String warm-toned LED lights along the tent poles or around the exterior perimeter to create a magical, inviting glow after dark.
- Arrange a seating ‘lounge’ outside the tent with a small table and a portable fire pit to serve as the heart of your cozy retreat.
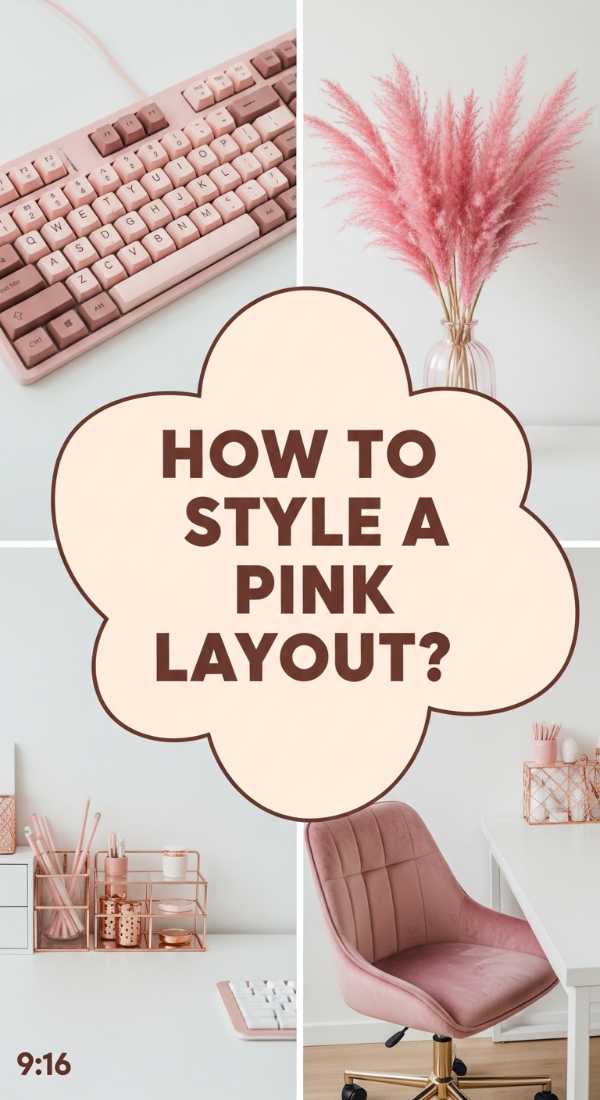
How to Design a Pink Layout for the Dreamiest Aesthetic Workspace
Why we love this
A pink-themed workspace is a visual hug that fuels creativity and softens the edges of a long workday. From the matte finish of a blush desk mat to the rose-gold accents on your tech, the color palette creates a cohesive, serene environment that feels both professional and deeply personal. There is a specific joy in the way a pink neon light reflects off a glass monitor, casting a warm, rose-colored hue over your notes. It transforms ‘work’ into an ‘experience,’ making the hours spent at your desk feel like a curated session of productivity and self-care.
Essential Elements:
- White or light wood desk
- Blush or dusty rose desk mat (vegan leather)
- Ergonomic pink office chair
- Rose gold or white monitor stand
- Coordinated pink tech (mouse, keyboard, headphones)
- Succulents in ceramic pink pots
- Warm LED desk lamp or sunset lamp
How to make it
- Start with a clean, neutral base by clearing your desk of all clutter and cleaning the surface until it gleams.
- Place a large, high-quality pink desk mat as your ‘anchor’ piece; this defines your primary work zone and adds immediate color impact.
- Organize your tech by using white or rose gold cable management sleeves to hide messy wires, keeping the look sleek and intentional.
- Layer your lighting by adding a sunset lamp in the corner of the room to cast a warm, pinkish glow across the walls during late-night sessions.
- Curate your desktop accessories—think pink staplers, acrylic organizers, and a pink-tinted glass water bottle—to maintain the monochromatic theme.
- Incorporate natural elements like a small plant or a crystal to add texture and prevent the space from feeling too ‘flat’ or plastic.
- Position your ergonomic chair and add a pink faux-fur throw or lumbar pillow to combine high-end aesthetics with necessary physical comfort.
How to Construct a DIY Duck Enclosure for a Happy Farm Life

Why we love this
There is a rhythmic, peaceful charm to the sound of ducks splashing in fresh water and the sight of them waddling into a secure, beautiful home. A well-built duck enclosure is the heart of a modern homestead, smelling of fresh straw and clean cedar. The tactile satisfaction of the sturdy hardware cloth and the smooth, painted wood of the coop provides a sense of security for your feathered friends. It’s a project that connects you to the land, offering a daily dose of wholesome, viral-worthy ‘farm-core’ joy right in your own backyard.
Essential Elements:
- Pressure-treated lumber for the frame
- Hardware cloth (1/2 inch gauge for predator protection)
- Corrugated roofing panels
- Plywood for the nesting box and house walls
- Heavy-duty door latches and hinges
- Pea gravel or wood chips for the run floor
- Small plastic pool or pre-formed pond
How to make it
- Design a layout that provides at least 4 square feet of house space and 10 square feet of run space per duck.
- Build the main frame using 2×4 lumber, ensuring the structure is tall enough for you to enter comfortably for cleaning.
- Cover the entire exterior of the ‘run’ with hardware cloth, burying the bottom 6-12 inches into the ground to prevent digging predators like foxes or raccoons from entering.
- Construct the raised sleeping quarters (the coop) using plywood, ensuring there is plenty of ventilation near the roofline to prevent moisture buildup.
- Install a sloped, corrugated roof over both the coop and a portion of the run to keep the ducks dry and provide shade.
- Incorporate a ‘pond’ area using a recessed plastic pool with a dedicated drainage system to make the frequent water changes easy and efficient.
- Add a thick layer of pine shavings inside the coop for bedding and pea gravel in the run to keep the area from becoming a muddy mess.
How to Execute Professional Landscaping Ideas for a Lush Green Backyard

Why we love this
A professionally landscaped backyard is more than just a lawn; it is a living, breathing masterpiece that engages all the senses. Imagine the velvety feel of perfectly manicured grass underfoot and the deep, earthy aroma of fresh mulch after a light rain. The visual layering of heights—from low-creeping thyme to mid-sized hydrangeas and towering privacy evergreens—creates a sense of sanctuary and seclusion. It’s the kind of space that makes you want to linger with a glass of wine, surrounded by the rustle of leaves and the vibrant, healthy green glow of a garden in its prime.
Essential Elements:
- Assorted perennials and shrubs for layering
- High-quality dark mulch (cedar or hardwood)
- Edging material (metal, stone, or plastic)
- Soil amendments (compost and peat moss)
- Drip irrigation system components
- Landscaping fabric
- Outdoor accent lighting
How to make it
- Map out your planting beds using a garden hose to create natural, flowing curves rather than rigid straight lines.
- Remove the grass within the marked areas and till the soil to a depth of 8 inches, mixing in compost to ensure a nutrient-rich environment for your new plants.
- Arrange your plants while they are still in their nursery pots to visualize the spacing and height layers (tallest in the back, shortest in front).
- Dig holes twice as wide as the root balls, place the plants, and backfill with a mix of native soil and organic matter, tamping down lightly to remove air pockets.
- Install a drip irrigation line hidden beneath the surface to provide consistent, deep watering directly to the roots.
- Apply a 3-inch layer of dark mulch across the entire bed to retain moisture, suppress weeds, and provide a clean, high-contrast look against the green foliage.
- Define the edge of the bed with stone or professional metal edging to prevent grass from creeping in and to give the landscape a crisp, ‘finished’ border.
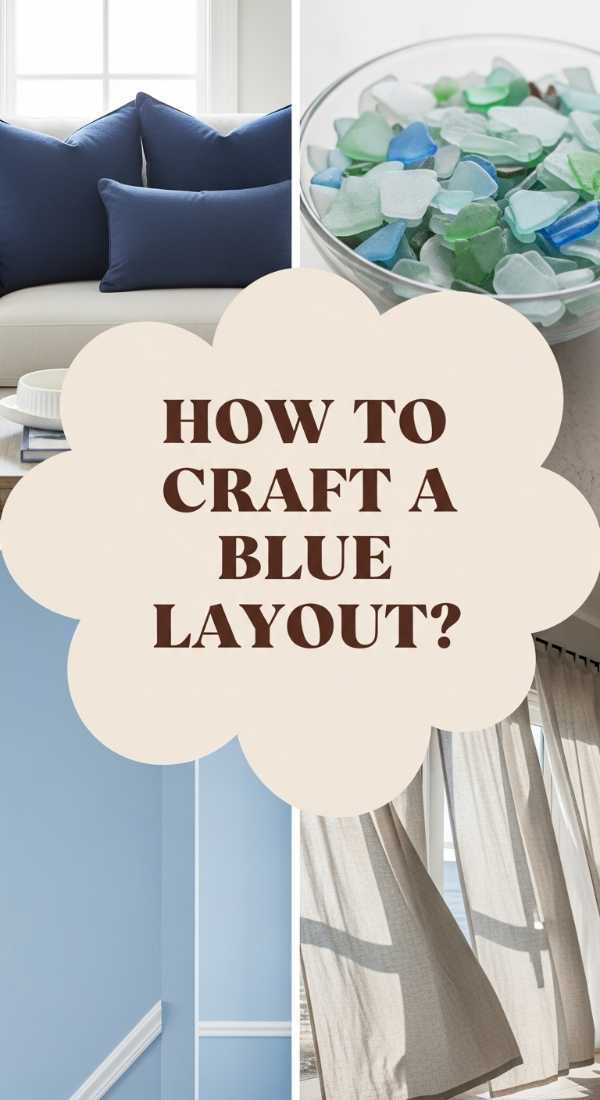
How to Curate a Blue Layout for a Serene Coastal Living Space
Why we love this
The color blue has a unique ability to mimic the calming vastness of the ocean and the clarity of a summer sky. In a curated coastal layout, the different shades of navy, sky, and teal work together to create a space that feels breezy and light. You can almost feel the cool, salty air and hear the rhythmic sound of waves as you look at a perfectly styled blue linen sofa accented with driftwood tones. It’s a sophisticated take on relaxation that feels both timeless and incredibly fresh, turning any room into a high-end seaside retreat.
Essential Elements:
- Blue velvet or linen accent furniture
- Natural fiber rugs (jute or sisal)
- Decorative glass jars in sea-glass hues
- White-washed wooden coffee table
- Art prints featuring ocean or sky abstracts
- Textured throw pillows in navy and cream
- White sheer curtains to maximize light
How to make it
- Choose a ‘foundation’ blue for your largest piece, like a navy sofa or a slate-blue area rug, to set the tone for the entire room.
- Layer in lighter shades of blue through textiles, such as throw blankets and pillows, ensuring you mix patterns like subtle stripes with solid textures.
- Incorporate ‘beachy’ neutrals like sand-colored walls or driftwood-finish furniture to prevent the blue from feeling too cold or overwhelming.
- Use glass and reflective surfaces—like a clear blue glass lamp or a large mirror—to bounce natural light around the room and enhance the ‘airy’ coastal feel.
- Style your shelves with curated coastal finds, like a piece of white coral or a bowl of polished river stones, keeping the arrangement minimalist and clean.
- Ensure your window treatments are light and flowy; sheer white linens allow the blue elements in the room to ‘pop’ while maintaining a bright atmosphere.
- Add a single, large-scale piece of blue art as a focal point to tie all the disparate blue elements together into a cohesive design story.
How to Arrange Landscaping Ideas for the Most Inviting Front Porch

Why we love this
Your front porch is the ‘handshake’ of your home, and a well-arranged landscape makes that first impression unforgettable. The sight of symmetrical boxwoods flanking the stairs and the scent of lavender wafting toward the front door creates an immediate sense of peace. There is a tactile beauty in the way a smooth stone path leads the eye toward a vibrant, freshly painted door. It’s about creating a transition zone from the busy world to your private sanctuary, wrapped in the colors and textures of a welcoming, well-loved garden.
Essential Elements:
- Symmetrical planters or urns
- Evergreen shrubs (boxwood or cypress)
- Seasonal flowering plants
- Flagstone or paver walkway materials
- Low-voltage path lights
- High-quality door mat and hardware
- Aesthetic porch furniture (rocking chairs or a bench)
How to make it
- Create symmetry by placing two identical, large-scale planters on either side of the front door or the base of the porch steps for an instant ‘estate’ feel.
- Plant a ‘base’ evergreen in each planter to provide year-round structure, then surround it with seasonal annuals that you can swap out as the weather changes.
- Install a clear, wide walkway using natural stone or pavers that leads directly from the sidewalk to the porch, ensuring it is level and easy to navigate.
- Line the walkway with low-profile LED path lights to create a safe, glowing guide for guests arriving after dark.
- Add a layer of foundation plantings along the front of the porch, using varying heights to ‘ground’ the house and blend it into the surrounding yard.
- Choose a color palette for your flowers that either matches or perfectly contrasts with your front door color to create a high-impact visual ‘wow’ factor.
- Finish the space with a high-quality, oversized doormat and a piece of comfortable porch furniture that invites people to sit and stay a while.
How to Pair Spring Flowers Wallpaper for a Whimsical Home Aesthetic

Why we love this
Pairing floral wallpaper with the right home elements is like conducting an orchestra—when the colors and textures hit the right notes, the result is sheer whimsy. The soft, papered walls provide a backdrop of delicate stems and bright petals that make the room feel alive and poetic. When you pair this with a vintage brass lamp or a velvet chair, the room takes on a storied, ‘collected’ feel. It’s about the sensory delight of a space that feels curated yet effortless, where every glance reveals a new, charming detail that sparks a bit of magic in your daily routine.
Essential Elements:
- Floral wallpaper with a large or small scale pattern
- Complementary paint colors for trim and ceiling
- Vintage-inspired hardware (brass or porcelain)
- Natural wood or velvet furniture
- Coordinating textiles (curtains, rugs)
- Artistic lighting fixtures (chandeliers or sconces)
How to make it
- Select your wallpaper first, then take the physical sample to the paint store to find a ‘hidden’ color within the pattern to use for your trim and baseboards.
- Consider the scale of the room; use large, bold floral prints in small spaces like powder rooms for a dramatic impact, and smaller, tighter patterns for large bedrooms.
- Pair the feminine floral walls with ‘heavy’ textures like a dark wood dresser or a velvet headboard to ground the room and add sophistication.
- Use ‘echoing’ colors by picking one specific shade from the wallpaper (like a sage green or a dusty rose) and repeating it in your curtains and throw pillows.
- Replace standard plastic outlet covers with brass or decorative porcelain plates to lean into the whimsical, high-end aesthetic of the wallpaper.
- Install a statement light fixture, like a vintage-style chandelier, which casts shadows that play beautifully with the floral shapes on the walls.
- Keep the rest of the decor relatively simple; let the wallpaper be the star of the show while the furniture and accessories play the supporting roles.
Embracing the Iconic Life
In the end, creating a viral-worthy lifestyle isn’t about perfection; it’s about the joy found in the process of transformation. Whether you are building a duck enclosure or carefully smoothing out a sheet of floral wallpaper, you are taking ownership of your environment and infusing it with your unique spirit. These projects are the daily habits that turn an ordinary house into an iconic home. So, pick one project, grab your tools, and start creating the beautiful life you’ve always imagined.